Google Meets displays a ‘Camera Failed’ error message when your system is blocking the Meet’s website from accessing the physical camera. There are also some cases where other applications might be conflicting with your camera hardware.
Before moving on to solutions to get your camera work on Google Meet:
- Check if restarting the system sorts out the camera issue. Also, check if your system’s camera either internal or external works fine in any other application. This will help rule out camera issues.
- Make sure no physical slider or cover over the camera is causing the issue. Check if plugging in an external camera
- Additionally, make sure the proper camera is selected in Google Meet’s settings.
System-specific Workarounds:
The following workarounds are tried and tested for issues related to your system in general as opposed to browsers which we have covered in later on in the article.
1. Update Your PC’s System Drivers to the Latest Release
Your Camera hardware is essentially managed and operated through your operating system and system drivers. These are updated every now and then through the Windows update. Here, we can attempt installing the latest drivers and see if they solve the issue.
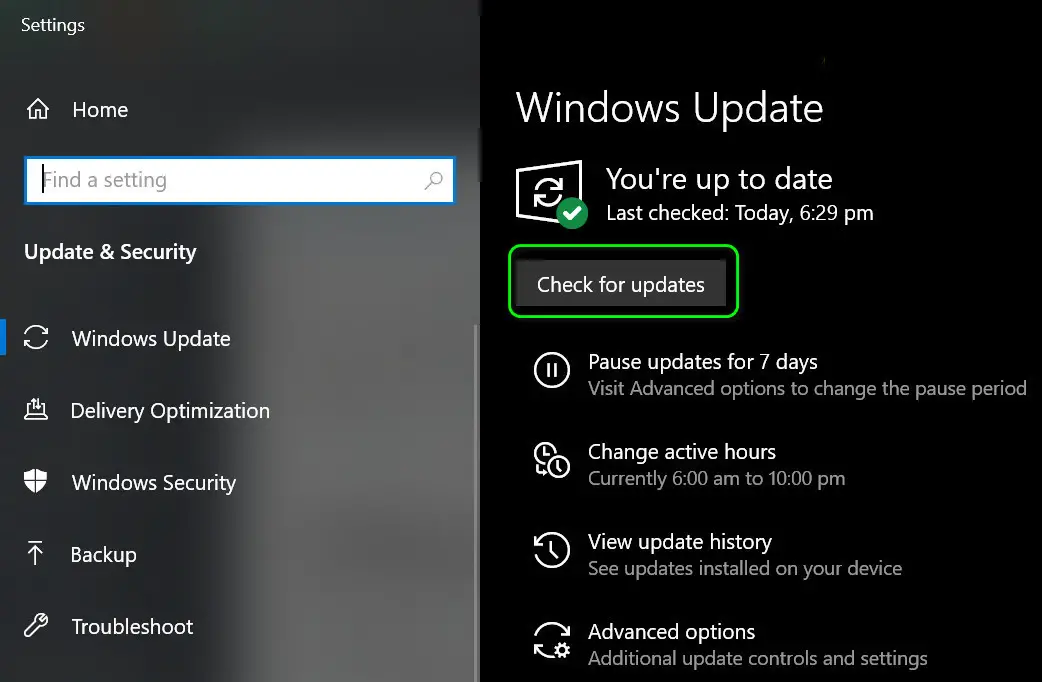
- Click Windows, key in Check for Updates, and open it.

Checking for Windows Updates - Then click on the Check for Updates button and if updates are available, let them download and install (do not forget to check the optional updates). Then, in the Device Manager, make sure the system’s drivers are updated to the latest builds (you can also use the OEM utility like Dell Support Assistant).
- Once the system’s drivers and Windows are updated, check if the camera is working fine in Google Meet.
2. Allow the Camera Access in the Privacy Settings
Google Meets may show the ‘Camera Failed Error’ if the privacy settings of your system or antivirus have restricted the applications’ access to the camera. In this context, allowing the camera access in the privacy settings of your system will enable access and solve this issue.
For Windows Users
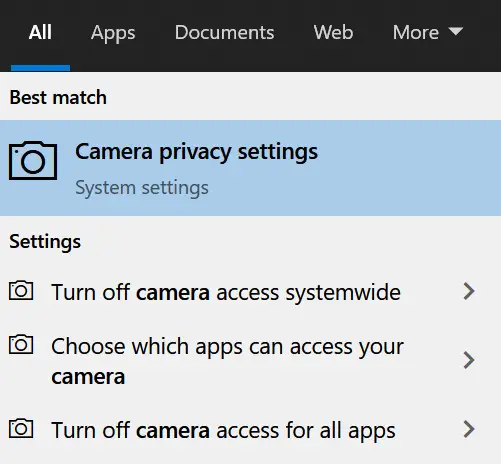
- Type: Camera Privacy Settings in Windows search, and open the settings.

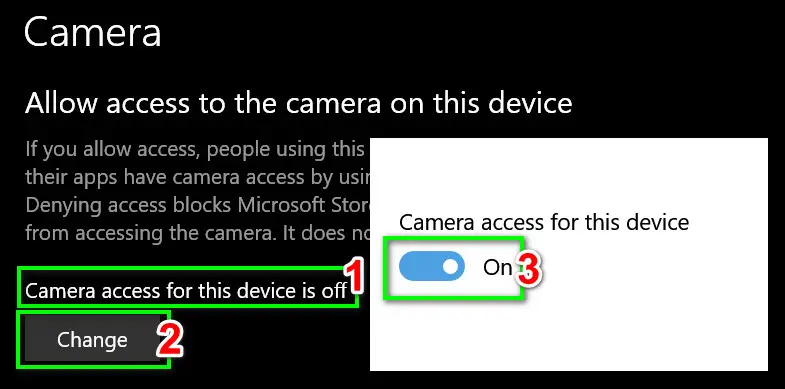
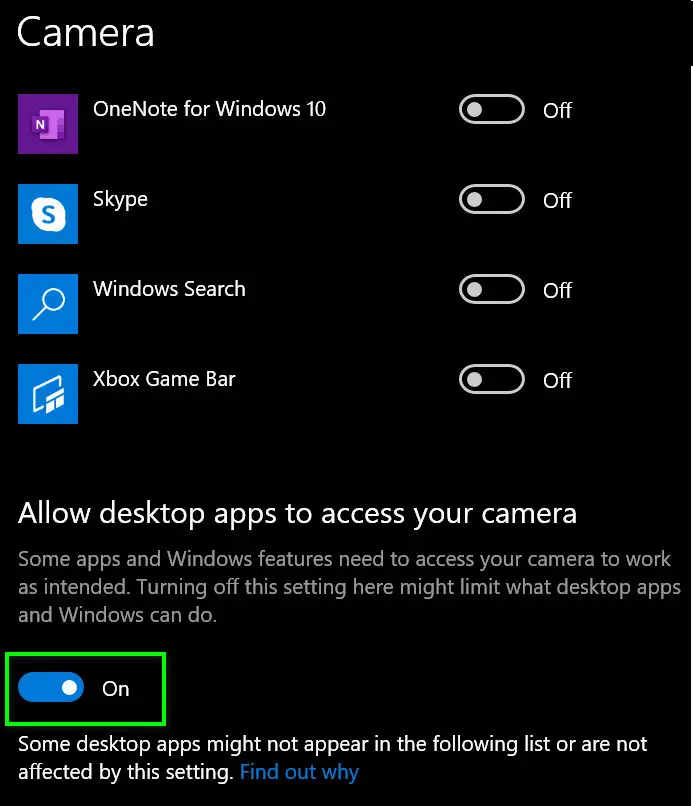
Camera Privacy Settings - Now set the Camera for This Device to enabled and toggle the option of Allow Apps to Access Your Camera to enabled as well.

Allow Apps to Access Your Camera - Next, enable the option of Allow Desktop Apps to Access Your Camera to enabled as well and reboot your system for changes to be implemented.
For macOS
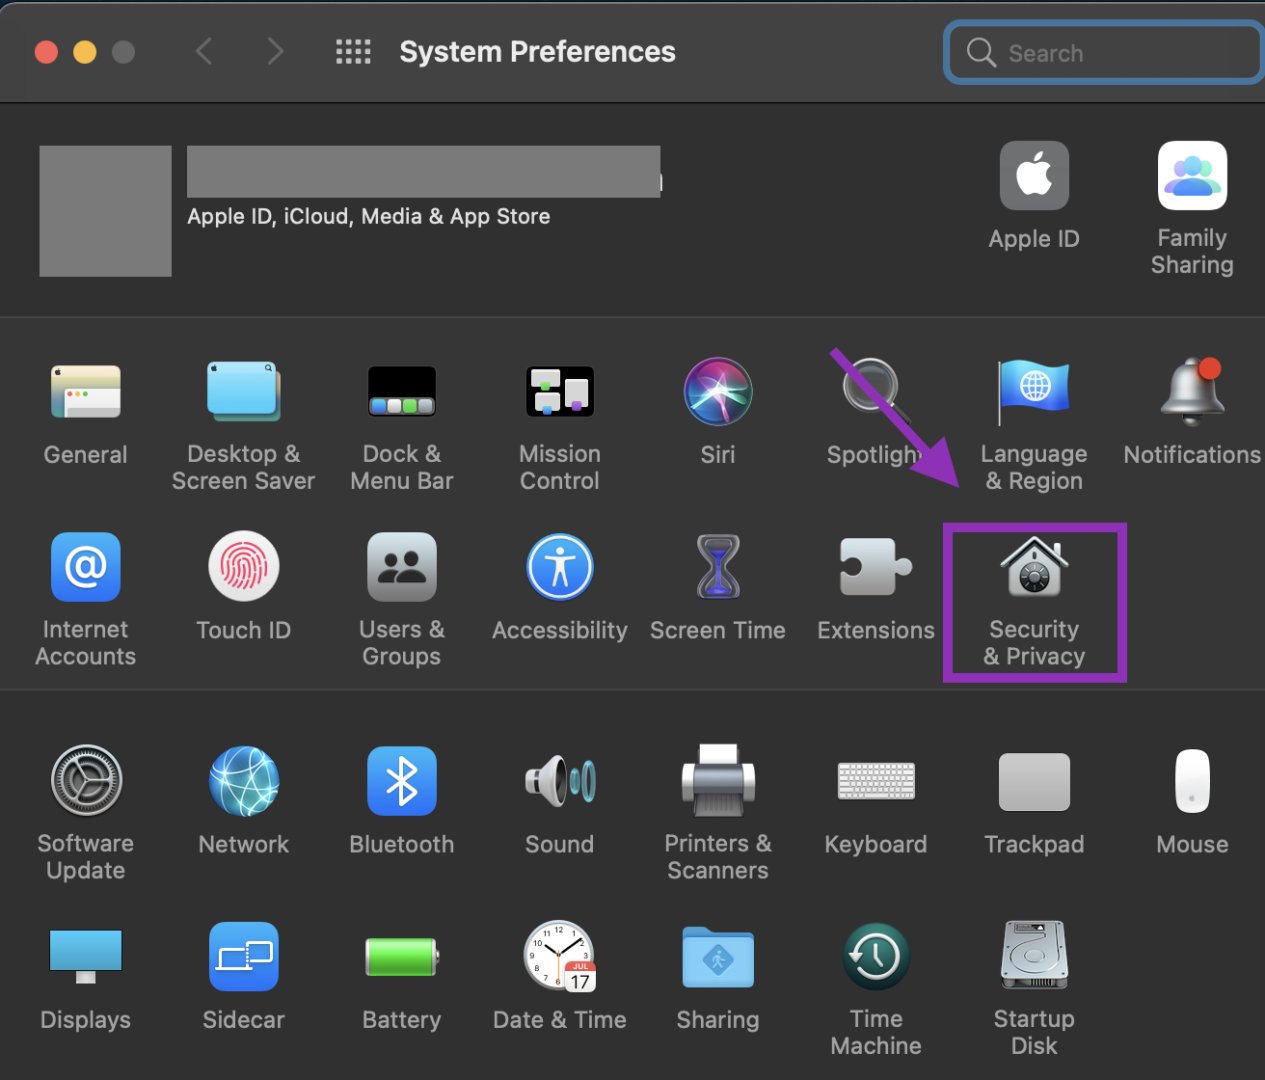
- Navigate to the Security & Privacy in Mac’s System Preferences and unlock the settings with the admin privileges.

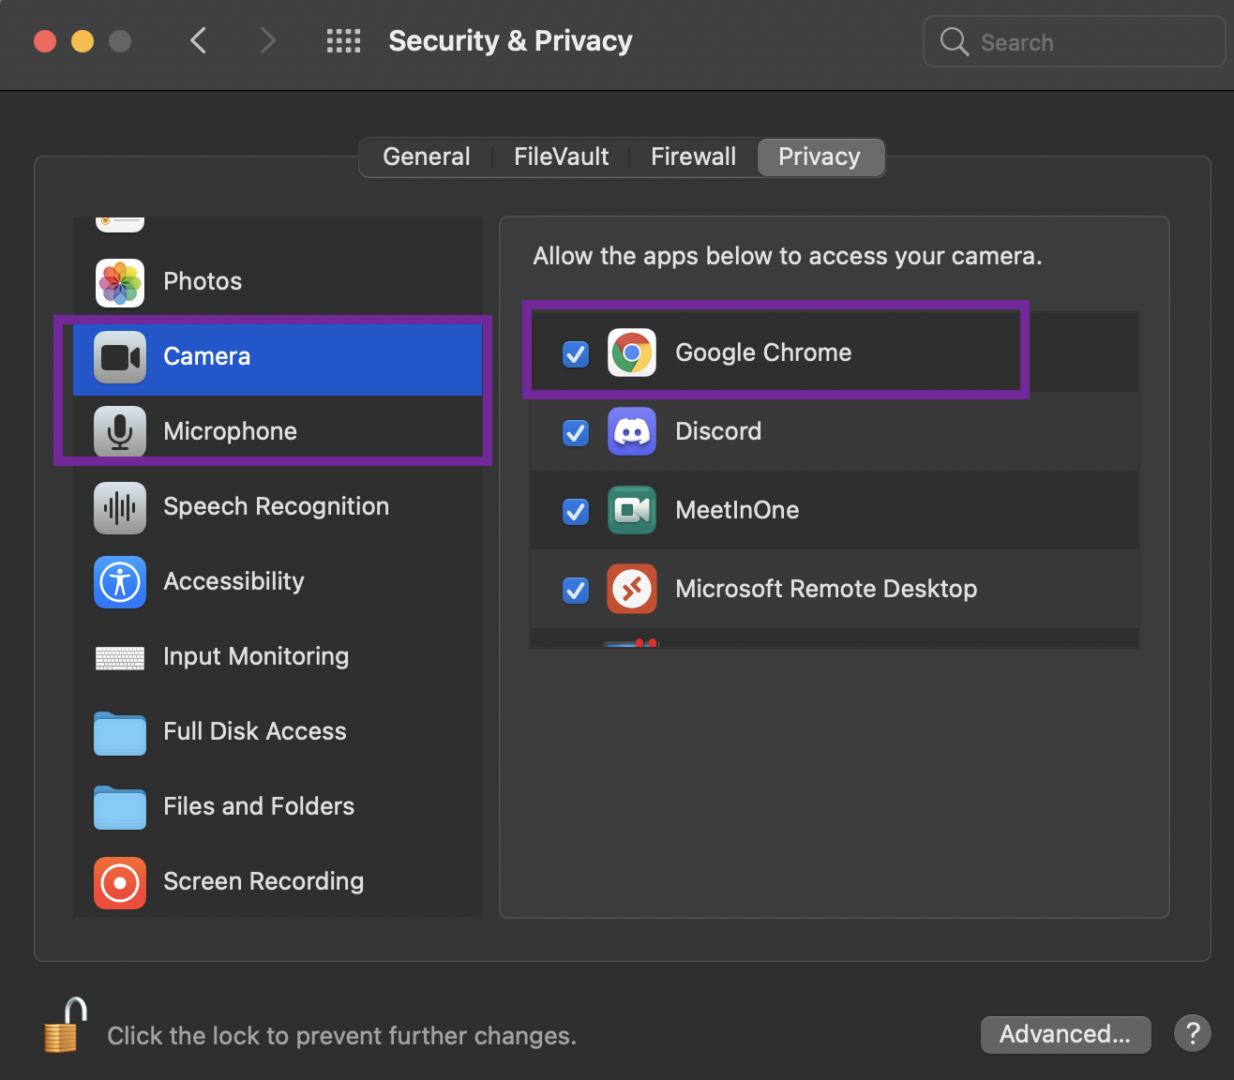
Security and Privacy in the Mac’s System - Now make sure that Camera, Screen Recording, and Microphone are enabled for your browser (e.g., Chrome) under the Privacy tab.

Granting Camera and Microphone access – Privacy settings
2. Allow the Camera Access in the Security Software Settings
There are also instances where the security software on your system flags Google Meets as a potential threat or spyware. We have seen this happen with a lot of Antivirus software like Kaspersky. Here, navigate to your Antivirus settings and make sure you disable all webcam-related protections.
You may follow the instructions as per your security software, for illustrative purposes, we will discuss the process of disabling the webcam privacy protection for Kaspersky.
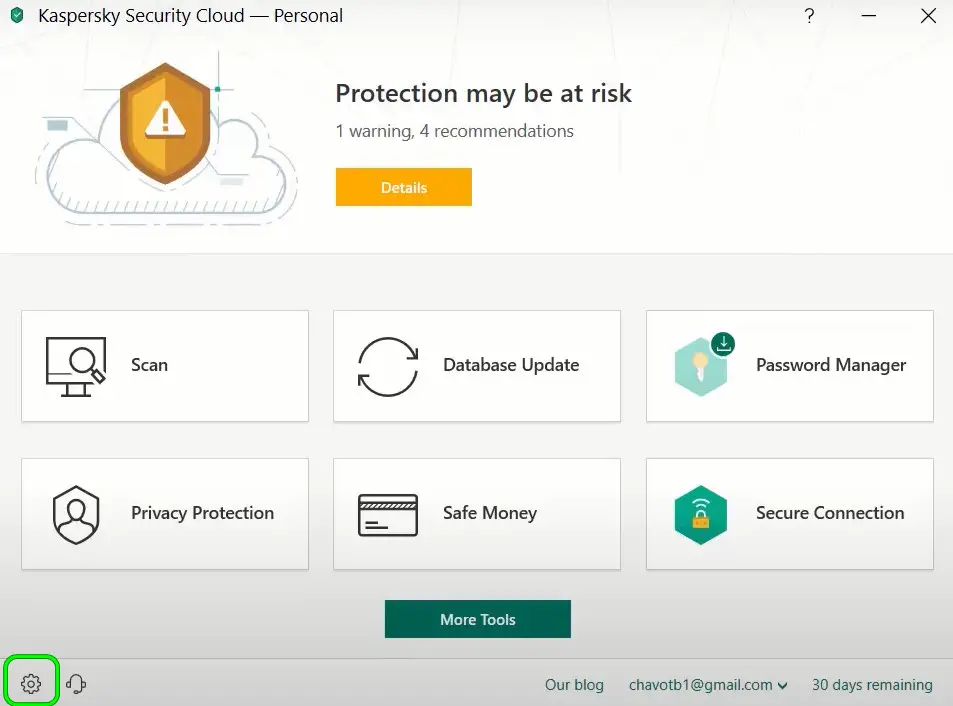
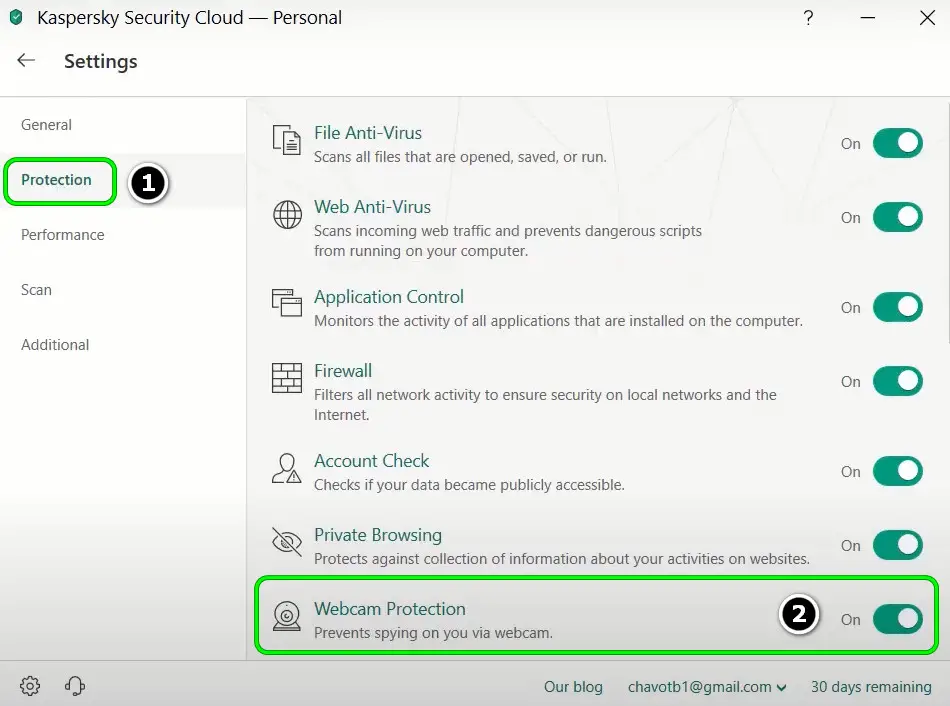
- Launch the Kaspersky application and click on the Gear/Settings icon (near the bottom left of the screen).

Opening Kaspersky’s settings - Now, head to the Protection tab (in the left side menu), and in the right-side menu, toggle the switch of Webcam Protection to off.

Disabling webcam protection in Kaspersky - Then relaunch your browser and check if the Google Meet is cleared of the Camera Failed issue.
3. Reset the Camera App to the Defaults
The camera might fail to operate in Google Meet if the installation of the Windows built-in camera app is corrupt (which is essential for the operation of the camera in any other application like a browser). In this context, resetting the Windows built-in Camera app to the defaults may solve the Google Meet issue.
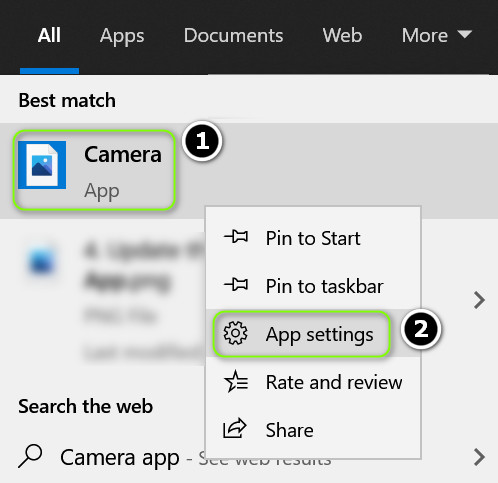
- Click Windows, key in Camera, hover over it, and open App Settings.

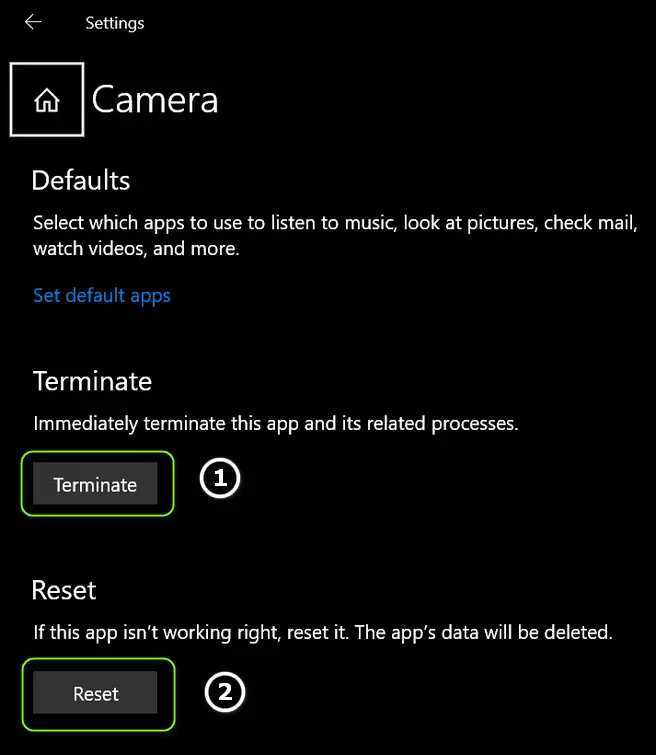
Opening Camera App settings – Windows 10 - Then scroll down and close the running processes of the Camera app by clicking on the Terminate button.
- Now click on the Reset button and then confirm to reset the Camera app to the defaults.

Resetting Camera in Windows 10 - Then reboot your PC and upon reboot, check if the camera is working fine in Google Meet.
If that did not do the trick, then check if executing the following in an elevated Command Prompt sorts out the camera issue:
Get-AppxPackage -allusers Microsoft.WindowsCamera | Foreach {Add-AppxPackage -DisableDevelopmentMode -Register "$($_.InstallLocation)\AppXManifest.xml"}
4. Clean Boot Your PC and Disable Conflicting Applications
Your Camera might also be failing in Meets if an application like ‘Quick Look’ is conflicting and competing for the camera resources. In this context, clean booting your PC and disabling/uninstalling the conflicting applications may solve the problem.
Before proceeding, check if ending the irrelevant or non-essential processes in the Task Manager of your system sorts out the issue.
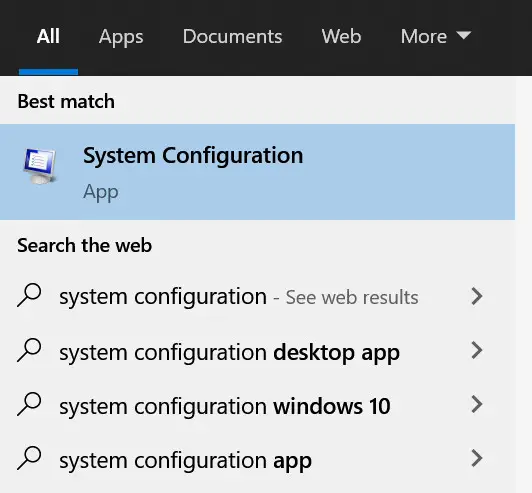
- Click Windows, type: System Configuration, and open it.

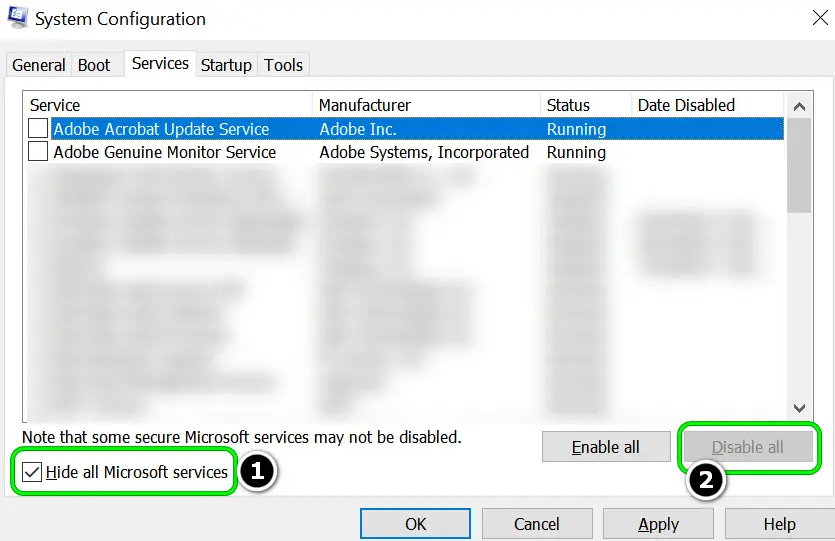
Opening System Configuration Utility - Now head to the Services tab and checkmark Hide All Microsoft Services.

Hide All Microsoft Services, Disable All Other Services, and Open the Startup Tab - Then click on Disable All to disable all other services and head to the Startup tab.
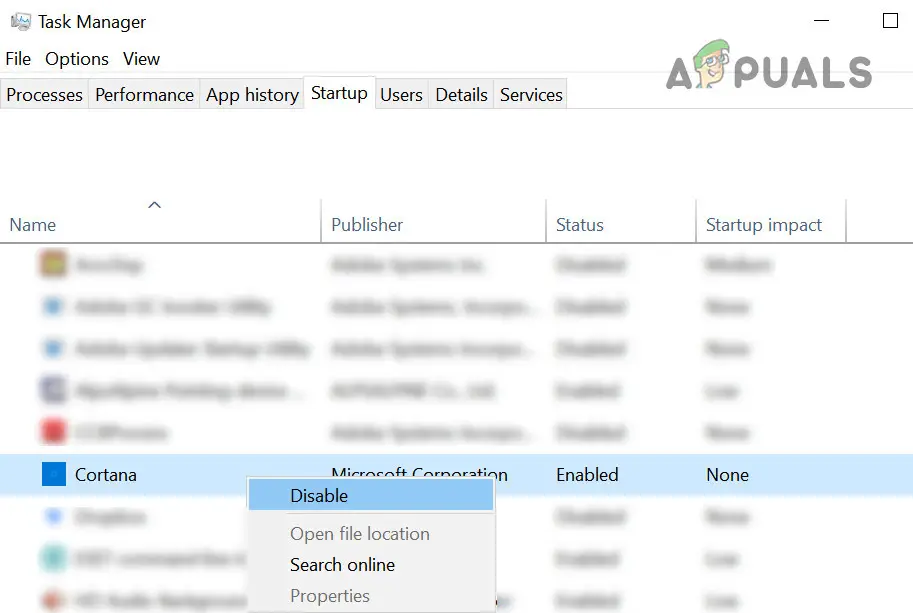
- Now click on Open Task Manager and in the Startup tab of the Task Manager, disable every process by right-clicking it and selecting Disable.

Disable All Startup Entries in the Startup tab of the Task Manager - Then apply your changes and reboot your PC.
- Upon reboot, check if the Google Meet camera failed issue is resolved.
- If so, then try to find out the process/program causing the issue by enabling the startup items one by one that was disabled during the clean boot process.
- Once the problematic one is found, either uninstall it (if not essential) or disable it.
The following applications are reported to cause the camera failure issue:
- Quick Look
- Zoom
If you have any of these (or applications of a similar niche), then you may have to uninstall (or disable the application).
5. Reinstalling the Camera Driver
The camera may not work in Google Meet if the installation of the camera driver is corrupt and reinstalling the camera driver may solve the Google Meet issue.
- Firstly, make sure to download the latest camera driver from the OEM’s website.
- Right-click Windows and open Device Manager.
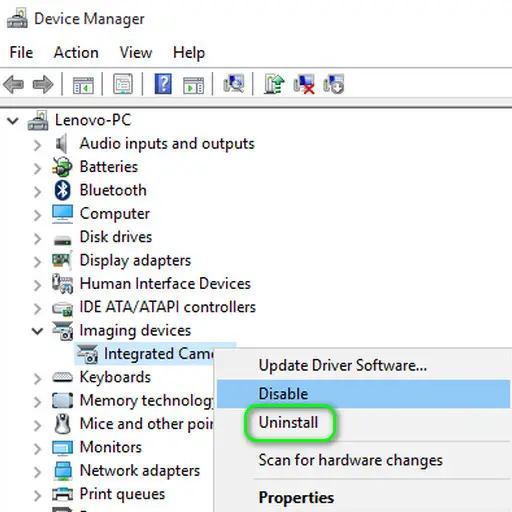
- Then expand the Camera option and right-click on the problematic camera device. If the Camera option is not present in the Device Manager, check under Imaging Devices.
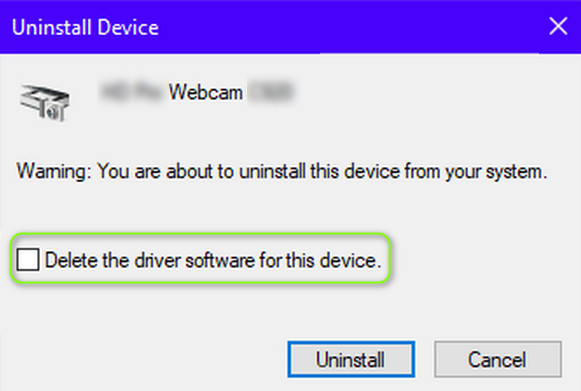
- Now, in the menu shown, select Uninstall Device and then checkmark the option of Delete the Driver Software for This Device.

Uninstall the Camera in the Device Manager - Then click on Uninstall and wait till the camera’s driver is uninstalled.

Removing the Driver as well for the Camera - Now reboot your PC and upon reboot, check if the camera is working fine in the Google Meet (if the Windows installed its generic camera driver).
- If the issue persists or the Windows did not install a driver, then install the latest OEM driver (downloaded at the first step) and reboot your PC to check if the camera is working fine in the Google Meet.
Browser-specific Workarounds:
There are many browser settings like hardware acceleration and extensions, etc. that may cause the camera failed issue in Google Meets. Here, we will go through different workarounds that worked for users using Meets in a browser.
1. Update the Browser to the Latest Build
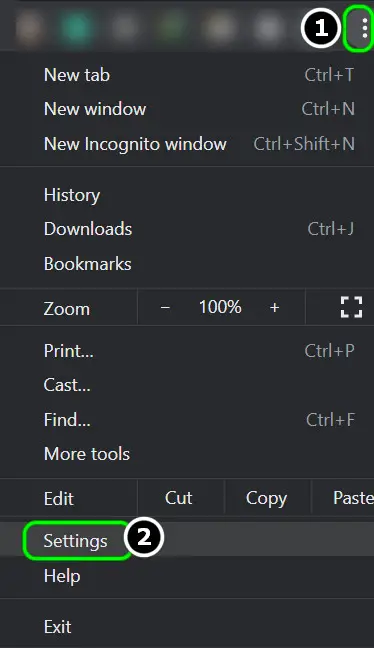
- Launch the Chrome browser and click on the overflow button (three eclipses in the top right).

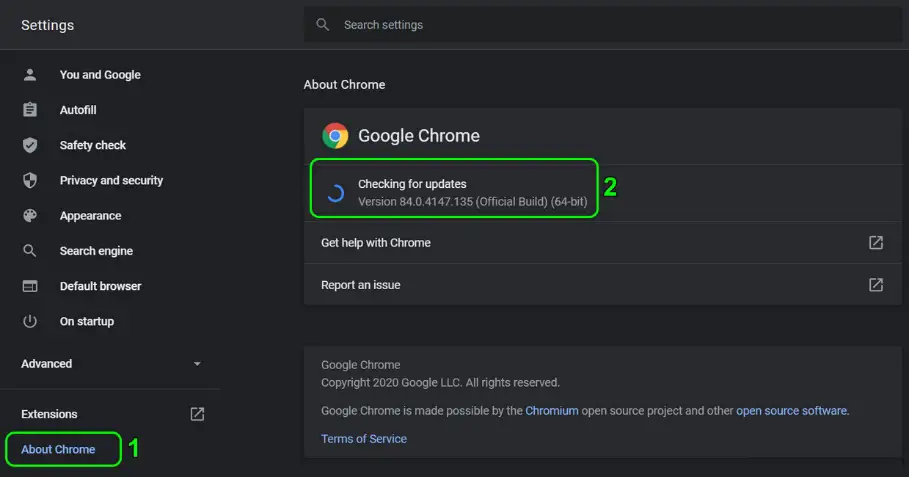
Opening Chrome Settings - Now select Settings and in the left side menu, click on About Chrome.
- Then, on the right side of the window, make sure that the Chrome browser is updated to the latest release.

Updating Chrome to the Latest Build - Now relaunch Chrome and check if the Goggle Meet is working fine.
- If not, then check if using the beta version of the Chrome browser solves the camera failed issue.
2. Reset the Google Meet’s Site Permissions
- Launch a browser and navigate to the Google Meet website.
https://meet.google.com/
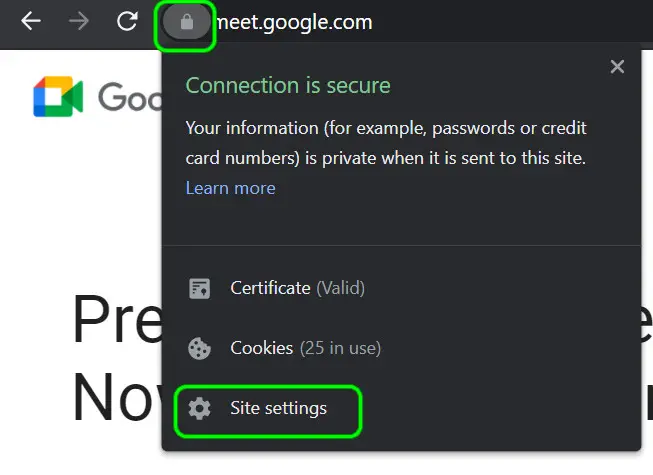
- Then click on the padlock icon on the left side of the address bar and in the menu shown, open Site Settings.

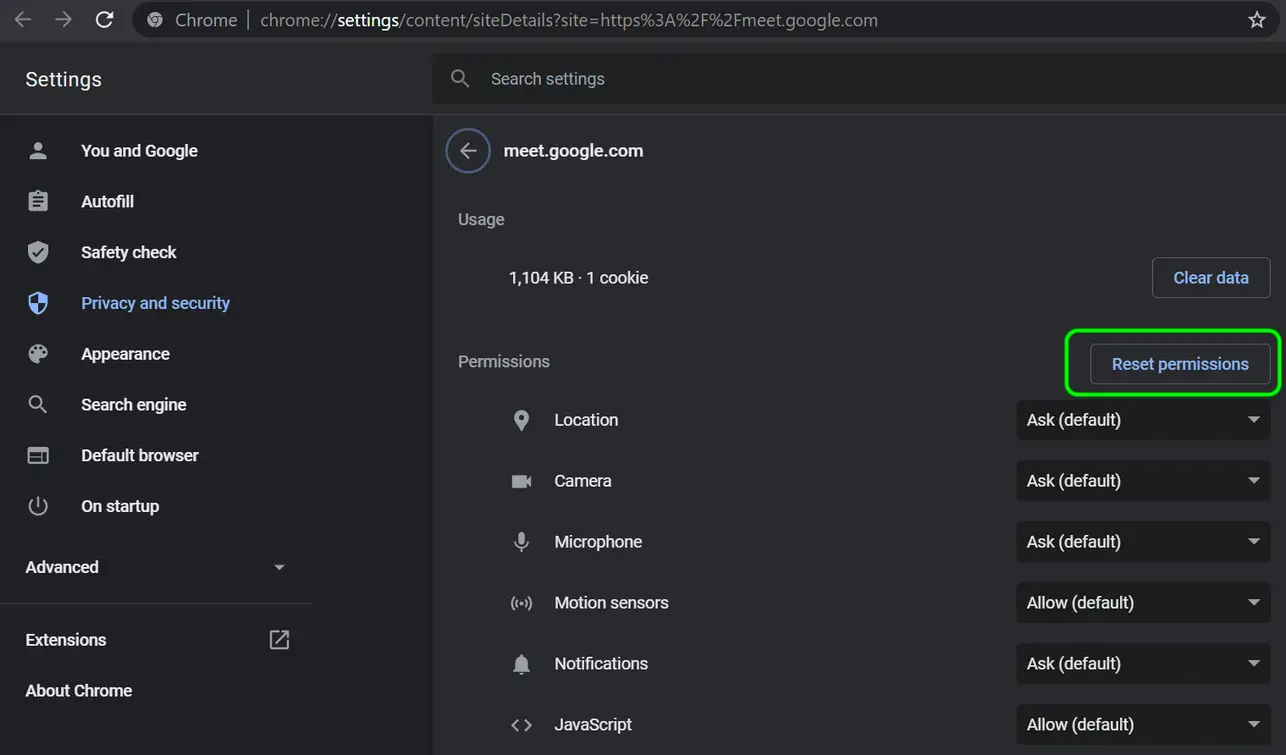
Opening Meets Site Settings - Now click on the Reset Permissions button and then relaunch the browser to check if the camera failed issue is resolved (make sure to enable the mic and camera permissions, if asked to).
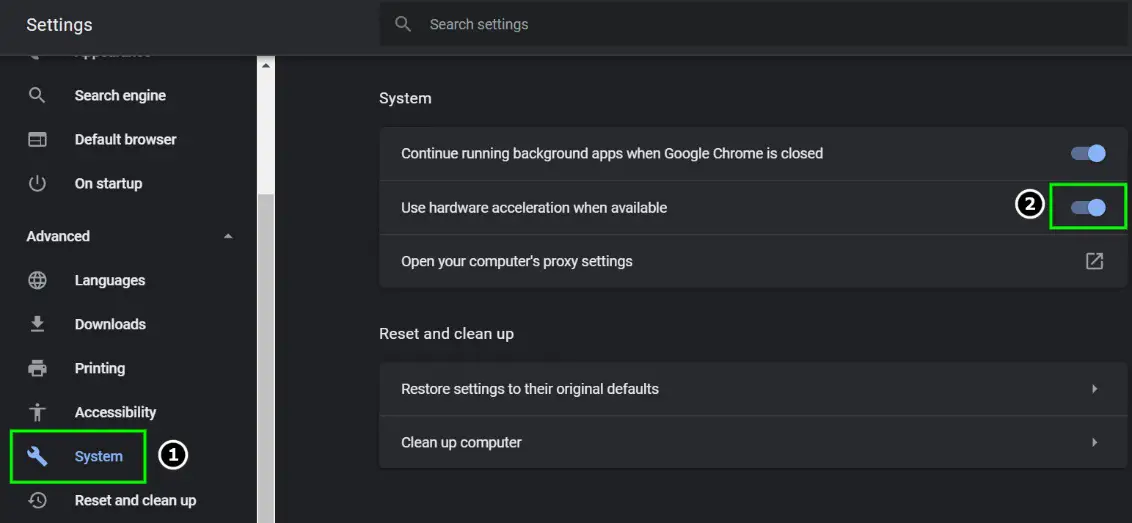
3. Disable/Enable Hardware Acceleration of the Browser
- Launch Chrome’s Settings and expand Advanced (in the left side menu).
- Now select System and in the right-side menu, disable the option of Use Hardware Acceleration When Available.

Disable Hardware Acceleration of Chrome - Then relaunch the Chrome browser and check the Google Meet camera issue is resolved.
- If the Hardware Acceleration is already disabled at step 2, then enable it and check if that resolves the camera failed issue.
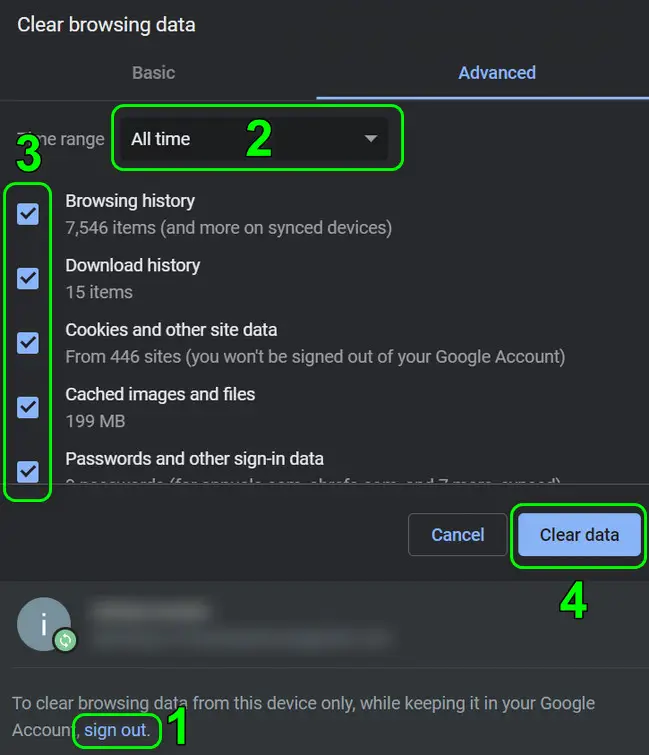
4. Clear the Cache and Cookies of the Browser
- Launch the Chrome browser and click on the overflow button to open Chrome’s menu.
- Now select More Tools and open Clear Browsing Data.

Clearing browser Data and cookies – Chrome - Then click on Sign Out (near the bottom of the window) and select All-Time in the Time Range dropdown.
- Now, checkmark all the categories (like Browsing History, Download History, etc.) and click on the Clear Data button.
- Then relaunch Chrome and check if the camera failed issue of Google Meet is resolved.
5. Disable/Remove the Problematic Browser Extensions
- Launch your browser in the incognito or InPrivate mode and check if Google Meet is working fine.
- If so, then launch the browser in normal mode and disable all the extensions.
- Now enable the extensions one by one till the problematic one is found (e.g., Virtual Background extension is reported to cause the issue at hand). Once found, either keep it disabled or uninstall it.
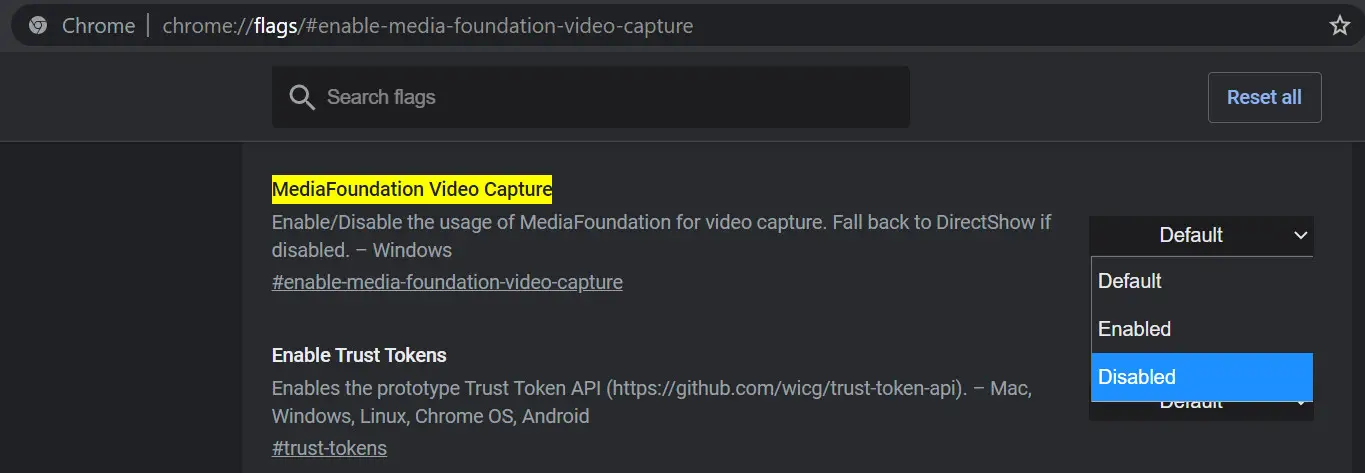
6. Disable Media Foundation Video Capture Flag
- Launch the Chrome browser and enter the following in the address bar:
chrome://flags/#enable-media-foundation-video-capture
- Now disable it and relaunch Chrome to check if the camera failed issue is resolved.

Disable the MediaFoundation Video Capture Flag in Chrome - If not, then enable back the video capture flag and check if the Google Meet is working fine.
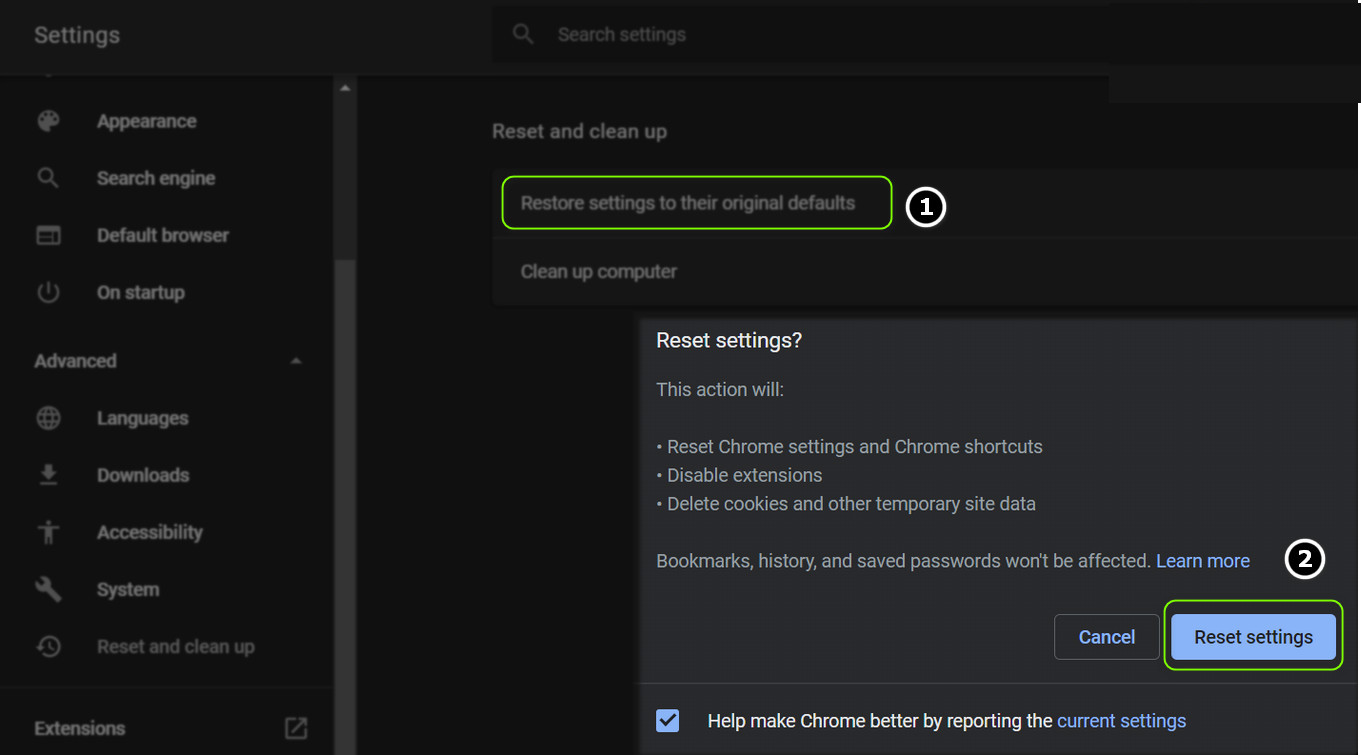
7. Reset the Chrome Browser to the Defaults
- Launch Chrome’s Settings and expand Advanced.
- Now select Reset and Clean Up and in the right pane, open Restore Settings to Their Original Defaults.
- Then click on the Reset Settings button (make sure to back up the essentials) and afterward, relaunch the Chrome browser to check if the Google Meet is operating fine.

Reset Chrome Settings to Defaults
If that did not do the trick, then you may have to reinstall the browser after removing all its traces from the system. If the issue has started to occur after a browser update, then you may have to try an older version of the browser.
