If you use IntelliJ IDEA to write the Java code, then you might have faced the error java javactask source release 8 requires target release 1.8 issue. This error message occurs when the written code can’t find the corresponding JDK compiler.
Since this error message mostly occurs in IntelliJ IDEA, therefore, this error message is also known as IntelliJ IDEA error:java: javacTask: source release 8 requires target release 1.8. Anyway, if you’re also facing this error code, then let’s fix this.
Why Does This Error Message Occur?
- If the code in IntelliJ IDEA is written on the basis of JDK 1.8 and when the code couldn’t find the corresponding JDK compiler, people face this error message.
- This error message also occurs when the user enters the incorrect Java compiler information in the code.
How to Fix the Javactask Source Release Error?
Unlike the length of this error message, it is easier to fix it. In fact, there are two methods to fix this error code. One is for non-Maven users and the other one is for Apache Maven users.
1. Fixing by Changing Project Bytecode Version via ‘Settings’ Menu
In this solution, we’ll go through the settings of the IntelliJ IDEA to fix this error message.
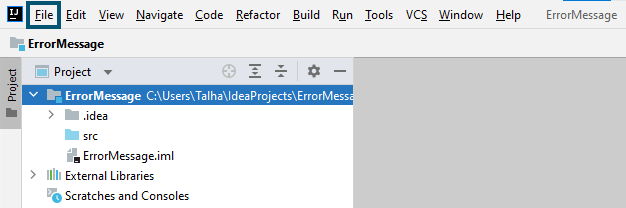
- First, you’ll go to the ‘File’ menu in the Menu bar.

Accessing the ‘File’ option in the menu bar - Then, you’ll choose the ‘Settings’ option.

Choosing the ‘Settings’ option in the ‘File’ menu

Note: You can also open the ‘Settings’ by pressing ‘Ctrl + Alt + S’ keys
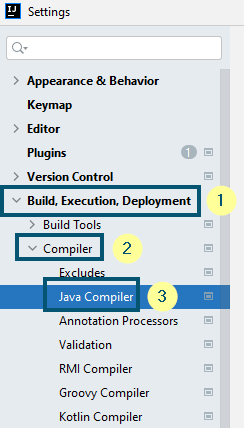
- After that, you’ll select the ‘Build, Execution, Deployment’ option and expand it.
- Then, inside the ‘Build, Execution, Deployment’ option, you’ll expand the ‘Compiler’ option and from the drop-down list, you’ll choose the ‘Java Compiler’ option.

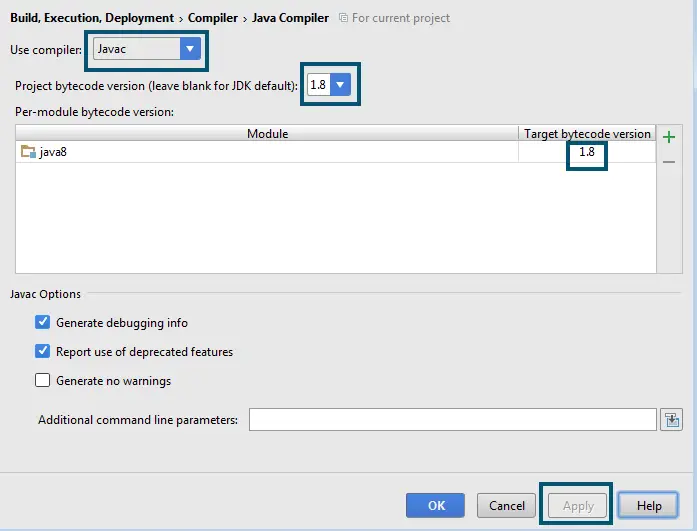
Choosing the ‘Build, Execution, Deployment’ < ‘Compiler’ < ‘Java Compiler’ options - Inside the ‘Java Compiler’ window, you’ll change the ‘Project bytecode version:’ to ‘1.8’ and then, you’ll ‘Apply’ the settings.

Changing the ‘Project bytecode version’ to ‘1.8’
This solution is the easiest and most successful way to fix this error code. However, if you’re an Apache Maven user, then try the next solution.
2. Adding the Compiler Plug-in in the ‘pom.xml’ File
For People Using ‘Apache Maven’
If you’re a programming nerd and you want to perform this entire operation via coding or you’re using ‘Apache Maven,’ then this solution is for you.
Here, we’ll add the compiler plug-in in the ‘pom.xml’ file, which you’ll find under the top-level project node.
- Once you’ve accessed the ‘pom.xml’ file, then, you’ll copy and paste the following code into that file.
<build>

<plugins>

<plugin>

<groupId>org.apache.maven.plugins</groupId>

<artifactId>maven-compiler-plugin</artifactId>

<configuration>

<source>1.8</source>

<target>1.8</target>

</configuration>

</plugin>

</plugins>

</build>
- After the code modification, you’ll select the ‘Reimport’ option in the Maven menu of IntelliJ IDEA.
- Then, you’ll re-import the project settings.
- After that, the tool will automatically apply the correct settings.
