Users experience ‘Internal Error’ in their Kindles when the Kindle is unable to attach the Amazon account to itself. This error has been present since the Kindle was launched a decade ago and persists even now. This usually occurs during the registration phase of the device. This internal error is accompanied with ‘There was an error while registering your Kindle‘.
In most cases, the internal error occurs when you are entering your Amazon account to complete the registration process of your Kindle. After the registration, you will be able to use the Amazon store on your device and purchase books.
There are two use-cases for you having a Kindle:
- You purchased a brand-new Kindle from a store
- You purchased a refurbished or used Kindle from a third-party store or an online marketplace like eBay.
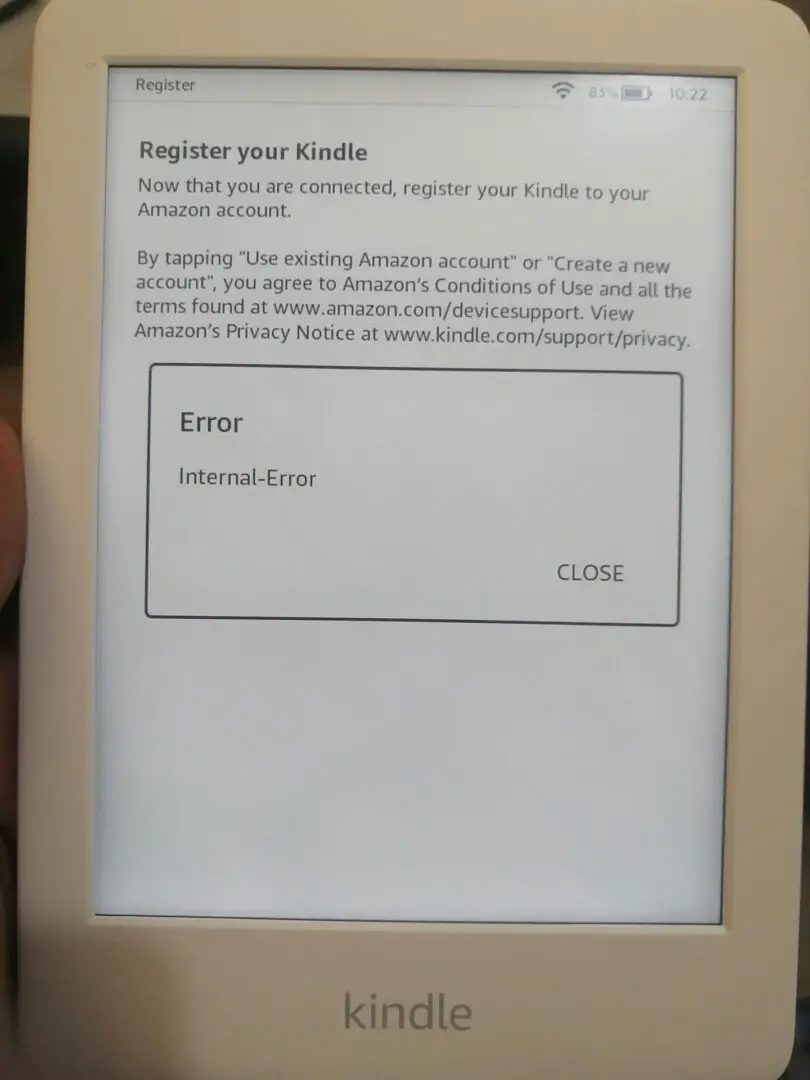
What does the Internal Error mean?
The ‘internal error’ in Kindles means that the internal login modules in the device were unable to handshake with Amazon servers due to some reason. This handshake is required when you are adding a new account to your Kindle device.
When the handshake fails, the device fails to get permission to add the account and it errors out. You will be able to use all other functionalities in Kindle but won’t be able to add eBooks from the Amazon store since there won’t be an account to facilitate the download or purchase.
You can still use third-party applications (like Calibre) to download and add books to the Kindle but it is not an alternative to the store.
What causes the Internal Error?
Here are some of the main causes that drive the ‘internal error’ in Kindles:
| Cause(s) | Explanation(s) |
|---|---|
| Kindle is blocked | If a Kindle is reported as stolen or lost, it is blocked by Amazon. Here you cannot add an account to the device |
| Network problems | If the device is unable to communicate with Amazon servers during login, you will get the 'internal error' |
| Outdated Firmware | Sometimes an outdated firmware can cause problems with the logging in modules in Kindle. |
| Two step verification | Even though this is highly recommended by Amazon, there are instances where this causes problems when adding a new account. |
| Language settings | Another bizzare scenario we came across was where due to some language selection, users were experiencing the issue. |
| Account not set to a Country | Services like Amazon rely on country selection to present you with the catalog which is available at that country. If your country is not selected in your main Amazon account, you will get this error. |
How to Fix the Internal Error
Here are workarounds that are verified and tested. Make sure you follow the order as they are listed with more complex ones at the end.
1. Contact Amazon Support
This workaround should be the first on your list. This case usually occurs when the Kindle was bought from a third-party website or the device is somehow refurbished; even if it is by Amazon itself. It might be that the Kindle you are using is reported as lost by its previous owner or it is accidentally added as such due to some glitch in the system.
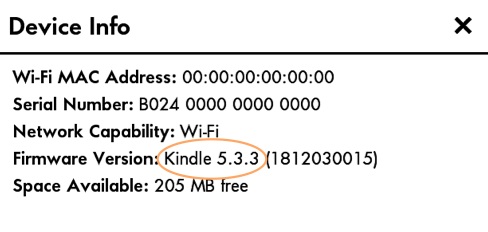
Before talking to support, you need to have your MAC Address and Serial Number at hand.
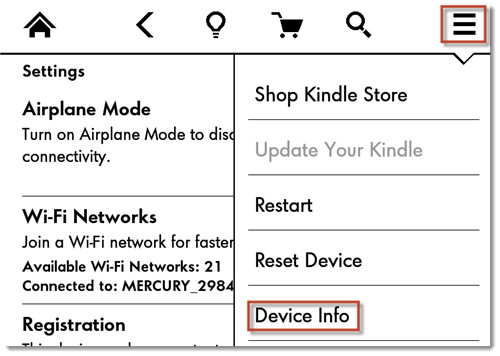
- Go to the device info of your Kindle.
- Copy your MAC Address and serial number.
- Now Contact Amazon Chat Support and describe your issue to the operator.
- Provide him with your MAC address and serial number. He will do a quick check against the database and inform you.
2. Changing Language Option
Language options seem to have a relation to which store you are going to go to. If there is a mismatch in the language you have selected in the Kindle vs the language you have set on your Amazon account, you might experience the ‘internal error’.
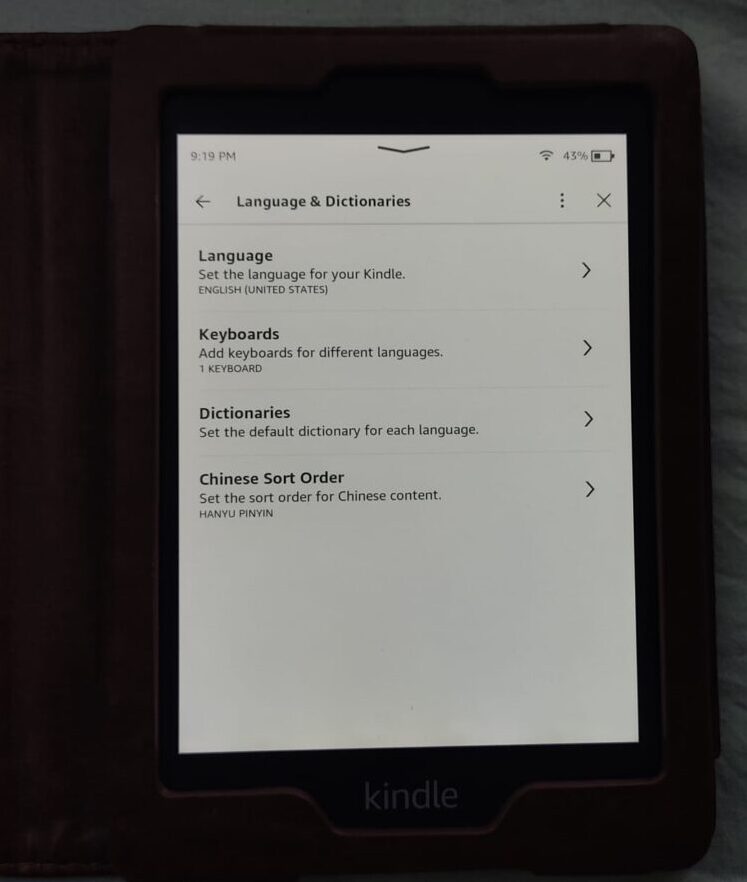
In this scenario, the easiest way is to navigate to your Kindle Settings and change the language. For example, from English (UK) to English (US). Once you’ve changed the language, save the changes and exit. Then Restart your Kindle once before trying to register it again.
3. Adding an Address to Amazon
Another thing to make sure of here is that there is an Address associated with your Amazon account which you are trying to log into your Kindle. Amazon makes use of addresses to make sure they have the license to sell the ebook in that location legally.
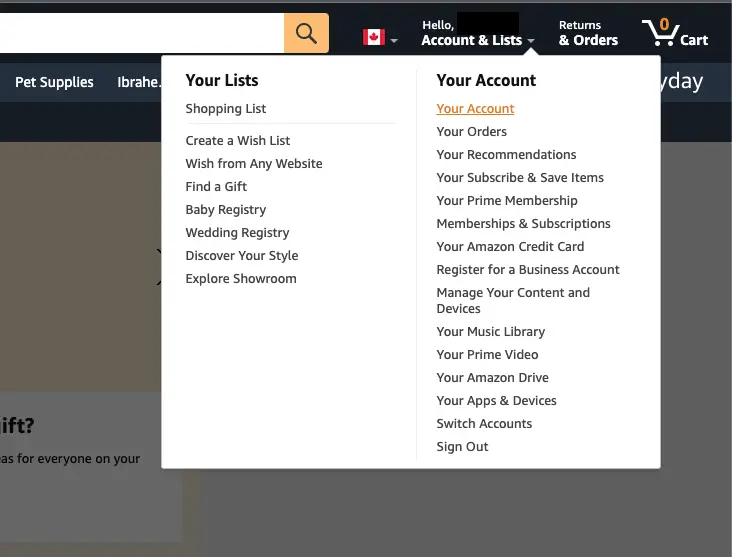
- Log into your Amazon account. Hover over ‘Accounts & lists‘ and click on ‘Your account‘.
Selecting ‘Your account’ in Amazon - Next, click on ‘Your Addresses‘ in the preceding menu.
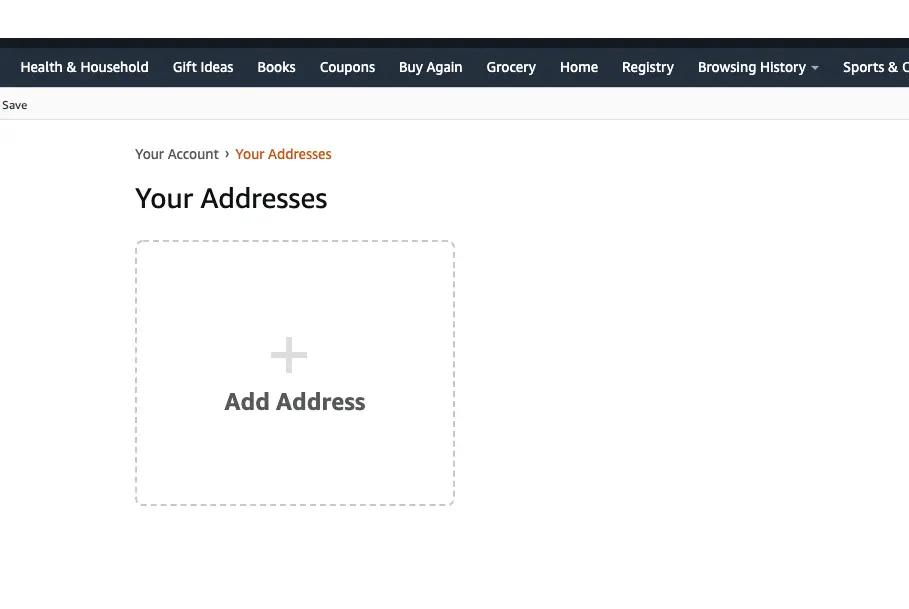
Addresses in Amazon Profile - Now, click on ‘Add Address‘ in the addresses menu and enter your details.
Adding Address in Amazon - Save changes and exit. Now try adding your account in Kindle and see if this did the trick.
4. Remove Two-Step Authentication from Kindle
Two-factor authentication is a very effective method to secure your account. The process involved inputting a security token from your two-factor address. However, we’ve seen reports by users where this authentication was causing issues when registering the Kindle.
A simple workaround you can do is to remove the authentication temporarily from your account then try logging in. Once it is logged in, you can re-enable the authentication.
- Go to the Amazon desktop site and hover over your name.
- Click on Hello, your Name and click on your Account.
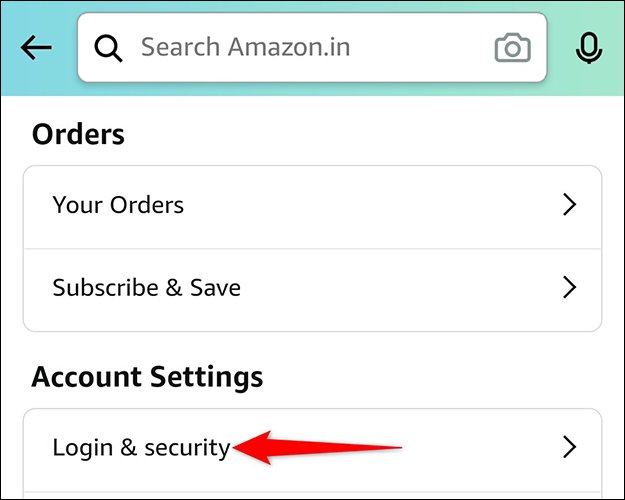
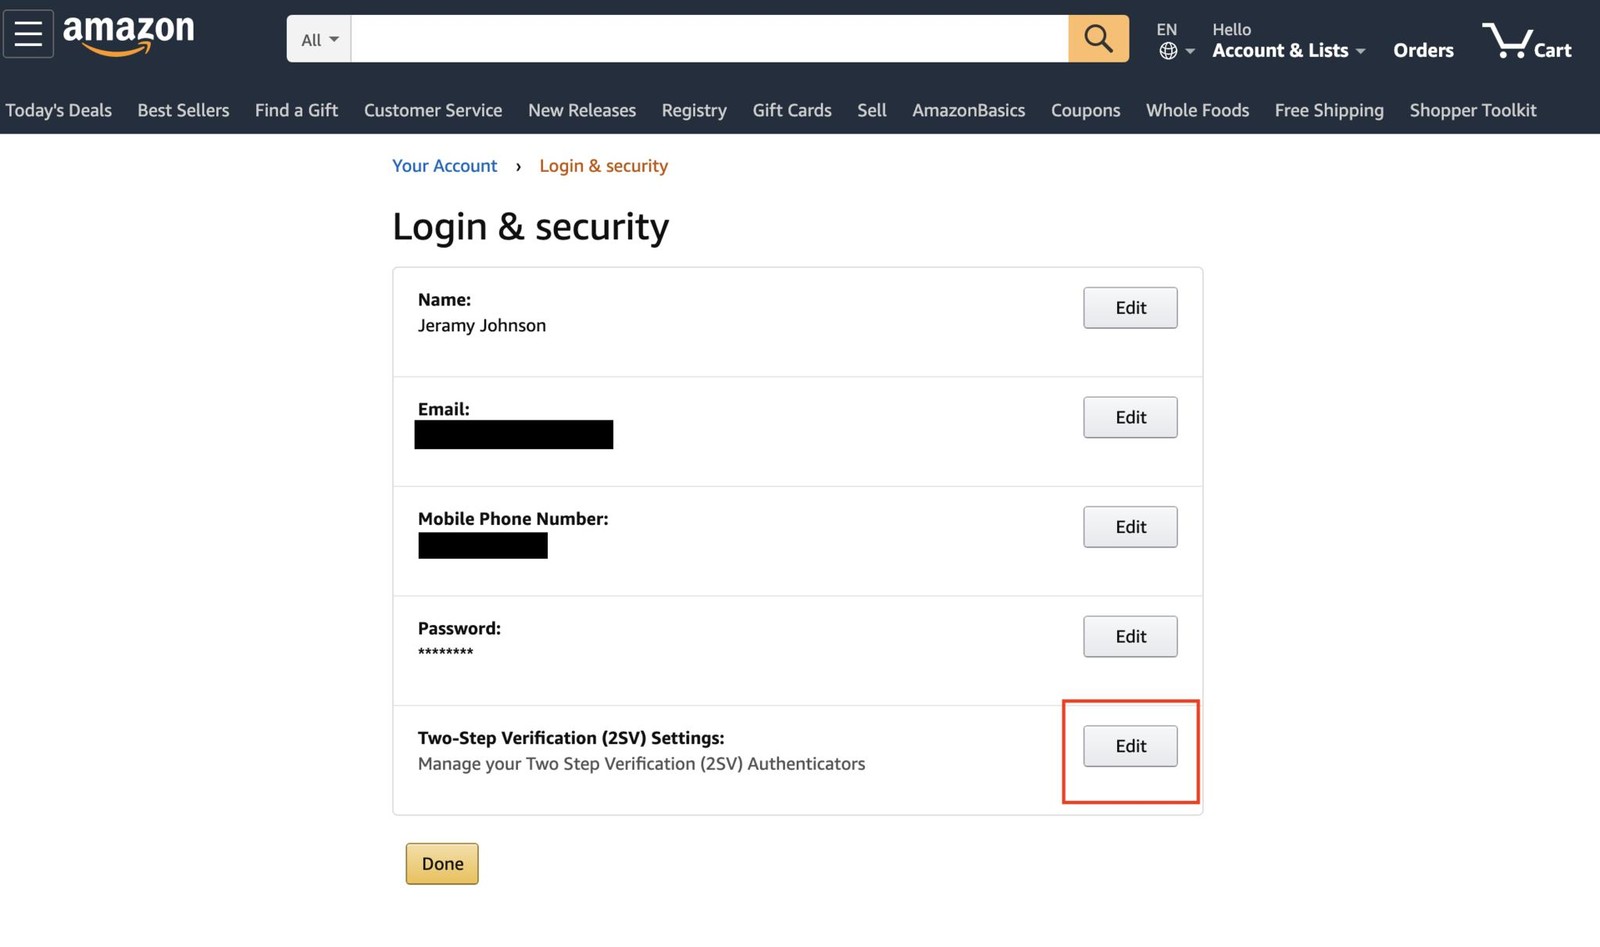
- Click Login and Security.
- Choose Two-Step Authentication settings and Edit. Now, change the settings to Disabled.
- You will need to enter your Amazon Security Code from your preferred or backup method on the next page to disable Two-Step Authentication or verify through email.
- After successfully entering your provided code, you will receive a notification that Two-Step Authentication has been disabled.
- Try logging into your Kindle again after 15 minutes and see if this does the trick.
5. Change your WiFi Network
Another thing to try is changing your WiFi network. As we mentioned before, the ‘internal error’ also occurs when the Kindle is unable to connect to Amazon’s servers. This can be due to any reason from issues in the ISP or your local network.
Here, you can either change your network or use a mobile hotspot temporarily. Try using at least 3 different connections to rule out a connection problem.
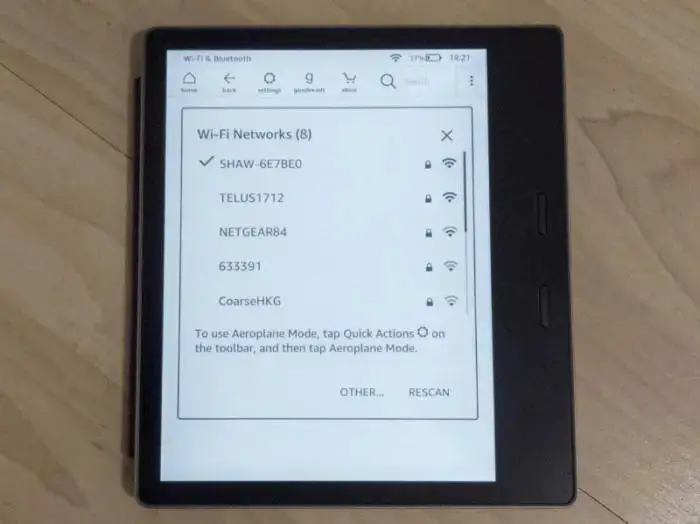
- Select All settings, then Wifi & Bluetooth.
- Now click on Scan. Select the new WiFi network and see if this does the trick.
6. Updating the Firmware of Kindle
Outdated Firmwares are known to cause problems in Kindle. Even though the store and registration modules are backward compatible, there are still instances where older firmware experience the ‘internal error’. Just to be on the safe side, we will check and update the Firmware of the Kindle to the latest version.
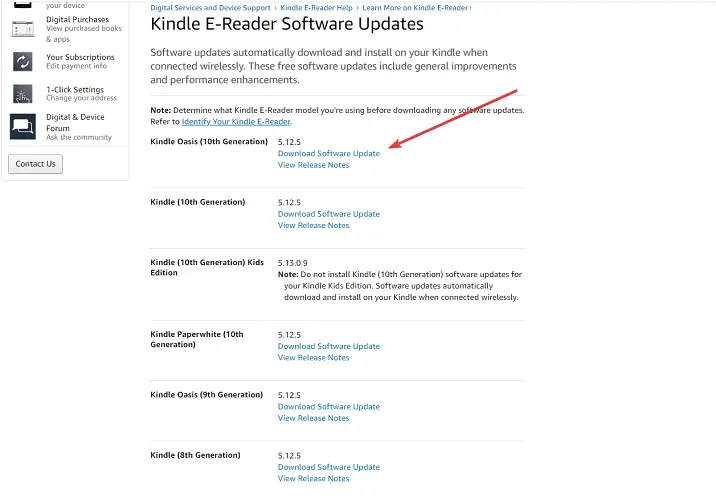
- Visit the Kindle E-reader Software Updates Page.
- Locate your device type from the list and click on the download Software update link beside it.
- Wait for the download to finish. Then Connect your Device to the computer with a reliable USB cable, and transfer the download update to the root directory of the Kindle device.
- Disconnect the Kindle from your computer.
- Tap on Menu and select settings.
- Click Menu again, and this time, go to update your Kindle.
- Click the OK button to trigger the updating process. You will now see a message that says your Kindle is updating.
This process will take up to 5 minutes. On completion, the device will start automatically. After restarting, try registering your account again and see if this works.

