You will fail to add a network printer with error 0x00011b due to issues with the system’s OS or if the printer’s driver is outdated. Try updating the PC’s Windows and printer driver as it will clear out any incompatibilities in your setup.
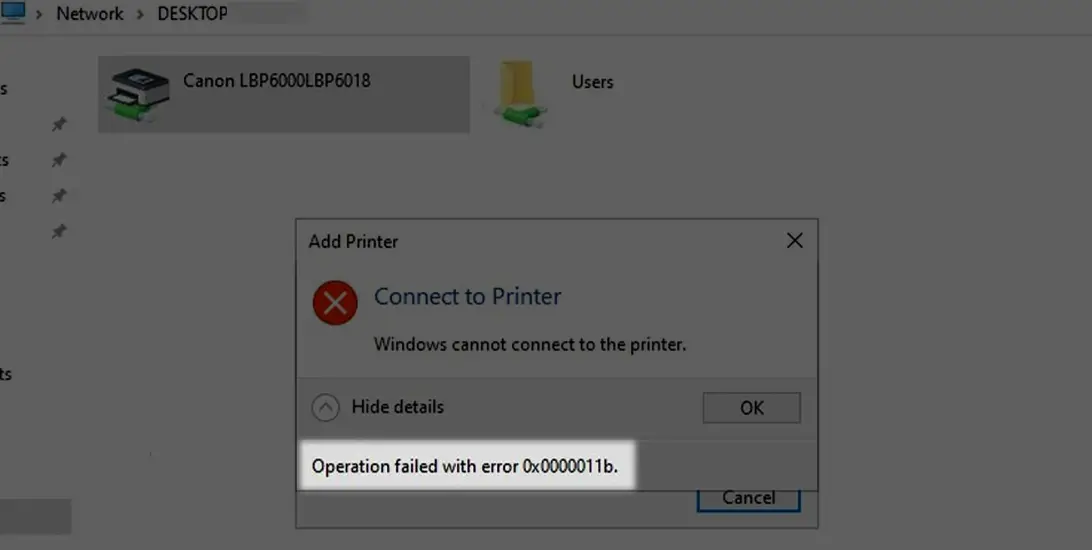
The problem occurs when you try to add a shared printer to your client machine but face the error 0x0000011b. The error is reported on home as well as corporate or domain-joined computers. Generally, an update to the system’s OS is reported to trigger the error. The error only occurs with the printer connected through a print server or host, not on the standalone network printers.
1. Update the System’s OS to the Latest Build
The printer 0x00011b error could be a result of a bug in your system’s OS and updating it to the latest build will patch any such bugs, thus resolving the issue. To do so on a Windows 11 system.
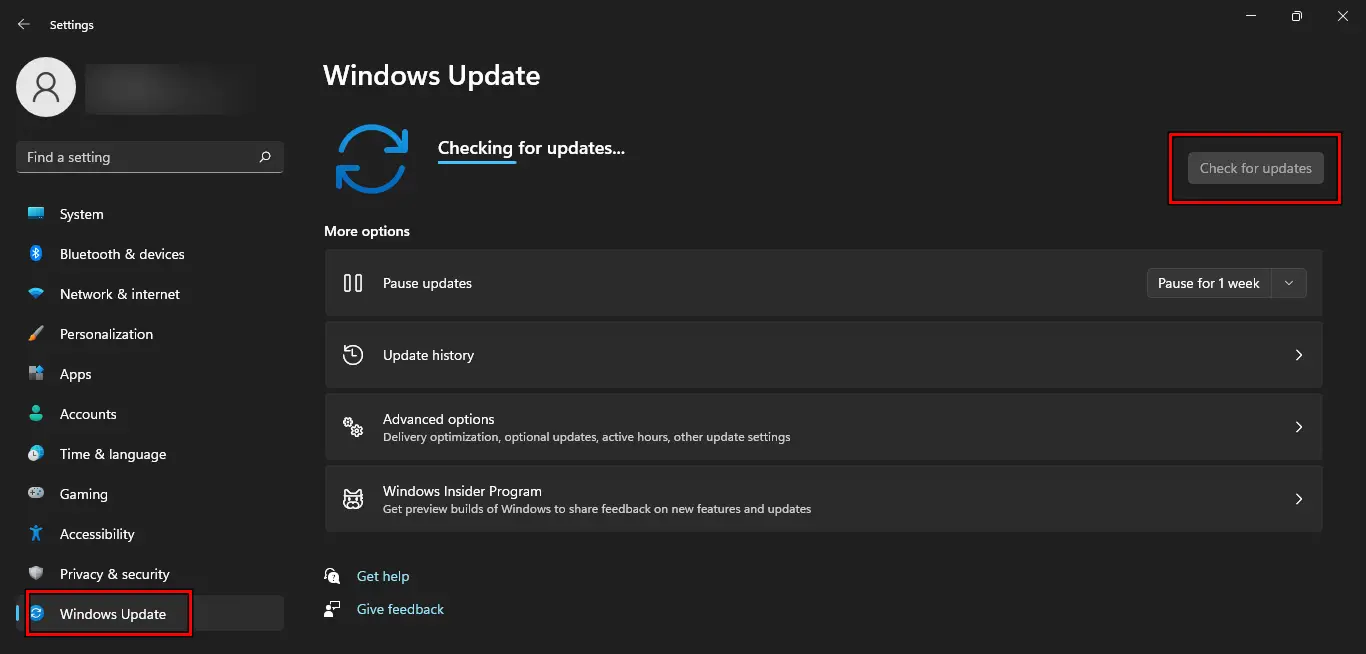
- On the host machine, go to Windows Settings > Windows Update.
- Click on Check for Updates and install all the available updates.

Check for Windows Updates - Once done, restart the system and repeat the same on the client machine. Check if the operation fail error is cleared.
2. Update the Printer Driver to the Latest Build
The 0x00011b error will occur if the printer driver you are using is outdated. This will make the system incompatible with other systems and printers. This can be solved by updating the printer driver to the latest build.
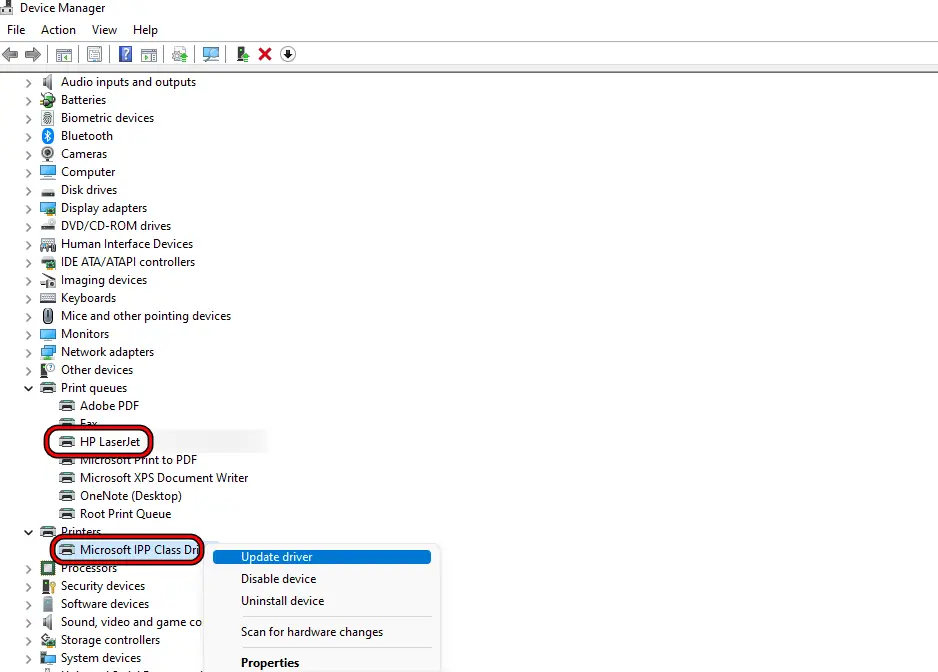
- On the host machine, right-click Windows and open Device Manager.
- Expand the Printers tab and right-click on your printer driver.
- Select Update Driver and follow the prompts to update the driver.

Update the Printer Driver in the Device Manager - Expand the Print Queues and update the driver of your printer.
- Once updated, restart the host system and repeat the same on the client machine. Check if the error 0x00011b is cleared.
- If not, disconnect the printer from the host machine and restart the host.
- Connect back the printer to the host and if it asks for an updated driver, let it update.
- Once done, check if the printer can be added to the client machine without causing the operation failed error.
- If this does not work, download the latest driver from the OEM website and install it as an administrator on the host machine. Check if that solves the problem.
- If the issue persists, switch to the packaged driver when sharing the printer on the host and see if that resolves the issue.
3. Add the Problematic User to the Local Admin
In a corporate network, domain users do not have admin rights and due to a recent change in the connection method, Windows sometimes require admin access to install the printer. Here, adding the problematic user to the local admin, installing the printer, and then removing the user from the local admin group will solve the problem.
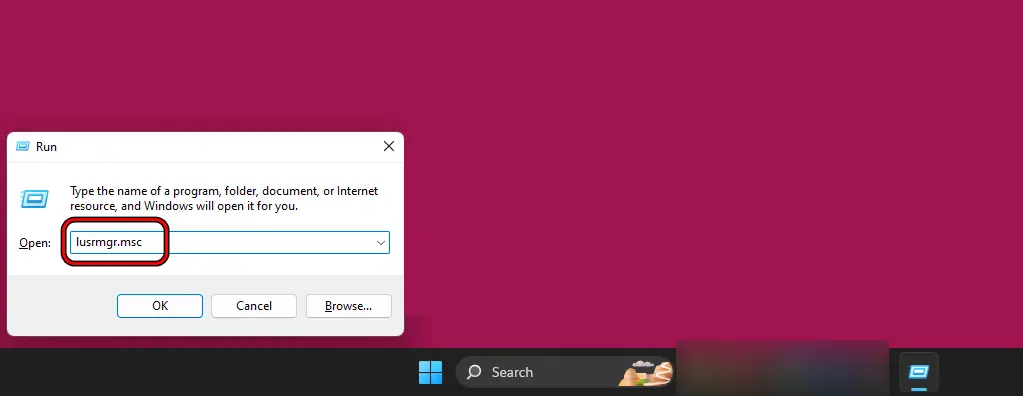
- On the client machine, press Windows + R keys to open the Run command box and execute the following:
lusrmgr.msc

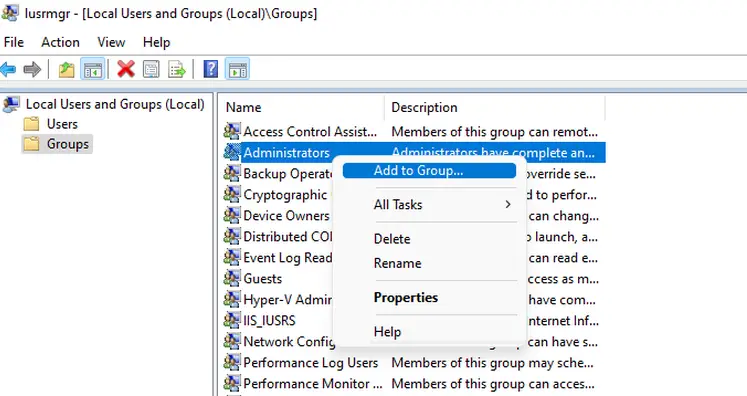
Open Local Users and Groups Through the Run Command Box - Go to Groups and right-click on Administrators.

Open Add to Group for Administrators in Local Users and Groups - Select Add to Group and click on Add.

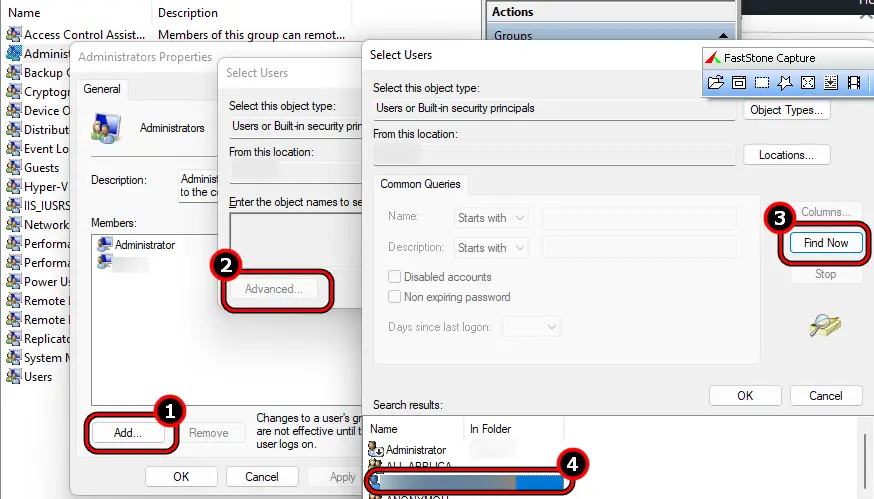
Add the User to the Local Administrators Group - Expand Advanced and click on Find Now.
- Double-click on the required account and click OK.
- Install the printer and check if the problem is solved. If so, you may remove the user from the local administrator group.
4. Uninstall Conflicting Updates
You will fail to add a network printer with error 0x00011b if the latest OS update applied to your system is not compatible with your system or the update itself has bugs. To fix this, uninstall the conflicting updates on your system.
Warning:
Advance with extreme caution and at your own risk as uninstalling updates can expose your system, network, data, etc. to threats.
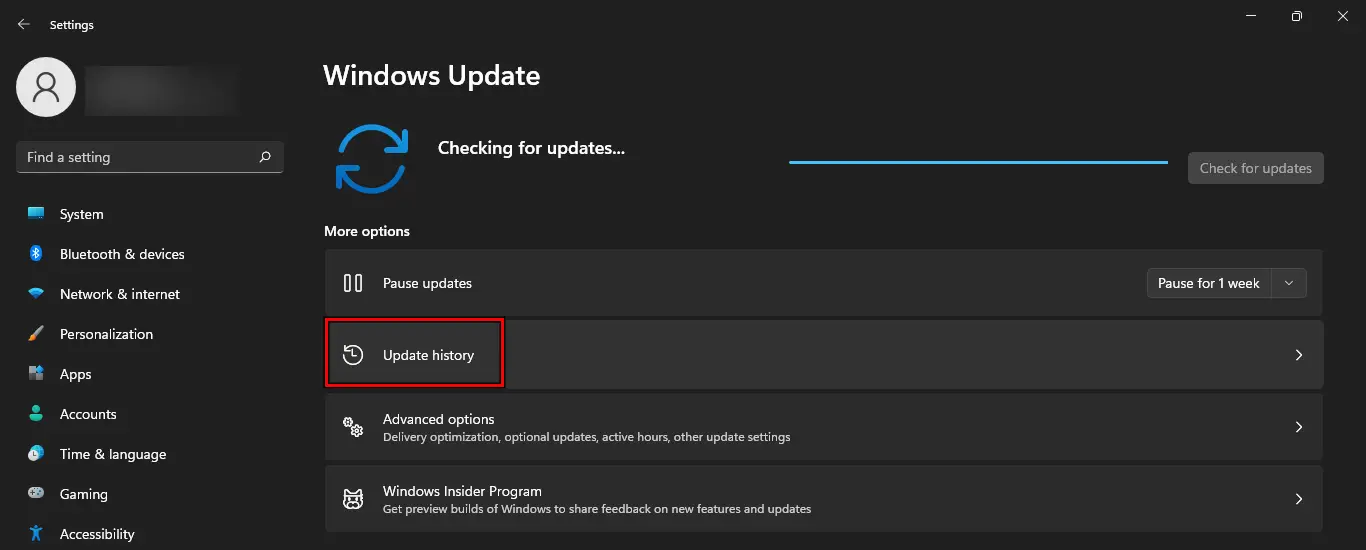
- On the host machine (if any), navigate to Settings > Windows Update > Update History.

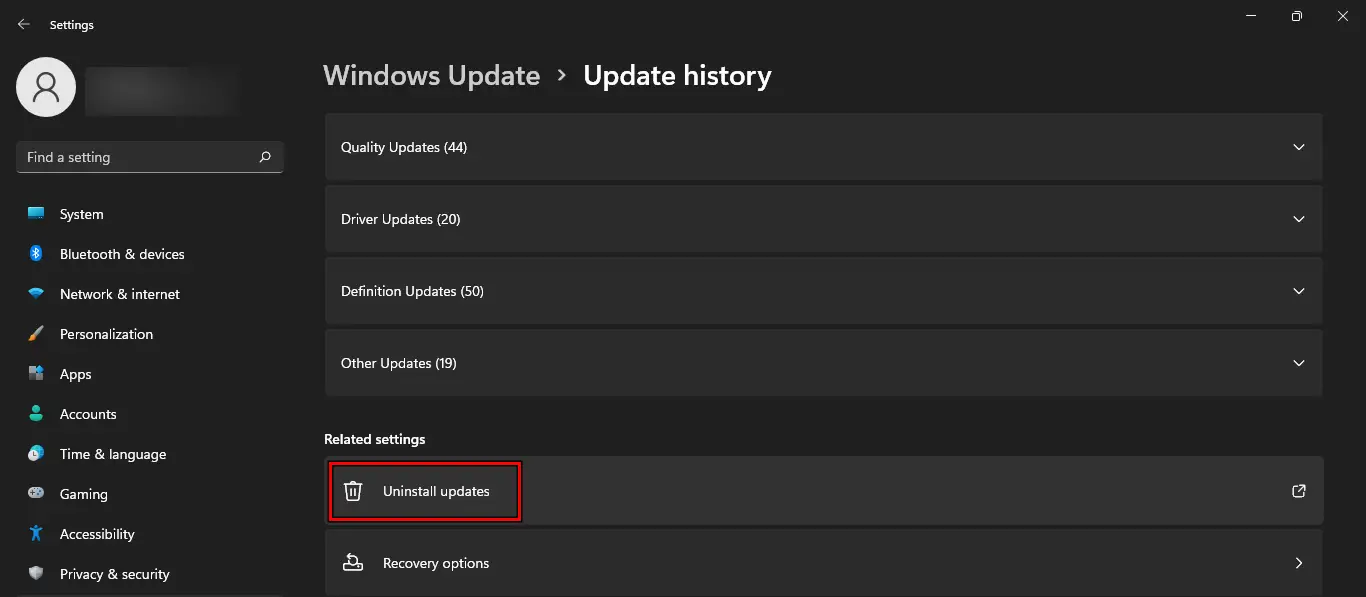
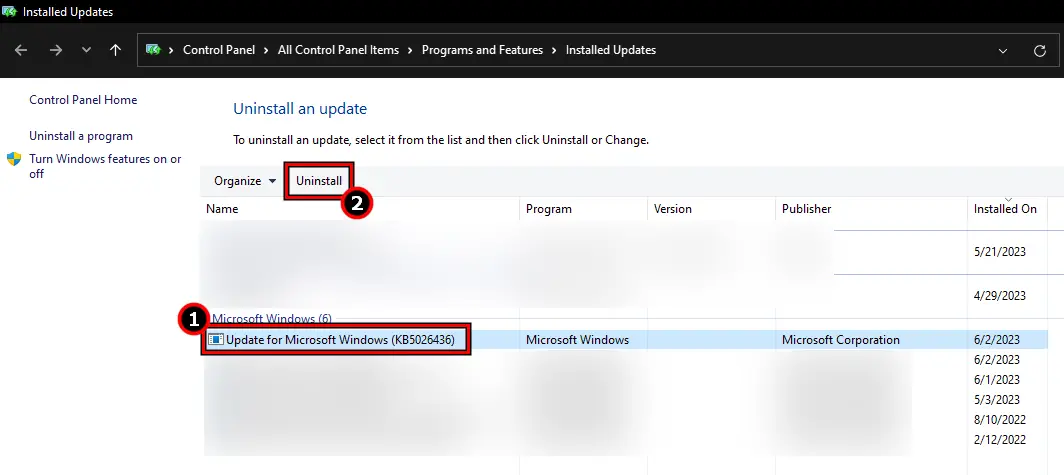
Open Update History on Windows - Open Uninstall Updates and locate the most recent update in the Installed-on column.

Open Uninstall Updates in the Update History - Select the update and click on Uninstall.

Uninstall the Latest Update from Installed Updates - Confirm to uninstall the update and once done, check if any other update was installed recently.
- If so, uninstall those updates as well and restart the system.
- Repeat the same on the client machine and check if the 0x00011b error is cleared.
If you fail to uninstall a particular update, launch Command Prompt as an administrator and execute the following (replace the KB5005568 with the value of the problematic update):
wusa /uninstall /kb:KB5005568
5. Edit the Group Policy
A recent change in the connection method in Windows has triggered a lot of printing issues and that can be rectified by editing the group policy.
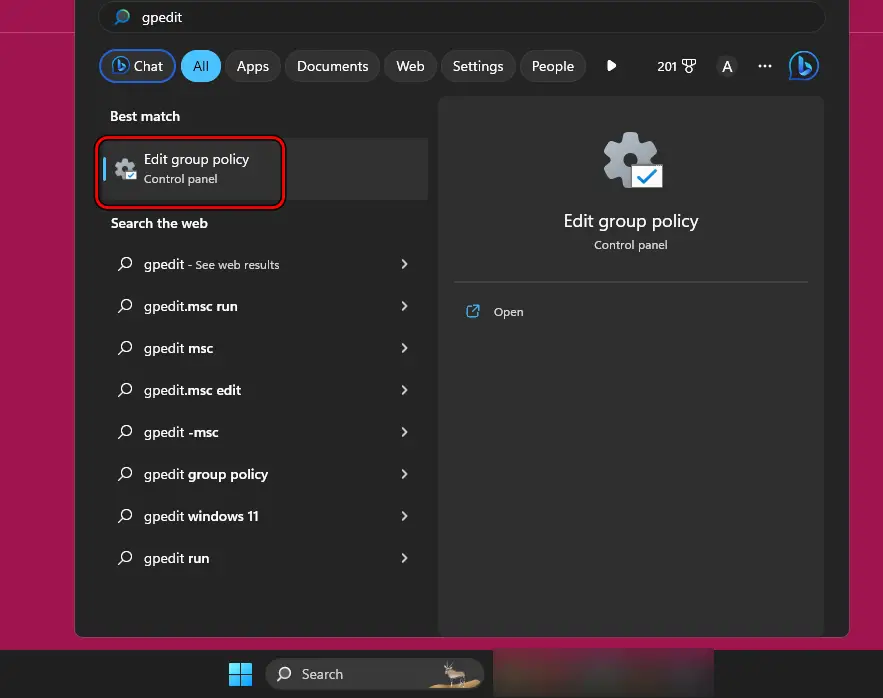
- Press Windows and type GPEdit.

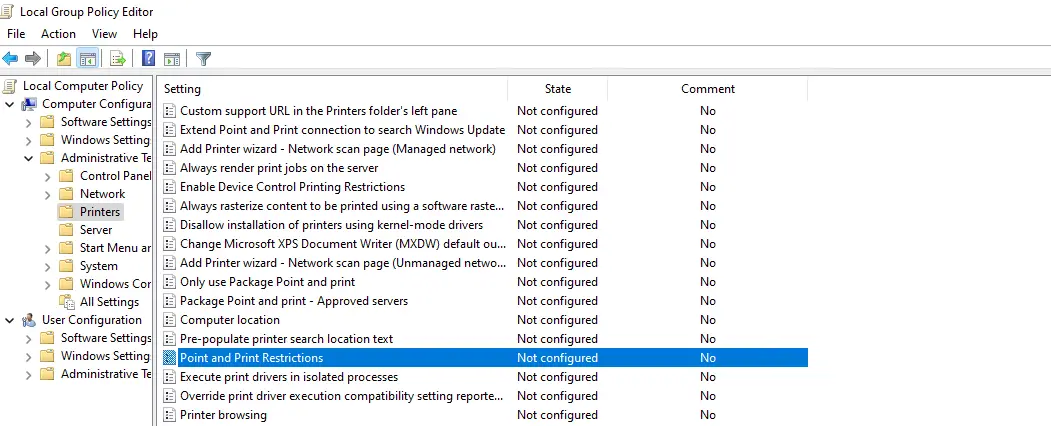
Open Group Policy Editor - Select Edit Group Policy and go to Computer Configuration > Administrative Templates > Printers.
- Open Point and Print Restrictions.

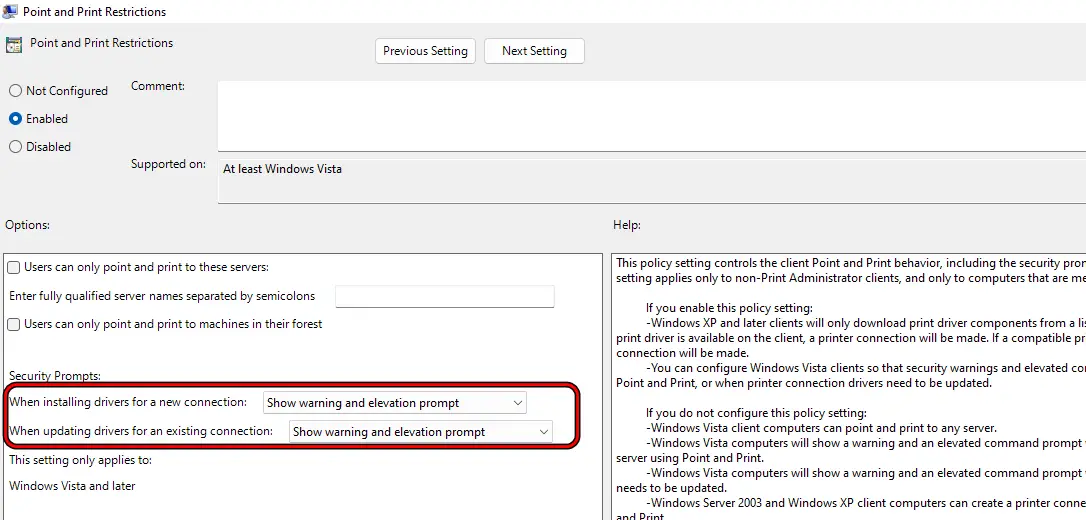
Open Point and Print Restrictions in the Group Policy Editor - Set it to Enabled and set When Installing Drivers for a New Connection to Show Warning and Elevation Prompt.
- Set When Updating Drivers for An Existing Connection to Show Warning and Elevation Prompt.

Set When Installing Drivers for a New Connection and When Updating Drivers for An Existing Connection to Show Warning and Elevation Prompt - Close the editor and restart the system. Check if the problem is solved.
- If this does not work, enable the Fully Qualified Servers in Point and Print Restrictions. Verify if that resolves the issue.
6. Edit the System’s Registry
If the recent change in the connection method is causing the print issue, then we can bypass that by editing the system’s registry.
Warning:
Proceed with utmost caution and at your own risk as editing the system’s registry may expose your data, system, network, etc. to threats.
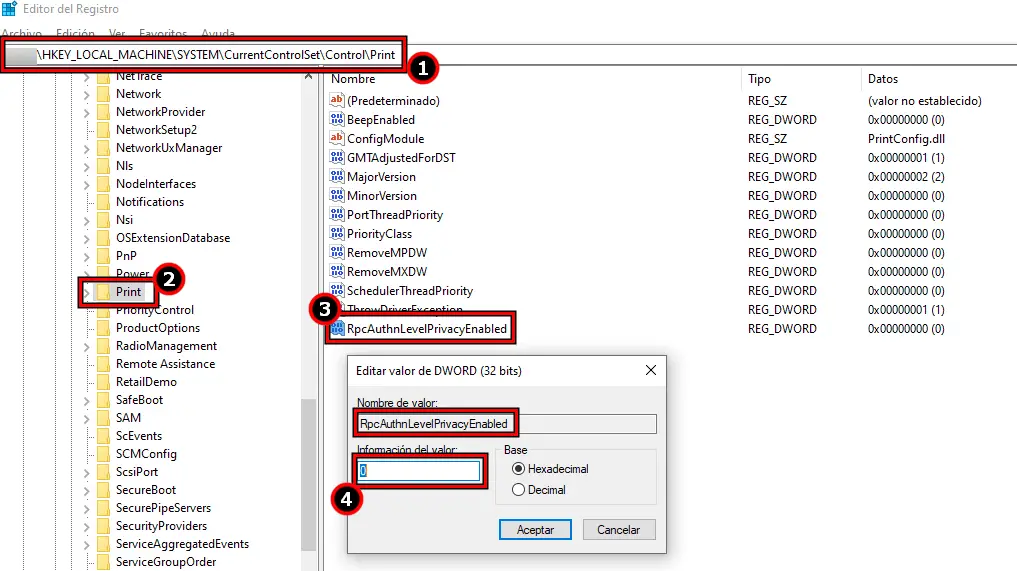
- On the host system, press the Windows key and search for Registry Editor.
- Right-click on it and select Run as Administrator.
- Navigate to:
HKEY_LOCAL_MACHINE\System\CurrentControlSet\Control\Print
- Right-click on Print and select New > DWORD (32-bit) Value.
- Name it as RpcAuthnLevelPrivacyEnabled and set its value to 0.

Create a RpcAuthnLevelPrivacyEnabled Value and Set it to 0 - Restart your PC and check if the issue is resolved.
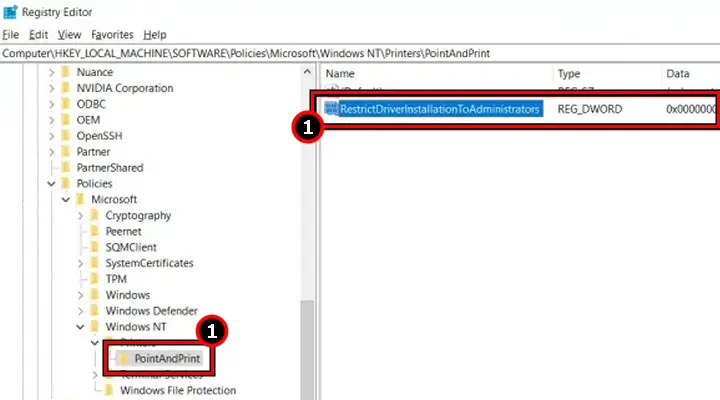
- If not, navigate to the following in the Registry Editor on the client machine:
HKEY_LOCAL_MACHINE\Software\Policies\Microsoft\Windows NT\Printers\PointAndPrint
- Right-click on PointAndPrint and select New > DWORD (32-bit) Value.
- Name it as RestrictDriverInstallationToAdministrators and set its value to 0.

Create a RestrictDriverInstallationToAdministrators Value and Set it to 1 - Restart the system and check if that resolves the issue.
7. Reinstall the Printer Driver and Software
If the printer driver or its management application on your system is not valid, you will not be able to share the printer and thus cause the operation failed error. Reinstalling the printer driver and software will resolve the issue.
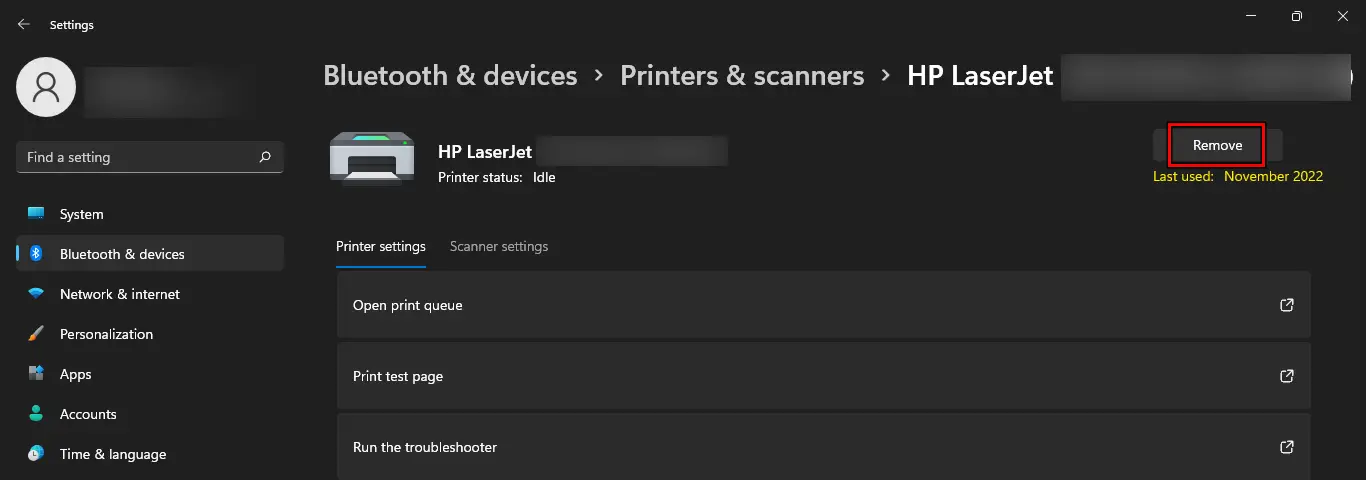
- On the host system, go to Windows Settings > Bluetooth & Devices > Printers & Scanners.
- Open the problematic printer and click on Remove.

Remove the Printer in the Windows Settings - Hit the back button and open Print Server Properties.
- Go to the Drivers tab and select the problematic driver.
- Click on Remove and select Remove Driver and Driver Package.

Remove the Printer Driver in the Drivers Tab of Print Server Properties - Click OK and close the opened windows.
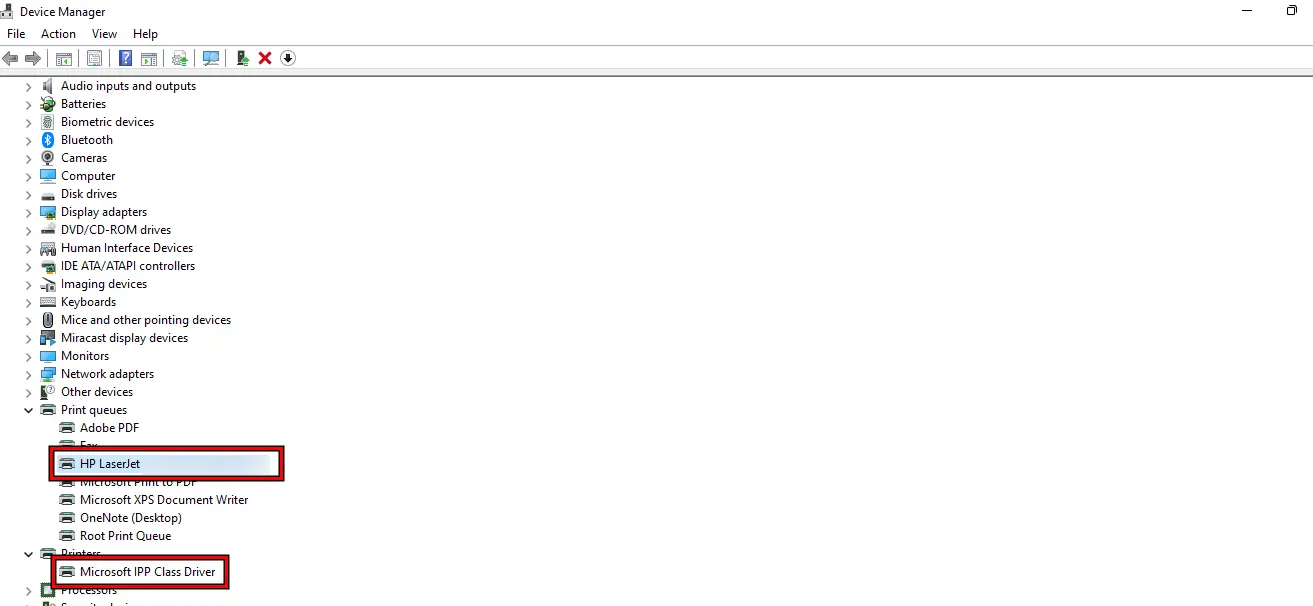
- Right-click Windows and open Device Manager.
- Expand Printers, right-click on the printer driver, select Uninstall, and confirm to uninstall the driver.
- Expand the Print Queues and uninstall the printer by repeating the above step.

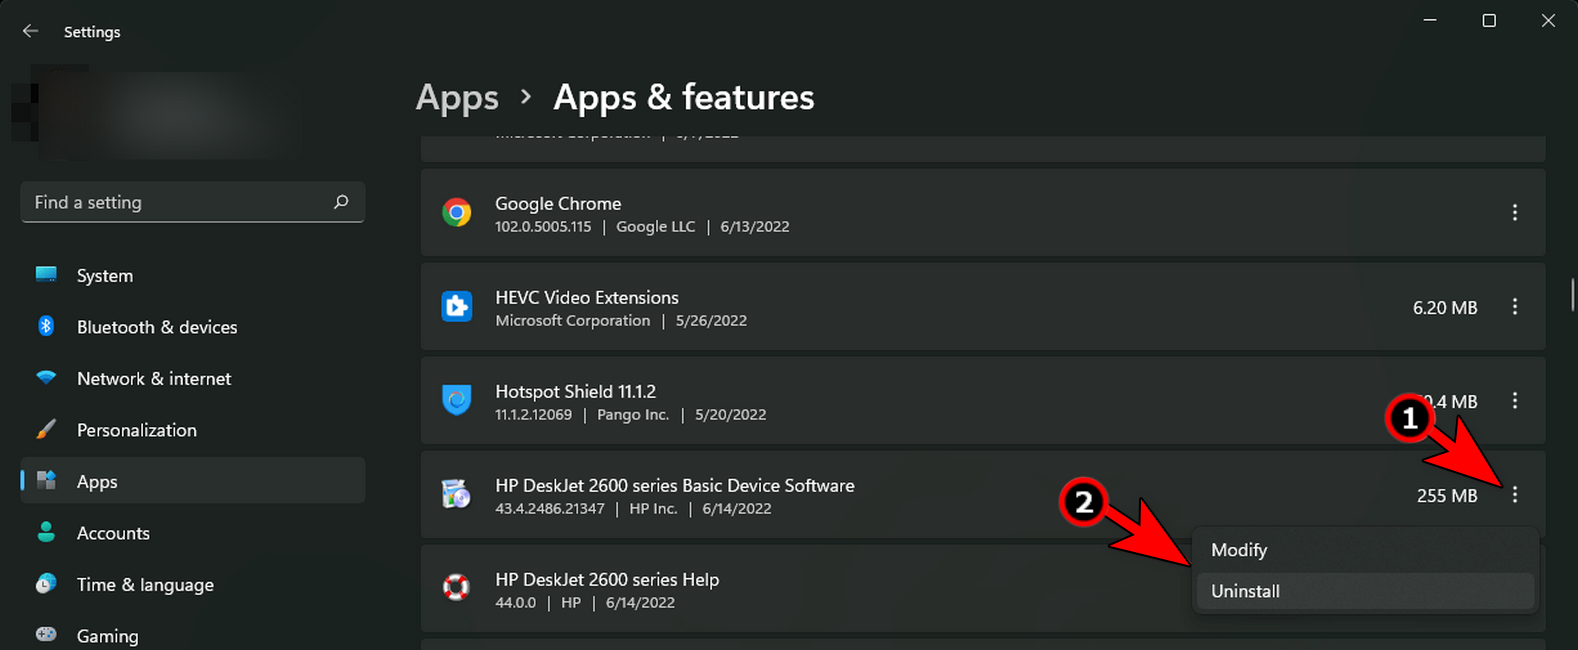
Remove the Printer Driver in the Drivers Tab of Print Server Properties - Close the Device Manager and open Apps & Features.
- Expand the Options of the printer application and select Uninstall.

Uninstall Printer Software in the Windows Apps & Features - Confirm to uninstall the application and follow the prompts to complete the process.
- Once done, restart your system and reinstall the printer driver on the host. Check if the printer can be successfully added to the client.

8. Manually Install the Printer on a Local Port
If none of the above worked, then manually installing the printer on a local port will solve the problem.
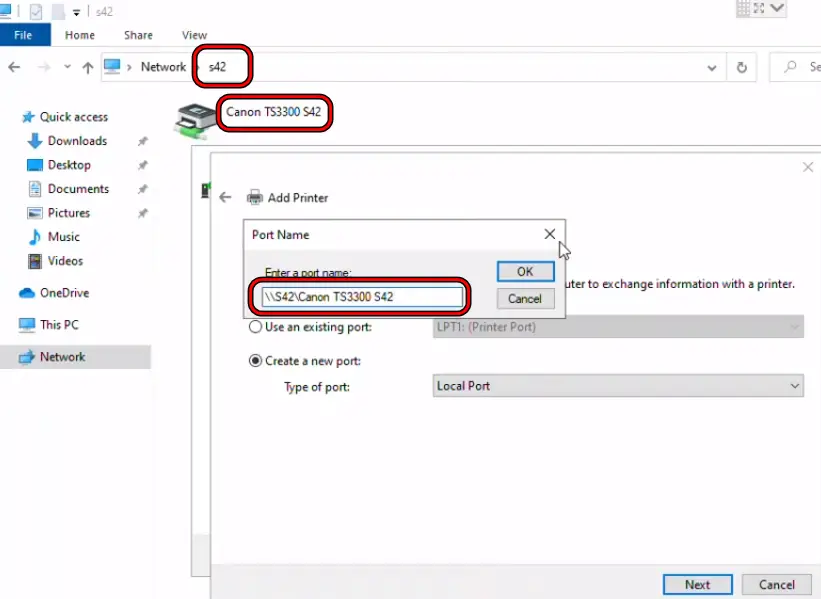
- On the client machine, launch the File Explorer, open Network, and navigate to the host computer. Note down the name of the host computer and printer. If you fail to open the host in File Explorer, make sure the workgroup of both computers is the same.
- Click Windows and search for Control Panel.
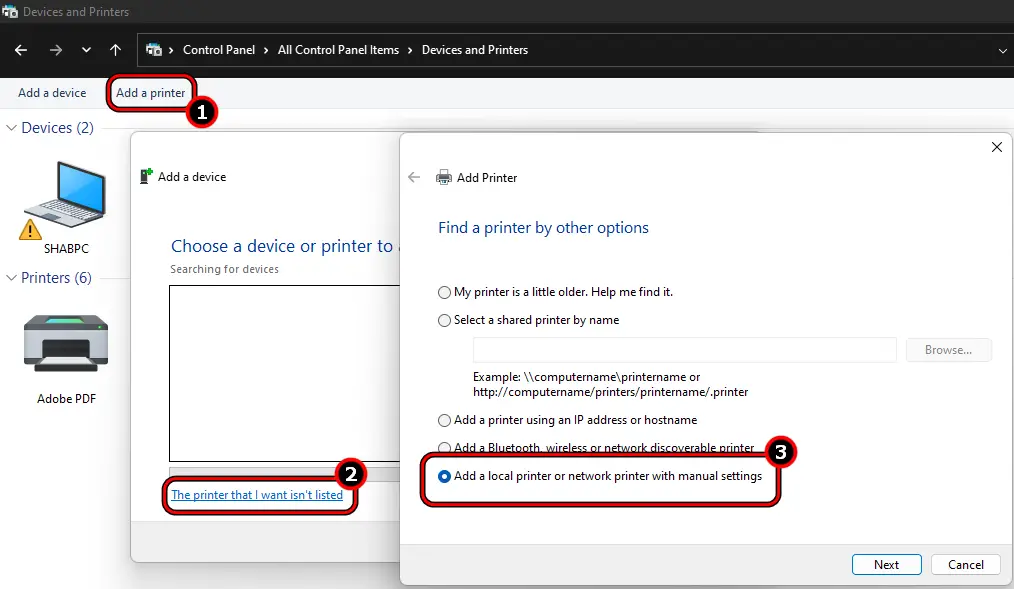
- Open it and select Devices and Printers.
- Open Add a Printer and click on the Printer I Want Isn’t Listed.
- Select Add a Local Network Printer with Manual Settings and click on Next.

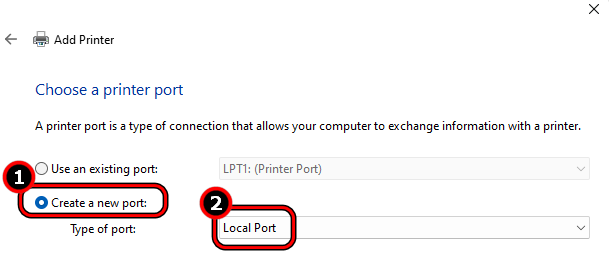
Add a Local Network Printer with Manual Settings - Select Create a New Port and set the Type of Port to Local Port.

Create a New Local Printer Port - Click Next, enter the name of the host computer (noted in step 1), followed by the name of the printer such as:
\\server\printer_name

Create a Port by Entering the PC Name and Printer Name - Click OK and if it says the port already exists, click OK and select Use Existing Port. Otherwise, follow step 10.
- Select the computer name and the printer.
- Click Next and select the printer driver. You may need to click on Windows Update or Have Disk.
- Click Next and follow the prompts to install the printer. Check if the issue is resolved.
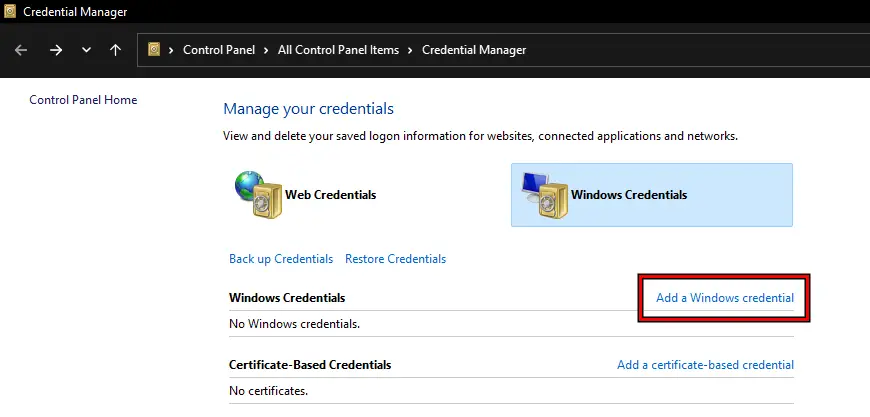
Use Credential Manager
- If the above does not work, open the Credential Manager and go to Windows Credentials.
- Click on Add a Windows Credential and type the hostname as the Internet or Network Address such as:
\\NameofPC\

Add a Windows Credential to the Credential Manager - Enter the username and password of the host PC.
- Install the printer on the client and check if that solves the problem.
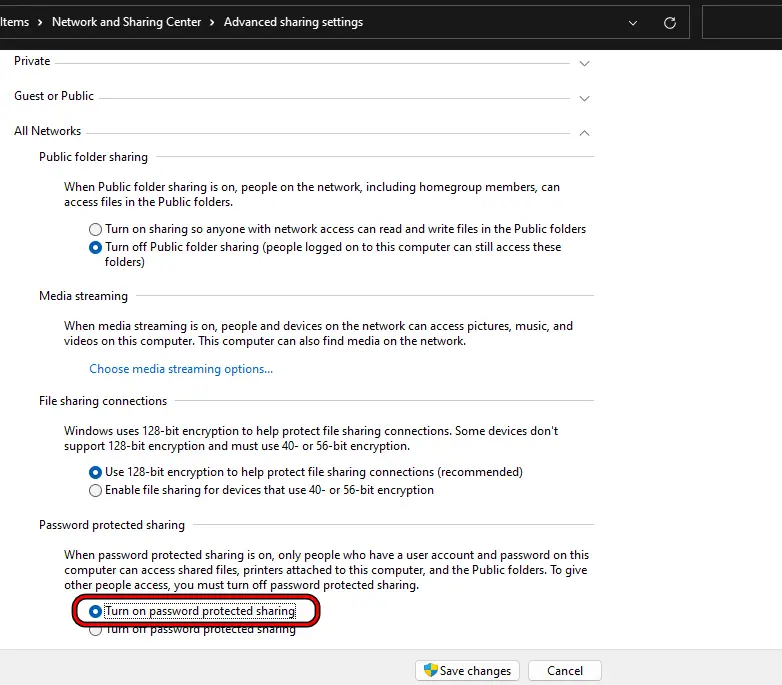
Enable Password Protected Sharing on the Host
- Click Windows and open Manage Advanced Sharing Settings.
- Select Turn on Password Protected Sharing and save the changes.

Enable Turn on Password Protected Sharing - Create a Shared Folder on the Host and set the proper permissions in the Security as well as on the Sharing tab of the folder’s Properties.
- On the client, mount the shared folder as a network drive and enable Reconnect to This Network Driver on Each Boot. The credentials must be added to the Credential Manager as discussed earlier.
- Install the Shared Printer on the client and hopefully, it will be added without showing the 0x00011b error.
If this does not work, then performing a clean installation of Windows may do the trick, otherwise, contacting Microsoft Support is the last resort.
Some people got this error fixed by replacing win32spl.dll in C:\windows\system32 from an older Windows PC but that can compromise the security of your system and make it vulnerable.