Resetting any operating system (OS) is the ultimate technique to resolve different problems with the OS. The same is the case with systems running Windows operating systems. But if you don’t know how to reset a window system, we have got your back.
What is a Factory Reset?
Factory reset is a technique that resets the operating system of any device to the default settings. Sometimes, this procedure wipes the entire users’ data, whereas, in other scenarios, this technique doesn’t harm the data. So, it depends on the device on which you are performing the factory reset operation.
When Should You Perform a Factory Reset Operation?
The factory reset technique is pretty useful in troubleshooting various errors or issues in a device. That is why tech experts recommend this technique in the following scenarios:
- When you are selling your device.
- When you are experiencing the slow speed of your device’s operating system.
- When you are facing some issue with the operating system of your device.
Now, let’s move to the techniques for resetting a Windows system.
How to Reset your Windows Operating System
Before trying any solution, it’s best to back up your data. This way, you won’t face any data loss during the procedure for how to factory reset a computer.
Using the Built-in Feature of Windows 10
For Windows 8 and 10 Users
The built-in reset feature will reset a Windows 8 or Windows 10 system to a clean and fresh state.
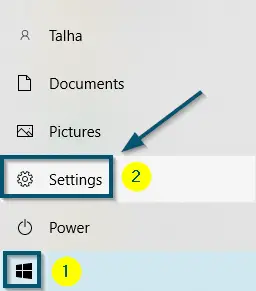
- First of all, open the ‘Settings’ of your Windows system.

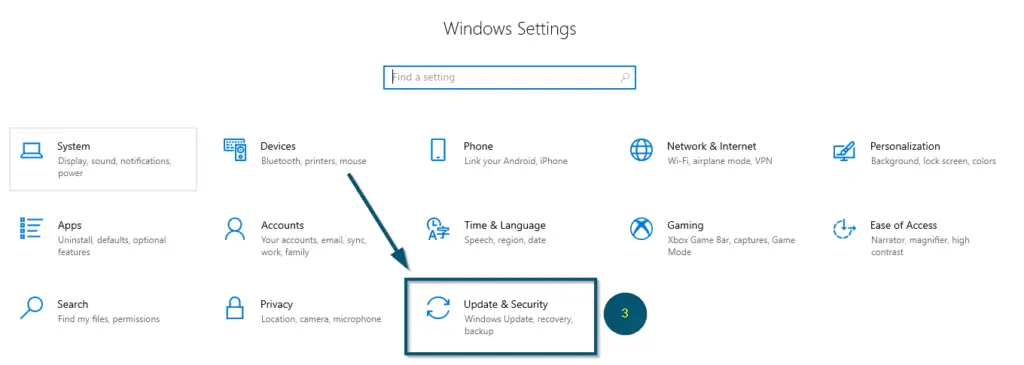
Going to the ‘Settings’ from the ‘Start menu’ - Then, click on the ‘Update & Security’ option.

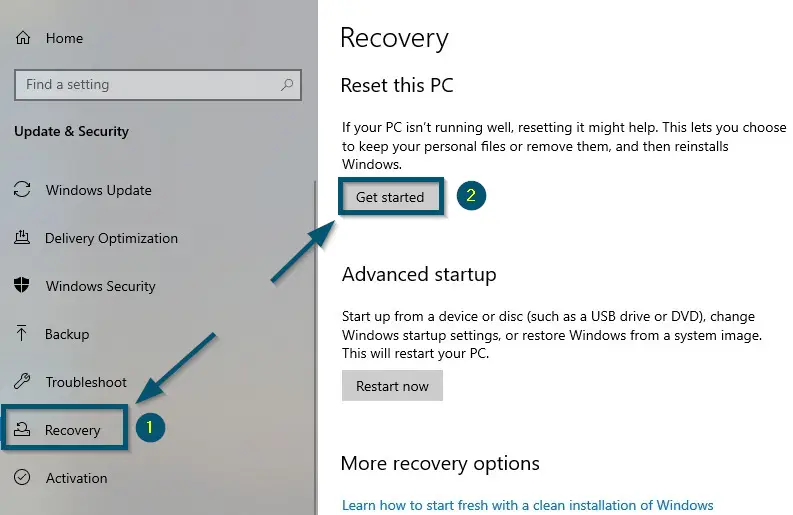
Clicking on the ‘Update & Security’ option - Now, choose the ‘Recovery’ option from the side options.
- Then, click on the ‘Get started’ button under the ‘Reset this PC’ section.

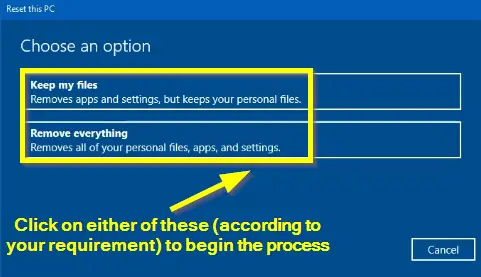
Clicking on the ‘Recovery’ option from the side options and after that, clicking on the ‘Get started’ button - Now, Windows will show you two options: ‘Keep my files’ and ‘Remove everything.’ The first option is useful if you are looking for the ‘how to reset Windows 10 without losing data’ method. However, if you want to sell your device, we recommend choosing the second option.

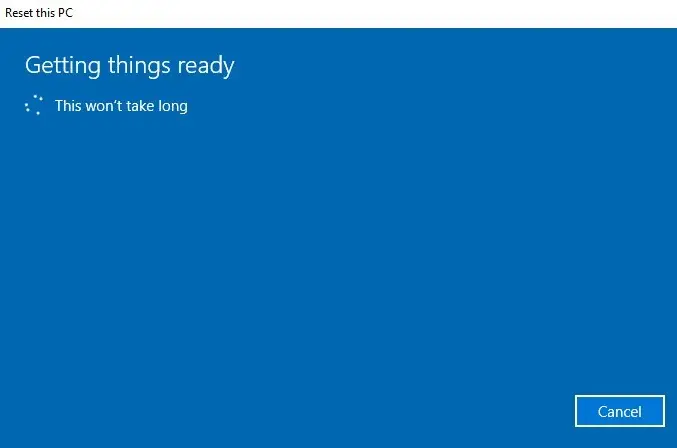
‘Choose an option’ screen for making the choice that whether you want to choose the ‘Keep my files’ or ‘Remove everything’ option - Once you have chosen the desired option, Windows will get the things ready.

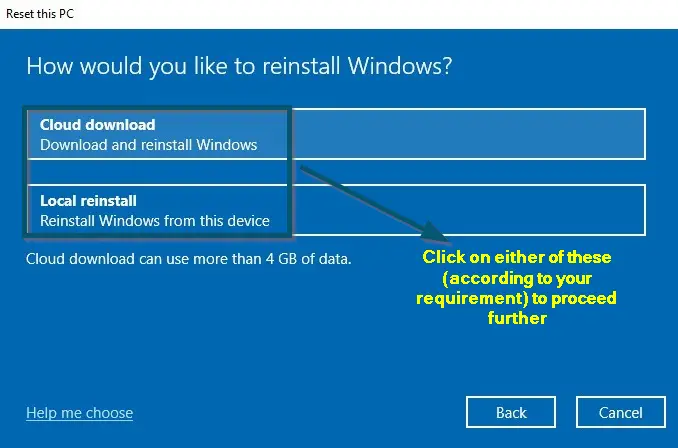
Windows is getting the things ready after choosing whether we want to perform a complete factory reset or reset operation without affecting the files - (After selecting either of the above options) Windows will show you two options: ‘Cloud download’ and ‘Local reinstall.’ So, you can choose the one according to your requirement.

‘How would you like to reinstall Windows’ screen for choosing whether you want to perform a ‘Cloud download’ or ‘Local reinstall’ operation
Cloud download vs. Local reinstall
When you choose the ‘Cloud download’ option, your system will download a fresh copy of the current version of Windows from Microsoft, along with a few minor updates. So, you will not get any feature updates. But this process will take more time to complete because it involves using an internet connection. Hence, we won’t recommend this option if you have a limited internet connection.
When you choose the ‘Local reinstall’ option, the system will construct a fresh copy of Windows by using the files on your current system. But if the files are corrupted, this process will not work.
Important: We will perform the next steps according to the ‘Cloud download’ of the ‘Keep my files’ option. The procedure for ‘Cloud download’ of ‘Remove everything,’ ‘Local reinstall’ of ‘Keep my files’ and ‘Local reinstall’ of ‘Remove everything’ will be pretty much the same
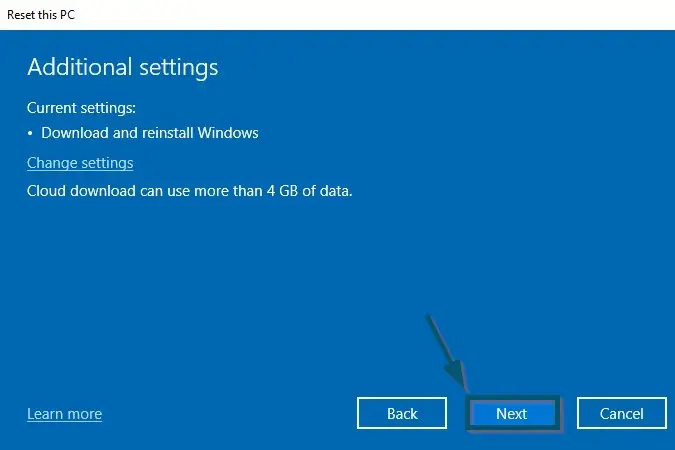
- Next, Windows will show you some ‘Additional settings,’ where you can click on the ‘Changes settings’ option to turn off the ‘Download and reinstall Windows’ option. However, we have chosen the ‘Cloud download’ option. So, we won’t turn off the ‘Download and reinstall Windows’ option here.
- Then, click on the ‘Next’ button.

Clicking on the ‘Next’ button in the ‘Additional settings’ window for the ‘Cloud download’ option of ‘Keep my files’ - Next, Windows will get the things ready for the selected operation.
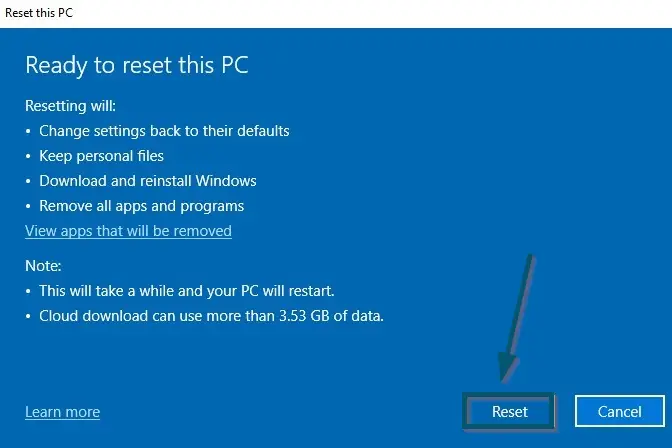
Windows is getting the things ready for resetting the PC - After some time, Windows will show you the ‘Ready to reset this PC’ screen, where you can see the apps that will be removed during this operation. So, click on the ‘Reset’ button to proceed.

Clicking on the ‘Reset’ button to begin the reset operation with the ‘Cloud download’ option of ‘Keep my files’ - Next, follow the on-screen instructions to complete the reset procedure.
Using the ‘Fresh start’ Option of Windows 10
If you are using an older version of Windows 10 (older than version 2004), the ‘Procedure # 1’ might not be available to you. So, in that case, we recommend performing the reset procedure from the ‘Fresh start’ option.
Some Prerequisites to Know Before Performing a ‘Fresh start’
But before performing the reset procedure via ‘Fresh start,’ you should know how this option works.
- ‘Fresh start’ always requires internet access because it doesn’t reinstall Windows using the local files.
- ‘Fresh start’ can’t perform a full factory reset and it always keeps your personal files.
- ‘Fresh start’ keeps the bloatware of ‘Microsoft Store’ only and removes the bloatware from your device’s manufacturer.
- Unlike ‘Procedure # 1,’ the ‘Fresh start’ option keeps some Windows settings without specifying which ones.
Procedure
To perform the procedure from ‘Fresh start,’ try the following steps.
- First, follow the ‘first two steps of Procedure # 1’ to reach the ‘Update & Security’ screen of Windows.
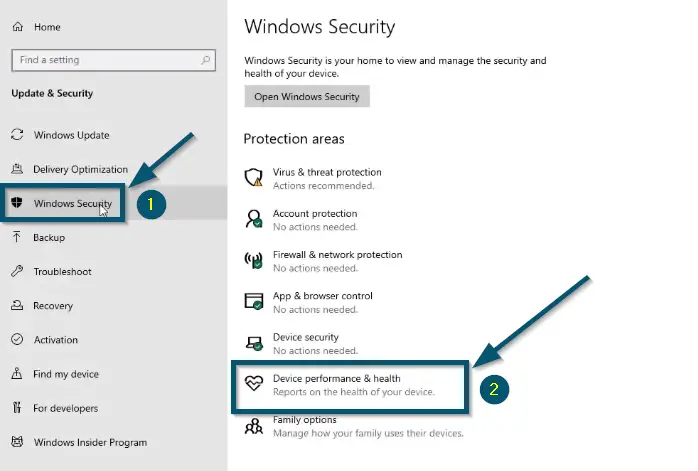
- Then, choose the ‘Windows Security’ option from the side options.
- After that, click on the ‘Device performance & health’ option inside the ‘Windows Security’ screen.

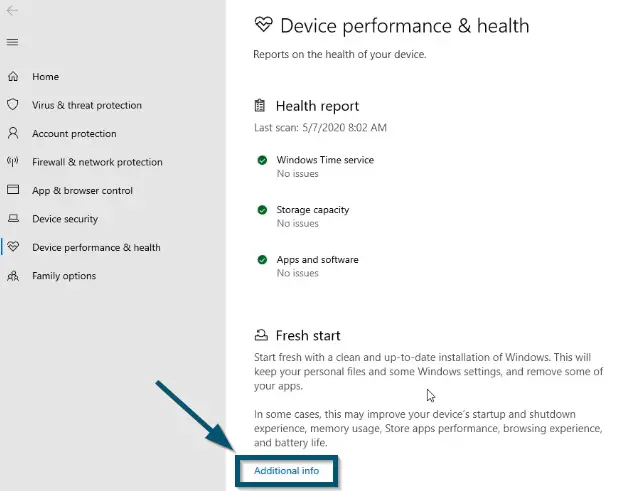
Tapping on the ‘Windows Security’ option from the side options and clicking on the ‘Device performance & health’ option inside the ‘Windows Security’ Screen - The sub-window of ‘Windows Security’ will open. So, click on the ‘Additional info’ option under the ‘Fresh start’ section.

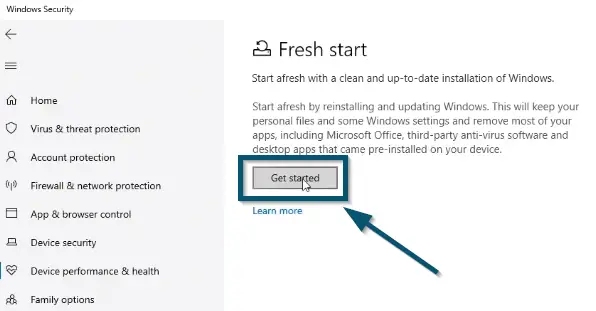
Clicking on the ‘Additional info’ option inside the ‘Device performance & health’ screen - Next, click on the ‘Get started’ button under the ‘Fresh start’ section.

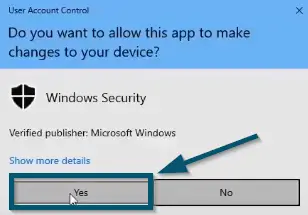
Clicking on the ‘Get started’ button under the ‘Fresh start’ section - UAC will display a confirmation message. So, click on the ‘Yes’ button to allow ‘Windows Security’ to make changes to this device.

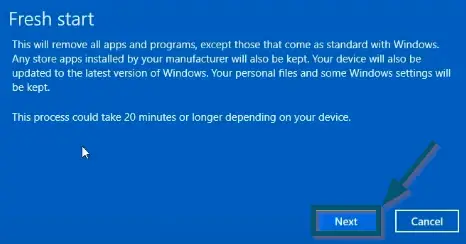
Clicking on the ‘YES’ button to allow ‘Windows Security’ to make changes to this device - Then, Windows will show a pop-up, which will contain some tips that we have already discussed in the ‘Prerequisites’ section of this procedure. So, if you have read them, click on the ‘Next’ button.

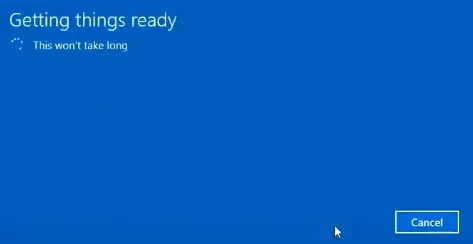
Clicking on the ‘Next’ button to proceed further with the ‘Fresh start’ procedure - Next, Windows will get the things ready for the selected operation.

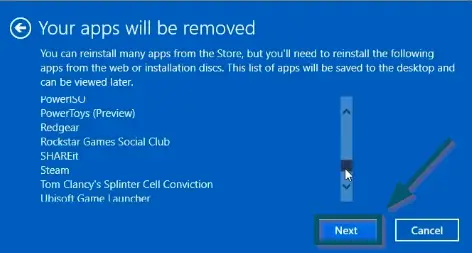
Windows is getting the things ready for performing the ‘Fresh start’ procedure - After a few seconds, Windows will show a list of apps that will be removed during this procedure. So, after reviewing those apps, click on the ‘Next’ button.

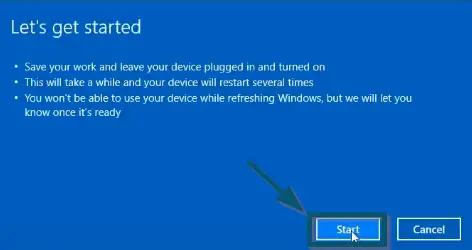
Clicking on the ‘Next’ button after reviewing the apps to be deleted - Then, click on the ‘Start’ button to start the resetting process.

Clicking on the ‘Start’ button to start the system resetting process - After that, follow the on-screen instructions to complete the reset procedure.
Using the Built-in Feature of Windows 11
If you are using Windows 11, the procedure to reset the system would be pretty much the same. However, the way of starting the reset procedure in Windows 11 is different. That is why we will discuss some steps to get you started with the factory reset procedure of Windows 11.
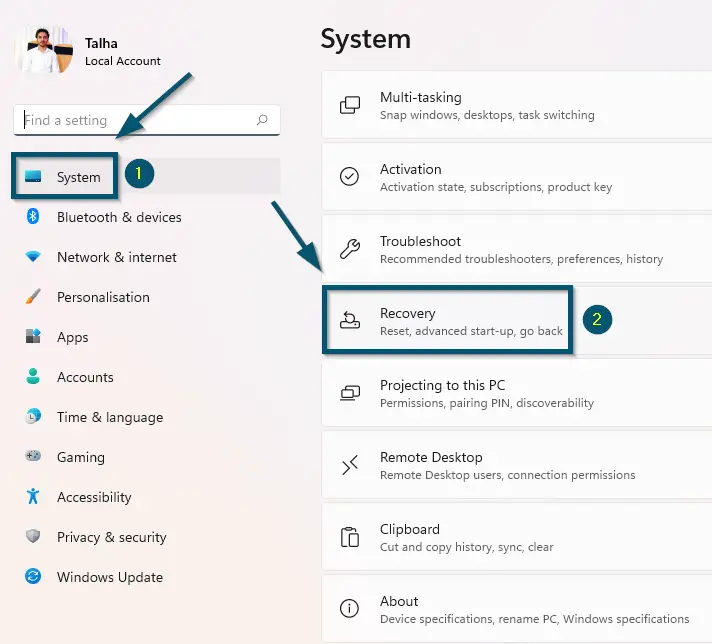
- First, navigate to the ‘Settings’ of Windows 11.

Clicking on the ‘Settings’ icon in Windows 11 - Inside the ‘System’ option, scroll down to find the ‘Recovery’ option.

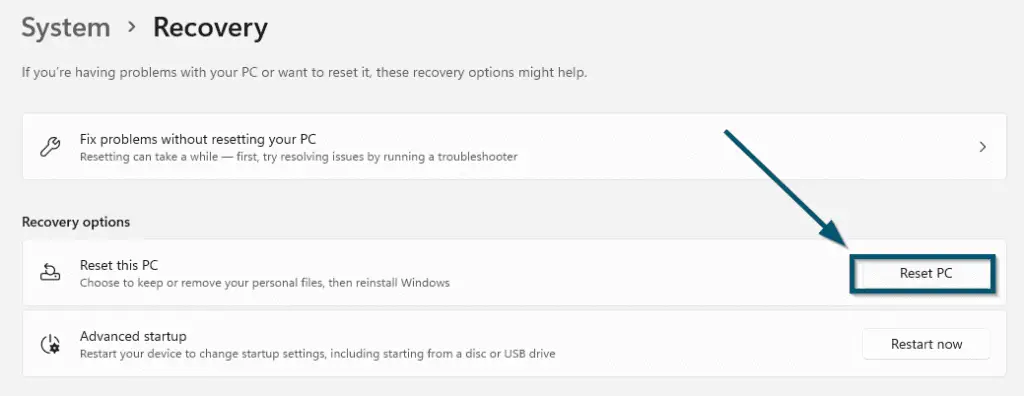
Navigating to the ‘Recovery’ option from the ‘System’ settings of Windows 11 - Then, click on the ‘Reset PC’ button.

Clicking on the ‘Reset PC’ button inside the ‘Recovery’ settings page - Now, the reset procedure will begin, which will be similar to the steps of ‘Procedure # 1.’ So, you can follow that guide to reset your Windows 11 system successfully.
Using the ‘Advanced startup’ Option
Recommended for Advanced Users
If you are trying to reset Windows from the boot menu or without logging in, we recommend performing the factory reset operation from the ‘Advanced startup’ menu. You can apply this procedure with or without booting the system in the normal mode. So, we will discuss both.
Steps for the Normally Booted Window
- First, follow the ‘first two steps of Procedure # 1’ to reach the ‘Update & Security’ screen of Windows.
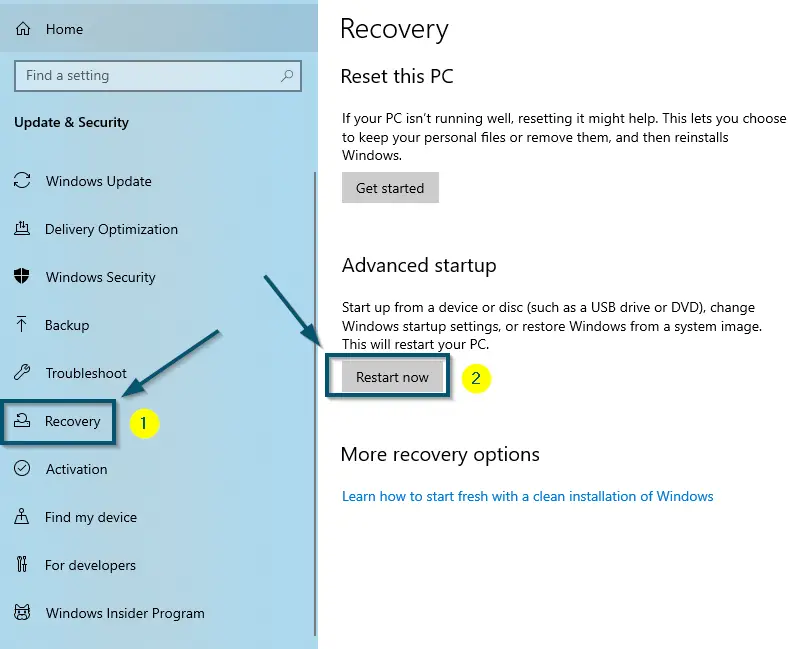
- Now, choose the ‘Recovery’ option from the side options.
Important: If you are using ‘Windows 11,’ you can ‘follow the first two steps of Procedure # 3’ to find the ‘Advanced startup’ settings
- Then, click on the ‘Restart now’ button under the ‘Advanced startup’ section. Your system will restart in the ‘Windows Recovery Environment’ mode.

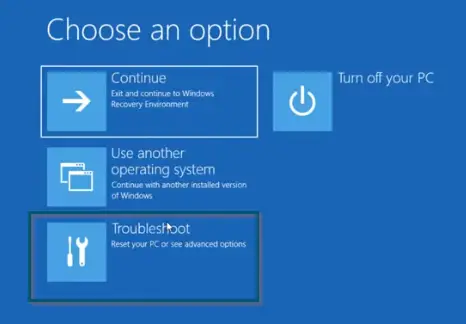
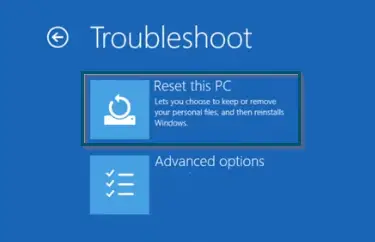
Going to the ‘Recovery’ tab and clicking on the ‘Restart now’ button - So, choose the ‘Troubleshoot’ option first.

Choosing the ‘Troubleshoot option’ - Then, select the ‘Reset this PC’ option in the ‘Troubleshoot’ window.

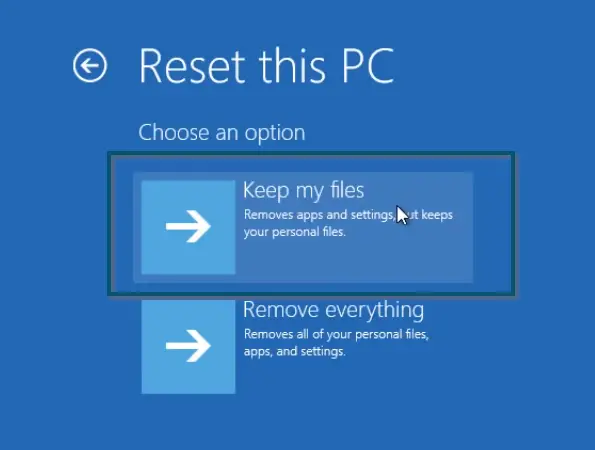
Choosing ‘Reset this PC’ in ‘Troubleshoot’ Window - Now, choose the ‘Keep my files’ option in the next window. This option will reinstall Windows 10 without deleting your personal files.

Choosing ‘Keep my files’ in the ‘Reset this PC’ window - In the next window, Windows 10 will show you the apps that will be removed during the resetting procedure. However, windows will automatically restore the built-in apps (like Mail, Calendar, and others) with their default settings. So, click on the ‘Next’ option.
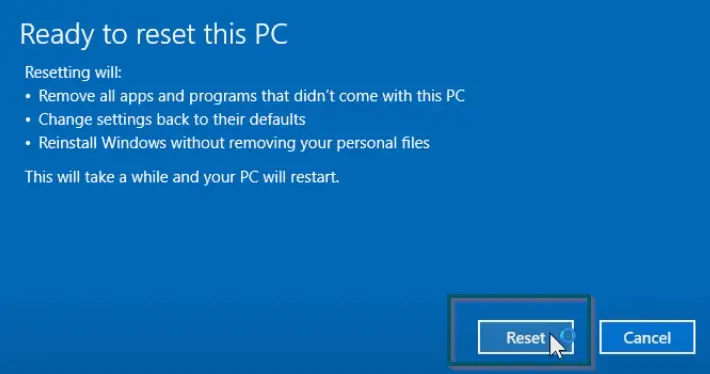
- Then, click on the ‘Reset’ button to start the process.

Clicking on the ‘Reset’ button to start the reset procedure
Steps for Running the Factory Reset from Boot
This procedure might not work for you because it varies from device to device. However, if you are curious to reset the system without booting in Windows normally, you can try this technique.
- First, power on your system and wait for the manufacturer’s logo to disappear. Once the logo disappears and Windows 10 tries to boot, hold the power button for about 5-10 seconds.
Note: Perform Step 1 twice
- Windows 10 should boot into the ‘Windows 10 Repair Environment’ on the third attempt.
Important: Alternatively, you can press the ‘F11’ key as your system boots to enter the ‘Windows 10 Repair Environment’
- Now, ‘follow the procedure from step number 4 of this solution’ to complete the reset procedure.