If you play online games with your friends, like Black Ops 3, Black Ops 4, Modern Warfare, Cold War, and Warzone on PS4, then you have often faced internet connection problems. So, when you turn to the internet to get its solution, you might have seen the term NAT Type.
Today, we will get into the details of NAT and its types. We will also discuss how to get open NAT Type in PS4 here.

Side Note: If you’re in a hurry and you already know about NAT and its types, then you can directly get to the steps of how to have open NAT type PS4.
What is NAT and How Does it Work?
NAT stands for Network Address Translation and it is a service that routers use to convert the private IP address of a device to the public IP address and vice versa.
For example, when you want to access a video from YouTube, your network first sends the data packets to your router. So, here, the NAT service changes the local IP address of your laptop to the public IP address.
After that, the router will send the modified packages to the YouTube server. The YouTube server returns those packets to the router first and then the NAT service again changes the public IP address to the local IP address.
This way, the data packages will return to the correct laptop instead of any other laptop and that’s how the internet keeps working the way it is today.
Different NAT Types
NAT comes in three types:
- NAT Type 1 (Open NAT) – indicates that your system is directly connected to the internet without any router and changing its IP address. The NAT Type 1 offers faster speed, less ping and delay in online games. So, you can connect to players using other NAT types.However, with NAT Type 1, only 1 device can be connected to the network. Plus, the NAT Type 1 network is more vulnerable as any hacker can enter your network.
- NAT Type 2 (Moderate NAT) – indicates that the system is connected to the internet via a router and you can be the host of the game. It’s the best NAT Type for PS4 or other gamers because it doesn’t make your system vulnerable as NAT Type 1.
- NAT Type 3 (Strict NAT) – also indicates that the system is connected to the internet via a router. But it’s not the same as NAT Type 2 because the games will lag here and some games won’t even let you play with PS4 NAT Type 3.
Now, you have a general knowledge about NAT and its types. So, let’s see the procedure of how to get NAT Type 1 on PS4 or open NAT Type PS4.
Steps for How to Get Open NAT Type PS4
There are two ways to get NAT Type 1 on any console. You can either use a LAN cable or a Wi-Fi network for it. However, you can’t get a NAT Type 1 with mobile connections like 4G, LTE and 5G because you need an internet connection with a router to get NAT Type 1. So, let’s dive into the journey to get NAT Type 1.
Keep in mind that this guide is for NAT Type 1 (Open) and we will need the router’s access to apply this guide. So, if you’re searching for how to get NAT Type 2 on PS4 or how to change NAT Type without access to router PS4, then this guide will not prove useful to you.
Step 1: Finding the Router’s IP Address
In this step, we will find out the IP address of your router. You can use a PC, PlayStation 4, or smartphone for it.
Using PC
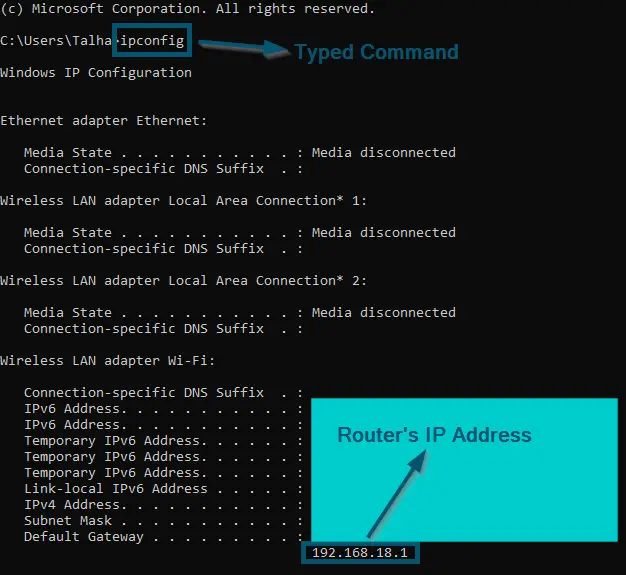
- First of all, open ‘Command Prompt’ on your PC and type the following command:
ipconfig
- Once you’ve executed the command, then you can scroll down to find the entry named ‘Default Gateway’ and this is the IP address of your router.

Finding the router’s IP address through PC
Using PlayStation 4
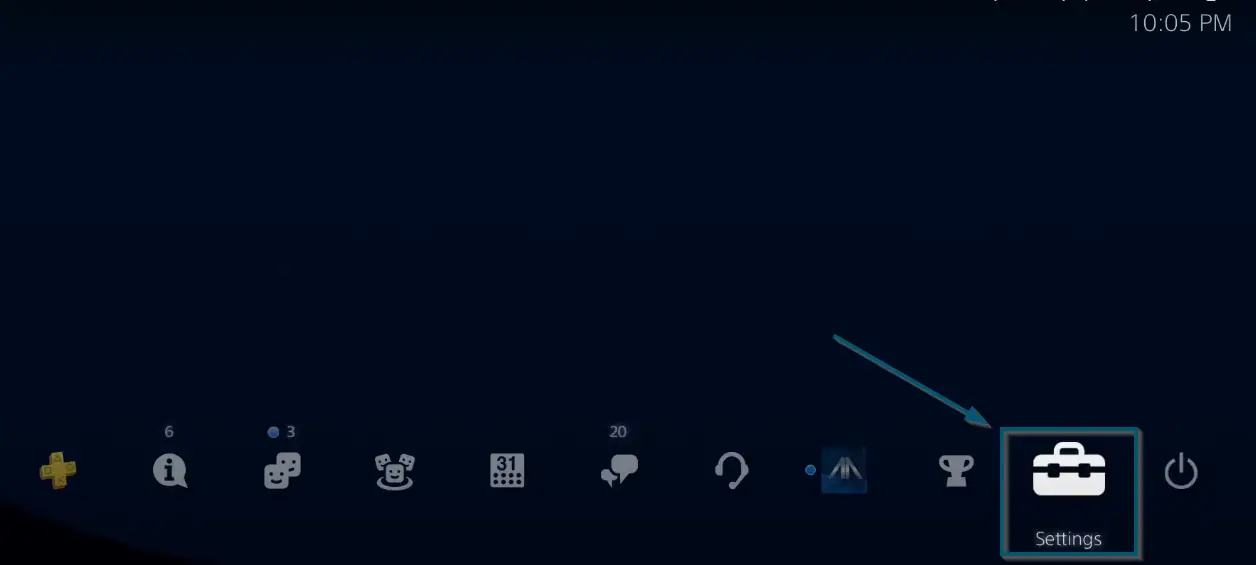
- Navigate to the ‘Settings’ of your PlayStation.

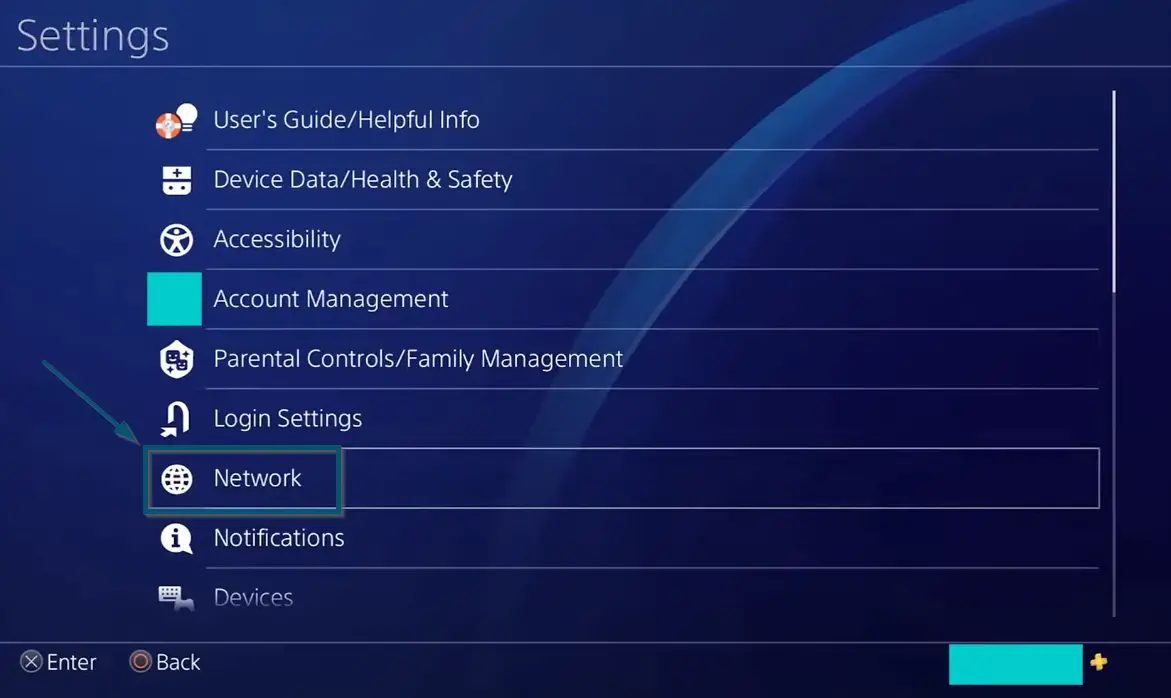
Going to the ‘Settings’ option of PS4 - Then, go to the ‘Network’ option and tap ‘View Connection Status’ in the new window.

Going to the ‘Network’ option of PlayStation settings 
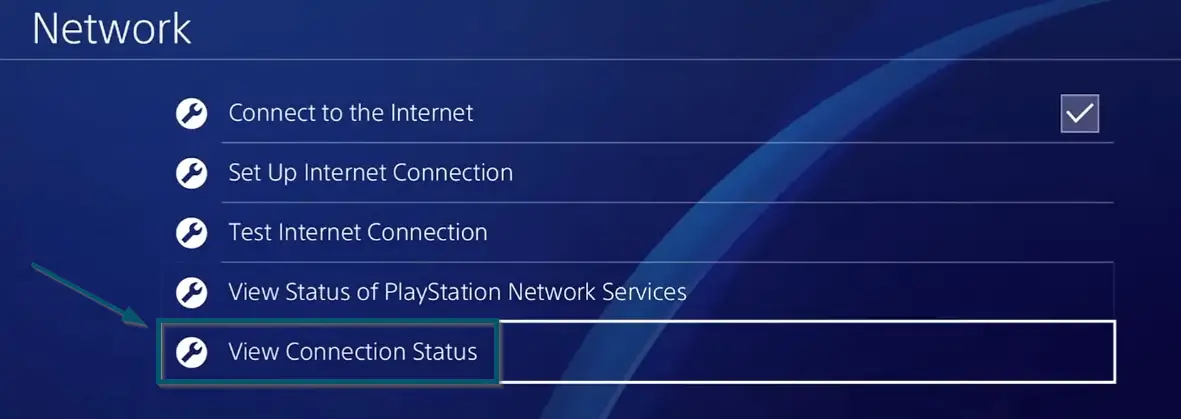
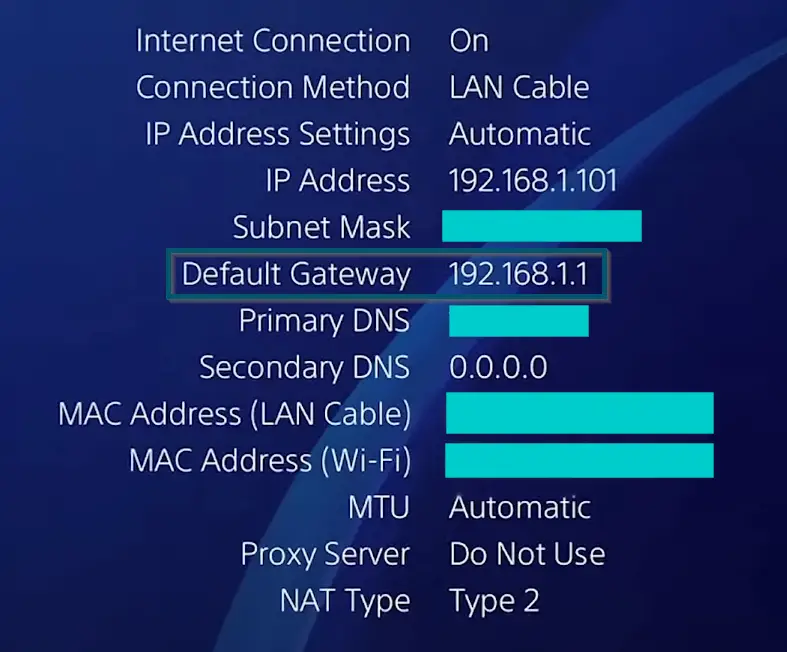
Going to the ‘View Connection Status’ option inside the ‘Network’ window - A new window will open that contains all the information regarding the connected network. So, jot down the ‘Default Gateway’ entry here as well.

Jotting down the Gateway of the connected network using PlayStation 4
Note: If you couldn’t find the IP address, then you can google the model of your router to find its IP address
Step 2: Configuring Router’s Settings
In this step, we will discuss the procedure of how to change NAT type on router.
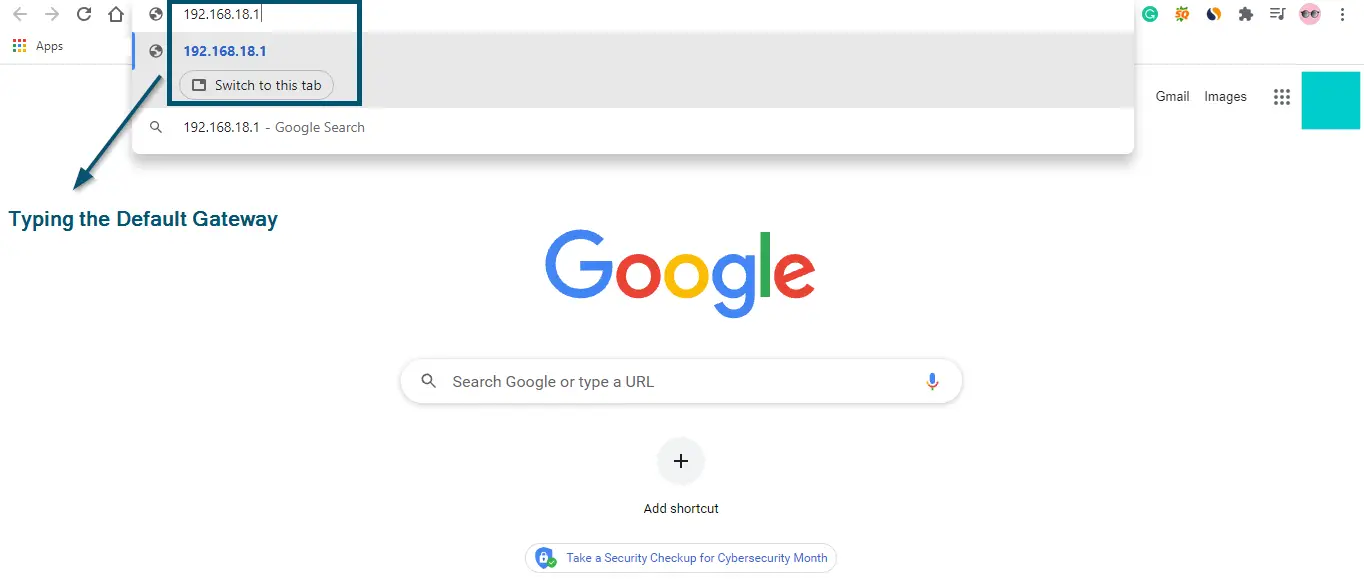
- Now, open the browser of your computer and type the jotted down ‘Default Gateway’ number. Then, press the ‘Enter’ key.

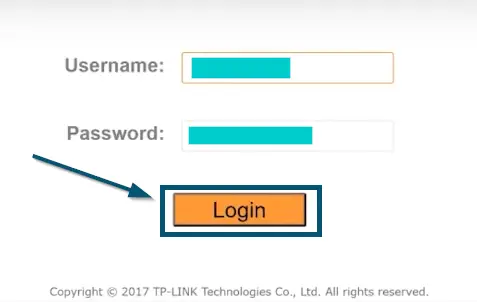
Entering the default gateway in the browser and hitting the ‘Enter’ key - After that, type the login information of your router, which you will find at the back of your router and click the ‘Login’ button.

Entering the login information of the router and clicking on the ‘Login’ button
Note: The UI of the router’s settings page will be different for different router companies
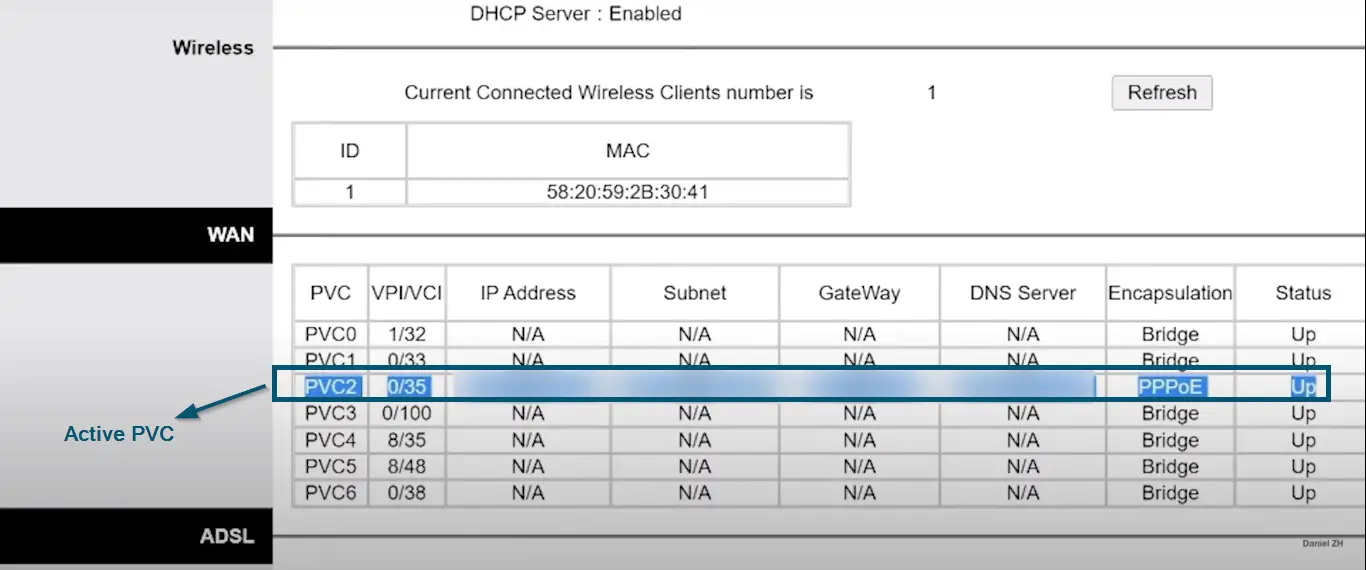
- Now, you will go to the ‘Status’ tab and find the active PVC. Here, you can see that the ‘PVC2’ is active.

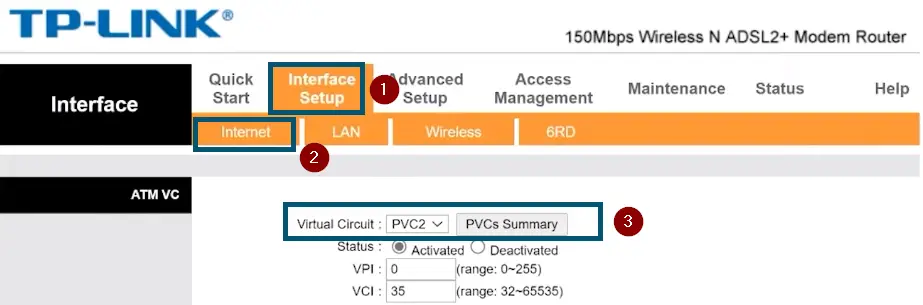
Finding the active PVC in the ‘Status’ tab of the router’s settings page - After that, go to the ‘Interface Setup’ (if you’re using a TP-LINK router). But if you’re using any other router, then go to the option where you can find the ‘Internet’ settings.
- Now, choose the ‘Virtual Circuit :’ type as ‘PVC2’ to get access to the settings because it is the activated PVC.

Getting to the ‘Interface Setup’ tab and changing the ‘Virtual Circuit’ type to ‘PVC2’ - Then, jot down the ‘Username :’ and ‘Password :’ entries, which your ISP has provided you for your router because we will need these entries later on for PS4.

Jotting down the provided ‘Username’ and ‘Password’ of the router
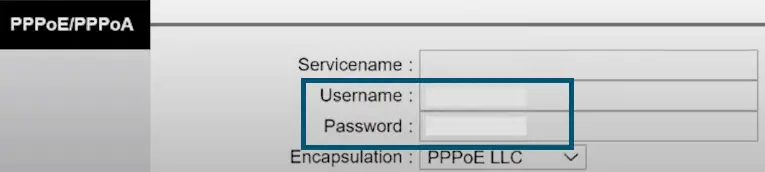
Note: If you can’t find the ‘Username :’ and ‘Password :’ then contact your ISP to find this information
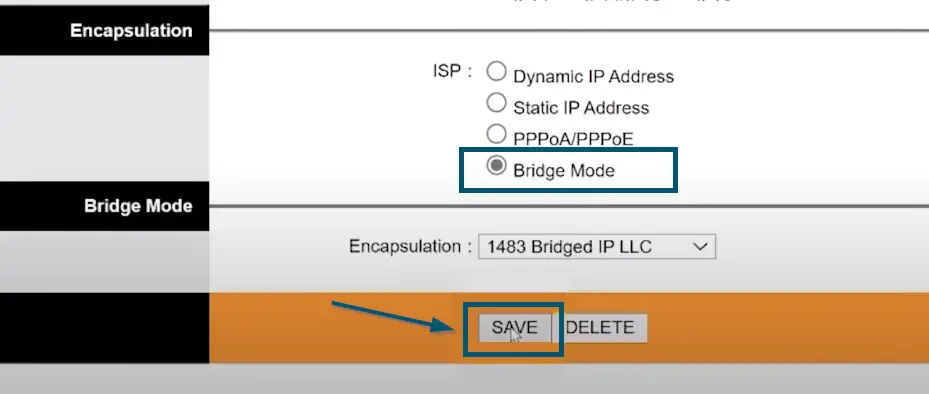
- Now, change the ‘ISP’ to ‘Bridge Mode’ in the ‘Encapsulation’ section and click on the ‘SAVE’ button.

Changing the ‘ISP’ to ‘Bridge Mode’ and clicking the ‘SAVE’ button
Note: View this article on some other device connected to the internet connection because if you perform step number 10 on the same computer, then you will lose the internet connection access for that device
- Once you’ve changed the settings, then wait for 10 seconds and restart your router.
- Once you’ve seen the connection icon on the router, then follow the rest of the procedure.
Step 3: Changing Settings on PS4
Now, we will apply the jotted down ‘Username’ and ‘Password’ from the router’s page to PS4. But as mentioned earlier, there are two methods of changing settings on PS4. So, we will first discuss the LAN method and then, we will move to the Wi-Fi method.
For LAN Network Connection
- Once you’ve connected your PS4 to LAN, then go to the ‘Settings < Network’ options of your PS4.
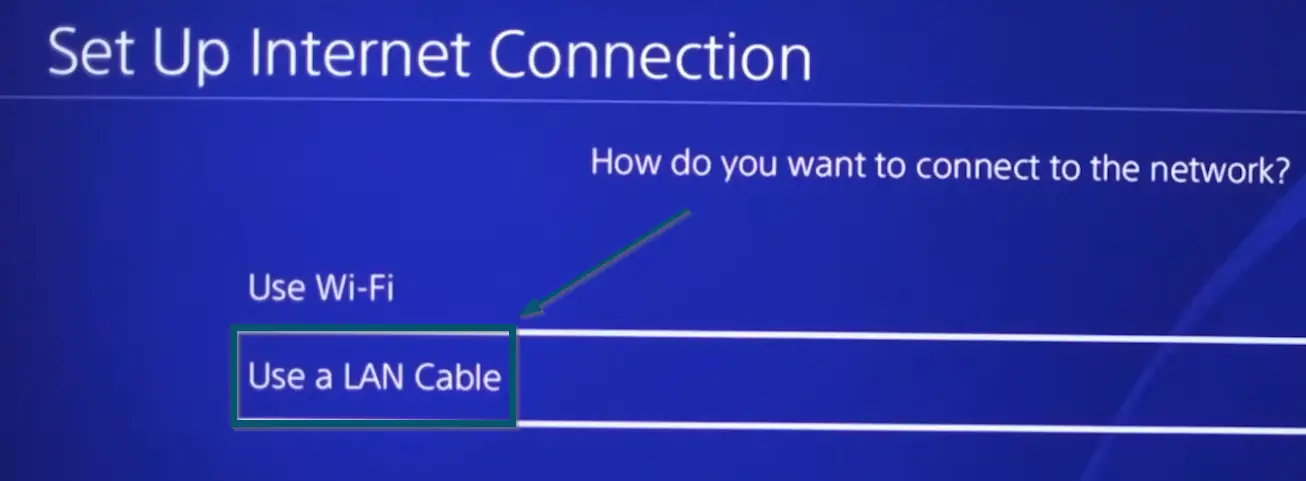
- After that, choose the ‘Set Up Internet Connection’ option inside the ‘Network’ window.

Choosing the ‘Set Up Internet Connection’ option inside the ‘Network’ settings window - Now, choose the ‘Use a LAN cable’ option.

Choosing the ‘Use a LAN Cable’ option inside the ‘Set Up Internet Connection’ window - Then, in the next window, select the ‘Custom’ option.

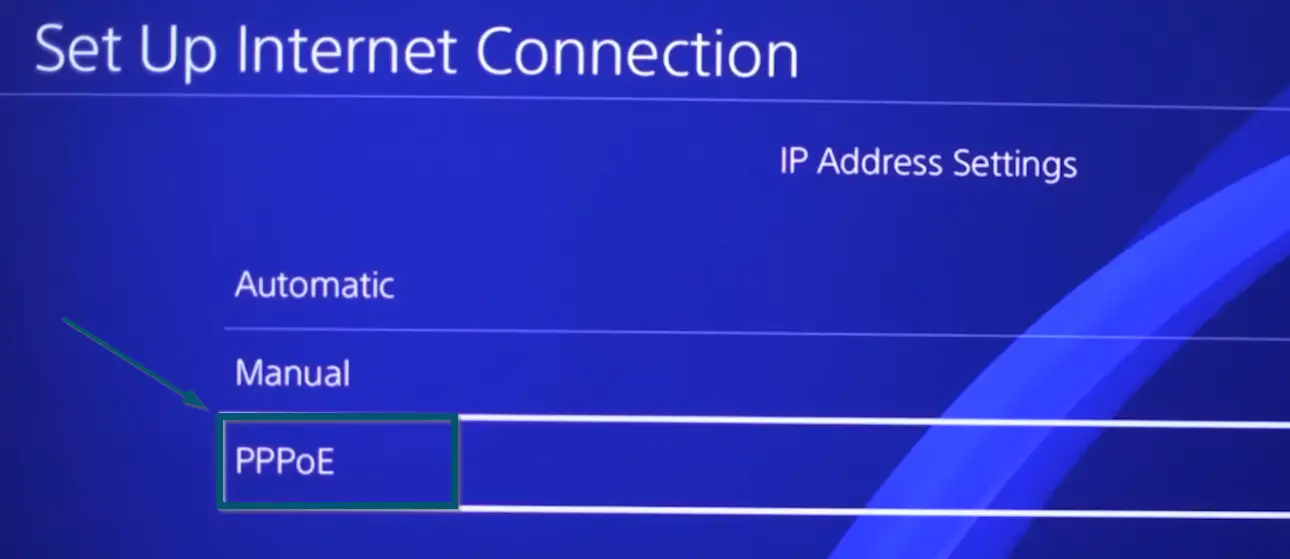
Choosing the ‘Custom’ option for ‘How do you want to set up the Internet connection’ - In the next window, you will choose the ‘PPPoE’ as IP Address Settings.

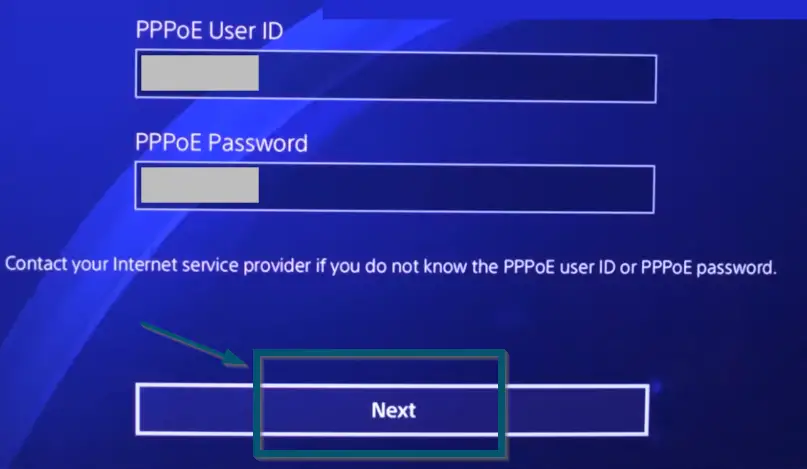
Choosing ‘PPPoE’ for the ‘IP Address Settings’ - Then, you will enter your username and password provided by ISP, which you’ve jotted down earlier and click on the ‘Next’ button.

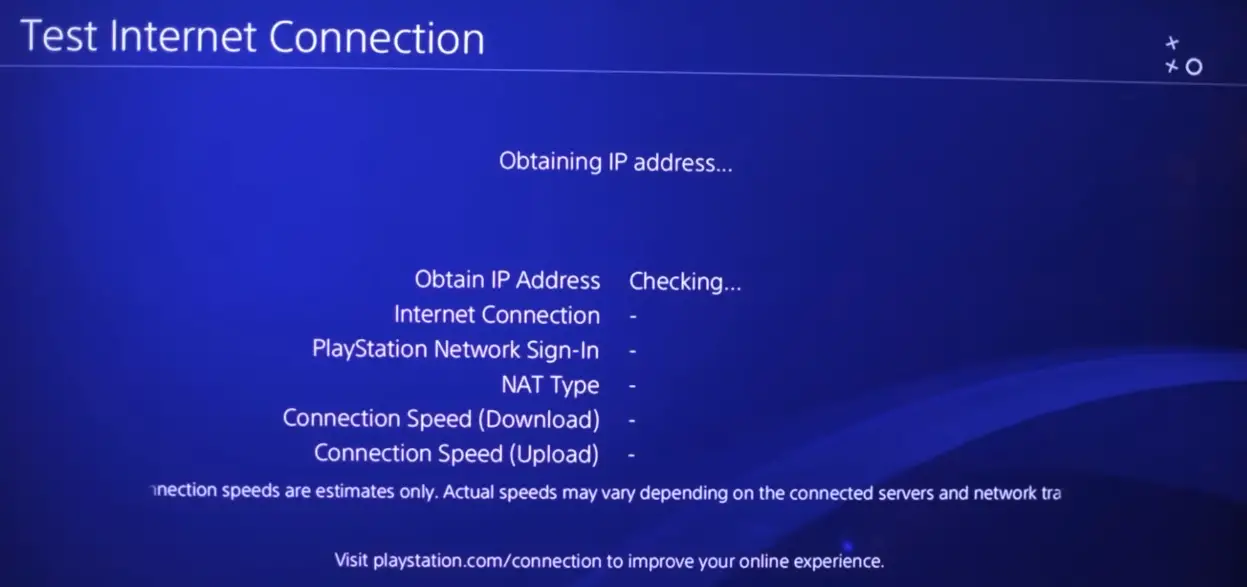
Entering the ‘PPPoE User ID’ and ‘PPPoE Password’ provided by ISP and clicking on the ‘Next’ button - For the next options, go with the default (selected) options until you see the following window.

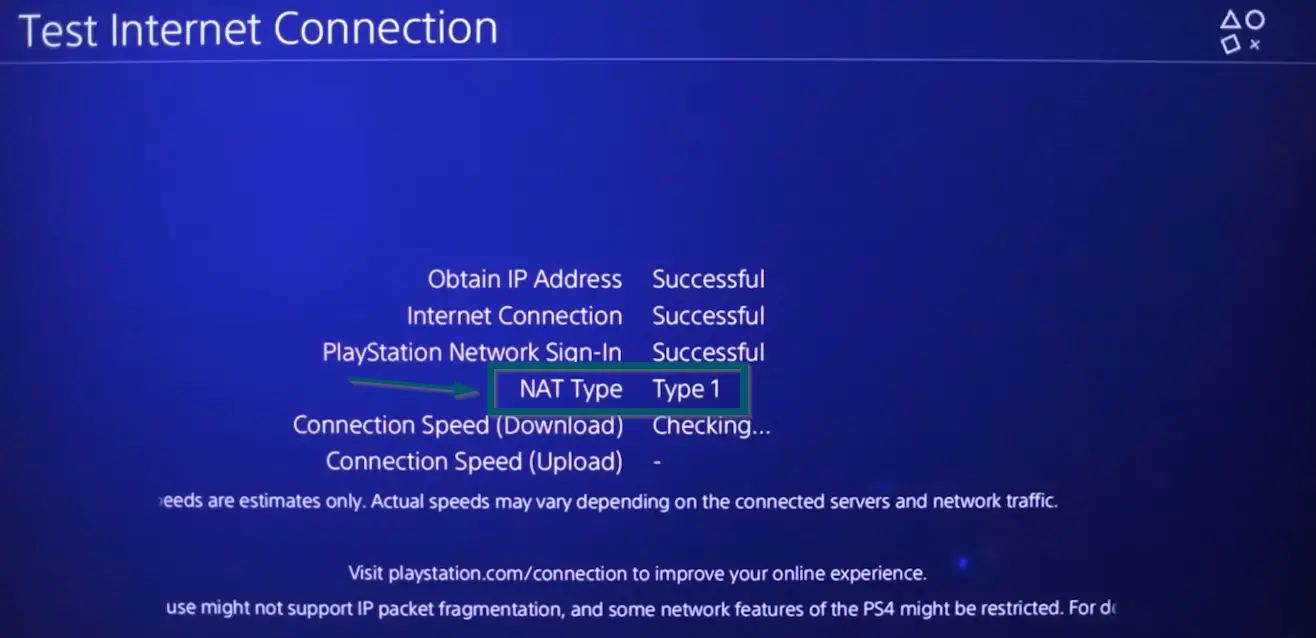
PS4 trying to apply the new settings for Open NAT Type - Wait for some time until the PS4 successfully applies the settings for Open NAT Type.

PS4 has successfully changed the NAT Type to Open


Note: If the console fails on the first try, then try once again and it will work. But if it doesn’t work on multiple attempts, then your username and password are wrong
For Wi-Fi Network Connection
- First, you’ll make sure that your Wi-Fi router is on. Then, you’ll again go to the ‘Settings < Network < Set Up Internet Connection’ options on your PS4.
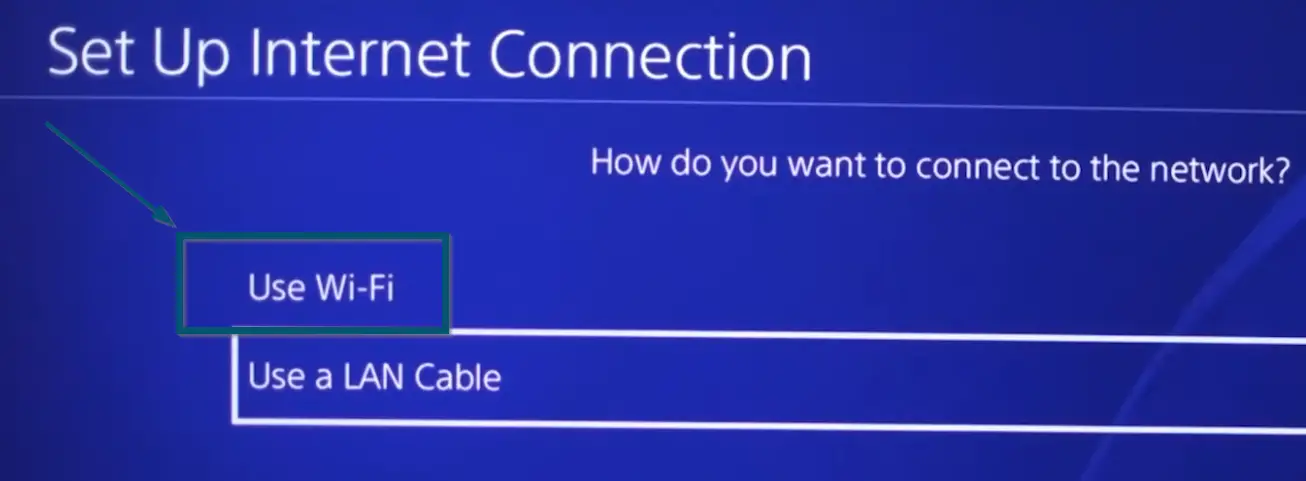
- Here, you’ll choose the ‘Use Wi-Fi’ option and if you have some Wi-Fi settings stored on the console from the past, then choose the ‘No’ option. However, if it is your first time, then the console won’t ask you.

Choosing ‘Use Wi-Fi’ in the ‘How do you want to connect to the network’ window - Then, in the next window, select the ‘Custom’ option.

Choosing the ‘Custom’ option for ‘How do you want to set up the Internet connection’ - In the next window, you will see all the nearby Wi-Fi devices. So, choose your Wi-Fi network and enter its password to connect your PS4 to your Wi-Fi successfully.
- The next instructions are the same as instructions number 17, 18, 19 and 20 of the LAN method.
Conclusion
These are the only methods that have worked for other PS4 users. But if the above methods didn’t work for you, then call your ISP because something might be wrong from their end.
