If you’re tech-savvy, then you often get bored with the layout and the features of your Android device. Now, you can’t change the hardware of your Android smartphone, but you definitely can make tweaks to your Android device. That’s where rooting your device will come in handy.

What is meant by ‘Rooting’?
In the terminology of Android, the term ‘Root’ is equivalent to jailbreaking an iOS device. Rooting an Android device is one of its major advantages over iOS devices because you can root your device to get ‘Super User’ privileges and customize everything on it. So, if you want to install any custom ROMs or some paid apps for free, rooting will come in handy.
However, if you’re searching the internet about how to root an Android device and so far, you’re overwhelmed by the available material, then we will help you.
Here, we will help you figure out some of the easiest and most effective techniques for rooting an android device.
How to Root an Android Device? – The Methods
Nowadays, the procedure of rooting an Android device is different for each device because the companies have locked their devices with things like bootloaders for security purposes. So, if you want to root your device, you have to unlock that device first. Even if you want to know how to root your Android device with a computer, you still have to unlock your device first.
Now, the locking prevention for each device is different as well. Some companies ask the customers to submit a request for unlocking the bootloader, whereas others allow you to unlock the bootloader by going through a series of steps. Either way, it is a lengthy procedure.
Anyway, we will share two methods of rooting an Android device here. One is the old-school method. The other one teaches you how to search for the method of rooting your device because, as mentioned earlier, the procedure of rooting is different for each device and we can’t mention the procedure for each device. So, let’s get to the methods.
Note: Rooting the Android voids the warranty of the device and sometimes, it might brick your device. So, we are not responsible for anything that happens to your device
Method 1: Using One-Click Root
Here, we’ll discuss the old-school rooting technique, which is one-click root. The most popular way of performing one-click root is by using applications, like ‘KingRoot‘ or ‘Kingo Root.‘
You can use any of the aforementioned applications. However, if your device version is 7.0 or later, then these applications might not successfully root your device. In that case, you can follow the next rooting guide.
Step 1: Downloading Rooting Application
- First, you’ll open the following link on your mobile’s web browser.
https://kingrootapp.net/
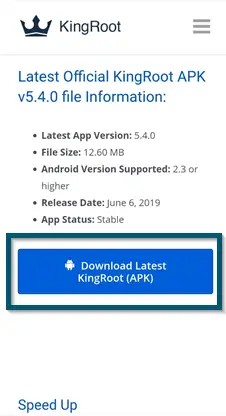
- Then, you’ll click on the ‘Download Latest KingRoot (APK)’ option to download the ‘.apk’ file of ‘KingRoot.’

Clicking on the ‘Download Latest KingRoot (APK)’ option - Once the download is complete, you’ll install this application.
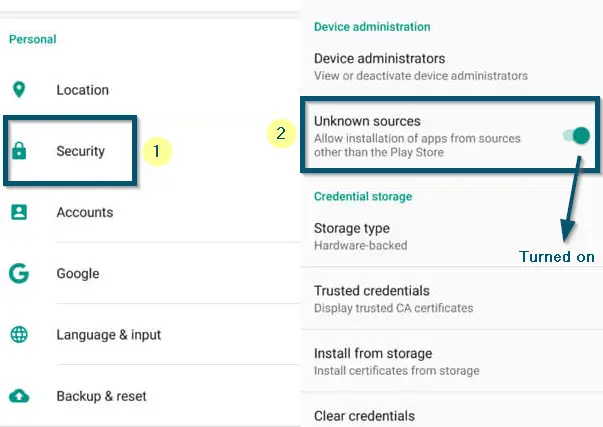
Note: If your device prompts that the installation process is blocked, then you’ll turn on the ‘Unknown sources’ option by going to the ‘Settings < Security’ options
Note: You will need a good internet connection for rooting your device
Step 2: Rooting your Android Phone
- Now, you’ll open the application and tap on the ‘TRY IT’ button.

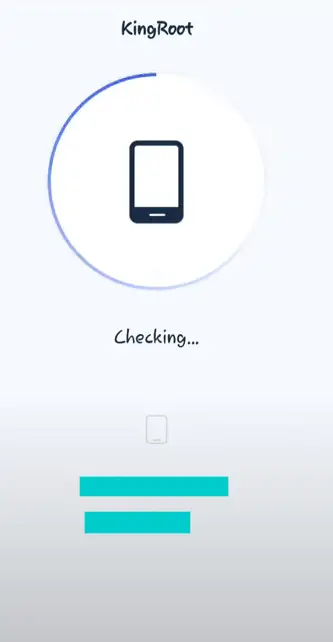
Clicking on the ‘TRY IT’ button to begin the working of the ‘KingRoot’ application - After that, the application will perform a scan on your system by showing the model number and OS version of your system.

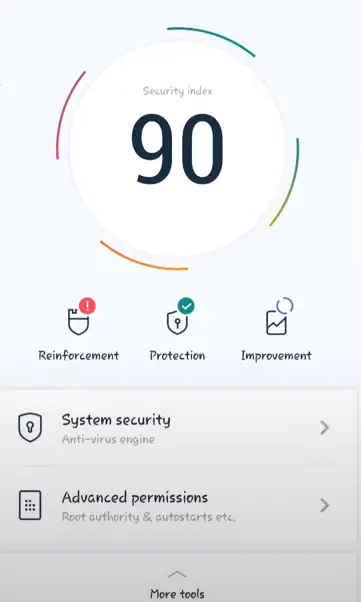
‘KingRoot’ checking whether root access is available on the system or not - Once the application has finished the scanning, it will show you the following screen:

‘KingRoot’ has finished the system scanning - So, you’ll click on the navigation drawer icon in the top-left corner of the screen.

Clicking on the navigation drawer icon - A new screen will open and you’ll click on the ‘TRY ROOT’ option.

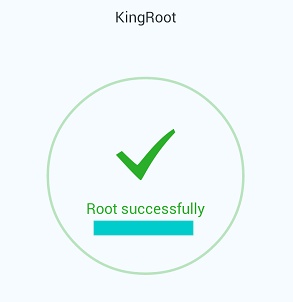
Clicking on the ‘TRY ROOT’ button - Now the application will begin the rooting process and after some time, it will complete the rooting procedure. Then, the application will show you the following message.


If your device version is 7.0 or later than 7.0, then this method might not work on your device. Therefore, follow the next procedure.
Method 2: Using XDA Forums
If One-Click Root Didn’t Work
If the one-click root didn’t work for you, then you can follow the following steps.
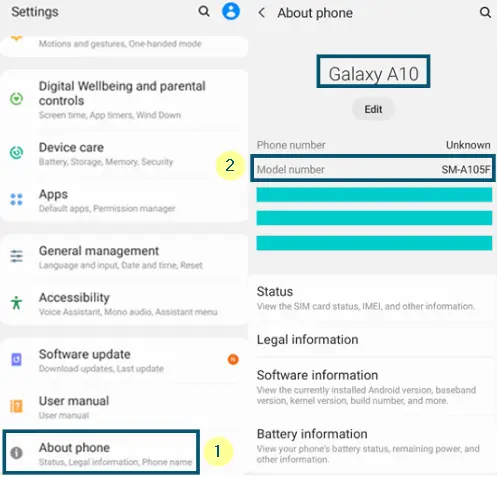
- Here, you should know the model number of your device. So, you can go to the ‘Settings < About phone’ option to find the model number of your device.

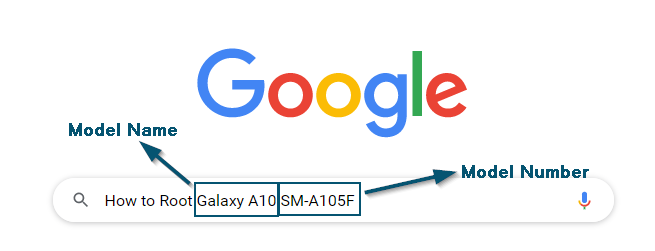
Clicking on the ‘About phone’ option and then, remembering the ‘Model number’ of the smartphone - Now, you’ll search Google regarding rooting your device. For example, your search query will look like this:
How to Root Galaxy A10 SM-A105F
Note: Here, you’ll replace the ‘Galaxy A10’ with your mobile/model name and ‘SM-A105F’ with the variant of your model

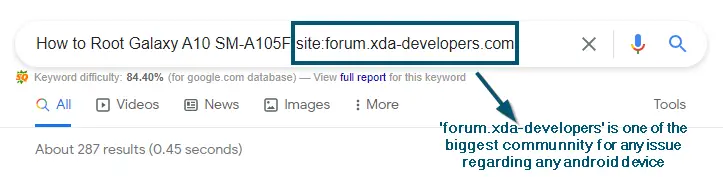
Entering the search query for knowing the procedure of rooting the device - There’ll be a lot of help regarding your model on the internet. But if you can’t find any suitable guide, then we recommend changing your search query to the following:

Adding ‘forum.xda-developers’ to search query for finding the information regarding rooting the device - This forum provides a comprehensive guide about everything related to any Android device. You can check here whether your device is rootable or not because some companies have applied strict restrictions on rooting their devices. But if your device is rootable, you will find the method here.