PS4 is still one of the most popular consoles in the market because of its graphics and audio options. Therefore, gamers rely on headphones to have a better gaming experience. However, connecting headphones to PS4 is complex because this console officially supports a few of them. So, if you want to connect and configure the PS4 audio settings for headsets, then we have got you covered here.
Here, we will discuss all the possible methods of connecting PS4 audio output to headphones. So, without any further delay, let’s get to the topic.

How to Setup Headset for PS4?
There are several ways of connecting the headphones to a PS4 console. You can either use an audio cable to connect your headset or the Bluetooth connectivity option. However, there’s a catch with connecting Bluetooth headphones to the PS4 console. So, let’s get into the details of this discussion.
Method 1: Connecting the Officially Supported Bluetooth Headphones
As mentioned earlier, there’s a catch to connecting Bluetooth headphones because Sony has made PS4 compatible with only a handful of Bluetooth headphones. So, before trying the following steps, check whether your Bluetooth headphones are compatible with PS4 or not.
- First, put your headphones in the pairing mode and, once your headphones are in pairing mode, you will see a flashing (blue) light.
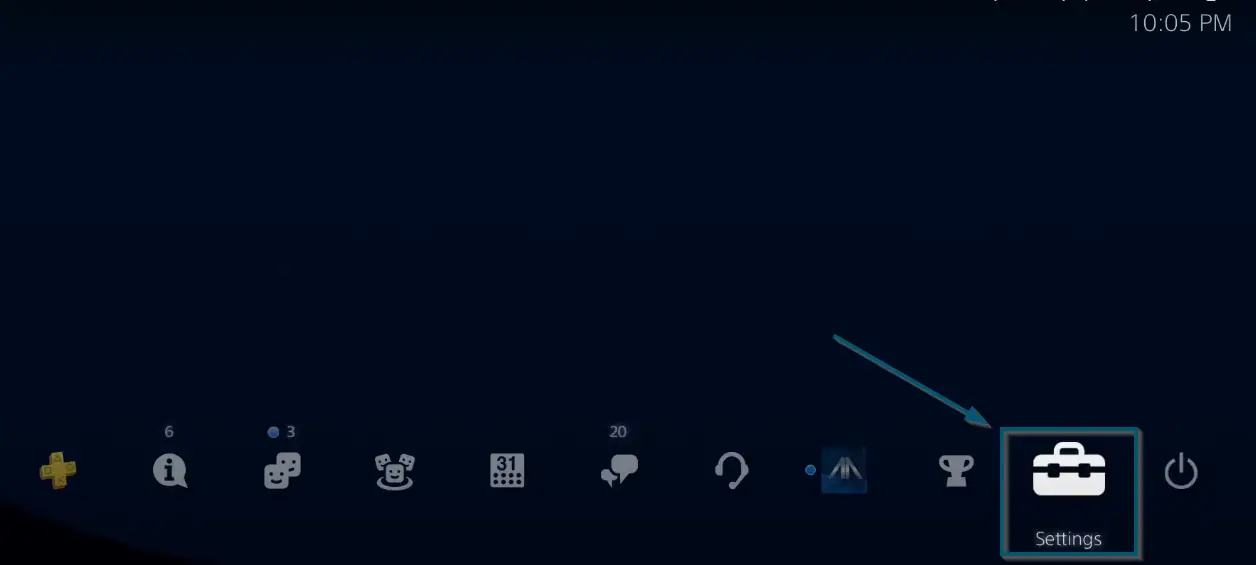
- Now, go to the ‘Settings’ of your console using your controller.

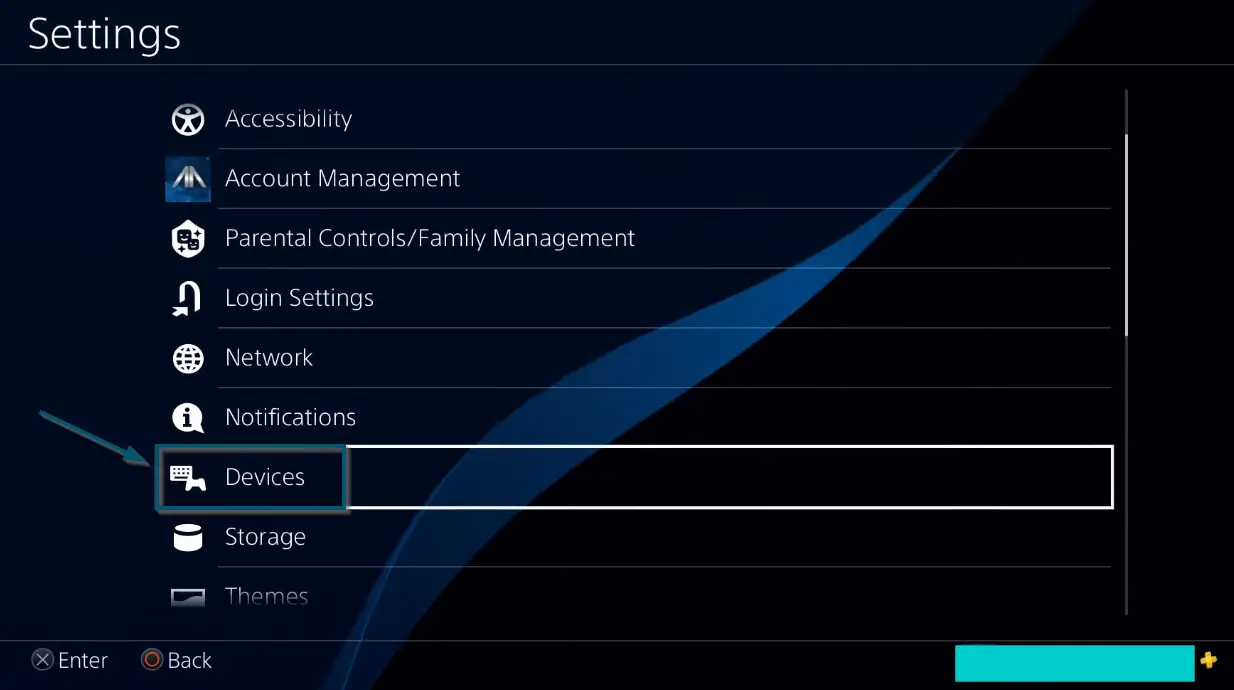
Going to the ‘Settings’ option of PS4 - In the ‘Settings’ window, you will choose the ‘Devices’ option. This will open the ‘Devices’ window and here, you will see a list of devices that you can connect with the PS4 console.

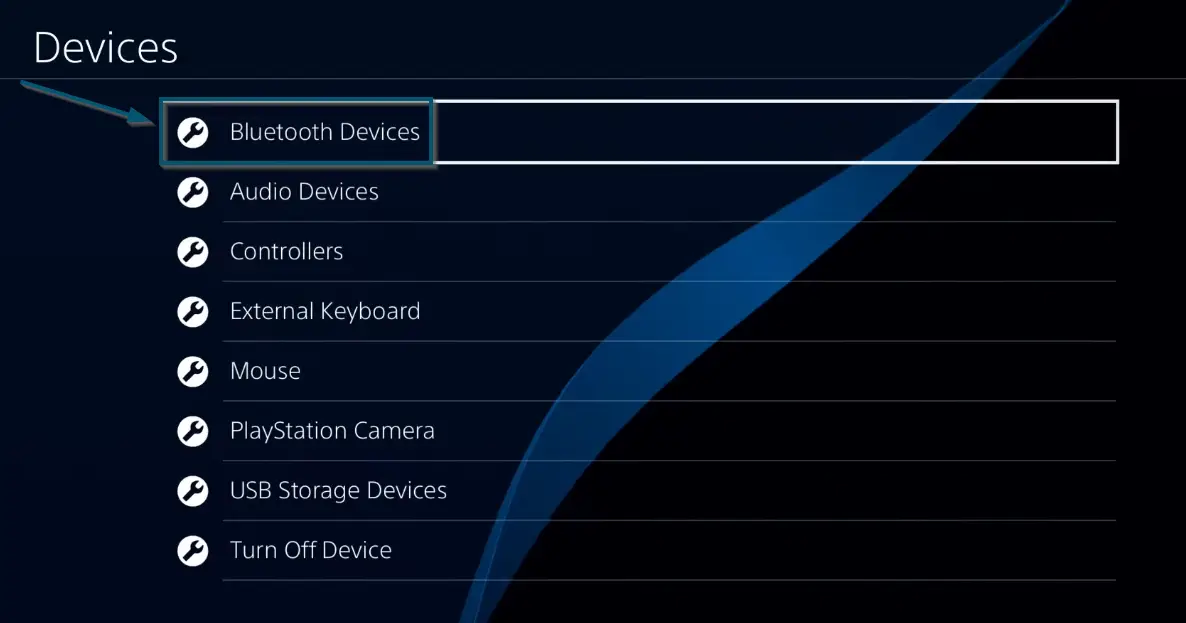
Going to the ‘Devices’ option in the ‘Settings’ window - So, choose the ‘Bluetooth Devices’ option.

Going to the ‘Bluetooth Devices’ option in the ‘Devices’ window - In the next window, you will see the list of devices available to connect with your PS4 console via the Bluetooth facility.

List of devices available in ‘Bluetooth Devices’ window
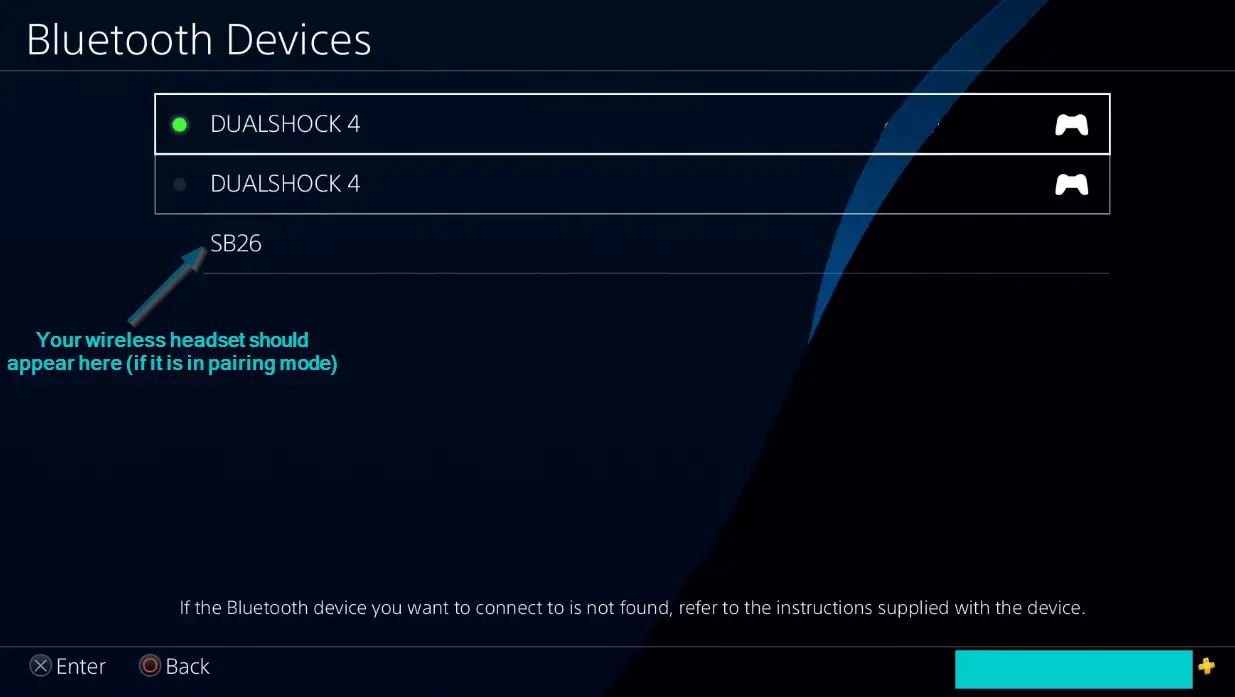
Note: If your Bluetooth headphones don’t appear at first, then wait for some time because PS4 performs a scan for the Bluetooth device at the backend
- Once your device appears, then select it by pressing the circle button on the controller and follow the on-screen procedure.

Pressing the circle button on the controller
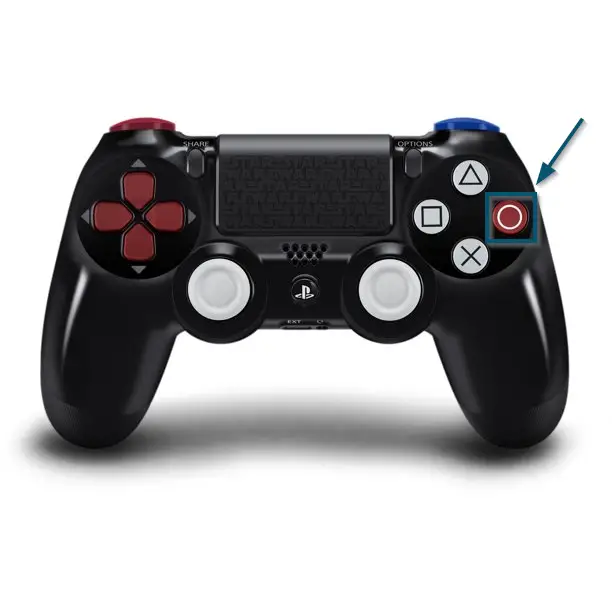
Note: If the console prompts you to register the device, then enter the necessary details to complete the connectivity process
This method will be useful for only the headphones that are compatible with PS4. If you own such headphones, then this method will help you. Otherwise, you can try the next techniques.
Method 2: Connecting Bluetooth Headphones via Male-to-Male Audio Cable
For incompatible headphones
Sometimes even Sony Bluetooth headphones might not work with PS4 and if that is your case or you’re using some other Bluetooth headphones, then you will need a 3.5mm male-to-male connector.
As we all know, most Bluetooth headphones come with an audio jack. So, if your headset has an audio jack, then try the following steps.
- First, go to the ‘Settings < Devices’ options of your console by ‘following the step 2 and 3 of the first method.’
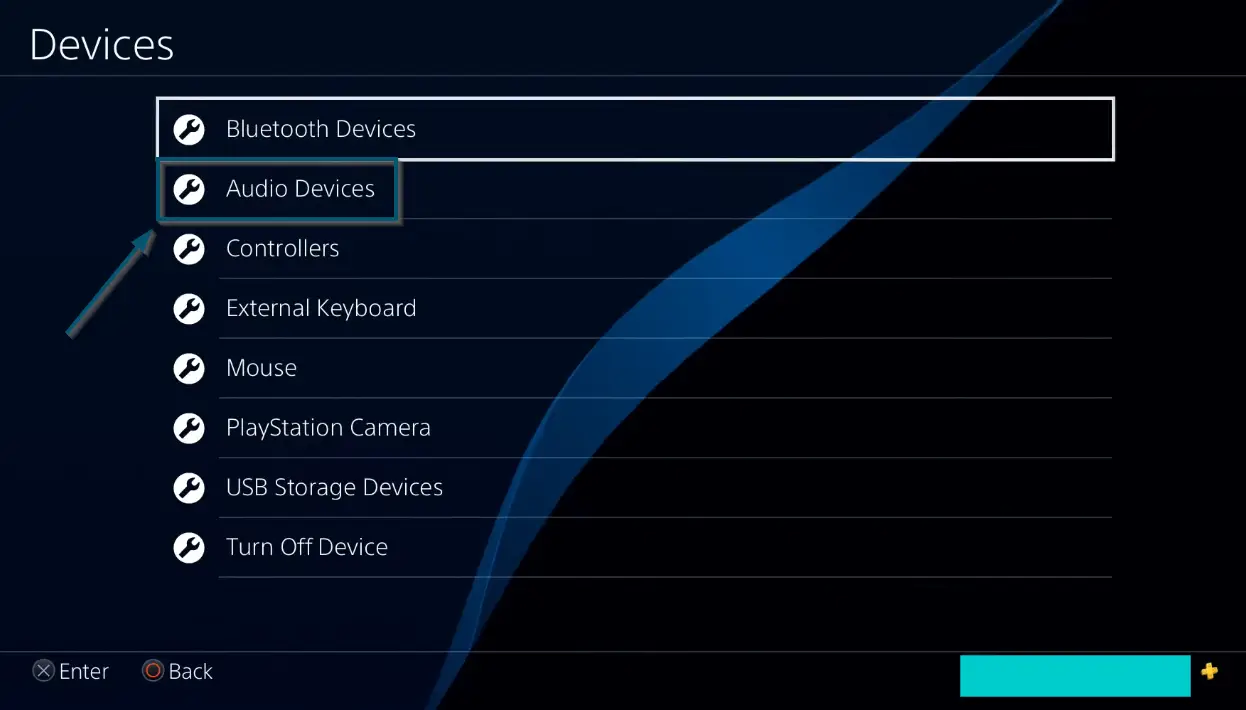
- Then, select the ‘Audio Devices’ option.

Choosing the ‘Audio Devices’ option in the ‘Devices’ window - Now, plug one end of the male connector into the headphone jack on the controller and connect the other end to your Bluetooth headphones.

Plug one end into the audio jack of the PS4 controller and the other end into the audio jack of the headphones - Once you have successfully connected the wires, you will see the following notification on your screen.

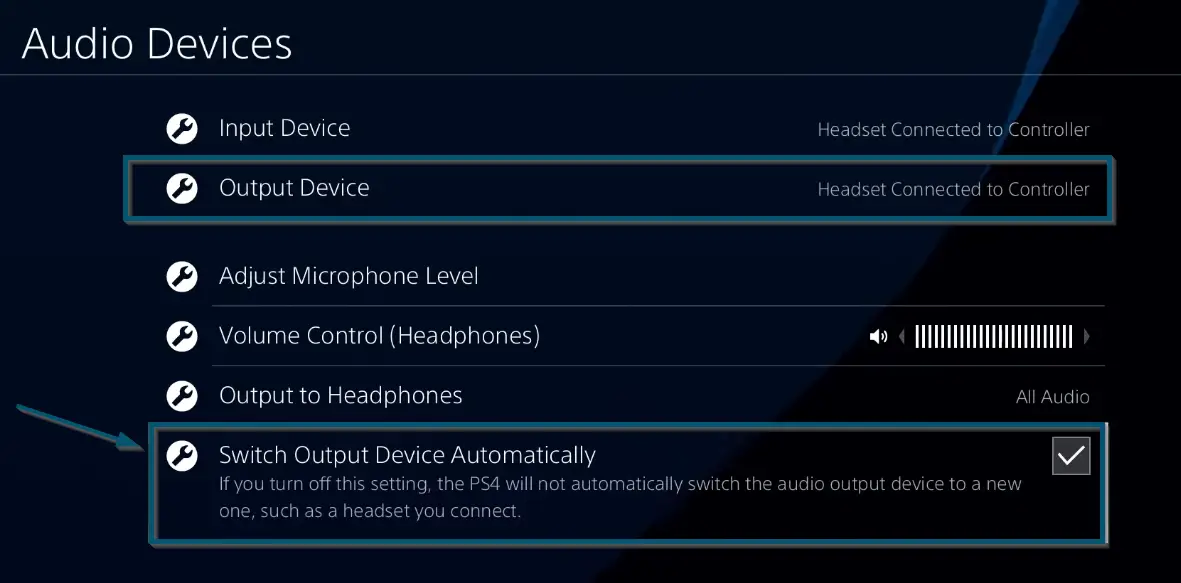
PS4 notifying that the headphones are successfully connected to console - As PS4 has automatically recognized the connected headphones, therefore, it has changed both the ‘Input and ‘Output Devices’ to ‘Headset Connected to Controller.‘ If the console doesn’t change these settings automatically, then turn on the ‘Switch Output Devices Automatically’ option in the ‘Audio Devices’ window and reconnect it.

Turning on the ‘Switch Output Devices Automatically’ option in the ‘Audio Devices’ window - You can also configure some other settings if you want. However, if you want to know the best audio settings for PS4 headset, then scroll down to find them.


If you don’t want to plug in the male connector to your controller, or you’re using a separate microphone and a separate controller, then you will need a USB to 3.5mm jack dongle. So, you’ll plug one end into the dongle and the other into your headset.
Method 3: Connecting the Wired Headphones
PS4 and newer smartphones use the CTIA standard for connecting the wired headphones. These headphones come with a microphone connector point on the 1st ring (base) of the jack and the ground connector on the 2nd ring.
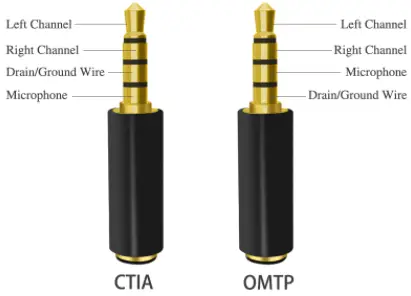
So, if you connect the OMTP standard headphones to PS4, you will face low-quality audio issues. Therefore, you will either need an OMTP to CTIA adapter/converter or a CTIA headphone.
- If your headphones are OMTP-based, then first you’ll connect the converter and after that, you will plug it in into your PS4. However, if your headphones are CTIA-based, then you will not need a converter.
- Next, ‘follow the instructions of method 2’ (except step number 3) to configure your wired headsets with PS4.
Now, let’s move to the part of the audio settings of your connected headset.
What are the Best PS4 Audio Settings for Headset?
After following one of the three methods, you will have successfully connected the headphones to your PS4 console. Therefore, now, let’s see the available options for configuring the audio headsets with PS4 according to your needs.
Whether you’re playing Call of Duty: Warzone on PS4 and you want to know the best audio settings for Warzone PS4 headset, or you’re searching for the best PS4 audio settings for USB headsets, best audio settings for PS4 platinum headsets, and the best audio settings for PS4 gold headsets, then this guide will come in handy.
Changing PS4 Audio output Headphones and TV:
If you want to hear the audio from your speakers and you just want to use the microphone of your headphones, then change the settings to the ‘TV or AV Amplifier’ option in the ‘Output Devices’ options.
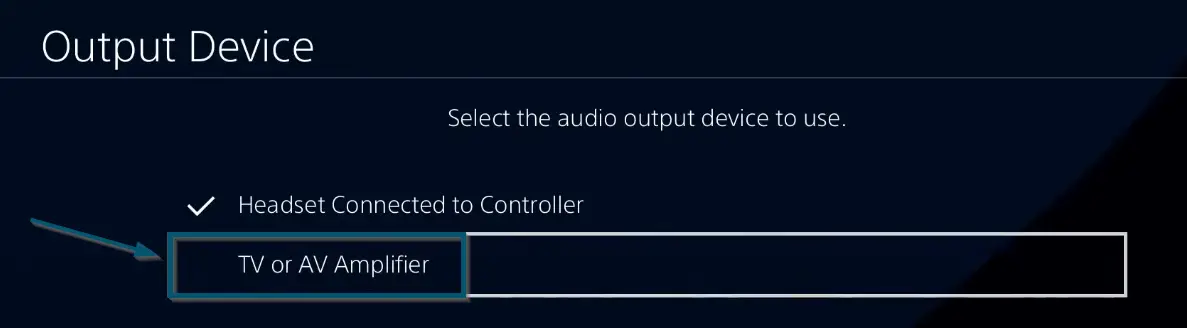
Note: For going to the ‘Output Devices’ option, you can ‘follow the first 2 steps of Method 2’
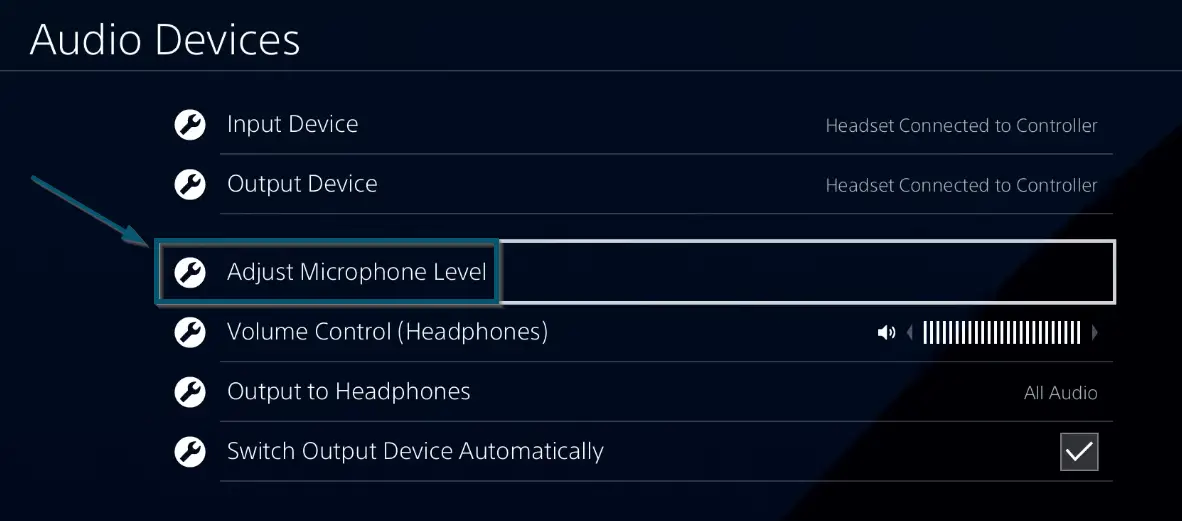
Configuring the Microphone Settings:
Some headphones come with microphones and they need additional configuration after plugging them with PS4. So, if you’re stuck in a similar situation, then follow these steps.
- Go to the ‘Audio Devices’option by ‘following the first two steps of method 2.‘
- Then, navigate to the ‘Adjust Microphone Level’and adjust the slider while putting the headphones on your ear.
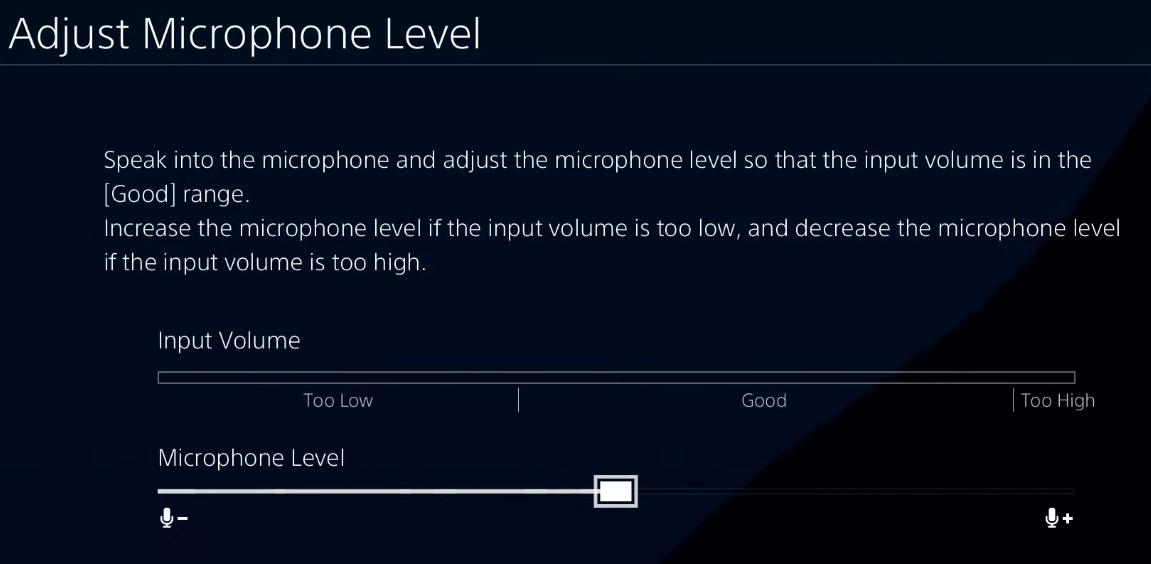
Wherever you will find the best settings, leave the slider there and enjoy your gaming experience.
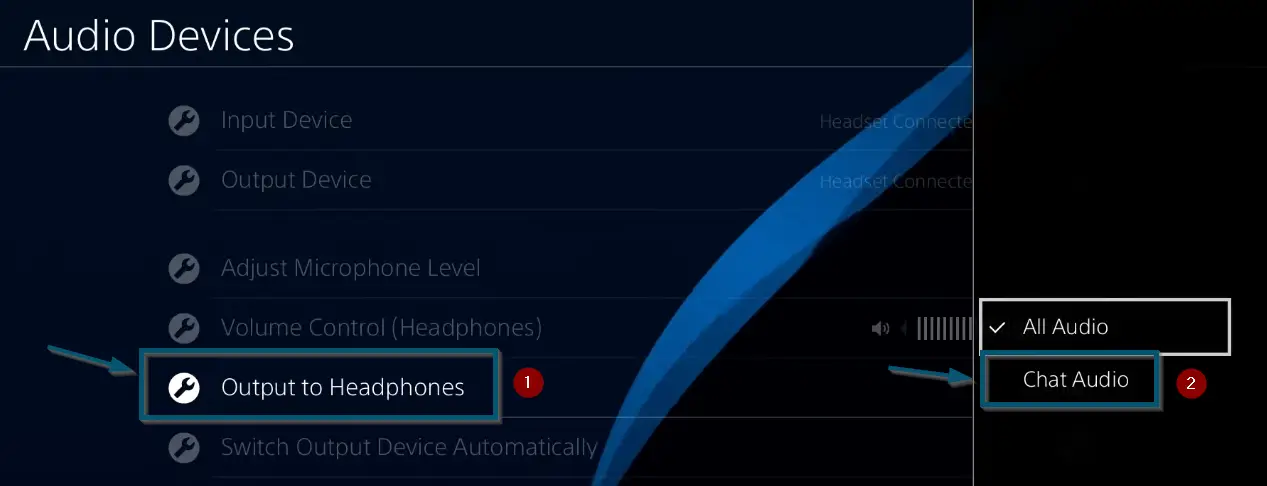
Configuring the Game Audio and Chat Audio
If you have connected headphones with PS4, the console will play all the audio in the headphones. But if you want to play the chat in headphones and the game audio through speakers, then enter the ‘Output to Headphones’ option in the ‘Audio Devices’ window and switch to the ‘Chat Audio’ option.
Configuring the Audio Settings for Live Streaming
If you want to configure the audio settings for live streaming, then try the following steps.
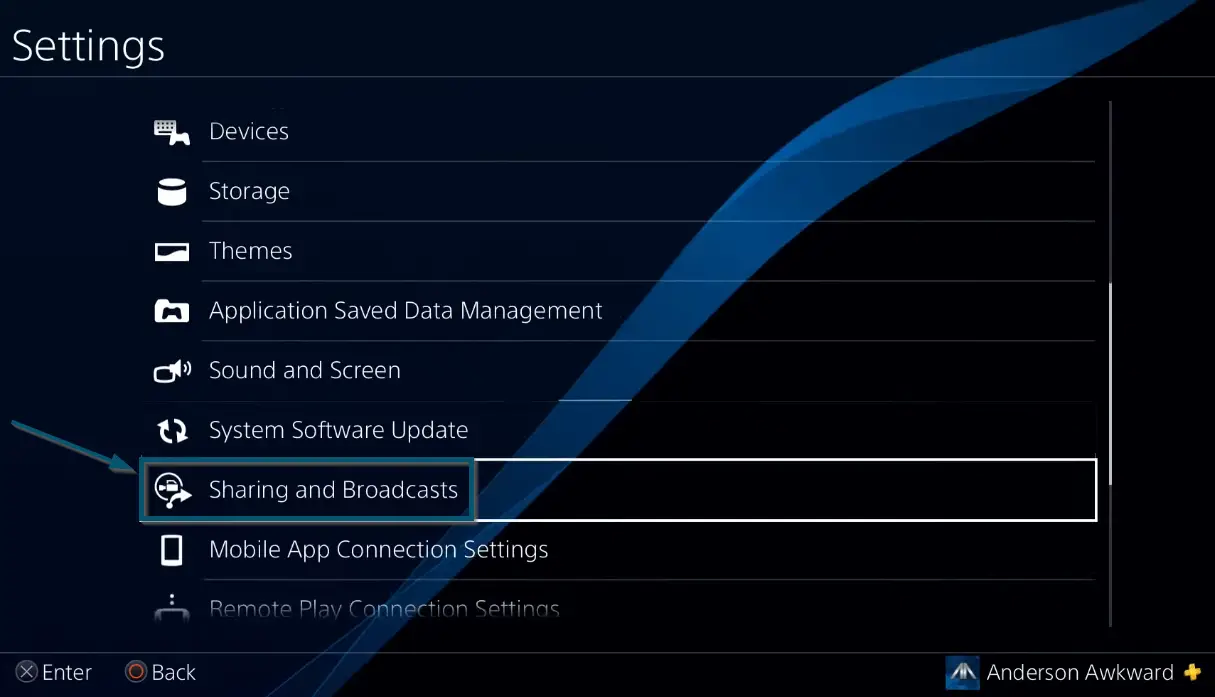
- Go back to the main ‘Settings’ page and scroll down to find the ‘Sharing and Broadcasts’ option.

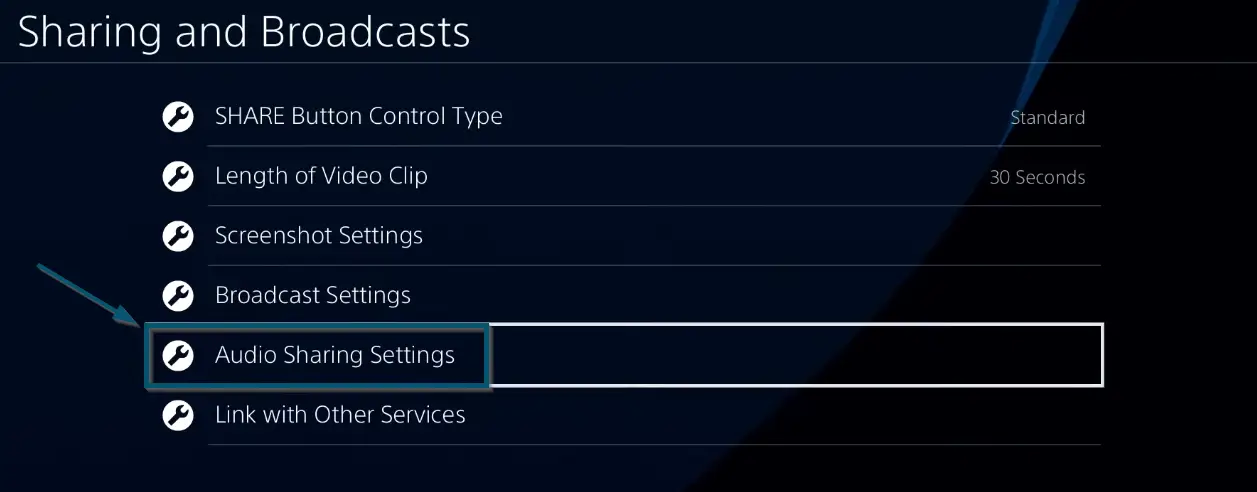
Choosing the ‘Sharing and Broadcasts’ option in the ‘Settings’ window - Then, choose the ‘Audio Sharing Settings’ option and inside the new window, make sure that the ‘Include Microphone Audio in Video Clips’ and ‘Include Microphone Audio in Broadcasts’ options are checked.

Choosing the ‘Audio Sharing Settings’ option in the ‘Sharing and Broadcasts’ window 
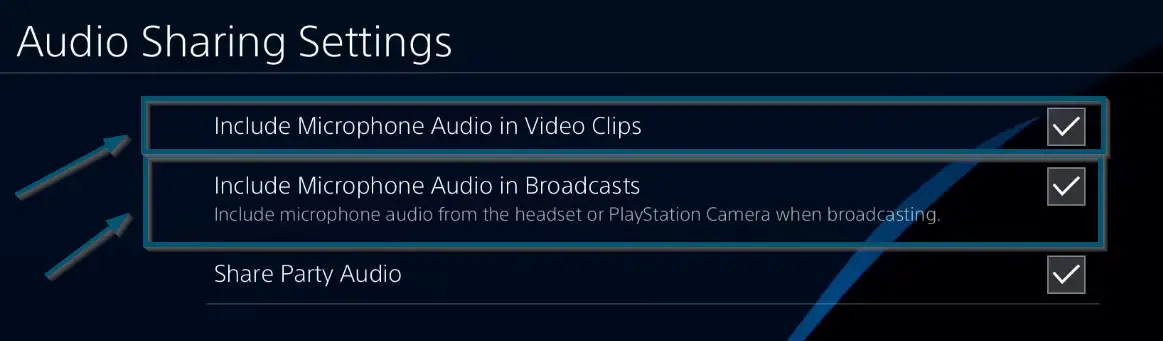
Make sure that ‘Include Microphone Audio in Video Clips’ and ‘Include Microphone Audio in Broadcasts’ options are checked - Plus, if you want to hear your members in the party during a live stream, then enable the ‘Share Party Audio’ option as well. Otherwise, you will be talking to yourself in your live stream.
Conclusion
There are a lot of headphones models available in the market and this guide covers almost all of them. So, if your issues with headphones are fixed using this guide, then appreciation in the comments section will not hurt anyone. But if you’re still facing some issue with headphones connectivity, then comment down below and we’ll try to reach you ASAP.