Hardware updates are not as common as software updates. But when some issue arrives in the hardware of a laptop/PC, the manufacturer tries to resolve that issue by releasing the BIOS update. That is why tech-savvies recommend updating the BIOS of a laptop/PC to the latest version. However, if you don’t know how to do that, then we have got you covered.

What is BIOS?
BIOS stands for Basic Input/Output System. BIOS firmware handles the initialization of the system’s hardware during system booting. Apart from hardware initialization, this firmware also supplies the run-time services to the operating system and its programs.
Why Should you Care about Updating the BIOS?
Computer experts recommend updating the BIOS of a system to the latest version because the updated BIOS will allow the motherboard to identify the new hardware perfectly. Plus, BIOS updates will remove the bugs and increase the system’s stability. Hence, it is necessary to download and install the BIOS updates whenever available.
Steps for How to Update the BIOS
The procedure for updating the BIOS of a system is almost the same for all manufacturers. There might be a few differences but you can get around them by Googling your hardware.
Some Prerequisites
Before starting the update process, keep the following things in mind:
- Make sure that your laptop has at least 10% battery.
- It’s better to plug in your laptop with a power source instead of running out of power during the update process.
- Back up your data because if anything goes wrong during the BIOS update, you will at least have a copy of your data.
- If you are using BitLocker encryption on your hard drive, you will need to suspend BitLocker encryption. You can get more information regarding this on DELL Knowledge Base. We recommend doing the same for your laptop’s manufacturer.
Now, let’s start the BIOS updating procedure.
Note: You can either download the official support assistant of your laptop’s manufacturer or use the manufacturer’s website for updating the BIOS. For this example, we are using the official website
Method
- First, type ‘Dell.com’ in your favorite browser and hit the ‘Enter’ key to reach the official website of DELL.
Note: We are performing this procedure for DELL. But you can do the same for your laptop’s manufacturer

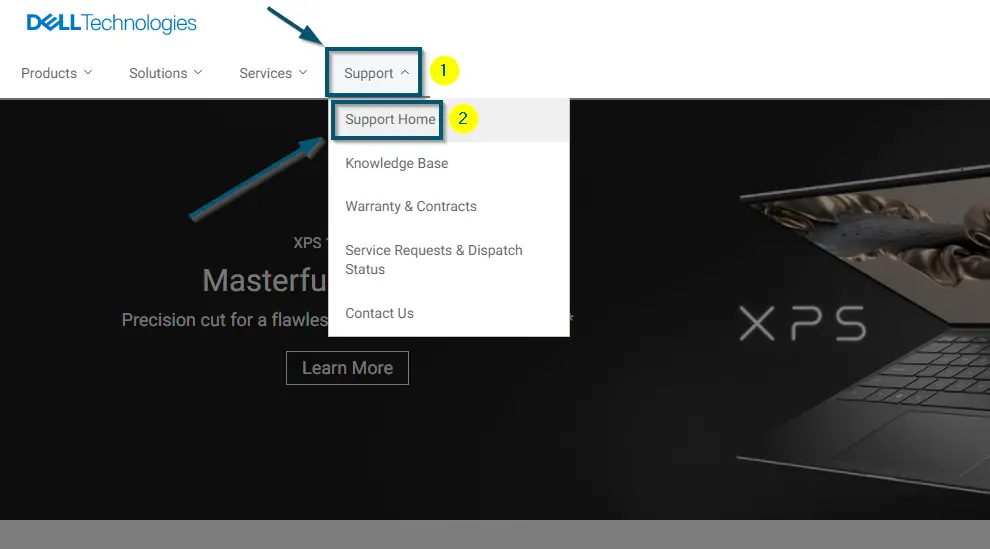
- Then, hover over the ‘Support’ option and the website will display a drop-down menu. So, click on ‘Support Home.’

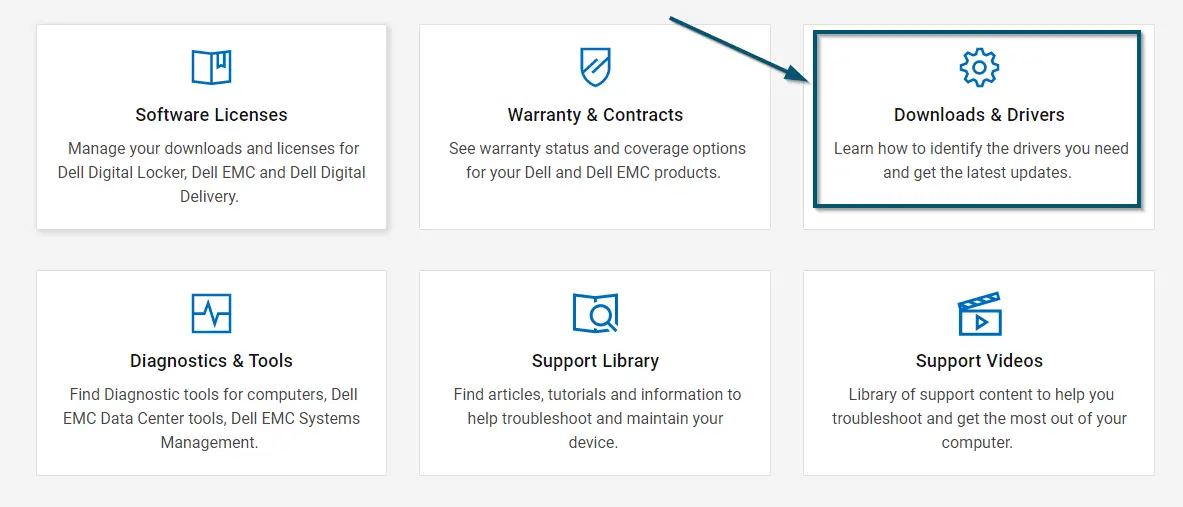
Hovering over the ‘Support’ option and clicking on the ‘Support Home’ option - Now, scroll down to find the ‘Downloads & Drivers’ option and click on it to open it.

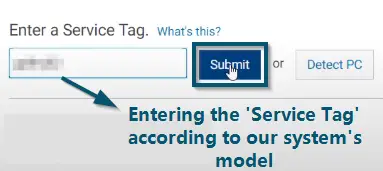
Clicking on the ‘Downloads & Drivers’ option - The website will now give you two options. You can either enter the required information according to your model manually or download the SupportAssist to detect the essential information automatically. Here, we have chosen the manual option.

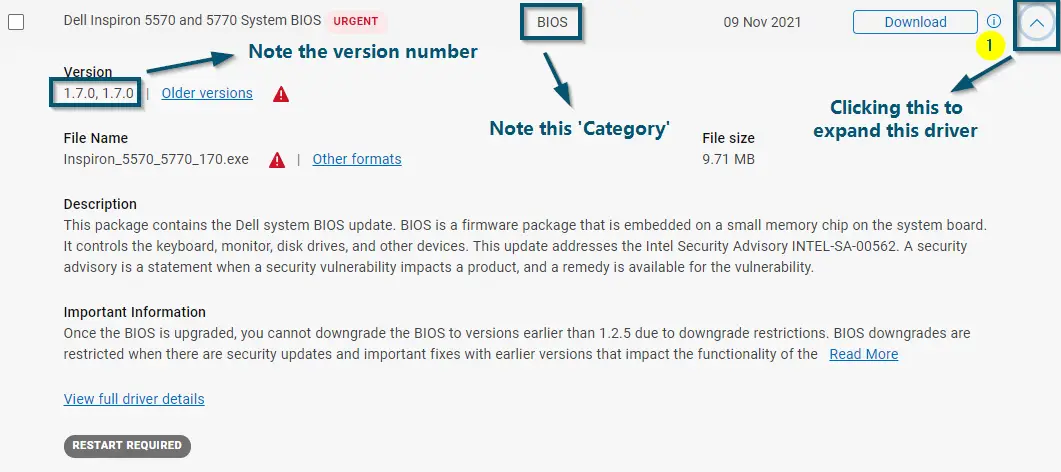
Entering the ‘Service Tag’ according to the system’s model - Now, scroll down to find the ‘BIOS’ category drivers and expand it.

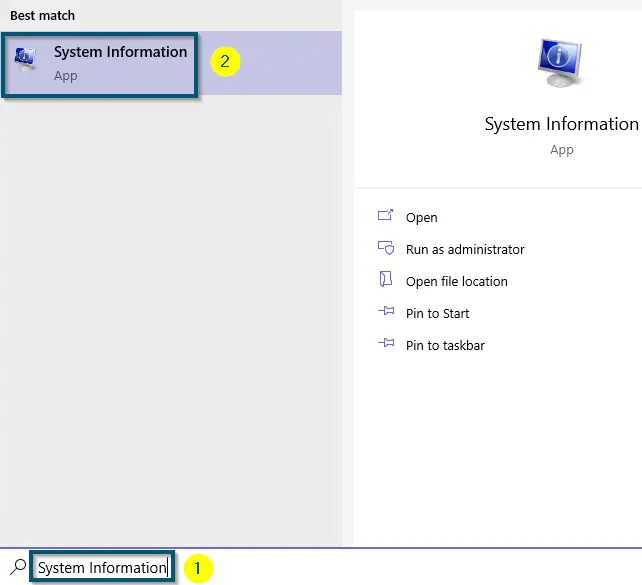
Expanding the ‘BIOS’ drivers and checking the required information - After that, type ‘System Information’ in the ‘Start menu’ and open it.

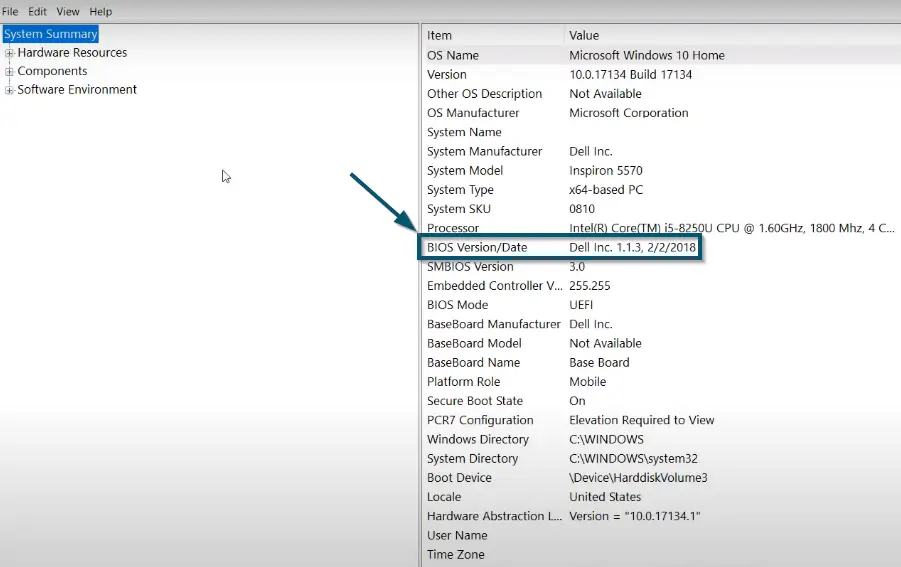
Opening ‘System Information’ from the ‘Start menu’ - Then, compare the ‘BIOS Version/Date’ in the ‘System Information’ with the version number specified on the official website. If you have the same version, skip the next steps. Otherwise, follow the next steps.

Jotting down the ‘BIOS Version’ in the ‘System Information’ - Now, begin the downloading by clicking on the ‘Download’ button against the required driver.

Clicking on the ‘Download’ button against the BIOS driver - Once the download is complete, then double-click on the downloaded file.
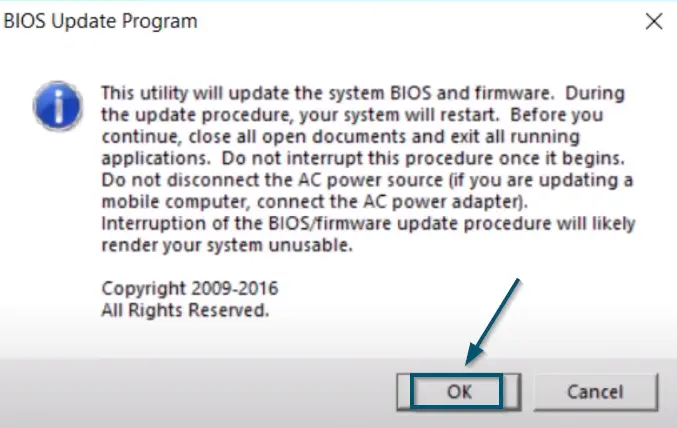
- Upon opening the file, the system will warn you that updating the BIOS process will reboot your system. So, click on the ‘OK’ button.

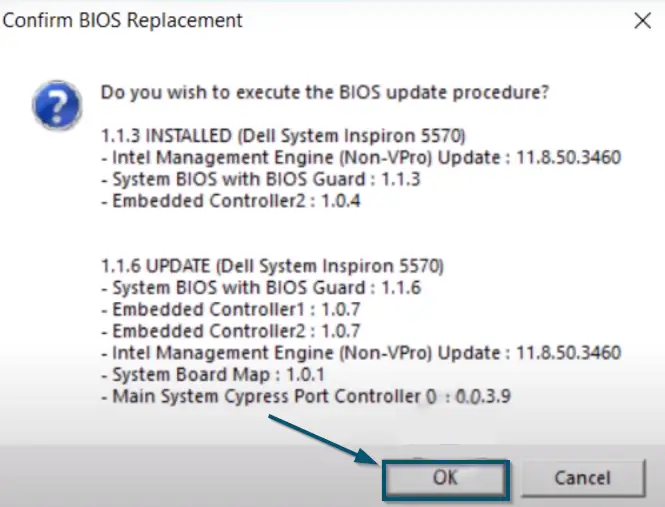
Clicking on the ‘OK’ button to close the warning message about restarting the system during updating the BIOS - Next, the system will show you another information dialog, which indicates the current version of BIOS and the version you are installing. So, click on the ‘OK’ button again.

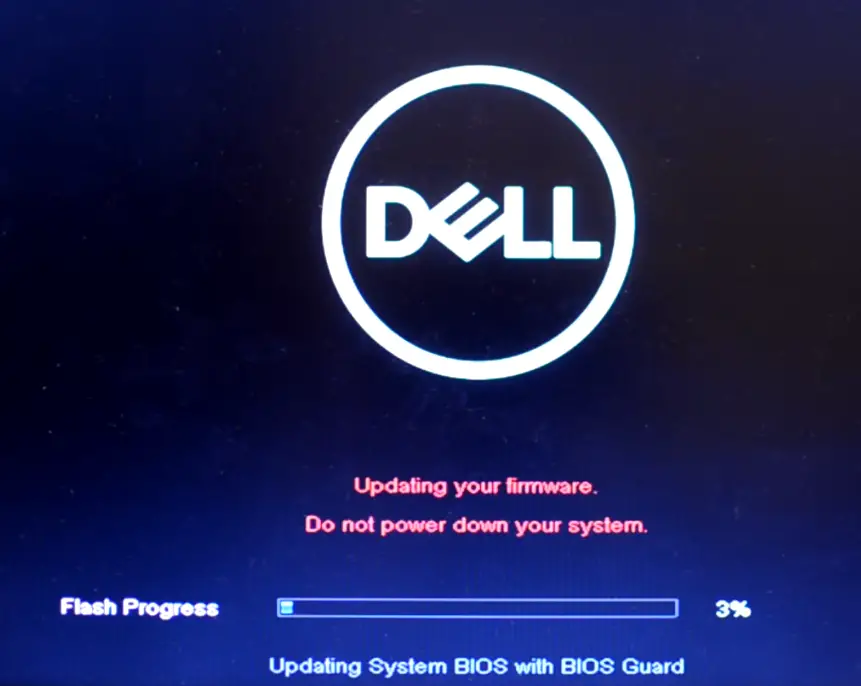
Clicking on the ‘OK’ button to close the information dialog about the version number of BIOS - Now, the system will begin the BIOS updating process.

System starting the BIOS updating process - Once the progress bar goes to 100%, you’ll see a black screen followed by the following screen.

System updating the BIOS - After the updating procedure gets complete, your system will reboot normally.
- Once the system has successfully rebooted, you can confirm that the latest BIOS version is installed by ‘following steps number 6 and 7.’


Wrapping Up
All in all, updated BIOS is necessary for the stability and optimized performance of a system. So, never miss the important BIOS updates. We recommend reading the changelog information of a BIOS update before moving on to the downloading and installation procedure.
