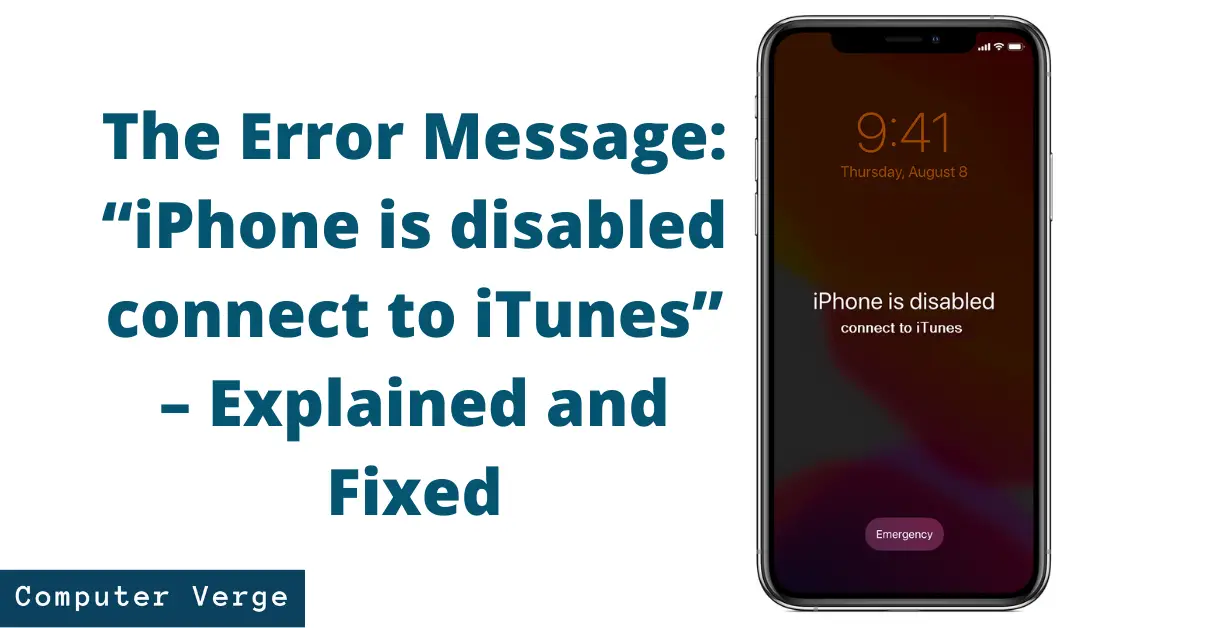
The error message ‘iPhone is disabled connect to iTunes’ occurs when you enter the wrong passcode 6-10 times on your iOS device. Doing this locks your iOS device to prevent unauthorized access. Before moving to workarounds, let’s understand the different variations and causes of this error message.
Variations of this Error Message
This issue starts from a mildly inconvenient error message and, when it reaches its peak state, it incapacitates the device. So, it is necessary to understand its variations before solving this error message.
You will get error messages in this format:
iPhone is disabled try again in 5 minutes
Here, the minutes will be changed according to the tries listed below:
| Incorrect tries | Time to wait (mins) |
|---|---|
| 6 | 1 |
| 7 | 5 |
| 8 | 15 |
| 9 | 60 |
| 10 | NA |
Why Does ‘iPhone is disabled. Connect to iTunes’ Occur?
iOS devices are famous for their security features. Your iPhone locks your device after continuous 6-10 wrong guesses to prevent unauthorized access. This ability of the iOS devices is known as prevention against brute force attempts to bypass the passcode.
If your iOS device has a physically or internally damaged screen, then your device may have developed a ghost touch. In ghost touch, the device automatically keeps pressing the various sections of the screen, which could be the reason for the wrong entered passcode. This behavior will disable your iOS device as well.
How to Fix this Error Message? – Possible Solutions
As mentioned earlier, this error message gets more difficult after each wrong passcode attempt. So, to solve the minor side of this error message (iPhone is disabled try again in X minutes), we recommend trying the prerequisite first.
Prerequisite: Waiting for the Specified On-Screen Time
For People Facing ‘iPhone is disabled try again in X minutes’ Error Message
If you are in the mild conditions of this error message where your device is locked for a specific time, then you should wait until the lock screen of your device reverts to its normal state.

Note: Your lock screen will return to its normal state once the mentioned time on the device’s screen has passed
This is a simple and easy fix. So, we recommend trying this first rather than trying something complex and losing your data. But it will only work in the mentioned scenario.
If this does not meet your use case or you have entered the wrong passcode for the 10th time, then try the following solutions. We will also be looking at unlocking your iPhone with your computer.
Method 1: Restoring the Backup
For People Who Have Synced their iOS Device with iTunes (at least once)
In this solution, we will attempt to unlock your iPhone without your data getting lost.
- First, open ‘iTunes’ on your computer/Mac. But if you haven’t installed it on your system, then download ‘iTunes’ first and install it.
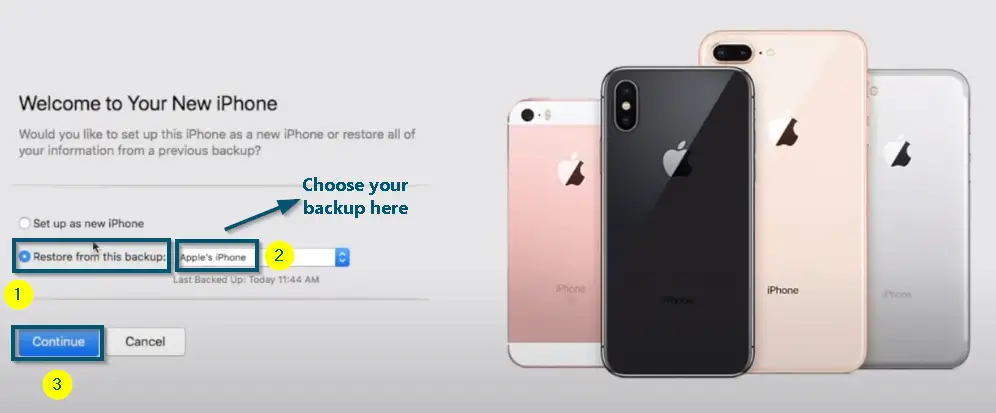
- Then, connect your iOS device to the computer/Mac via the provided USB cable. As you connect your iOS device to a computer/Mac, iTunes will show a new window, which indicates whether you want to ‘Set up as new iPhone’ or ‘Restore from this backup.’
Here, click on the ‘Restore from this backup’ option and choose the backup file from which you want to restore your data. - Now, click on the ‘Continue’ button for data restoration.

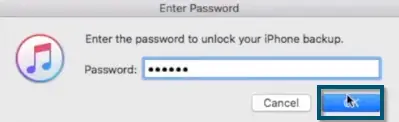
Selecting the ‘Restore from this backup’ option, choosing the backup and clicking on the ‘Continue’ button - Next, iTunes will ask for the password of the encrypted backup. Enter that password and click on the ‘OK’ button.

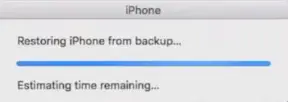
Entering the encrypted backup password and clicking on the ‘OK’ button - iTunes will start the process and, after some time, it will restart your iOS device.

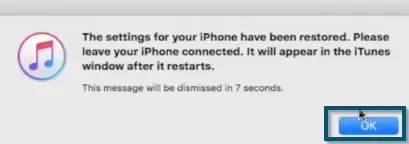
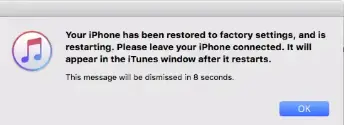
iTunes Starting the Data Restoring Process - When the restart is complete, you can unplug your device and enjoy.

iTunes informing about the completion of data restoring and restarting the iOS device
This method will only work for the mentioned criterion. But if you don’t fall into this criterion, then try the next solution.
Method 2: Wiping the Device Using the ‘Recovery Mode’
If the above solution has proved useless for you or you have not synced your device with iTunes, then another way of solving this error message is by wiping the device using the ‘Recovery mode.‘ If you want to access your iOS device at any cost, then try this solution.
- First of all, connect your iOS device to your Mac or PC via the provided USB cable.
- Now, we will reboot the device in the ‘Recovery Mode.’ But keep in mind that the procedure to reboot the device into recovery mode varies from model to model. So, read Apple’s Recovery Mode guide and reboot your device into recovery mode according to the provided guide.
- Once you are in the ‘Recovery Mode,’ you will locate your connected device. The procedure for locating the connected device varies from operating system to operating system. So, we will discuss all of them.
For Windows and macOS Mojave or earlier
If you are using macOS Mojave (or an earlier version of macOS) or a Windows system, then you will need ‘iTunes’ to perform the next steps. So, if you haven’t installed it on your system, then download ‘iTunes’ first and install it before following the next steps.
- Now, open ‘iTunes’ on your Mac or PC.
- After that, click on the ‘Phone’ icon in the upper-left corner of the iTunes 12 (or later) window. This will select your device.

Clicking on the ‘Phone’ icon in iTunes 12
Note: For iTunes 11, a similar option will appear on the right side and, for iTunes 10, the required option will appear on the (left) sidebar
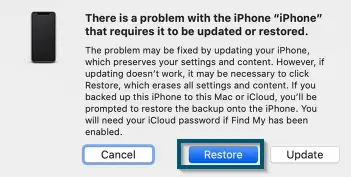
- Once your computer (Mac or PC) has successfully detected the device, it will show you a message whether you want to ‘Restore’ or ‘Update’ your device. So, click on the ‘Restore‘ button.

Clicking on the ‘Restore’ button after successful detection of the iOS device in iTunes - After that, iTunes will start contacting the iPhone software update server.

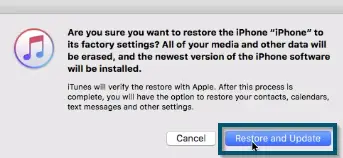
iTunes contacting the iPhone software update server… - Once the connection with the server is successful, it will present you with another dialog box asking you whether you want to ‘Cancel’ the operation or perform the ‘Restore and Update’ operation. So, click on the ‘Restore and Update’ button.

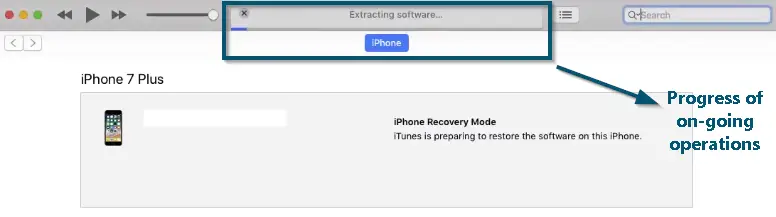
Clicking on the ‘Restore and Update’ button to start the operation - Now, iTunes will start the procedure and you can see the ongoing process and its progress on the top middle of the iTunes window.

Top-middle of the iTunes window showing the progress of the ongoing process - Once the operation is complete, iTunes will restart your iOS device. So, you can disconnect the USB cable.

Factory reset of iPhone via iTunes is complete - Now, follow the on-screen instructions to set up your iOS device as new.

For macOS Catalina and Later
If you are using macOS Catalina or later versions, you won’t need any additional applications because you can perform the next steps from the ‘Finder.’
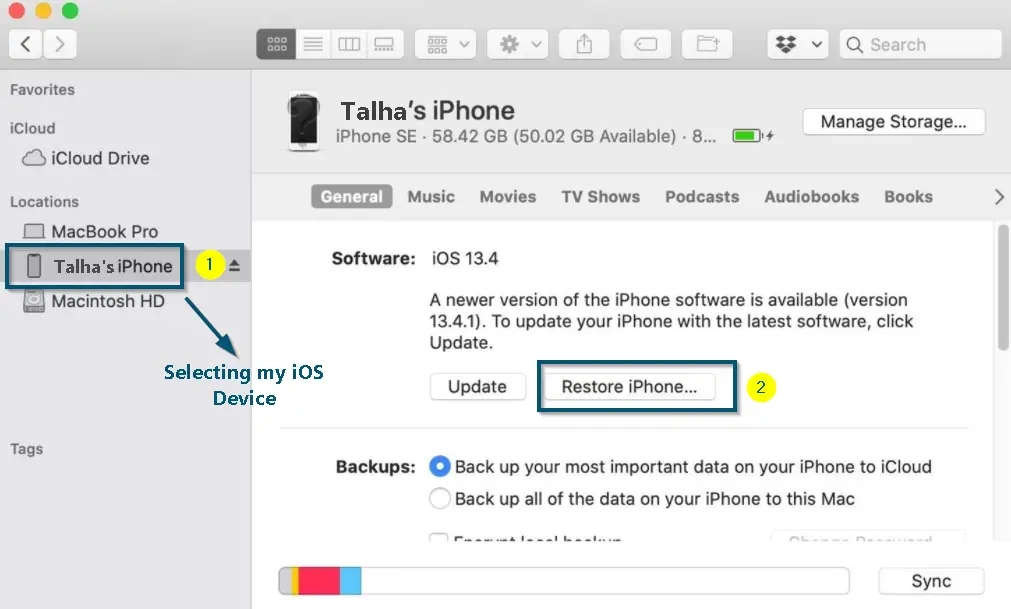
- So, under the ‘Locations’ section in ‘Finder,’ locate your iOS device. So, click on it to select it.
- After that, click on the ‘Restore iPhone…’ option. The operating system will start downloading the relevant iOS version for your device.

Selecting the required iOS device from ‘Finder’ and clicking on the ‘Restore iPhone…’ option
This method will wipe your device completely and set it up as new. So, if the first method didn’t work for you or you don’t meet the criterion of the first method, this method will resolve this error message. But keep in mind that this should be your last resort because you are losing your data here.
Method 3: Using iCloud for Erasing iPhone
Suitable for People Who are Facing Some Issues with iTunes Connectivity
If your iTunes isn’t working or connecting while solving the ‘iPhone is disabled’ error, then we can use iCloud to work around it.
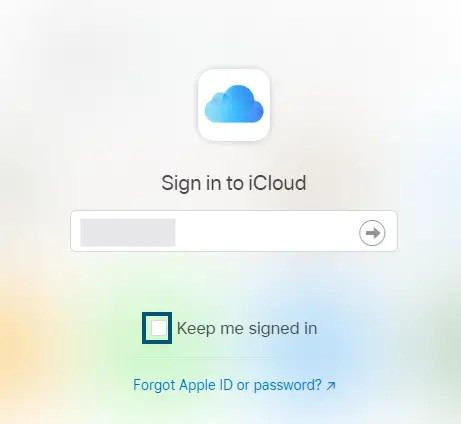
- First, navigate to the official website of iCloud.
- The website will straightaway ask you to log in with your iCloud account. So, enter your credentials and sign in.

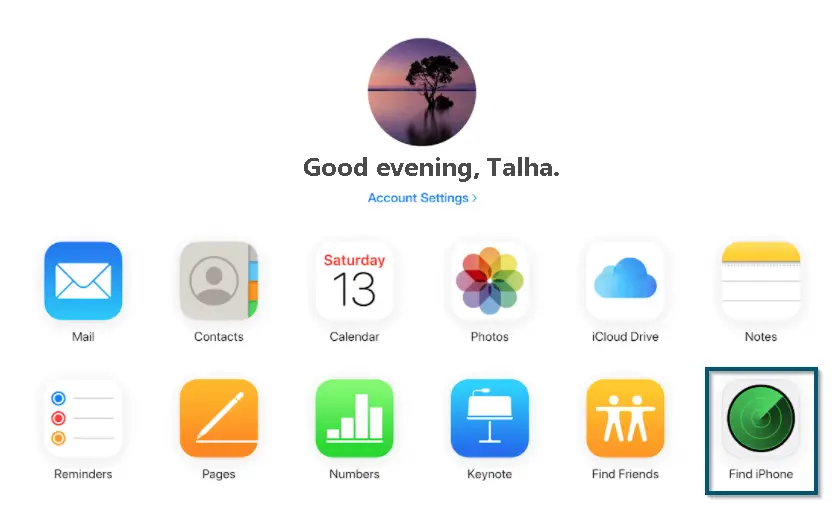
Entering the sign-in information on iCloud’s official website - After that, click on the ‘Find iPhone’ option.

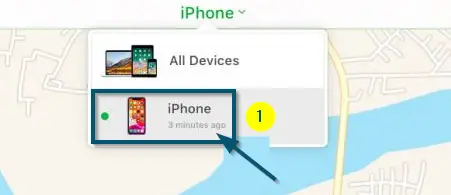
Clicking on the ‘Find iPhone’ option on ‘iCloud.com’ - Then, click on the ‘All Devices’ option to reveal the drop-down menu and choose the ‘iPhone’ option.

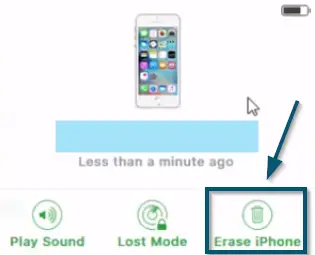
Clicking on the ‘iPhone’ option for finding the iOS device on ‘iCloud.com’ - Now, choose the ‘Erase iPhone’ option to wipe your data on your iOS device.

Clicking on the ‘Erase iPhone’ option - Once the operation is complete, you can restore your backup from iCloud or iTunes backup to get your data back.
This solution will solve this error message for you if you are facing any trouble while connecting to iTunes. However, your locked iOS device should be connected to the internet connection, and ‘Find My iPhone’ should be enabled on your device. If you meet these criteria, then try this solution. Otherwise, visit the Apple Store or contact their customer support staff.
