The steam client doesn’t open primarily because of issues in its installation files or because Steam is updating in the background. This is also caused when Steam fails to log in at the startup and goes in a loop.

This issue occurs when users try to open the Steam client and they can’t see the Steam client’s window. However, people have reported several other use cases regarding this issue. So, let’s see those use cases.
- Sometimes, on opening the Steam window, the loading bar says verifying installation, but after that, nothing happens and the Steam window doesn’t open.
- In some cases, even after opening the Steam Client, people have reported not being able to see the Steam Client’s window and process in the task manager.
- Sometimes, people have faced this issue because of the interference from their antivirus applications.
- Often people have faced this issue in the normal boot mode. But when they opened the Steam Client in the Safe and Network mode, the Steam worked fine.
Before getting to the fixes, let’s get into the details of this issue and see the probable reasons for this issue.
Why the Steam Client Doesn’t Open?
Here are the most common solutions for the Steam client not opening.
- Sometimes the Steam Client doesn’t open because some of its processes are already running in the background. Therefore, when you try to open the Steam Client, your system refuses to open it because it thinks that the same clients have already been running.
- Often, the corrupted game files or a poorly optimized game can be the reason for Steam not responding or opening on clicking.
- Sometimes the cache of the system or some other small background processes interferes with the Steam Client, which results in the Steam Client bootstrapper not opening.
- This issue can also occur because of a bad network. So, it’s better to check your network before trying anything.
- Sometimes, you face the issue of the Steam Client not opening windows 10 because the Steam servers themselves are down. So, before trying any fix, you should check the Steam servers as well.
- In some cases, the outdated GPU drivers and the software version can be the reason for Steam not working Windows 10.
- Often, problematic RAM also causes this issue.
How to Fix this Issue?
Steam provides the best way of traversing into the world of gaming. But if your Steam Client is not running, then here are some solutions that you can apply to fix this issue.
Pre-requisite 1: Check the Stability of Your Internet Connection
Since Steam requires a stable internet connection, therefore, before getting into any complexities, we recommend you check your internet connection.
- First, you should check whether all the other devices are working fine on your network or not.
- If not, then contact your ISP (Internet Service Provider) and report this issue to them.
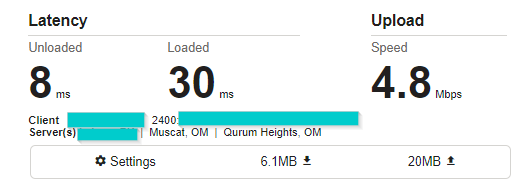
- If all the other devices are working fine, then it’s time to check your network’s bandwidth. Because “Steam requires at least 3Mbps of bandwidth and some modern games require at least 10Mbps of bandwidth.“ So, make sure your network’s bandwidth meets the requirements of Steam and the game you want to play.
- For checking the bandwidth, you’ll open a browser and type ‘fast.com’ in its address or search bar. Then, you’ll hit the ‘Enter’ key to head over to that web page.
- When the new webpage will open, your browser will start the analyzing process.

‘fast.com’ measuring the network’s bandwidth - Once fast.com has finished the network analysis, then you can click on the ‘Show more info’ button to get a detailed overview of your network.

Revealing more information by clicking on the ‘Show more info’ button - If your bandwidth is lower than your needs, please contact your ISP to increase the network’s bandwidth. This way, your network can meet Steam’s network requirements.

However, if your bandwidth is fine, then move to the next solution.
Pre-requisite 2: Check Steam Server Status
If your network is fine, then the next thing is to check the stability of Steam’s server. If the Steam client gets stuck in the connection phase or doesn’t open, then there is a network issue or the Steam servers are down. But, since your network is fine, therefore, try the following steps for checking Steam’s servers.
- First, you’ll open any browser and go to either ‘Is Steam Down’ or the ‘Unofficial Steam Status’ website. Both websites are reliable, so you check Steam’s status according to your region.
- Secondly, you should know that “every Tuesday around 1-3 pm (Pacific Time), Steam goes down for routine maintenance.“ So, if your Steam won’t open Windows 10 around these hours (on Tuesday), then don’t panic.
If Steam’s servers are working fine in your case, then it’s time to try the main solutions.
Solution 1: Closing All Steam Tasks in Background
and Restarting the Steam Client
The most common reason for the Steam Client not opening is its already running processes in the background. So, it’s best to close those processes and restart the Steam Client.
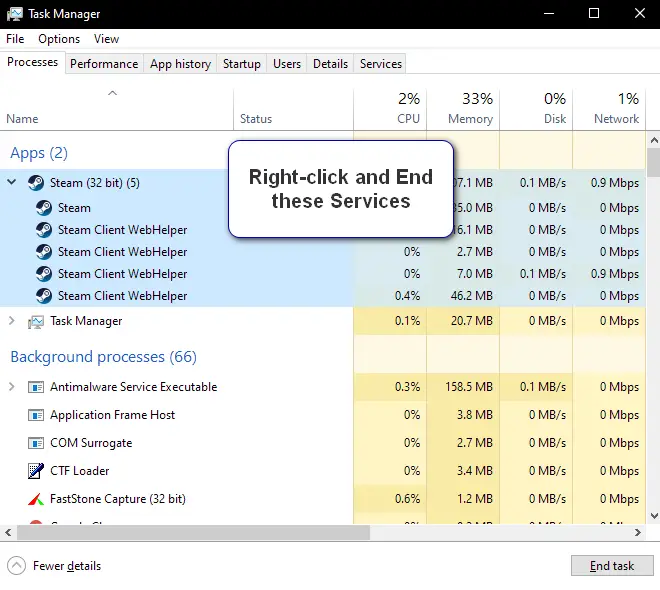
- First, you’ll open the ‘Task Manager’ by pressing the ‘Ctrl + Alt + Delete’ keys or searching in the Start Menu.
- Then, you’ll find the process named ‘Steam Client Processes’ and right-click on it. This will open a drop-down menu and you’ll select the ‘End task’ option.

Ending Steam Client Processes - This will end all the processes related to Steam Client.
- Now, you’ll try to open the Steam Client again and check if the issue persists.
If this method has resolved your steam won’t open when I click the icon issue, then good for you. Otherwise, try the next solution.
Solution 2: Restarting Your Computer
Sometimes, Steam Client not launching issue also occurs because of some corrupted game files. So, in this case, you can try restarting your system because this will refresh the operating system and remove the temporary files that can be the reason for this issue.
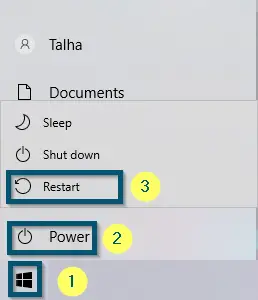
- So, you’ll go to the ‘Start menu’, then you’ll choose the ‘Power’ option, which will open a menu. From the menu, you’ll select the ‘Restart’ option.

Restarting the system - After the system restart, you’ll open the ‘Steam’ application again and check if the issue persists.
Solution 3: Disabling the Beta Client
If your Steam Client says verifying the installation and after that, it closes before going to the password window, or if the ‘Steam Client Service’ doesn’t appear in the ‘Processes’ tab after opening and you’re using a Beta Steam Client, then disabling that Beta Client will fix the issue.
- First, you’ll open ‘This PC’ (for Windows-10 and Windows-8/8.1, but if you’re using Windows-7, you’ll open ‘Computer’).
- Now, you’ll paste the following address in the address bar and press the ‘Enter’ key.
C:\Program Files\Steam\package
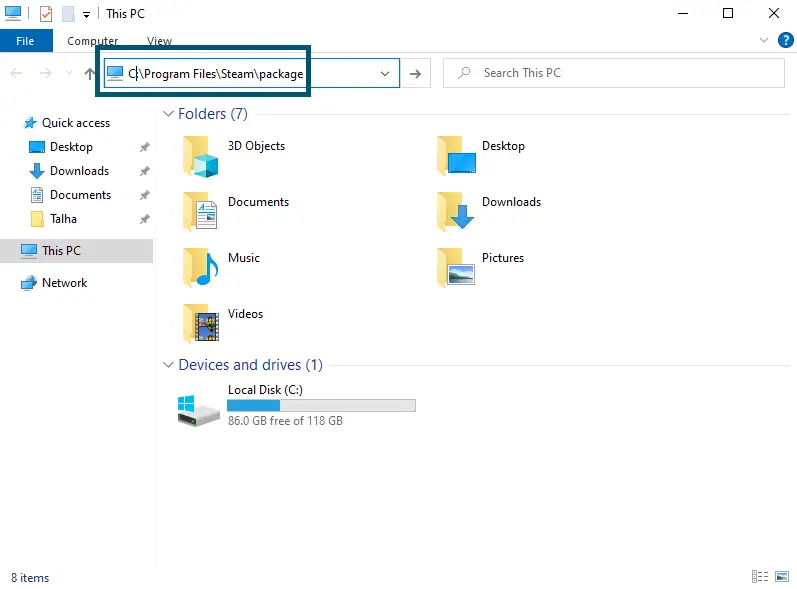
- The system will take you to the ‘package’ folder of ‘Steam.’ So, inside that folder, you’ll look for the file named ‘beta’ and delete it.

Deleting the ‘beta’ file in the ‘package’ folder of Steam
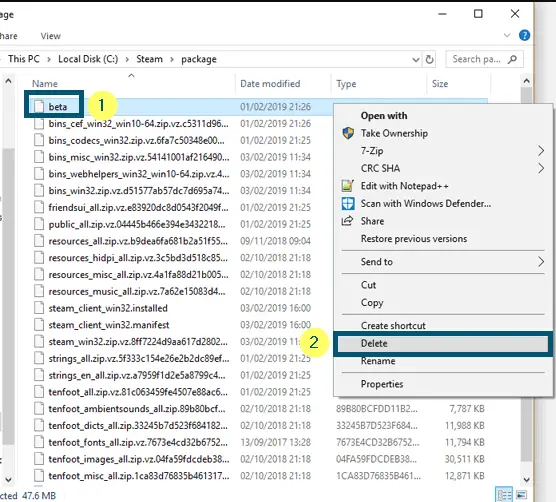
Note: If you didn’t find the ‘beta’ file, then you’re not running the beta client.
- After deleting the file, you’ll restart the Steam Client and it will update the client to the stable version.
Now, check if this solution has resolved your issue or not. If yes, then good for you, otherwise try the next method.
Solution 4: Reinstalling the Steam Client
If any of the above methods didn’t work, the last resort is to perform a clean uninstall and then reinstall the Steam Client. So, try the following steps.
Note: This solution will delete all of your downloaded Steam games. This will cause all the games to be downloaded again.
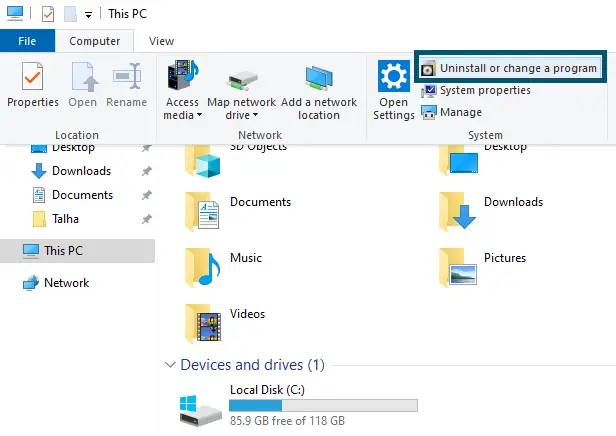
- First, you’ll open ‘This PC’ (for Windows-10 and Windows-8/8.1, but if you’re using Windows-7, you’ll open ‘Computer’).
- Then, you’ll choose the ‘Uninstall or change a program’ option.

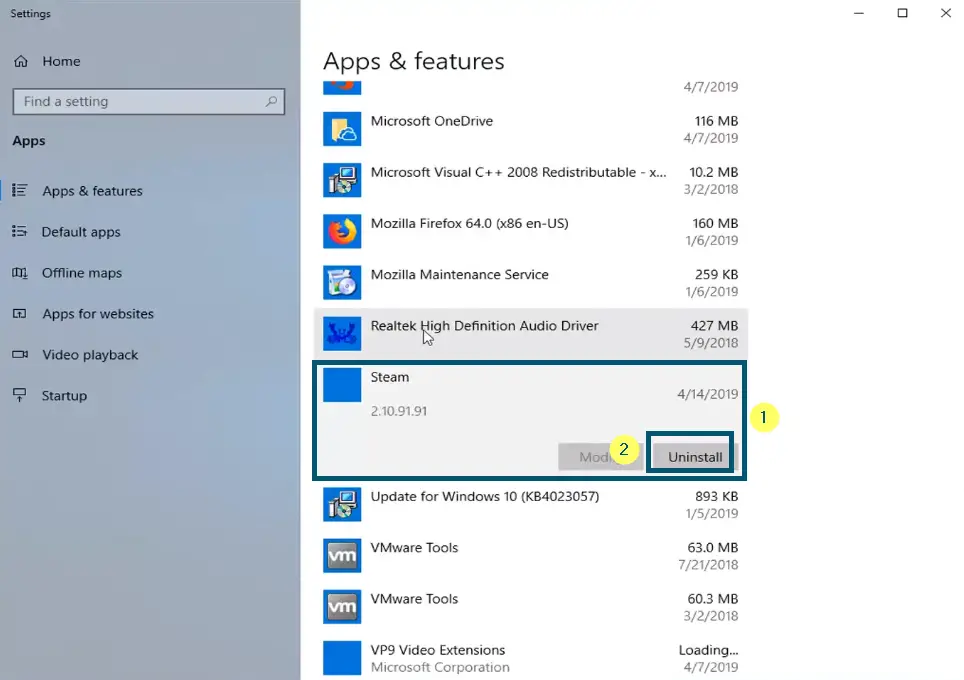
Choosing the ‘Uninstall or change a program’ Option - This will open the list of installed programs and from here, you’ll choose the ‘Steam’ Then, you’ll click on the ‘Uninstall’ button.

Choosing to uninstall the ‘Steam’ - The uninstallation procedure will begin and you’ll see the following window.

Uninstalling procedure of Steam

Note: If you have downloaded the Steam setup, then go to Step 6
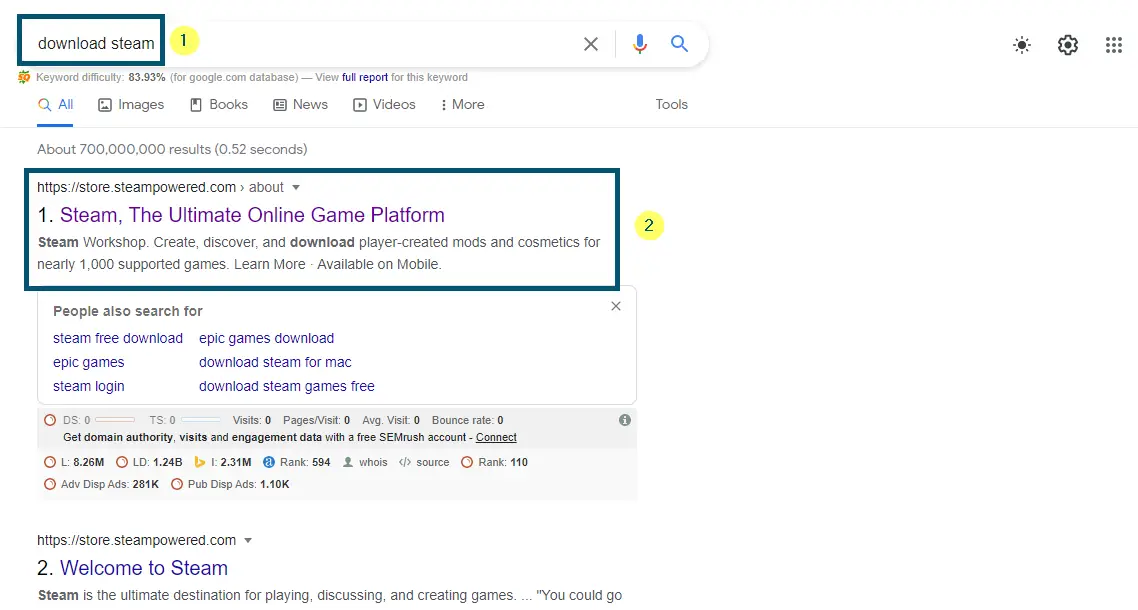
- Now, you’ll open any browser and type ‘download steam.’ Then, you’ll open the first link.

Opening the Steam downloading link - After that, you will click the ‘Install Steam’ button and the setup downloading procedure will begin.

Clicking on the ‘Install Steam’ button - Now, you’ll open the setup (after the completion of downloading procedure) and click on ‘Next’ after the welcome screen.

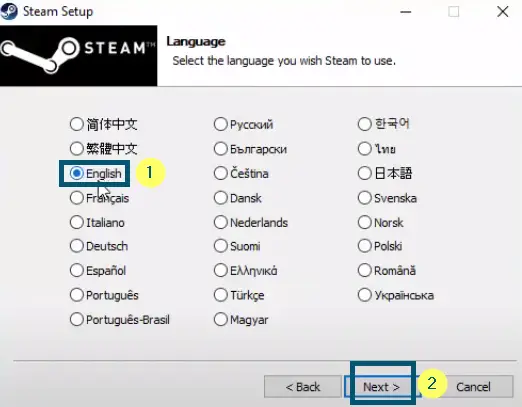
Clicking on the ‘Next’ button on the welcome screen - Then, you’ll choose the language and click on the ‘Next’ button.

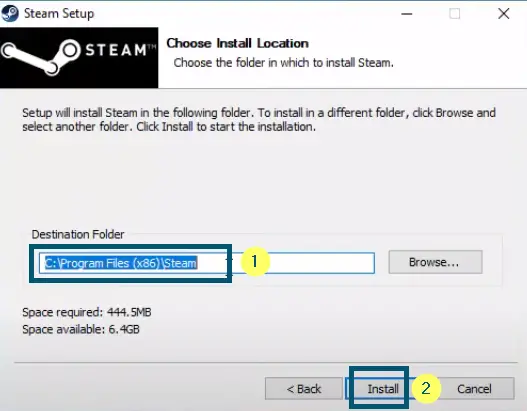
Choosing the language and clicking on the ‘Next’ button - After that, you’ll choose the installation directory and click on the ‘Install’ button. This will start the installation procedure.

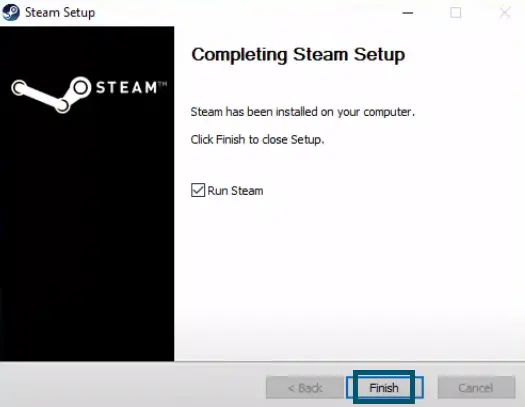
Choosing the installation directory and clicking on the ‘Install’ button - Once the installation is complete, then click on the ‘Finish’ button.

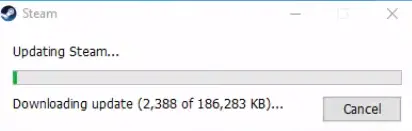
Clicking the ‘Finish’ button - Then, Steam will download some further files and after that, the system will take you to the Steam login window.

Further downloading of files in Steam - You’ll enter the credentials and then Steam will take you to the ‘LIBRARY’ tab.


If none of the solutions work, consider installing Steam through another user profile.
