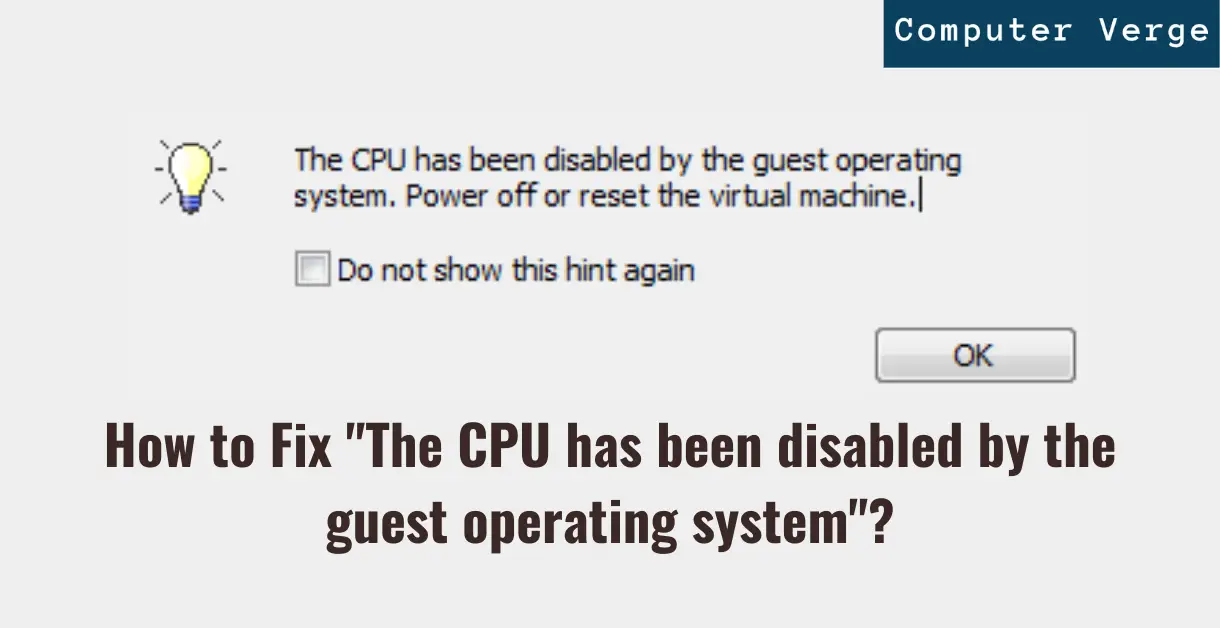
The error message: ‘The CPU has been disabled by the guest operating system’ is a virtual machine error message that occurs in VMware. This error message mostly occurs while trying to run a virtual operating system in VMware and its full form is:
This error message is not specific to any particular OS and processor’s family because users have faced this error message while installing images of Windows, Linux, and macOS operating systems on Intel and AMD CPUs. Here are some of the use-cases where this occurs most frequently:
Some instances in Ryzen

RedHat, CentOS, and Ubuntu in VMWare

Linux (including Kali)

macOS (OS X and BigSur included)
Before getting to the fixes, you should have a better understanding of this error message. That is why we will first discuss the causes of this error message and, after that, we will get to the solutions. So, without any further delay, let’s get going.
Why does this Error Message Occur?
After researching this error message for several days, we have found several reasons that could cause this error message. Here are the most common and relevant ones.
- Incompatible CPU: Sometimes the VMWare detects an incompatible CPU, which is why it shows you this error message. If this situation represents your case, you can solve it by masking the CPU ID.
- Disk configuration issues: This is the most common reason. Such issues might occur due to the recent changes you’ve made to the disk which has corrupted it containing the virtual machine and operating system.
- Incorrect Configuration keys: If you have an AMD system, then you have to use different configuration keys for your virtual machine. This is because AMD systems are different from Intel systems. If you don’t set the configuration keys according to your system, you will face this error message.
- Virtualization (VT-X) technology: VMWare Workstation needs this to run. If you have disabled this in your BIOS, you will face this error message.
- Cooling problems: Sometimes, the host operating system tries to cool down the system and, thus, prevents the user from running a virtual OS. In this case, the host OS prevents the user from displaying this error message.
So far, you have seen the probable reasons for the occurrence of this error message. Now, let’s get to the solutions to fix this error message.
How to Fix ‘The CPU has been disabled by the guest operating system’ Error Message?
The solutions to this error message vary from use case to use case. Therefore, before applying the steps of a solution, read its description to avoid any issues.
Pre-requisites
Let the Laptop Cool Down A Bit
If you use a laptop to run the virtual operating system and ‘VMWare Workstation’ shows the guest operating system a disabled error message, then Windows might be shutting off some cores to save energy.
As we know, most laptops don’t have a better cooling system than desktops. So, let the laptop cool down a bit and try again after a few hours.
Enabling Virtualization in BIOS
As mentioned earlier, the disabled virtualization (VT-X technology) could be the reason for this error message. So, before getting to the main solutions, enable virtualization (VT-X technology).
Step 1: Checking Whether VTX-Technology is Enabled or Not
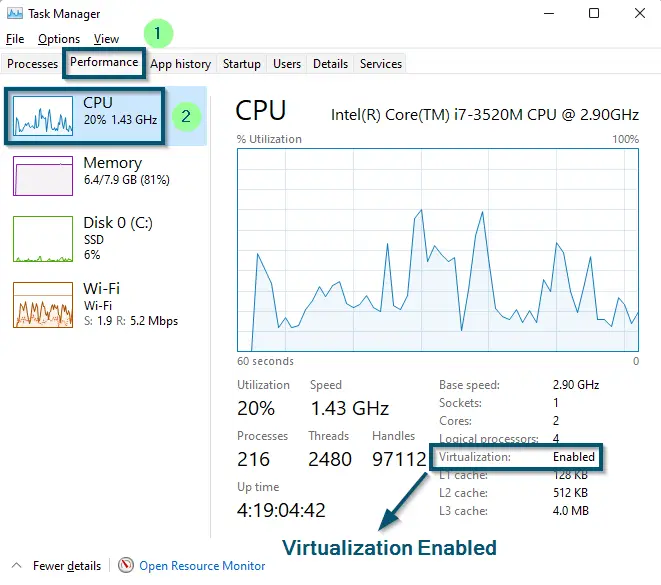
- First, check whether the VT-X technology is already enabled or not. So, go to the ‘Task Manager.’

Opening ‘Task Manager’ via ‘Start menu’ - Then, navigate to the ‘Performance’ tab and click on the ‘CPU’ activity.
- Now, check the details given under the graph and if you find the entry named ‘Virtualization: ’ as ‘Enabled,’ this indicates the VT-X technology is already enabled on your system. So, skip the next steps of this procedure and try the main solutions. However, if that is not the case, then follow the next steps.

Navigating to the ‘Performance’ tab and checking whether ‘Virtualization’ is enabled or not

Step 2: Enabling the VT-X Technology
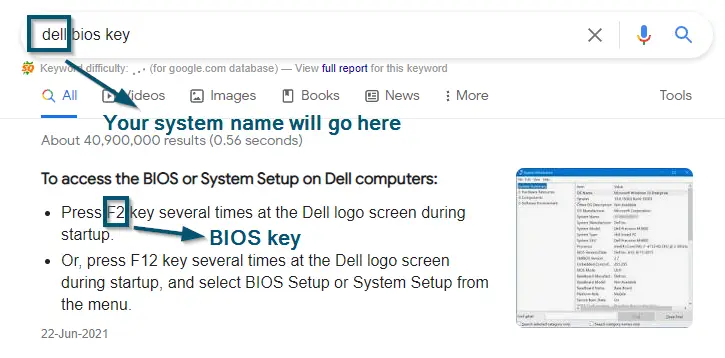
- Now, search for the BIOS key of your system on the internet. But if you already know it, then skip this step.

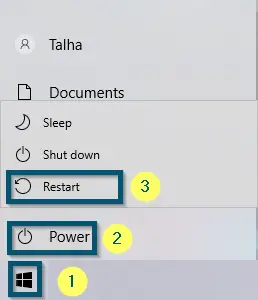
Searching for the BIOS key of the system on the internet - Now, restart your system by going to the ‘Start menu’ < ‘Power’ < ‘Restart’ options.

Restarting the system - Once your laptop displays the manufacturer’s logo upon restarting, press the BIOS key several times until the following window opens.

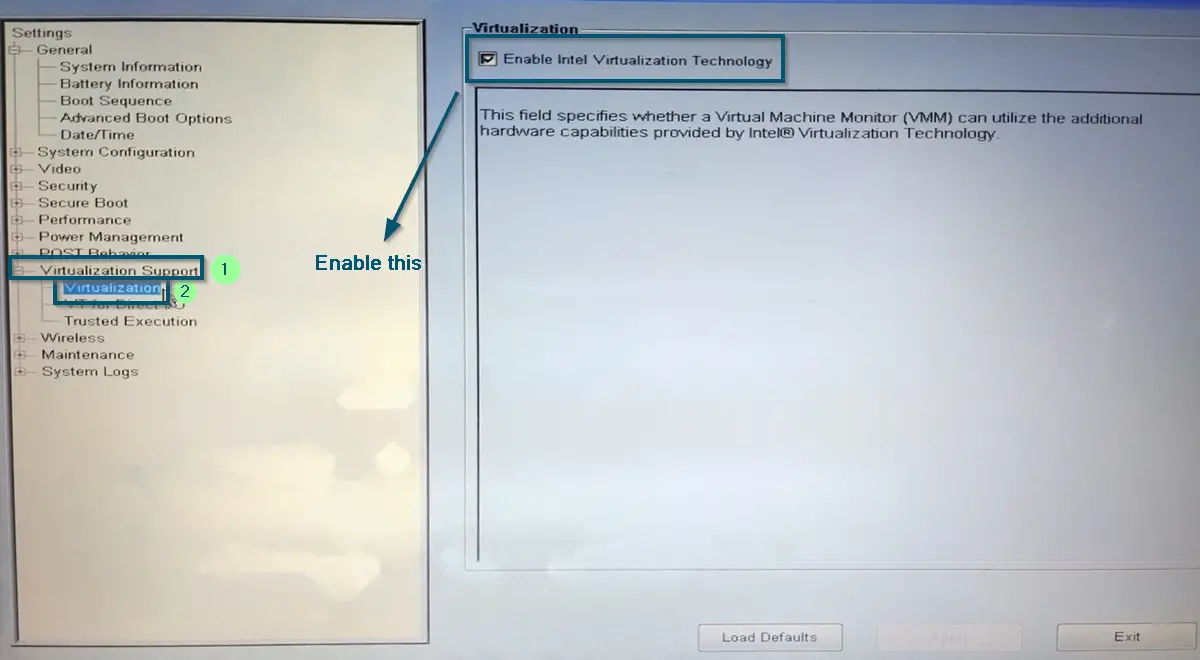
- Now, go to the ‘Virtualization Support’ option and expand it. Then, choose the ‘Virtualization’ option and inside the new option, check the ‘Enable Virtualization Technology’ option.

Enabling the ‘Intel Virtualization Technology’ inside the ‘Virtualization Support’ and ‘Virtualization’ options
Note: The user interface of BIOS varies from laptop to laptop. So, you can find mentioned settings according to your system
After that, exit by applying changes and run the VMWare application again to check if this tip has resolved this error message or not. If yes, then good for you. Otherwise, try the main solutions.
1. Adding the Configuration Keys for AMD Systems
& Changing the VM Hardware compatibility to ’10.x’
For People Facing this Issue of macOS Installation with AMD Systems
Apple doesn’t support operating system installation on non-Apple hardware. However, Apple is not the only one because, by default, VMWare Workstation Player also doesn’t support macOS installation. So, whether you have an Intel or AMD processor, and you need to install a macOS system, then adding configuration keys will do the trick.
Note: We have used the ‘16.0’ version of ‘VMWare Workstation Pro’ here
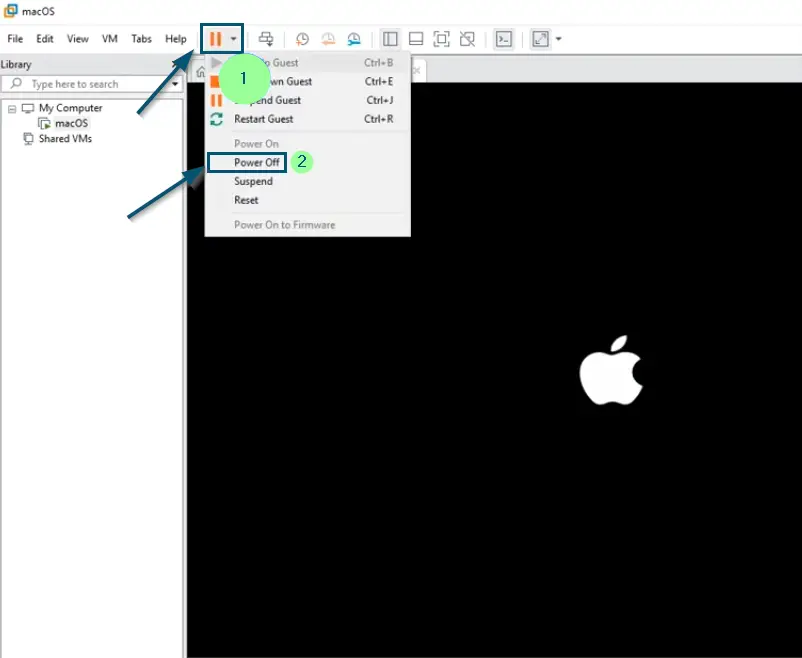
- First of all, power off your virtual machine if it is on.

Powering off the virtual machine
Step 1: Changing the ‘Hardware compatibility’ to ’10.x’
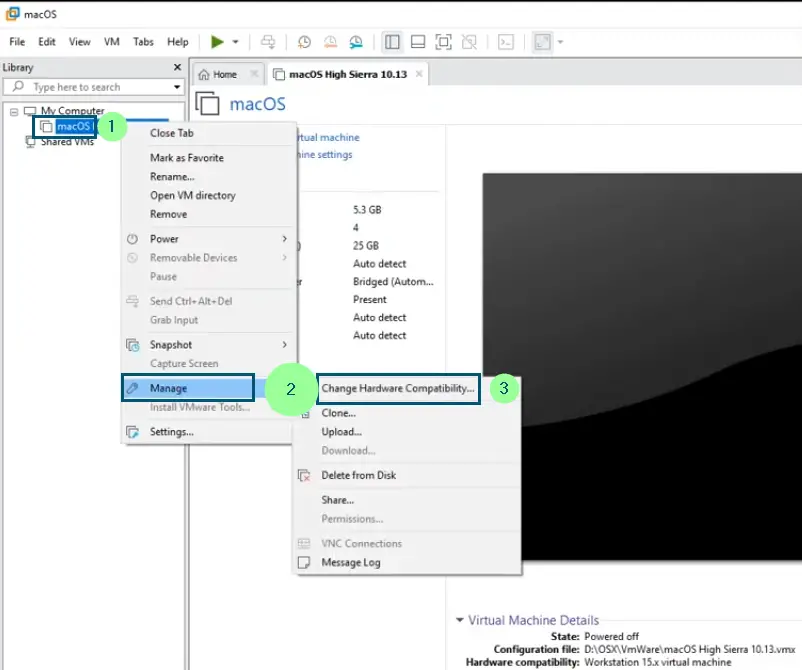
- Then, right-click on your virtual operating system, and from the drop-down menu, choose the ‘Manage’ option. After that, click on the ‘Change Hardware Compatibility’ option.

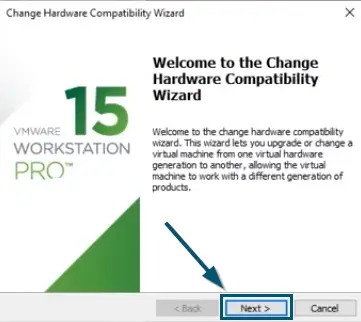
Right-clicking on the virtual machine and click on the ‘Manage’ < ‘Change Hardware Compatibility…’ options - A new sub-window will appear. So, click on the ‘Next’ button.

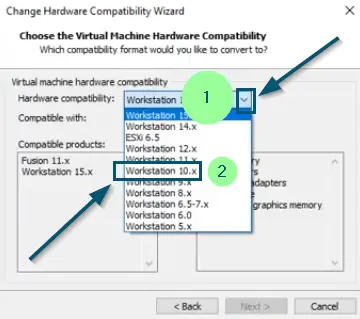
Clicking on the ‘Next’ button - Now, switch ‘Hardware compatibility:’ to ‘10.x’ and click on the ‘Next’ button.

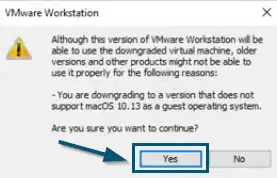
Switching ‘Hardware compatibility’ to ’10.x’, then clicking on the ‘Next’ button - A confirmation message will appear. So, click on the ‘Yes’ button.

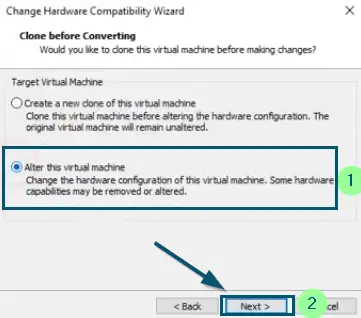
Clicking on the ‘Yes’ button of the confirmation message - In the next window, choose the ‘Alter this virtual machine’ option and click on the ‘Next’ button.

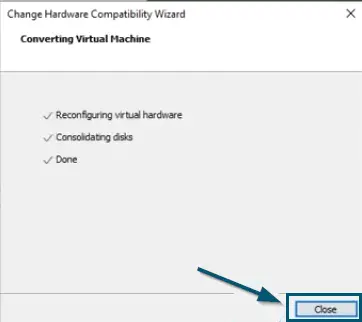
Choosing the ‘Alter this virtual machine’ option and clicking on the ‘Next’ button - Then, choose ‘Finish’ and after that, click on the ‘Close’ button in the subsequent windows.

Clicking on the ‘Close’ button
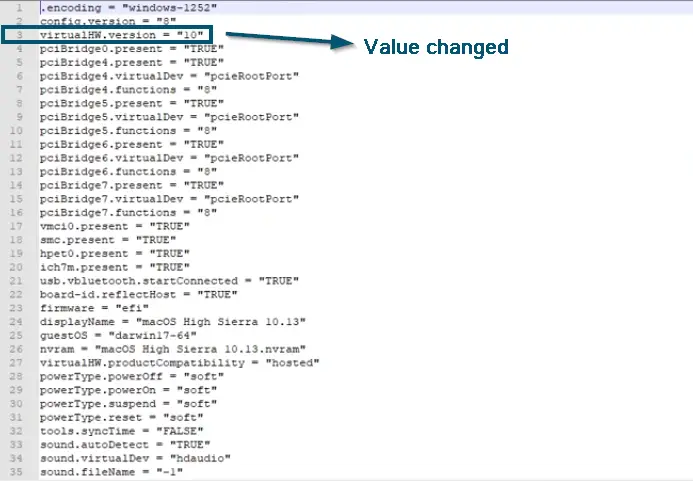
Note: You can change the ‘Hardware compatibility’ by opening the ‘.vmx’ file of the virtual operating system in Notepad and change the value of ‘virtualHW.version’ to ’10.’
Step 2: Adding the Configuration Keys for Virtual Machine
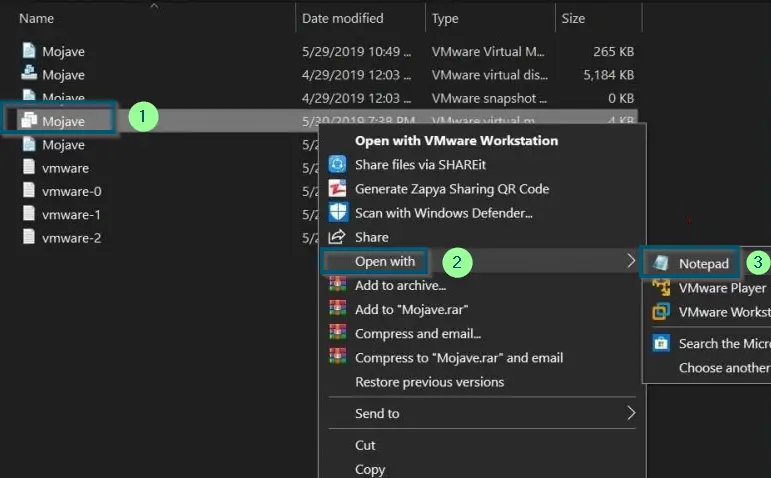
- Now, close the ‘VMWare Workstation Pro’ application and navigate to the virtual machine files. Then, right-click on the ‘.vmx’ file and choose the ‘Open with’ < ‘Notepad’ options.

Opening the ‘.vmx’ file of the virtual operating system in ‘Notepad’ - Once the system has opened the notepad file, then paste the following entries at the end of that file.
smc.version = 0

cpuid.0.eax = “0000:0000:0000:0000:0000:0000:0000:1011”

cpuid.0.ebx = “0111:0101:0110:1110:0110:0101:0100:0111”

cpuid.0.ecx = “0110:1100:0110:0101:0111:0100:0110:1110”

cpuid.0.edx = “0100:1001:0110:0101:0110:1110:0110:1001”

cpuid.1.eax = “0000:0000:0000:0001:0000:0110:0111:0001”

cpuid.1.ebx = “0000:0010:0000:0001:0000:1000:0000:0000”

cpuid.1.ecx = “1000:0010:1001:1000:0010:0010:0000:0011”

cpuid.1.edx = “0000:1111:1010:1011:1111:1011:1111:1111”

featureCompat.enable = “FALSE”

- After that, press the ‘Ctrl+S’ keys to save the new configurations.
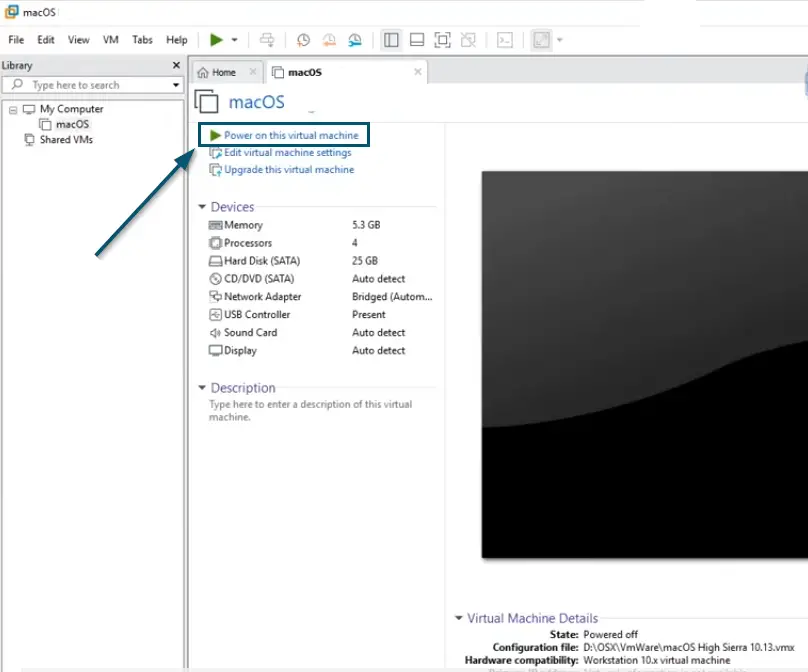
- Now, open the ‘VMWare Workstation Pro’ again and click the ‘Power on this virtual machine’ option.

Clicking on the ‘Power on this virtual machine’ option - If you are facing the same error message after saving the changes, then change ‘featureCompat.enable =’ entry to “TRUE.” After that, remove the ‘cpuid.ss’ and ‘wcpuid.ds’ entries from the enabled features. Plus, change the value of ‘cpuid.1.edx’ line to ‘ “0000:0111:1000:1011:1111:1011:1111:1111” .’
Note: Paste the above value with normal double-quotes because VMWare Workstation Pro will complain that the fancy double quotes are not a valid Boolean
This solution will solve this error message for the specified use case. But if you don’t want to perform these steps, you can use VirtualBox to install macOS as a guest operating system because it supports macOS installation by default. Moreover, if your use case is different, then try some other solution.
2. Turning Off Windows Subsystem for Linux &
Virtual Machine Platform
For Arch Linux
If you’re trying to use ‘Arch Linux’ as a virtual operating system on the VMWare Workstation Pro installed on Windows (host) operating system and you’re facing the same error message, then you might have enabled the ‘Windows Subsystem for Linux’ and ‘Virtual Machine Platform.’ Here, turning them off will fix your issue.
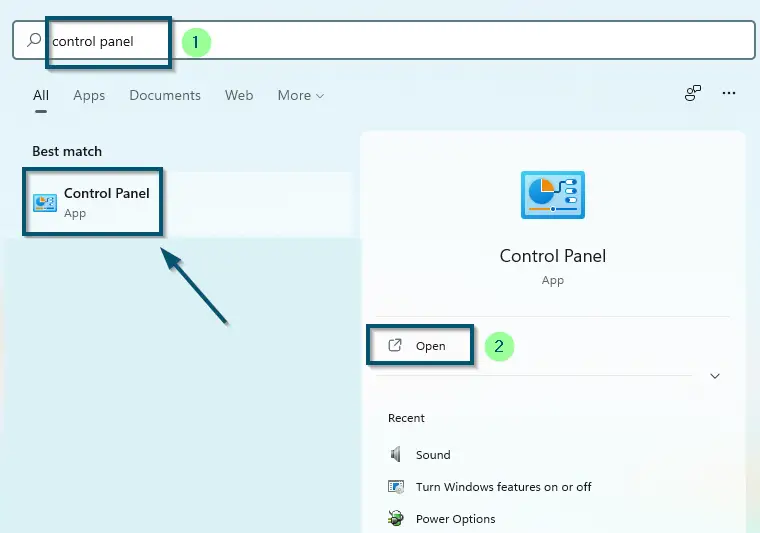
- First, go to ‘Control Panel’ on your (host) Windows operating system.

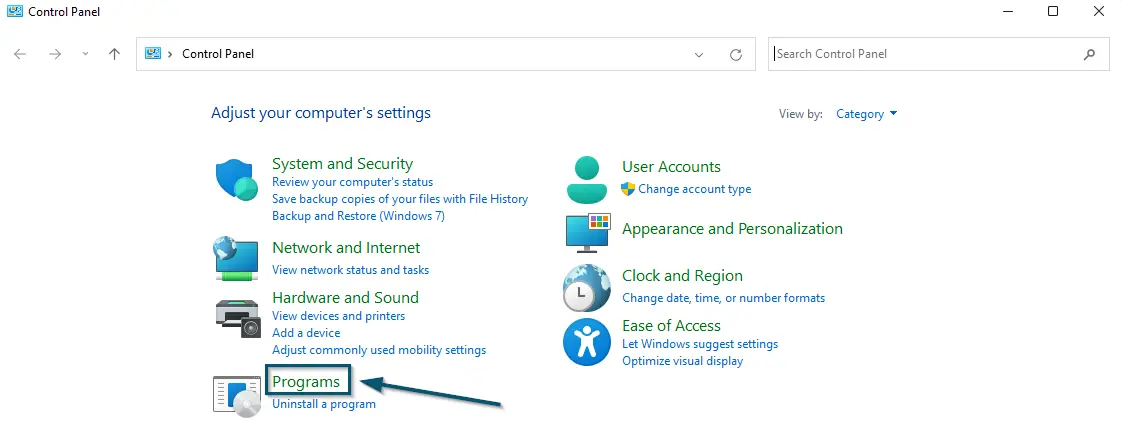
Opening ‘Control Panel’ via ‘Start menu’ - In the ‘Control Panel’ window, go to the ‘Programs’ option.

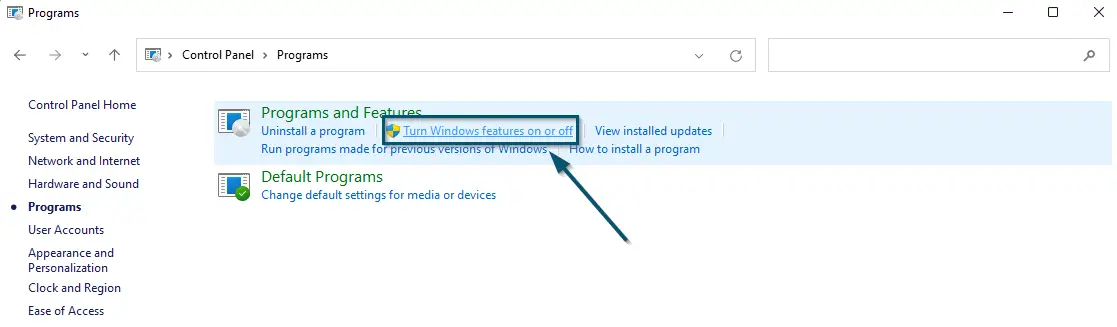
Clicking on the ‘Programs’ option in the ‘Control Panel’ window - In the new window, click on the ‘Turn Windows features on or off’ option.

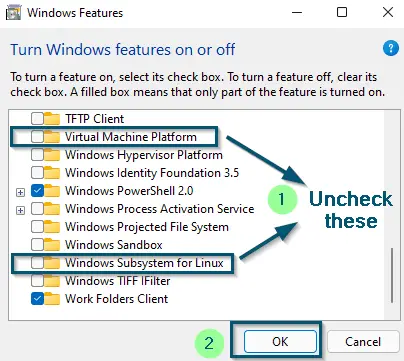
Clicking on the ‘Turn Windows features on or off’ option inside the ‘Program’ window of ‘Control Panel’ - After that, uncheck the ‘Virtual Machine Platform’ and ‘Windows Subsystem for Linux’ options. Then, click the ‘OK’ button.

Unchecking the ‘Virtual Machine Platform’ and ‘Windows Subsystem for Linux’ options inside the ‘Windows Features’ window - The system will perform its process and ask you to restart the computer to complete the procedure. So, you will restart the system.
- After the system restarts, open the ‘VMWare Workstation Pro’ application again and run the virtual OS.
If this solution has fixed your issue, then good for you because it has helped others with a similar use case. But if it doesn’t work, then keep reading this discussion.
3. Downgrading the ‘VMWare Workstation’ Application
If you’re getting this error message after upgrading the ‘VMWare Workstation’ to the latest version, then downgrade your VMWare Workstation version. This way, you won’t face this error message.
You can Google the query of ‘VMWare Workstation older version‘ and download an older version.
Conclusion
If you’re trying to install macOS Catalina (10.15) or later via VMWare, it might not work because this software doesn’t have graphics acceleration. This makes the operating system almost unusable. So, you can either try some other software that can run a virtual operating system like VirtualBox or use a heavy system. But if you want to use VMWare, you can check their guide regarding this matter.
Plus, when it comes to running some operating systems as a virtual OS, each operating system has specific requirements. So, make sure to read all the requirements before trying any of the online solutions.