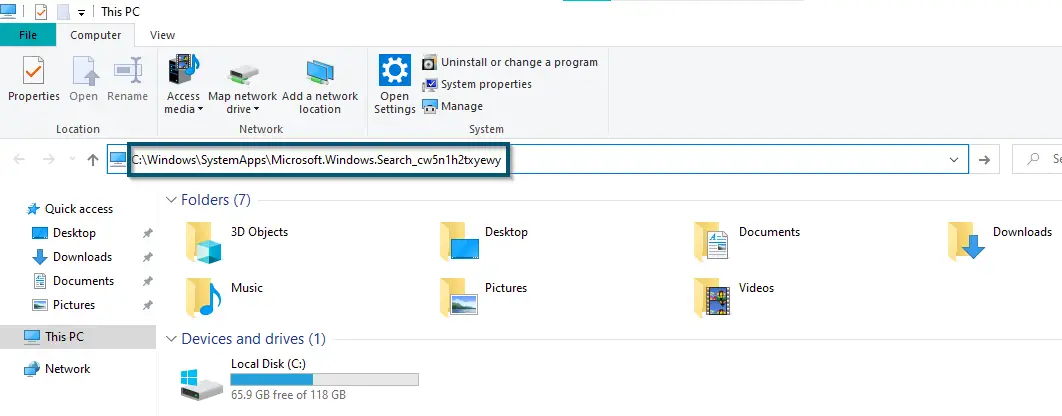
‘SearchApp.exe’ is an executable file that handles the working of the search function of the Windows taskbar. Since this application belongs to the search functions in Windows 10, therefore, you can find it in the following directory:
C:\Windows\SystemApps\Microsoft.Windows.Search_cw5n1h2txyewy
In the previous builds of Windows 10, this executable file was a part of Cortana, and back then, its name was ‘SearchUI.exe.’ But in the 19H1 update of Windows-10, Microsoft renamed this executable file and removed it from Cortana to distinguish this feature from the other components.
Often people face different issues with ‘SearchApp.exe’ and they try to disable this executable file. But this is a necessary windows process, so disabling this might cause the search feature to stop throughout the operating system.
The only way to fix this issue is by disabling this executable file. However, there are various ways to disable this executable file (permanently or temporarily). So, we’re going to discuss all the possible fixes to this issue.
But first, we will share some methods to check whether this file is harmful or not. So, without any further delay, let’s get right to it.
Is ‘SearchApp.exe’ Harmful?
The original ‘SearchApp.exe’ file is Microsoft’s executable file. However, sometimes cyber thieves deliberately give their processes the same name for injecting trojan or malware into a system. The infected executable files often use extensive system resources without activating them and if that’s your case, then removing those files should be your priority.
However, executable files are not always infected. So, it’s best to check the authenticity of any executable file that looks suspicious to you.
There are various ways to check the authenticity of an executable file. Some people use a third-party application. However, as ‘SearchApp.exe’ is Microsoft’s executable file, therefore, we will check this file for Microsoft’s digital signatures. So, let’s begin the SearchApp.exe virus detection process.
Method 1: Checking via the Properties of ‘SearchApp.exe’
Microsoft has included its digital signature in the catalog of this executable file. So, the procedure for checking the digital signatures for this file is pretty straightforward.
- First, you’ll open the ‘This PC’ window.
- Then, you’ll type the following address in the address bar of This PC’s opened window and hit the ‘Enter’ key:
C:\Windows\SystemApps\Microsoft.Windows.Search_cw5n1h2txyewy
- A new window will open and now you’ll locate the ‘SearchApp.exe’ file.

Locating the ‘SearchApp.exe’ file
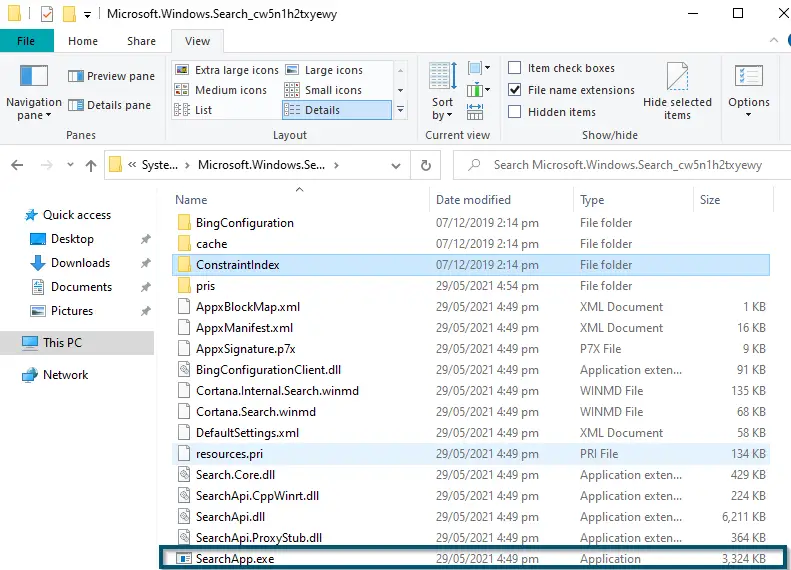
Note: If you’re using an older version of Windows-10 (older than 19H1 update), then look for ‘SearchUI’ instead of ‘SearchApp’
- Now, you’ll select the ‘SearchApp.exe’ file and press the ‘Alt + Enter’ keys to enter its ‘Properties’ window.
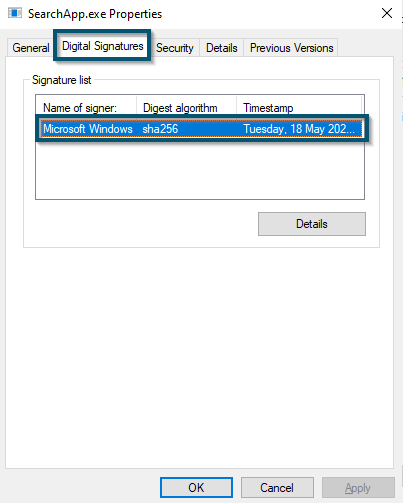
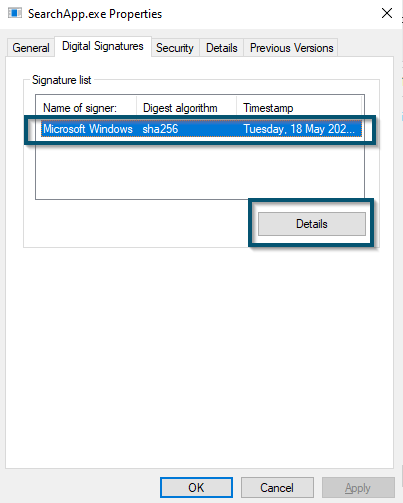
- Then, you’ll move to the ‘Digital Signatures’ tab and here you’ll find Microsoft’s ownership.

Moving to the ‘Digital Signature’ tab and finding Microsoft’s ownership - To get more information, you’ll select the signature and click on the ‘Details’ button.
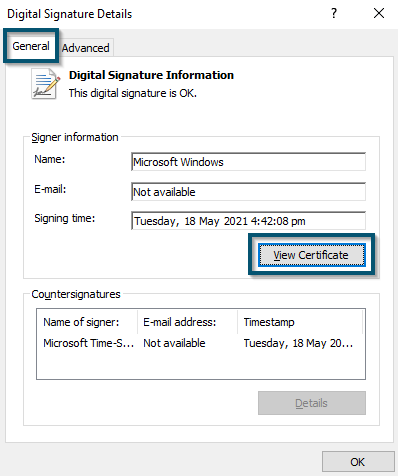
Clicking on the ‘Details’ button in the ‘Digital Signature’ tab - A new window will open and now, you’ll click on the ‘View Certificate’ button in the ‘General’ tab.

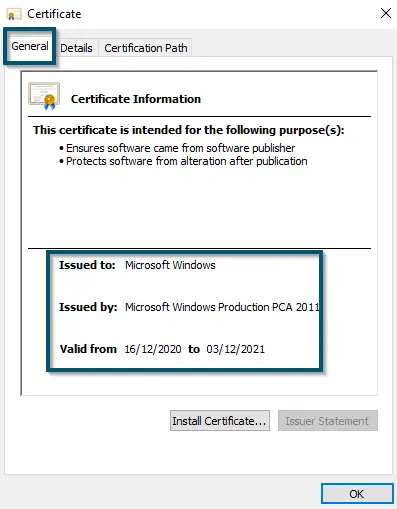
Clicking on the ‘View Certificate’ button inside the ‘General’ tab - This will open another new window and here you’ll find Microsoft’s certification information regarding this executable file.

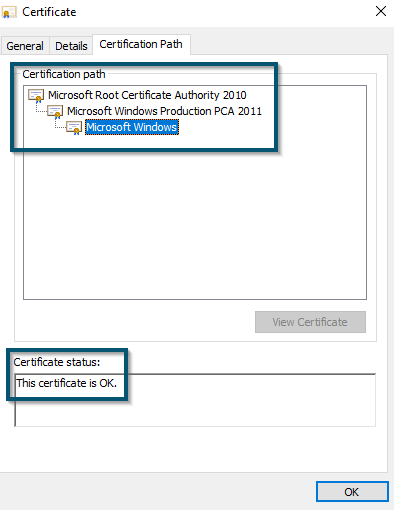
Finding Microsoft’s certificate information - You can also hover over to the ‘Certification Path’ tab and view the ‘Certificate status:’ section for verifying the certificate of this executable file.

Viewing ‘Certificate path’ and ‘Certificate status’
Method 2: Checking via CMD or PowerShell
If you can’t find the ‘Digital Signatures’ Tab in ‘Properties’ of ‘SearchApp.exe’
For some executable files, Microsoft doesn’t provide the digital signature information inside their catalog. So, if you’re in one such situation, then follow the steps below 👇🏻.
- First, you’ll follow the ‘first two steps of Method # 1’ for reaching the folder of the executable file (under-discussed).
- Now, you’ll open any browser and copy-paste the following link:
https://docs.microsoft.com/en-us/sysinternals/downloads/sigcheck

- Then, you’ll press the ‘Enter’ key to open the required webpage.
- From the new webpage, you’ll download the ‘Sigcheck’ application by clicking on the ‘Download Sigcheck’ option.

Downloading ‘Sigcheck’ - Once the download is complete, then you’ll extract the downloaded file.
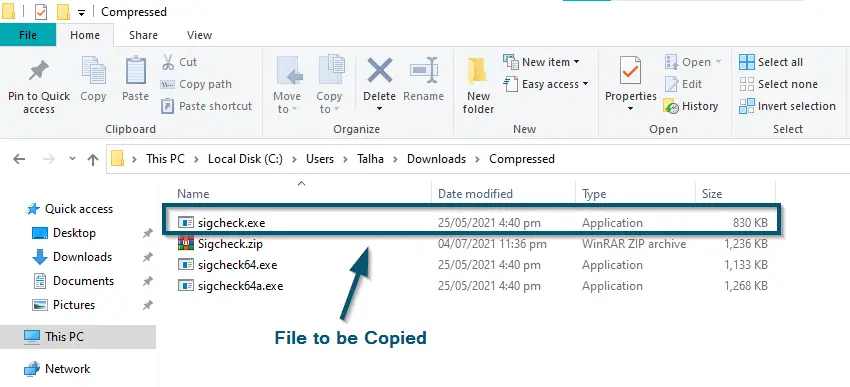
- After the extraction, you’ll select the file named ‘sigcheck’ and copy it.

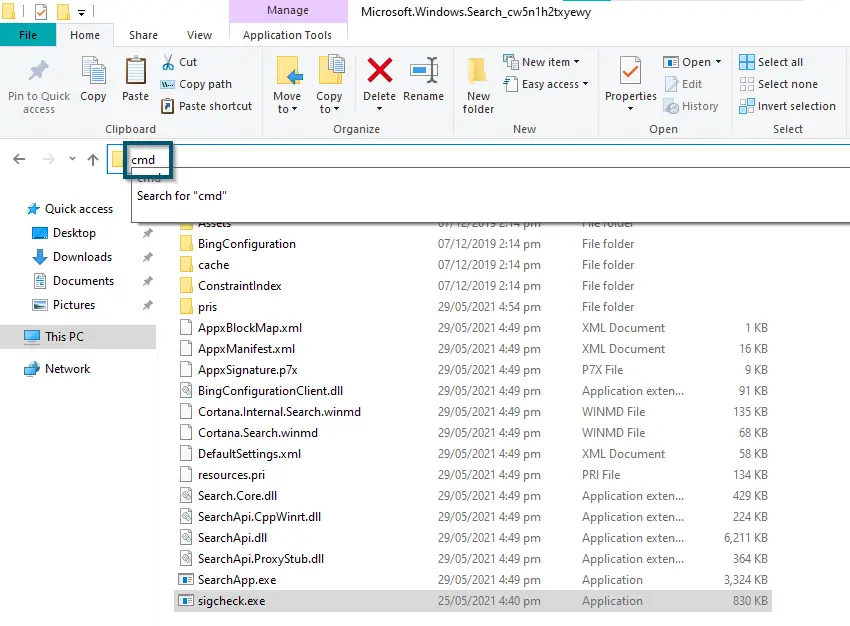
Selecting the ‘sigcheck’ file for copying - Now, you’ll paste the (copied) file inside the ‘SearchApp.exe’ folder and type ‘cmd’ in the address bar of that folder.

Typing ‘cmd’ in the address bar of the ‘SearchApp.exe’ folder - In the CMD window, you’ll type the following command and press the ‘Enter’ key to execute that command:

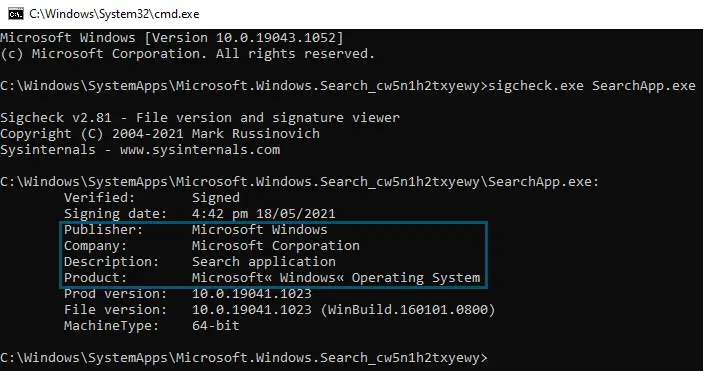
sigcheck.exe SearchApp.exe
- A new window will appear and here you’ll find the Digital Signature information of the executable file (under-discussed).

Verifying digital signatures via CMD
If you’ve followed both methods and after both methods, your signature information is similar to the provided information, then ‘SearchApp.exe’ is safe (in your case). However, if you didn’t find Microsoft’s ownership, then your executable file is a virus, and removing that file should be your priority.
How to Disable / Fix the Errors with the ‘SearchApp.exe’ File?
If you’re facing any of the mentioned issues with ‘SearchApp.exe’ and you want to disable this executable file, then you should know that disabling this will stop the search function of Windows 10 because the search feature in Windows 10 depends on this feature.
Disabling ‘SearchApp.exe’ via Deleting the ‘SearchApp.exe’ Folder
(Temporary Method)
In this solution, we will delete the root folder of the ‘SearchApp.exe’ file. But first, we have to kill its process from the Task Manager.
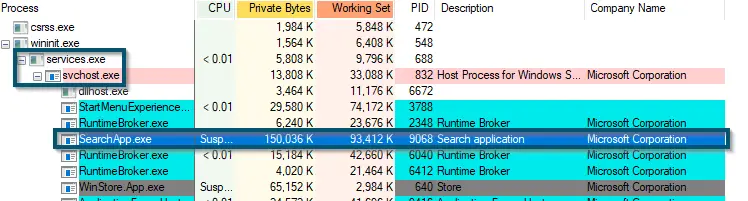
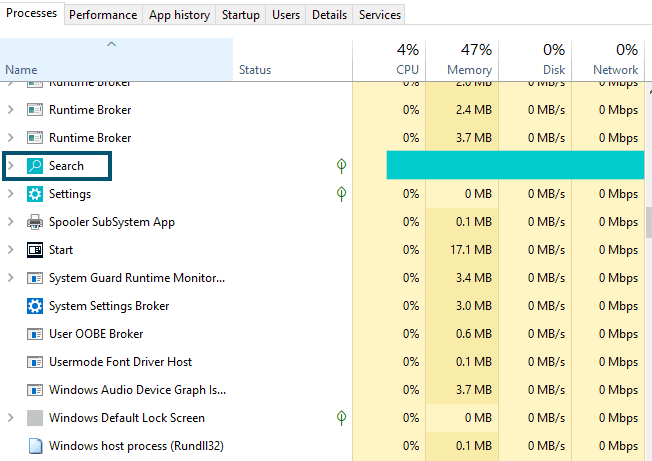
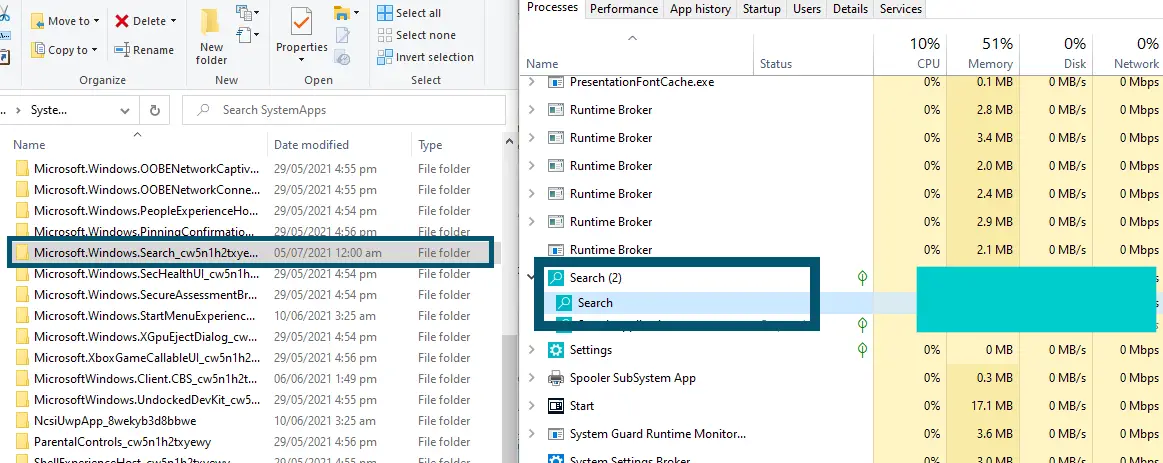
- First, you’ll open the ‘Task Manager’ by pressing the ‘Ctrl + Alt + Delete’ keys or searching in the Start Menu.
- Then, inside the ‘Processes’ tab, you’ll look for the ‘Search’ process.

Locating the ‘SearchApp.exe’ in Task Manager - Then, you’ll expand the ‘Search’ process and right-click on the selected process to open a drop-down menu.
- From the drop-down menu, you’ll choose the ‘Open file location’ option.

Selecting the ‘Open File Location’ option in Task Manager - This will open the root folder of the ‘Search’ process and I recommend opening both windows (Task Manager and Root Folder) side-by-side.

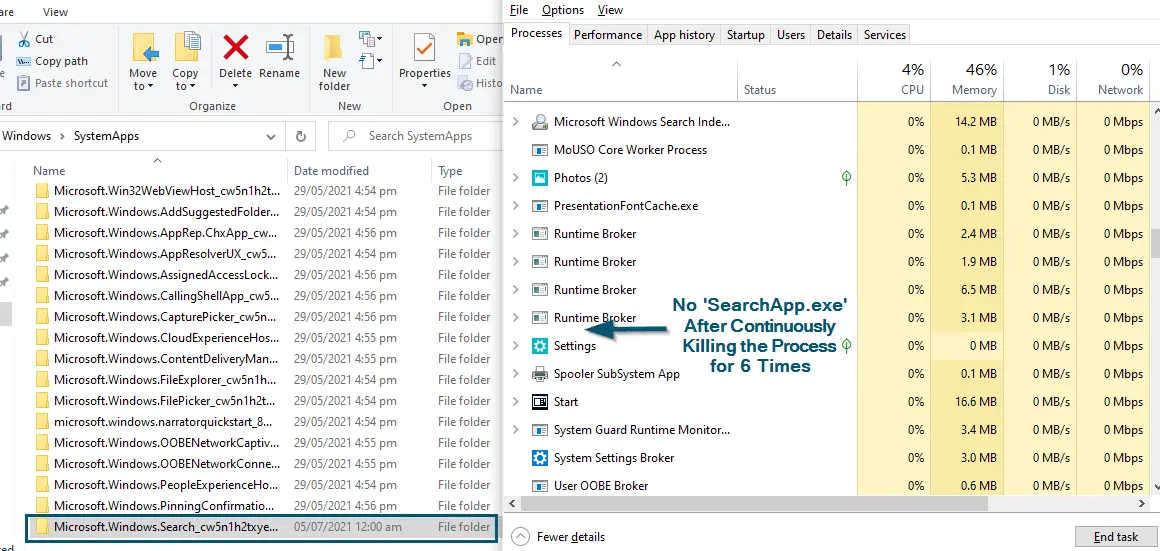
Opening ‘Task Manager’ and ‘Root Folder’ windows side-by-side - Now, you’ll kill the ‘Search’ process in the task manager. But keep in mind that you have to continuously delete this process 6-7 times. Because the system will automatically reopen this process until you delete it 6-7 times.

Killing the ‘Search’ process and selecting its root folder - Once the process is no longer in the task manager, then you can either rename the root folder of the ‘Search’ process or you can delete it.

After deleting, you won’t be able to use any of the search functions in Windows 10. But this will solve the issues with the ‘SearchApp.exe’ file.
However, after you install any update on Windows 10, the system will automatically enable this. So, if you want to delete this process permanently, then head over to the next solution.
Disabling it via CMD/PowerShell (Permanent Method)
If the above method didn’t resolve your issue or if you want to permanently delete the executable file (under-discussed), then follow the steps below. But keep in mind that the search facility in Windows 10 won’t work after deleting the search process because it’s a native windows component and disabling this might lead you to windows re-installation.
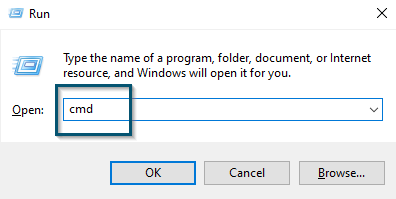
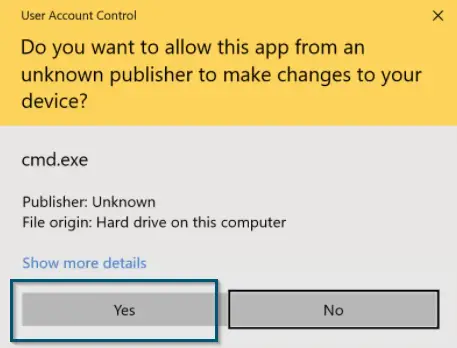
- First, you’ll press ‘Windows + R’ to open the Run dialog box and type ‘cmd.’ Then, (instead of pressing enter) you’ll press the ‘Ctrl + Shift + Enter’ keys to open the command prompt as administrator.

Typing ‘cmd’ in the ‘Run’ dialog box - In the next window, you’ll select ‘Yes’ for opening the ‘Command Prompt’ as administrator.

Choosing ‘Yes’ for running the ‘Command Prompt’ as Administrator - Now, you’ll copy and paste the following command in the command prompt to enter the ‘System Apps’ folder:
cd %windir%\SystemApps
- After that, you’ll type the following command again and again until it permanently kills the ‘Search’ process from the taskbar.
taskkill /f /im SearchApp.exe
Note: If you’re using an older version of Windows 10 (older than 19H1 update), then use ‘SearchUI’ instead of ‘SearchApp’
Note: You can also open a Task Manager window side-by-side as I’ve mentioned in the ‘5th Step of Solution # 1′
- Once the system has successfully deleted the process, then you can type the following command:
move Microsoft.Windows.Search_cw5n1h2txyewy Microsoft.Windows.Search_cw5n1h2txyewy.old
Now, you have successfully disabled the ‘SearchApp.exe’ or ‘SearchUI.exe’ file. This method will resolve any issues regarding this executable file because it has permanently deleted the executable file. But keep in mind that you can’t use any search feature inside Windows-10 now.
Disabling it by Deleting Cortana (For Users using old Windows 10 Build)
If you’re using the old Windows 10 build (older than 19H1 update) and the executable file is associated with Cortana, then you have to erase the Cortana permanently. So, follow the steps down below 👇🏻.
- First, you’ll open the ‘Windows PowerShell’ as administrator by searching it in the search bar and clicking on the ‘Run as administrator’ option.
- Then, you’ll choose the ‘Yes’ option in the next window to allow ‘Windows PowerShell’ to make changes to your system.

Allowing ‘Windows PowerShell’ to make changes to the system - Now, you’ll type the following commands in the PowerShell to remove Cortana permanently.

Get-AppxPackage *Microsoft.549981C3F5F10* | Remove-AppxPackage
- PowerShell will display the following message:

Windows PowerShell’s message - Then, you’ll type ‘exit’ to close the ‘Windows PowerShell.’

This method will permanently remove Cortana. But if you want to reinstall it, you can use the ‘Microsoft Store’ for that.
Enabling the ‘SearchApp.exe’ File:
If you want to enable the ‘SearchApp.exe’ or ‘SearchUI.exe,’ then, follow these steps:
Note: If you’re trying this method immediately after disabling the executable file (under-discussed), then it’s better to restart the system. Otherwise, this process might not work. However, if that’s not the case, then you don’t need to restart your system before this method.
- First, you’ll follow the ‘first 2 steps of Solution # 2’ for opening the ‘Command Prompt’ as administrator.
- In the ‘Command Prompt’ window, you’ll type the following command and press the ‘Enter’ key to execute this command:
cd %windir%\SystemApps
- Then, type the following command and press the ‘Enter’ key to execute this command:
move Microsoft.Windows.Search_cw5n1h2txyewy.old Microsoft.Windows.Search_cw5n1h2txyewy
Now, you’ll verify by clicking the search icon in the taskbar to see if it is working. If yes, then good for you, but if it’s not working, then you’ll restart your system. After restarting, it will work.
