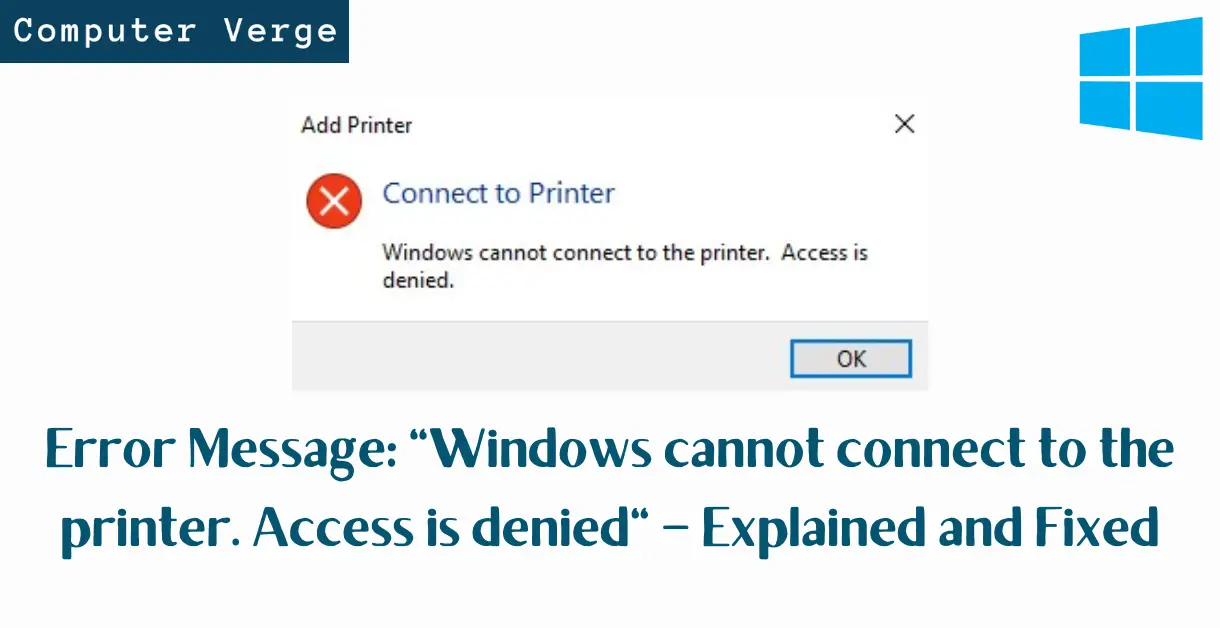
‘Windows cannot connect to the printer. Access is denied’ is a common printer error that Windows 10 users mostly face after installing the security update KB5005565 in Windows 10 or in some cases, out of the blue as well.
This error message occurs while adding a printer because of some issue with the ‘Print Spooler’ service. The ‘Print Spooler’ service is necessary for carrying out all the printing tasks successfully.
Variations of the ‘Windows Cannot Connect to the Printer’ Issue
Apart from Windows 10 users, Windows 7 and Windows XP users also face this error. This error message has several variations with almost all of them rooting to the same problem.
- Operation could not be completed (error 0x0000007e).
- Printer error access denied unable to connect.
- Access is denied 0x0000011b.
- Operation Failed with Error 0x00000002.
- Operation Failed with Error 0x0000007e.
- Access is denied server 2012 r2.
- No printers were found.
Following are the error codes that are displayed separately:
- 0x00000bcb
- 0x00003e3
- 0x11b
If your error message is one of those, then you will find the solution to your issue here.
Reasons for the Occurrence
After researching this error message for several days and troubleshooting it, we have found the following reasons for its occurrence.
- Print Spooler service is not running or is stuck in an error state.
- Pending documents might be locked in the printing documents queue.
- Permissions might not be granted to the computer. Typically, this happens in a network when multiple computers are sharing a single printer. In some cases, the administrator blocks the printing access.
- A corrupted or improper installation of the printer drivers might also cause this error message.
Prerequisites
Reinstalling the Printer
The most basic remedy to this error message is reinstalling the printer by checking whether all the wires are plugged right or not.
If reinstalling the wires of the printer didn’t resolve this error message, then move to the next tip.
Running the Basic Troubleshooter and Resetting the Printer
The next tip is to use the default troubleshooter of Windows to detect the problem. Mostly this doesn’t work but trying it won’t cost anything.
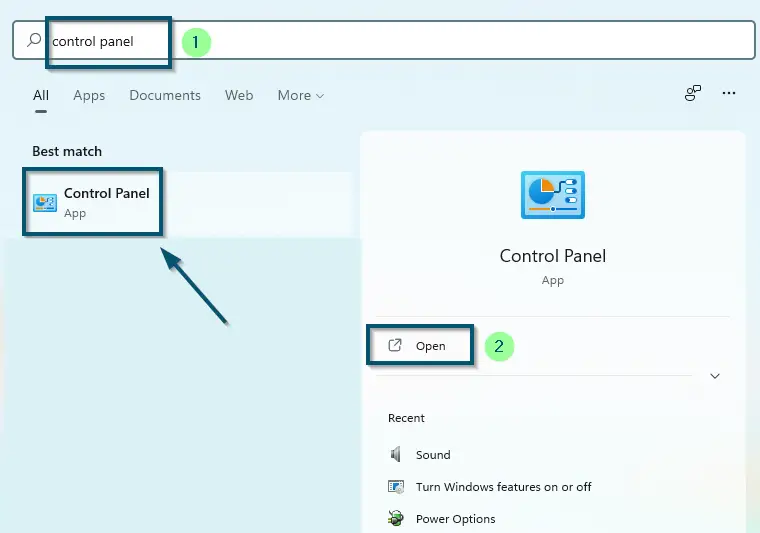
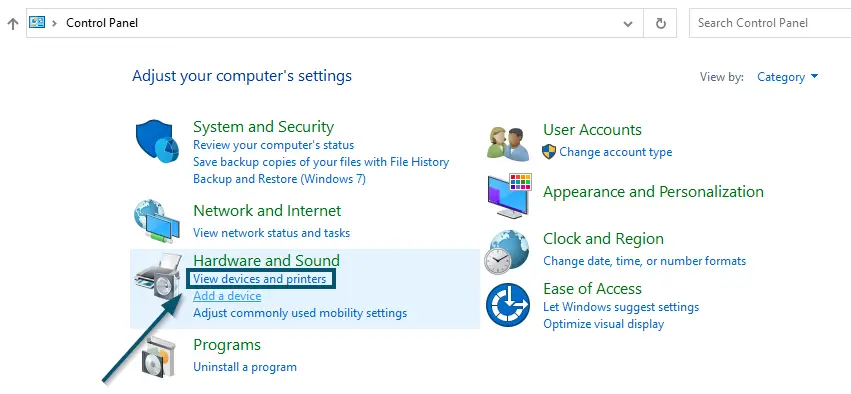
- So, go to the ‘Control Panel’ and choose the ‘View devices and printers’ option under the ‘Hardware and Sound’ section.

Opening ‘Control Panel’ via ‘Start menu’ 
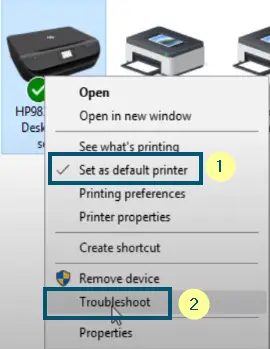
Choosing the ‘View devices and printers’ option under the ‘Hardware and Sound’ section - Now, right-click on your printer under the ‘Printers’ section and choose the ‘Set as default printer’ and ‘Troubleshoot’ options.

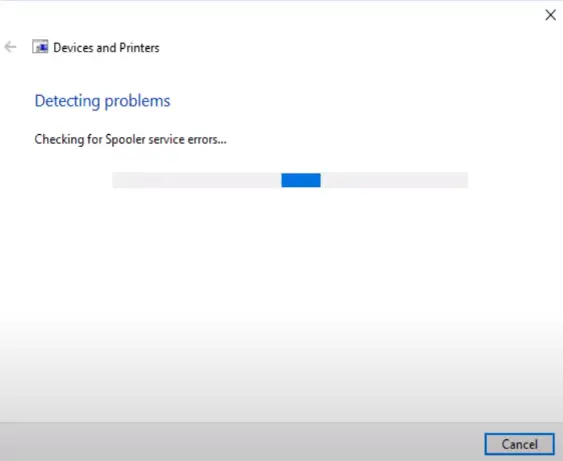
Setting the current printer as default and choosing the ‘Troubleshoot’ option - When you select the ‘Troubleshoot’ option, Windows will run a troubleshooter to find the problem you are facing with this device and try to fix it.

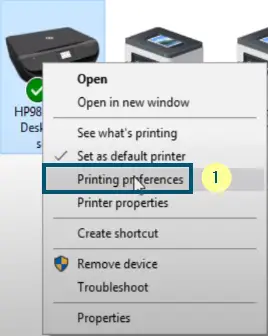
Windows is detecting the problems in the printer via default troubleshooter - Once Windows has finished the troubleshooting procedure, then right-click on the printer again and choose the ‘Printer preferences’ option.

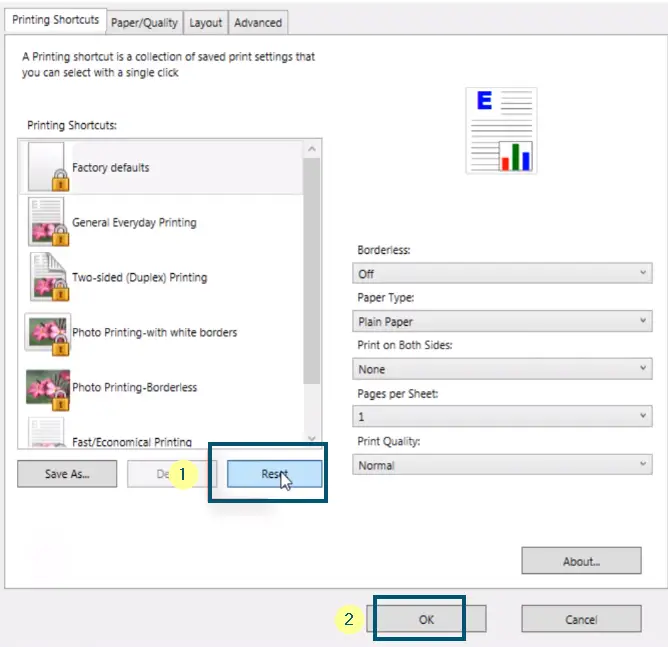
Clicking the ‘Printing preferences’ option by right-clicking the printer - A new window will open. So, click on the ‘Reset’ button and save the changes by clicking on the ‘OK’ button.

Clicking on the ‘Reset’ button and then, choosing the ‘OK’ button
Checking the Drivers of the Printer
The next tip is to reinstall the printer drivers because sometimes faulty or corrupted drivers’ updates can also cause this issue.
- So, go to the ‘Device Manager’ window and find your printer.
- Then, right-click on it and choose the ‘Uninstall device’ option.
- Now, reconnect the printer again and Windows will automatically install the best possible drivers. However, if you are using an older version of Windows, like Windows-XP/Vista/7, then you may have to install the drivers manually.
- So, go to the official website of your printer’s manufacturer and download and install the drivers.
If reinstalling the printer’s drivers didn’t resolve this error message, then move to the main solution.
How to Fix the Issue?
Before trying any solution, read the description of the solution because the solutions to this error message vary from use case to use case. So, it’s better to read the description first because it will save you from trying anything stupid and wasting your time.
1. Editing ‘Providers’ in Windows Registry
If none of the methods work, we are going to delete a registry key in the ‘Providers’ section in the Windows registry. We recommend backing up your registry before proceeding as you can always revert the changes back if this doesn’t work.
- Press Windows + R, type ‘regedit‘ in the dialogue box, and press Enter.
- Once in the registry editor, navigate to the following path:
HKLM\SOFTWARE\Microsoft\Windows NT\CurrentVersion\Print\Providers
- Now, delete the following key from this registry:
Client Side Rendering Print Providers
- The last step is to restart the Print Spooler service. Press Windows + R, type “services.msc” in the dialogue box, and press Enter.
- Search through the services until you find the service. Open its properties and Stop the service. After waiting a few seconds, Start it again.
- Now try connecting to the printer and see if this solves the problem.
2. Removing the ‘Deny’ Permission from /spool/drivers
Another workaround as reported by numerous Redditors was to remove the ‘Deny’ permission from the following file path:
C:\Windows\System32\spool\drivers
This seems to do a quick fix if the issue is originating from not having enough permissions available. This was particularly the case after updating Windows to the latest build available.
Here is a batch file you can use to instantly perform the action instead of manually changing the permissions
@echo off
net  stop  spooler
takeown  /F  C:\Windows\System32\Spool\Printers  /R
icacls  C:\Windows\System32\Spool\Printers  /T  /Grant Everyone:F
del  /Q  C:\Windows\System32\Spool\Printers\*.*
net  start  spooler
You can learn more about how to create Batch files from an article on Windows Central.
3. Enabling the Guest Account
If you are using a printer in a computer network, the administrator might have disabled your guest account. Here, enabling the guest account will resolve this issue for you.
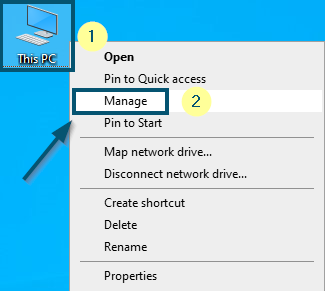
- First, right-click on ‘This PC’ (for Windows-10 and Windows-8/8.1 users) on the computer with which you have (physically) attached the printer. But if you are using Windows-7 or Windows-XP, then the required option would be ‘Computer’ or ‘My Computer.’
- Then, choose the ‘Manage’ option to open the ‘Computer Management’ window.

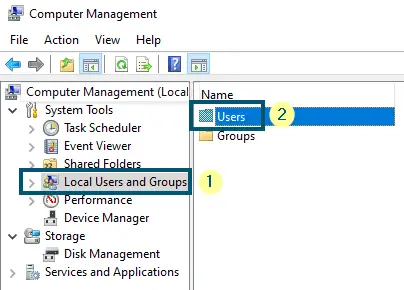
RIght-clicking on ‘This PC’ and choosing the ‘Manage’ option - After that, go to the ‘Local Users and Groups’ and inside that, go to the ‘Users’ folder.

Going to the ‘Local Users and Groups’ and inside that, opening the ‘Users’ folder - Now, you will find a ‘Guest’ account inside the ‘Users’ folder and the administrator of your network may have disabled this account, which is why you are facing this issue.
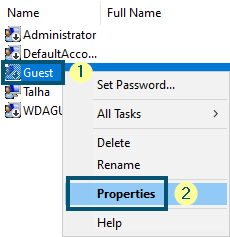
- So, right-click on the ‘Guest’ account and choose the ‘Properties’ option.

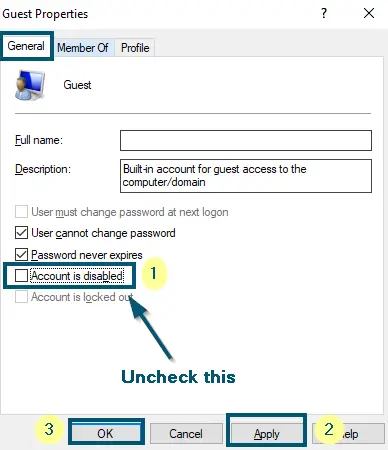
Going to the ‘Properties’ of ‘Guest’ account - Then, uncheck the box that says ‘Account is disabled’ inside the ‘General’ tab.
- After that, click on the ‘Apply’ and then the ‘OK’ button.

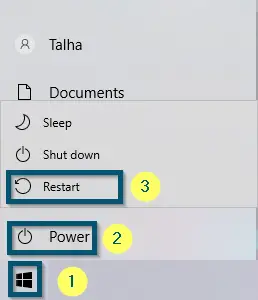
Unchecking the ‘Account is disabled’ option and clicking on the ‘Apply,’ then the ‘OK’ button - Now, restart the system.

Restarting the system by going to the ‘Start’ < ‘Power’ < ‘Restart’ options
After restart, check whether this solution has fixed the error message.
4. Creating a New Port While Connecting to the Shared Printer
Suitable for Shared Printers
If you have faced the error message while attempting to add the network printer, then try this solution. Even if you have already applied the basic troubleshooting, such as checking the security settings of the shared printer, check the sharing settings to make sure that the file and printer sharing is enabled.
Sharing the Printer from the Host Computer/Laptop
- First of all, share the printer as usual from the computer on which you have physically attached the printer. So, ‘follow Step 1 of Tip # 2’ to reach the ‘Devices and Printers’ window.
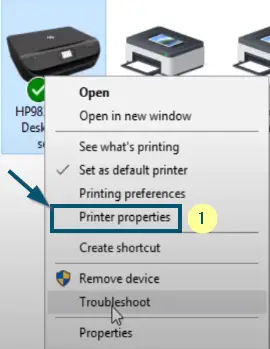
- Now, right-click on your printer under the ‘Printers’ section and choose the ‘Printer properties’ option.
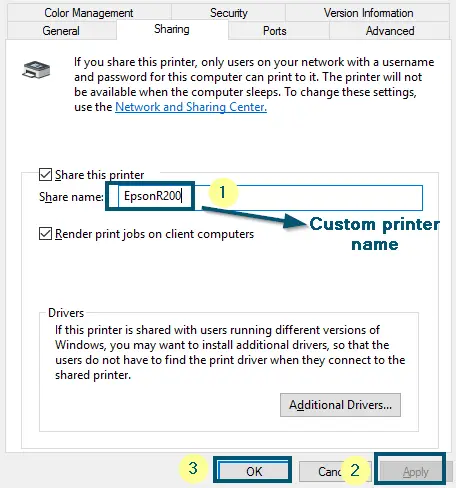
Choosing the ‘Printer properties’ option of the connected printer - Then, go to the ‘Sharing’ tab and type an easy-to-remember name of the printer. In our case, we have used ‘EpsonR200.’

Typing a custom printer name while sharing and clicking on the ‘Apply,’ then the ‘OK’ button
Connecting to the Shared Printer from the Other Computer/Laptop
- Now, on the other computer (from which you want to connect to this printer), we will run the printer wizard as usual. So, go to the ‘Control Panel’ again and choose the ‘View devices and printers’ option under the ‘Hardware and Sound’ section according to ‘Step 1 of Tip # 2.’
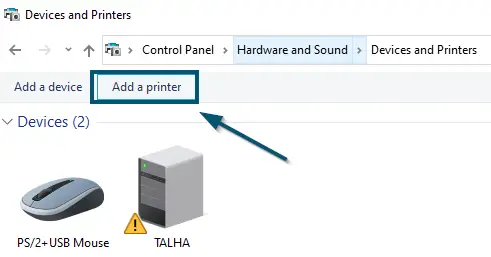
- Now, click on the ‘Add a printer’ option in the new window.

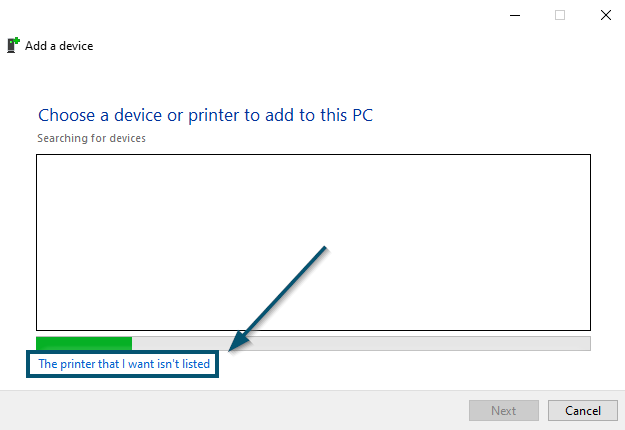
Clicking on the ‘Add a printer’ option inside the ‘Devices and Printers’ window - Then, windows will run a scan to find the attached printer. So, click on the ‘The printer that I want isn’t listed’ option.

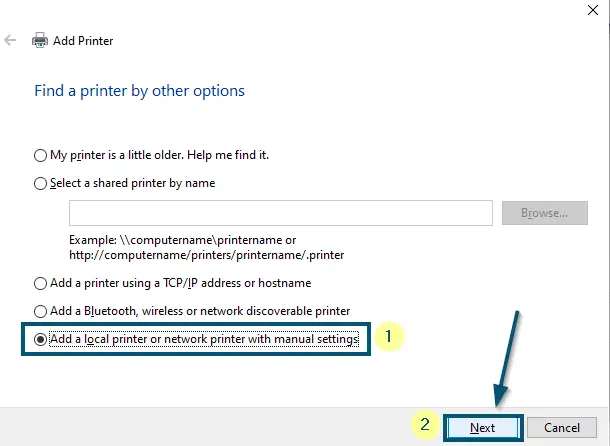
Choosing the ‘The printer that I want isn’t listed’ option - A new window will open. So, choose the ‘Add a local printer or network printer with manual settings’ option and click on the ‘Next’ button.

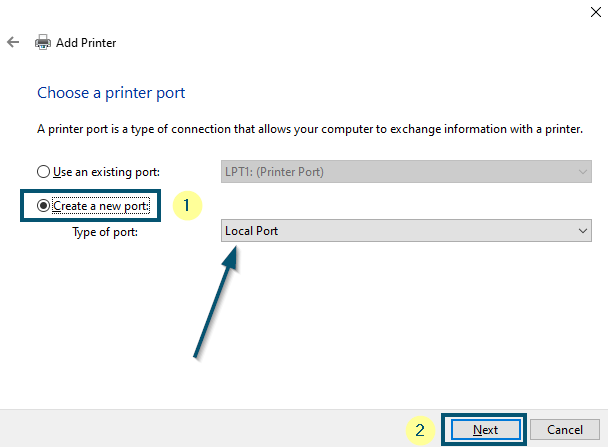
Choosing the ‘Add a local printer or network printer with manual settings’ option and clicking on the ‘Next’ button - After that, choose the ‘Create a new port’ option and keep the ‘Type of port:’ as ‘Local Port.’ Then, click on the ‘Next’ button.

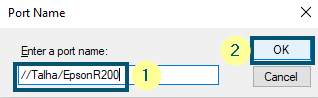
Choosing the ‘Create a new port’ option and keeping the ‘Type of port’ as ‘Local Port.’ then, clicking on the ‘Next’ button - Now, type the port name in this format ‘//computername/printername.’ So, in our case, the ‘computername’ is ‘Talha’ and ‘printername’ is ‘EpsonR200.’
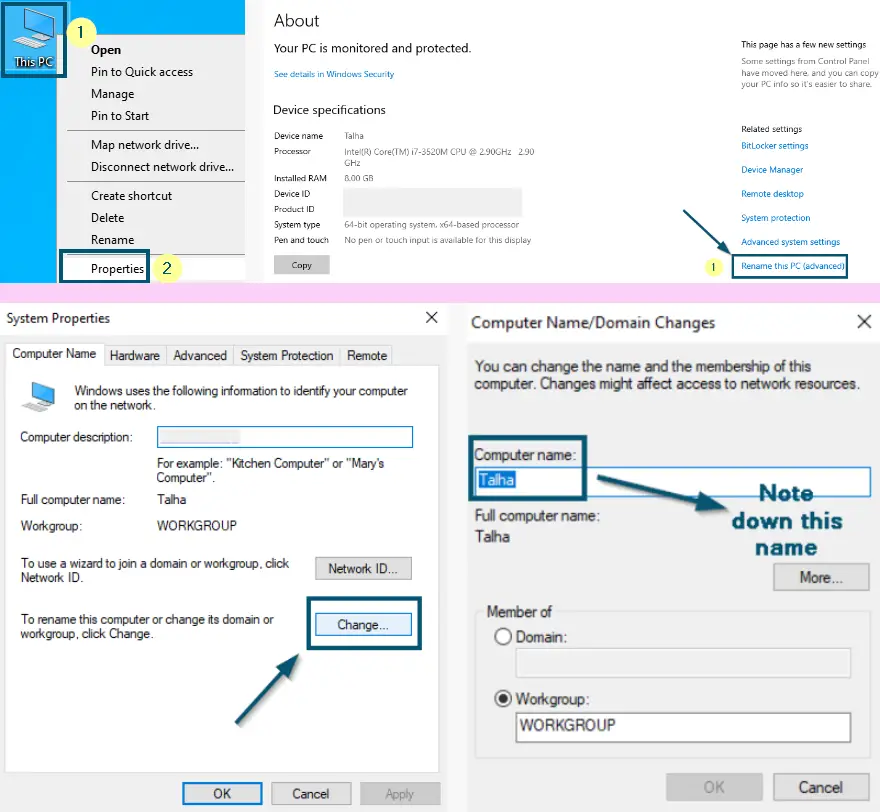
Note: If you don’t know your computer name, then right-click on ‘This PC’ (or ‘Computer’) and choose the ‘Properties’ option. Then, choose the ‘Rename this PC (advanced)’ option and click on the ‘Change…’ button to view your ‘Computer name:’
Note: Make sure that you are using the name of that computer, on which you have (physically) attached the printer
- Then, click on the ‘OK’ button.

Entering the port name and clicking on the ‘OK’ button - Next, Windows will ask you to select the make and model of the printer, install its drivers, etc. So, keep following the wizard and provide the information it requires to connect to the printer successfully.
After following all the steps, this solution will definitely solve the ‘shared printer access denied unable to connect windows 10’ error message for you because it worked for others in the past. But if this solution didn’t prove useful, then try the next solution.
5. Disabling the Mitigation for CVE-2021-1678
If you are receiving the error message after installing the Windows security update (KB5005565), then this might be an issue with the ‘Print Spooler’ service. Here, uninstalling the faulty security update will fix this issue. But if you don’t want to uninstall the update, then disable the mitigation for CVE-2021-1678 with the help of the following guide.
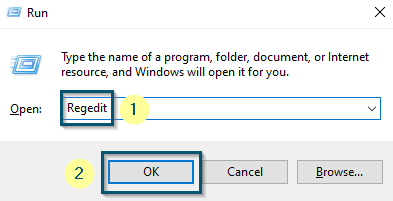
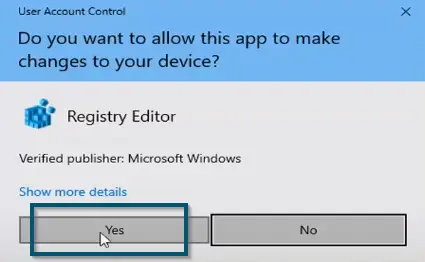
- Press the ‘Windows + R‘ keys to open the ‘Run’ dialog box and type ‘Regedit’ in the text box. Then, click the ‘OK’ button.

Opening the ‘Run’ dialog box and typing ‘Regedit’ - In the next window, click on the ‘Yes’ button to allow the windows ‘Registry Editor’ to make changes to your device. This will open the Registry Editor.

Clicking on ‘Yes’ to open the ‘Registry Editor’ - Now, paste the following address after ‘Computer’ in the address bar of ‘Registry Editor’ and hit the ‘Enter’ key to reach the required folder.
\HKEY_LOCAL_MACHINE\SYSTEM\CurrentControlSet\Control\Print
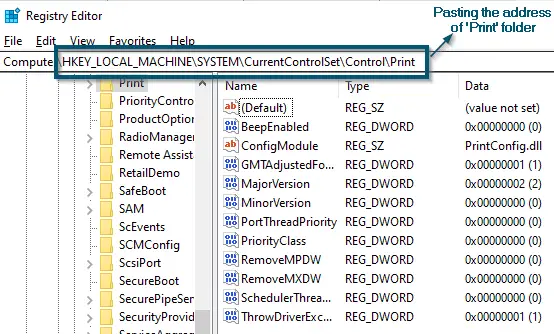
- Now, right-click on the space inside the ‘Print’ folder and choose the ‘New’ < ‘DWORD (32-bit) Value’ options.

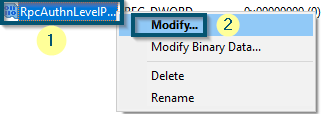
Right-clicking on the empty space inside the ‘Print’ folder and choose the ‘New’ ‘DWORD (32-bit) Value’ option - Then, rename the newly created value as ‘RpcAuthnLevelPrivacyEnabled.’
- Right-click on the newly created value and click on the ‘Modify…’ option.

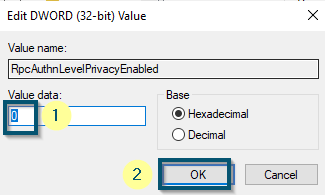
Right-clicking on the ‘RpcAuthnLevelPrivacyEnabled’ and choosing the ‘Modify…’ option - Then, change the ‘Value data:’ to ‘0’ to disable it and click on the ‘OK’ button.

Changing ‘Value data’ to ‘0’ and clicking on the ‘OK’ button
This solution will let you use the printer again. However, if this solution didn’t prove useful, then you can undo the changes and try the next method.
6. Disabling the ‘Point and Print Restrictions’
If the above solutions didn’t work for you, then try disabling the ‘Point and Print Restrictions’ by going to the ‘Edit group policy’ application.
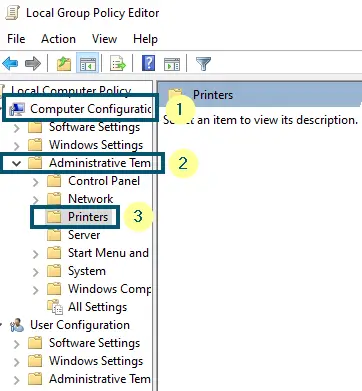
- First, go to the ‘Edit group policy’ application.

Opening the ‘Edit group policy’ from the ‘Start menu’ - Then, go to ‘Administrative Templates’ under ‘Computer Configuration’ and double click on the ‘Printers’ folder to open it.

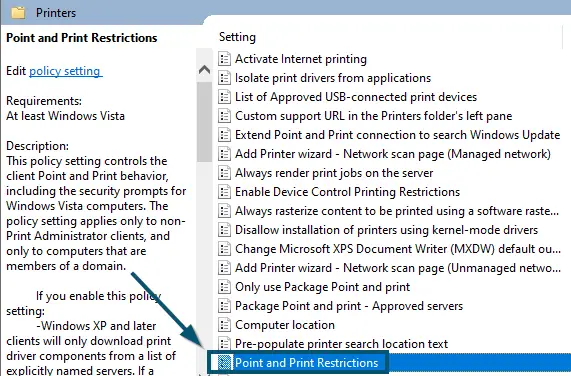
Going to ‘Administrative Templates’ under the ‘Computer Configuration’ section and double-clicking on the ‘Printers’ folder - Now, double-click on the ‘Point and Print Restrictions’ option.

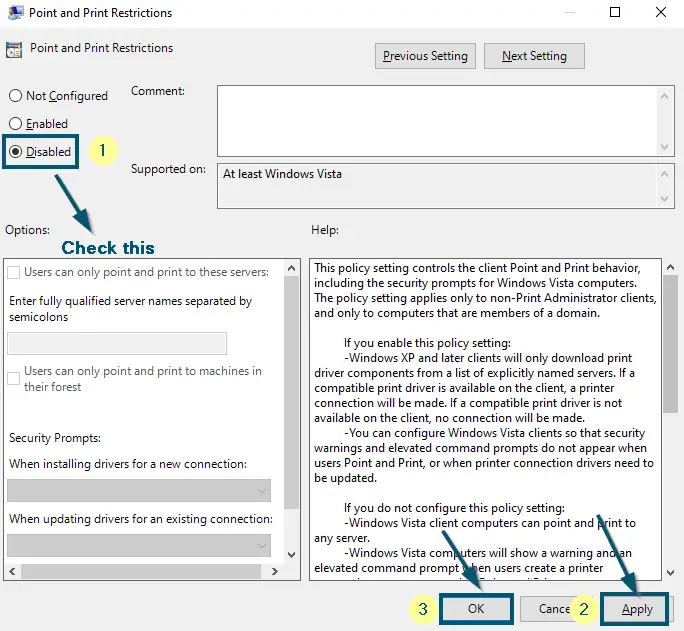
Opening the ‘Point and Print Restrictions’ option by double-clicking on It - Then, choose the ‘Disabled’ option and click on the ‘Apply’ and ‘OK’ buttons to save the changes.

Checking the ‘Disabled’ option and applying the Settings by clicking on the ‘Apply’ and ‘OK’ buttons - Now, restart the system.
Restarting the system by going to the ‘Start’ < ‘Power’ < ‘Restart’ options

After restarting, check if this solution has fixed the error message for you. If yes, then good for you. Otherwise, try the next solution.
7. Uninstalling the Security Update KB5005565
If none of the discussed methods have worked for you, then we recommend uninstalling the security update. Uninstalling the security update will definitely fix this issue because this issue mostly originates after installing the security update (KB5005565).RpcAuthnLevelPrivacyEnabled
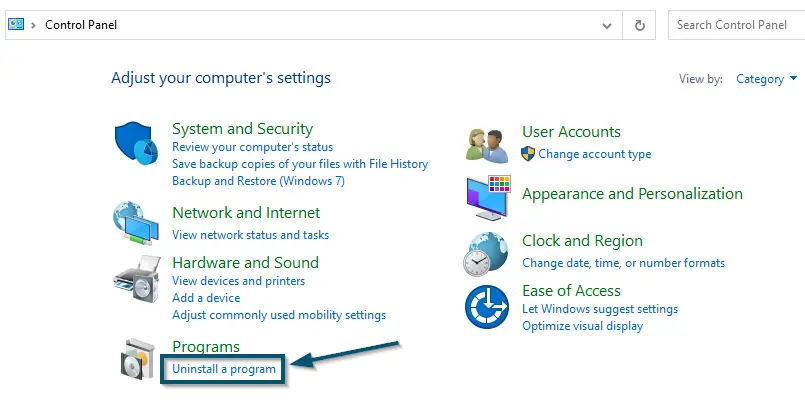
- First, go to the ‘Control Panel.’
Opening ‘Control Panel’ via ‘Start menu’ - Then, choose the ‘Uninstall a program’ option under the ‘Programs’ section.

Clicking on the ‘Uninstall a program’ option under the ‘Programs’ section in the ‘Control Panel’ window - Now, click on the ‘View installed updates’ option.

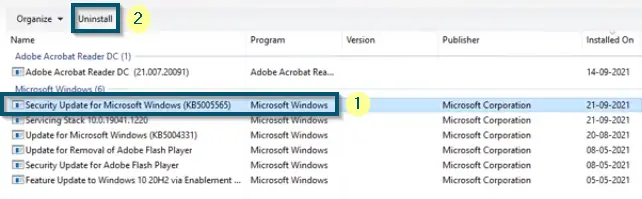
Clicking on the ‘View installed updates’ option - Then, select the ‘Security Update for Microsoft Windows (KB5005565)’ update and click on the ‘Uninstall’ option.

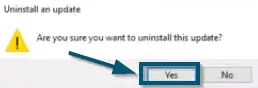
Uninstalling the ‘KB5005565’ security update - Click on the ‘Yes’ button in the next window to confirm the uninstallation procedure.

Confirming the uninstallation procedure of uninstalling the updates by clicking on the ‘Yes’ button