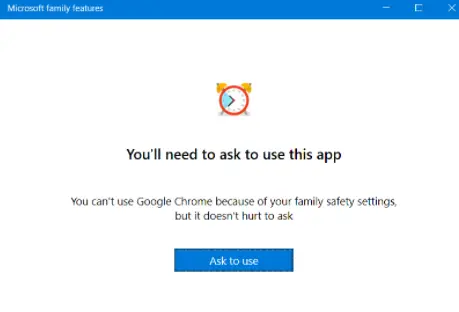
The pop-up message ‘You’ll need to ask to use this app’ is part of Microsoft’s Family Feature which was introduced in the latest Windows 10 updates.

What is Microsoft Family Feature?
‘Microsoft family feature’ is Microsoft’s way of keeping the kids connected with their parents even when they are physically apart. This application allows the kids to learn and explore more while staying safe online. The application is available on Windows-10 computers and on Android as well as iOS smartphones.
But for Windows users, it sometimes gets annoying and does the following things:
- It keeps blocking the users from using different applications.

Microsoft family feature blocking a particular application - It keeps asking for permission to sign in to your Microsoft account.

Microsoft family feature sign-in pop-up

So, if you’re also facing one of these issues and you want to know how to turn off family settings in your system, then stick with us because we’re here for you.
Why Do Microsoft Family Features Keep Popping Up?
Before getting to its reasons, sometimes malware can also act as an executable file. So, if you don’t belong to a child account and if this popup keeps appearing, then there’s a fair chance that this can be malware posing as Microsoft. That is why we recommend checking this file for malware before moving on.
- If you don’t belong to a child’s account, then this can be a bug from Microsoft’s end.
- If it’s blocking a particular application, then the parent account has blocked that application for you.
- If the “Sign-in to Microsoft family features” popup keeps appearing, it might be because you’re using a child account.
- Another reason for the sign-in family features popup appearance is that you have configured your computer under a child account.
How to Turn Off Microsoft family features Pop Up?
The annoying thing about this pop-up is even if you are not a part of the Microsoft family, the pop-up keeps appearing. So, even if you were a part of the family in the past and now, you leave it, it will not work. But the following suggestion will come in handy for removing this pop-up.
Bonus Fix: Changing the Date of Birth
- First, you’ll head over to the following link:
https://account.microsoft.com/account
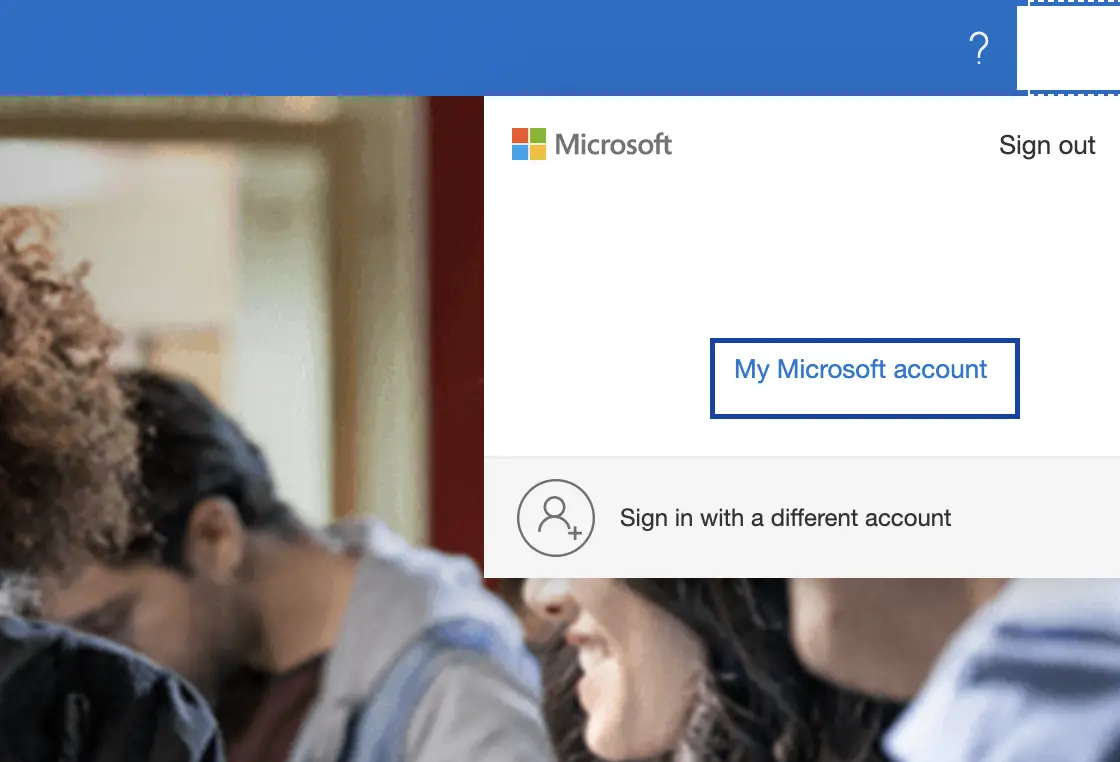
- Then, you’ll navigate to the top-right corner of the screen and click on your profile.
- From there, you’ll click on the ‘My Microsoft account’ option.

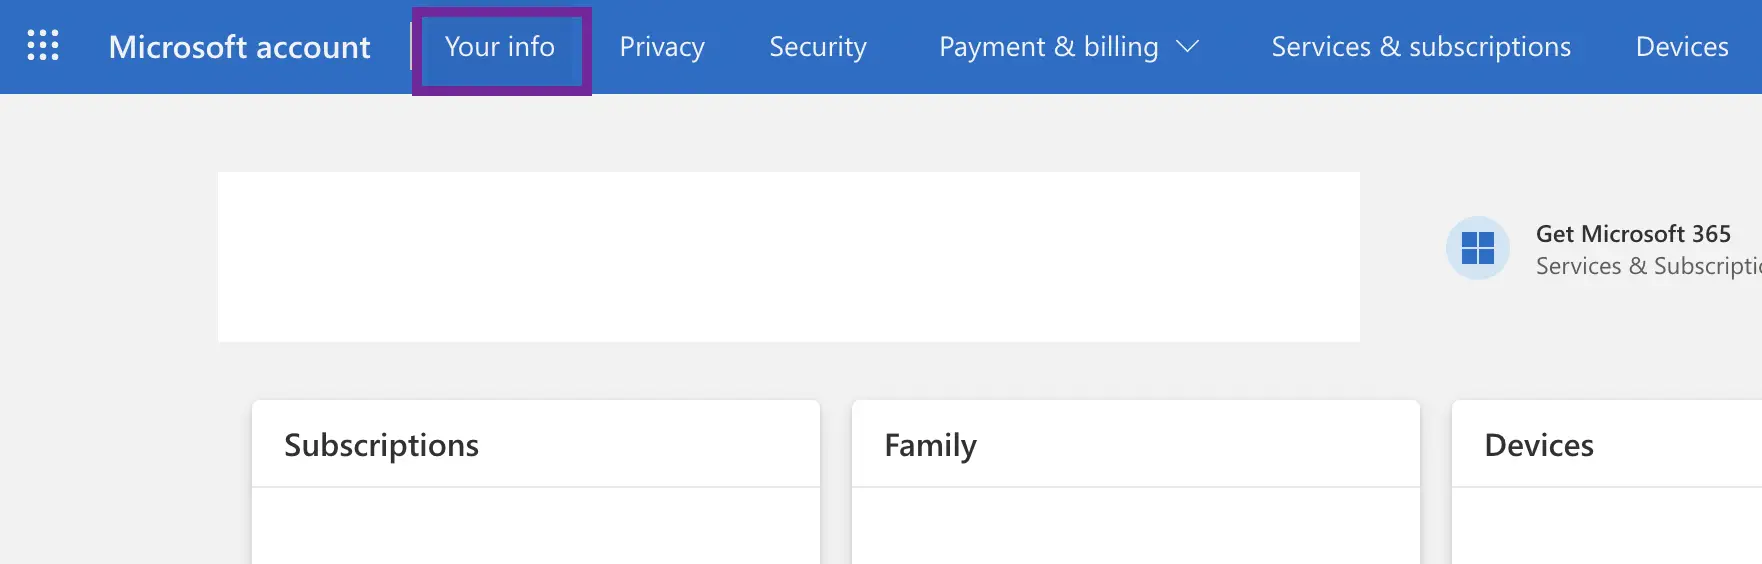
Clicking on ‘My Microsoft account’ on Microsoft’s official website - Now, you’ll click on the ‘Your info’ option from the top bar of your Microsoft account.

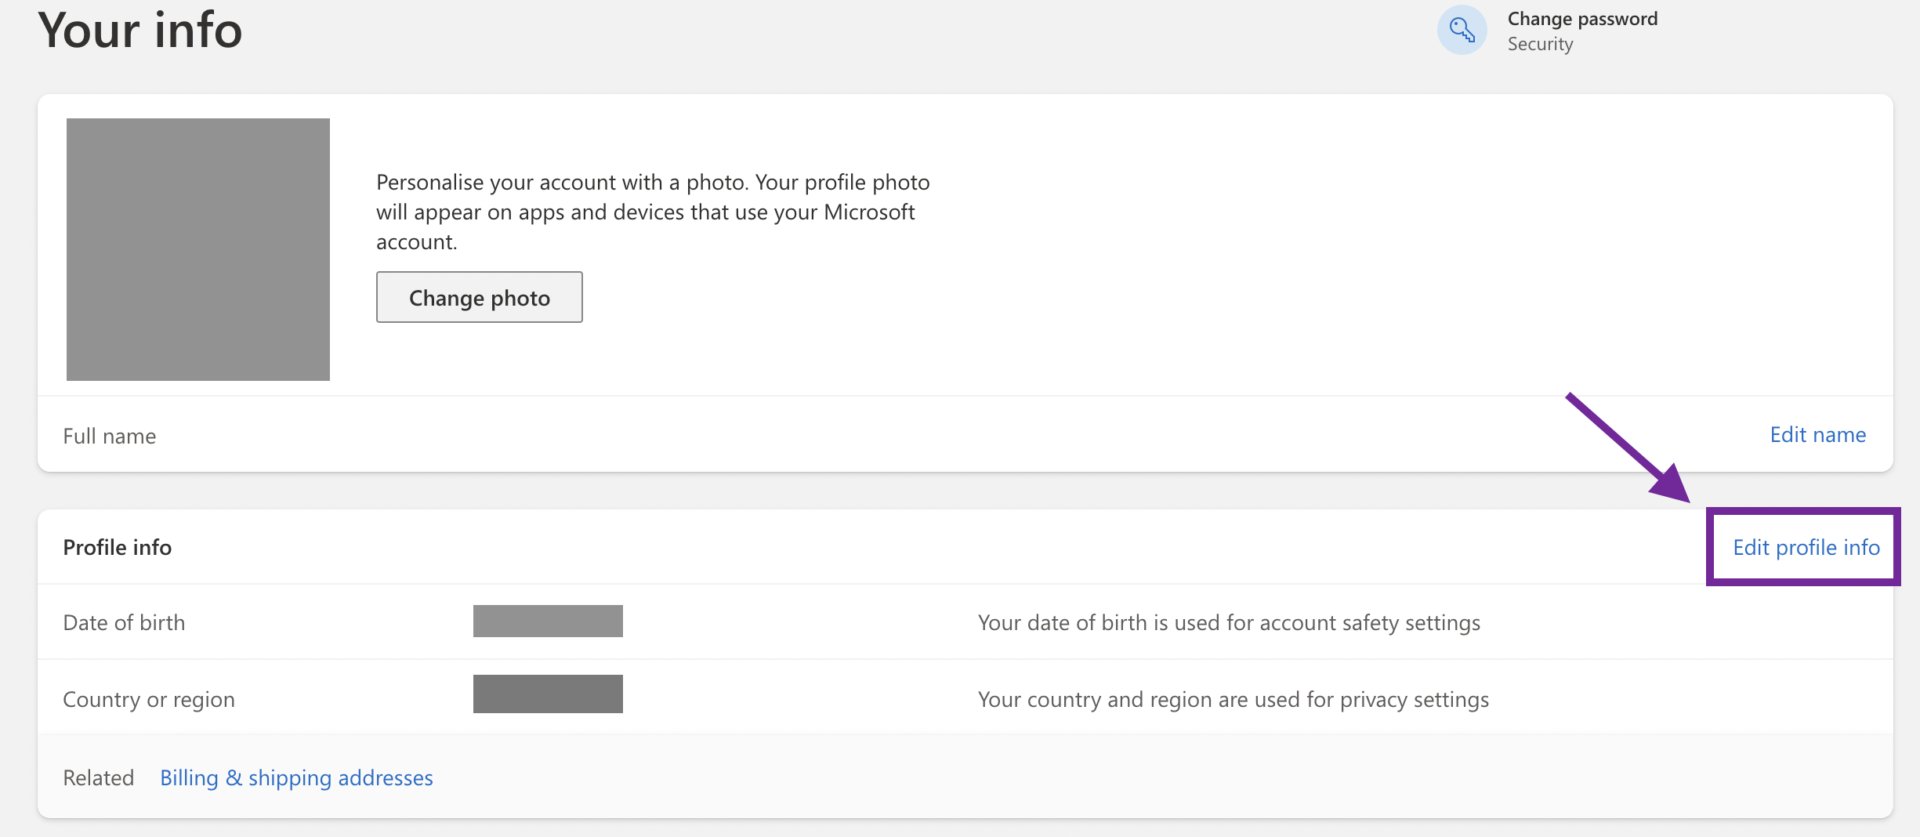
Clicking on the ‘Edit profile info’ option in the ‘Profile Info’ section - In the ‘Profile info’ section, you’ll click on ‘Edit profile info’ in front of your date of birth.

Clicking on the ‘Edit profile info’ option in the ‘Profile Info’ section - Now, it will ask you to add your account password. So, once you’ve added the password, then you’ll reach the ‘Personal info’ settings for editing your birthday.

Changing the birthday in the ‘Personal info’ window
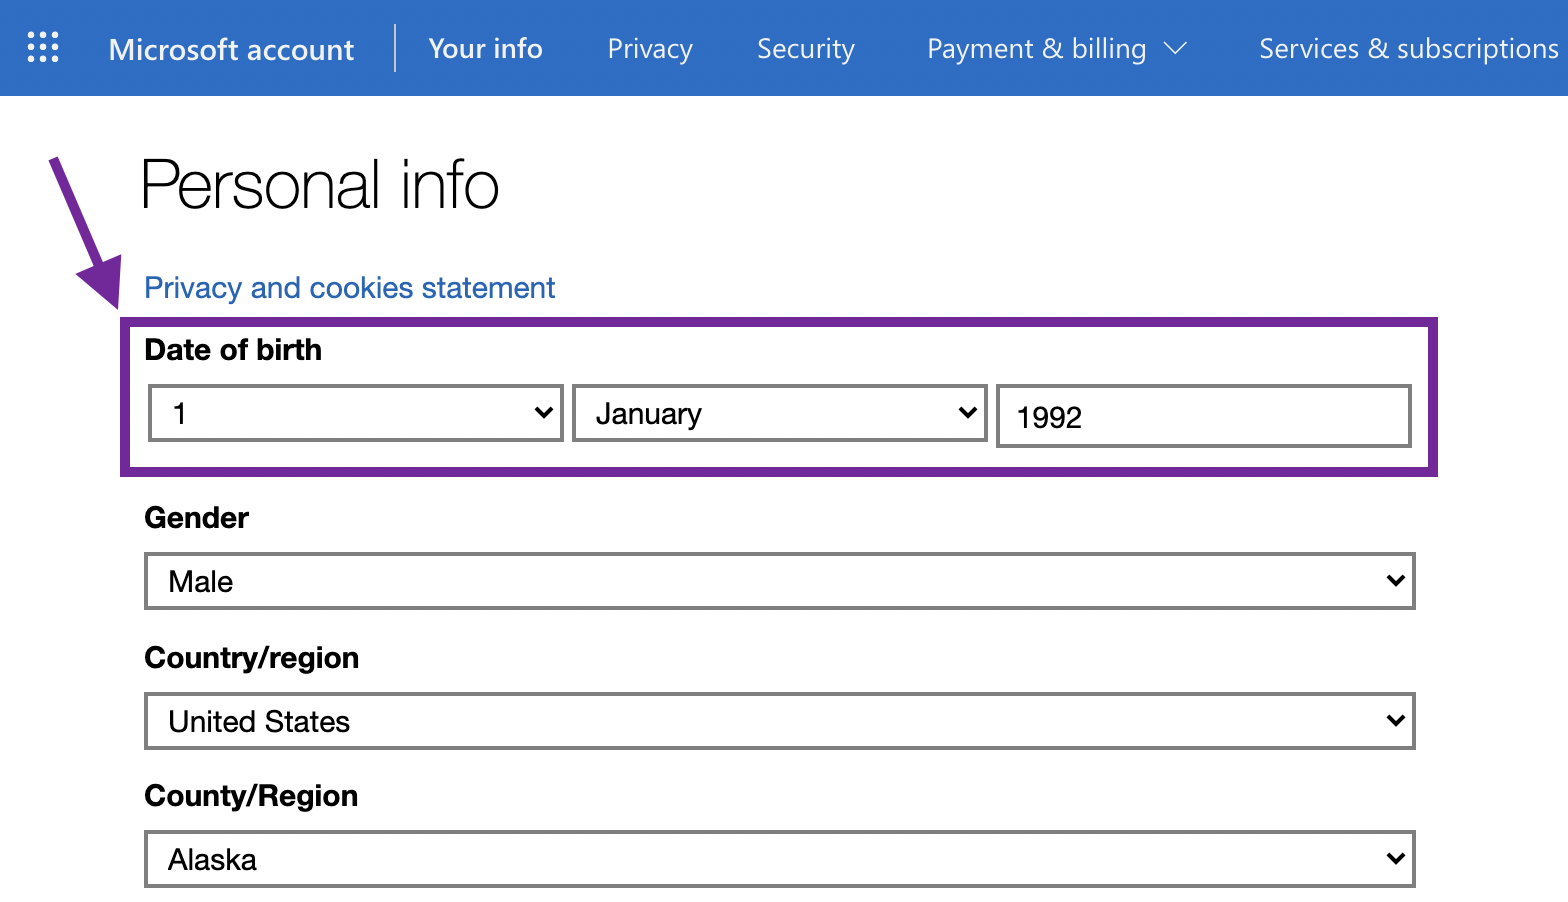
Note: If the above window didn’t appear in your case, then your age is set to under 13. So, you can’t change your date of birth
- After adding your date of birth, the control will ask for verification and once you’ve verified your date of birth, the changes will instantly go live.
Note: If the changes didn’t go live, then you can restart your PC to see the changes
However, if your age is 13+ and the ‘Personal info’ window didn’t appear, then you’ll be in a family group. So, you’ll have to leave the family group before changing your date of birth. We recommend checking Microsoft’s official help for leaving the family group.
1. Renaming the Root Executable File
For Administrator Accounts
This method has worked for several people in the past and it is still handy. But there’s a catch to this method and that is its 50-50 success ratio. Because for some it works and for others, it doesn’t.
Since Microsoft Family Features bans some applications to execute on a computer system, therefore, renaming the executable file will fix the popup.
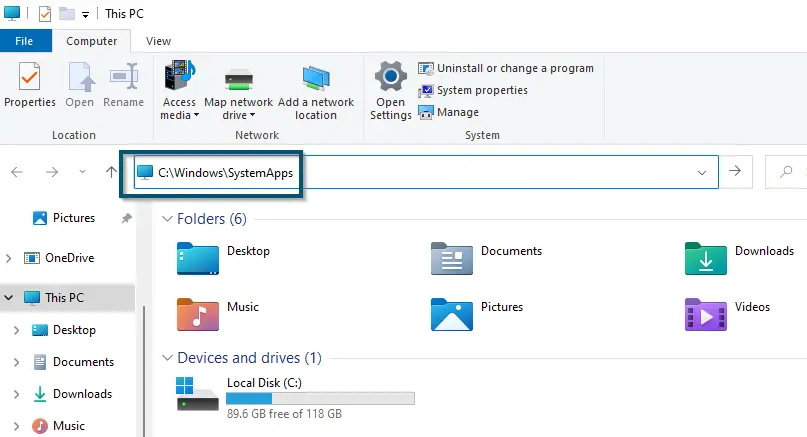
- First, you’ll copy and paste the following link in the address bar of ‘This PC.
C:\Windows\SystemApps

Pasting the link of the ‘SystemApps’ folder in the address bar of ‘This PC’ - Then, you’ll hit the ‘Enter’ key to reach the specified location.
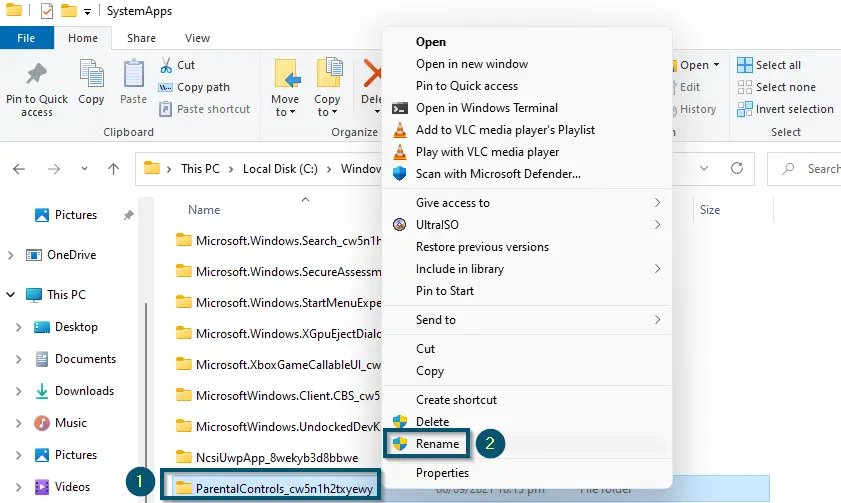
- Once you’ve entered the ‘SystemApps’ folder, here you’ll select a folder named ‘ParentalControls_cw5n1h2txyewy.’
- Then, you’ll right-click on it and choose the ‘Rename’ option. Now, you can rename this folder to anything.
Note: You will need the Administrator’s access to perform this functionality

Renaming the ‘ParentalControls_cw5n1h2txyewy’ folder - After that, you can delete this folder as well (Optional).
As mentioned, this solution has a 50-50 success ratio. So, we hope that this will work for you. But you should know that once you’ve updated the Windows, it will come back. So, you’ll have to repeat the same procedure.
2. Disabling the Parental Control in Services
For Administrators
Another way to turn off family settings in your Windows PC is by disabling parental control through the services. However, you will need the administrator’s access for this task. So, if you’re not an admin, then you can’t use this solution.
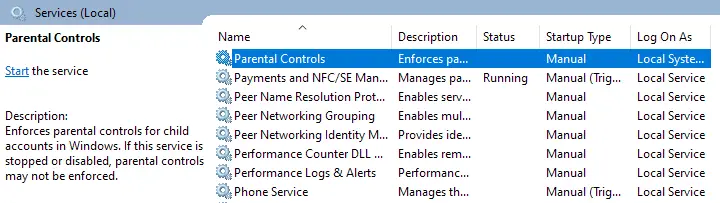
- First, you’ll search the ‘Services’ in the start menu, and then, you’ll click on the ‘Run as administrator’ option to open it as administrator.

Searching and opening ‘Services’ as administrator - After that, you’ll find the entry named ‘Parental Controls’ and then, you’ll right-click on it to enter its ‘Properties’ window.

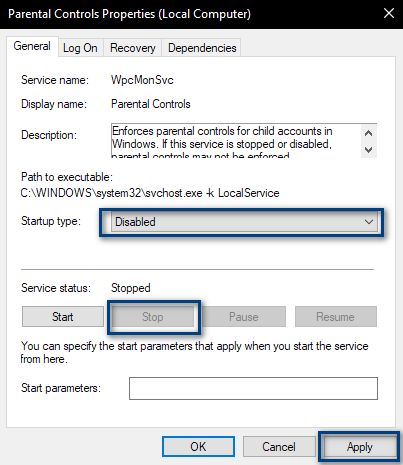
Entering the ‘Properties’ of ‘Parental Controls’ service - Once you’re in the ‘Properties’ window, then you’ll head over to the section named ‘Startup type:’ and confirm that it is set to ‘Disabled.’ If it’s not, then you’ll change it to ‘Disabled.’

Changing the ‘Startup Type:’ of Parental Controls to ‘Disabled’ - After that, you’ll click on the ‘Apply’ and then the ‘OK’ button.
- Now, you’ll search the ‘Task Manager’ in the start menu and click on ‘Run as administrator’ to run it as administrator.
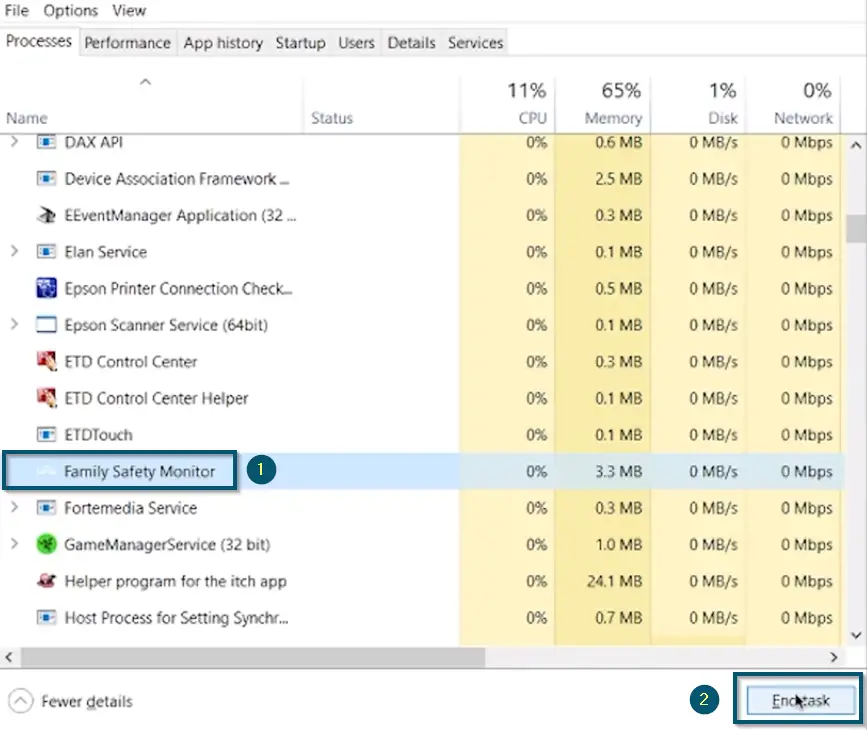
- Then, you’ll scroll down to find the process named ‘Family Safety Monitor’ and end this task.

Ending the task of ‘Family Safety Monitor’ in the Task Manager

This solution is the most successful method for solving this issue and it will definitely work for you.
3. Placing the Child Account Under the Parent Account & Removing All the Restrictions
Some people have faced the Microsoft family features pop-up asking for permission issues after changing the age of their child’s account, unlinking themselves from the parent’s account, or unblocking the programs. In this case, users have reported that Microsoft family features are blocking Google Chrome, forums, and websites. So, if you’re also stuck in a similar situation, then try the following steps.
Goal 1: Replace/Reassociate the Problematic Account (child account) Under the Same Parent Account
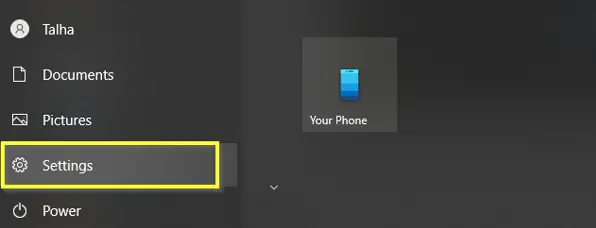
- First, you’ll head over to the ‘Settings’ option from the start menu.

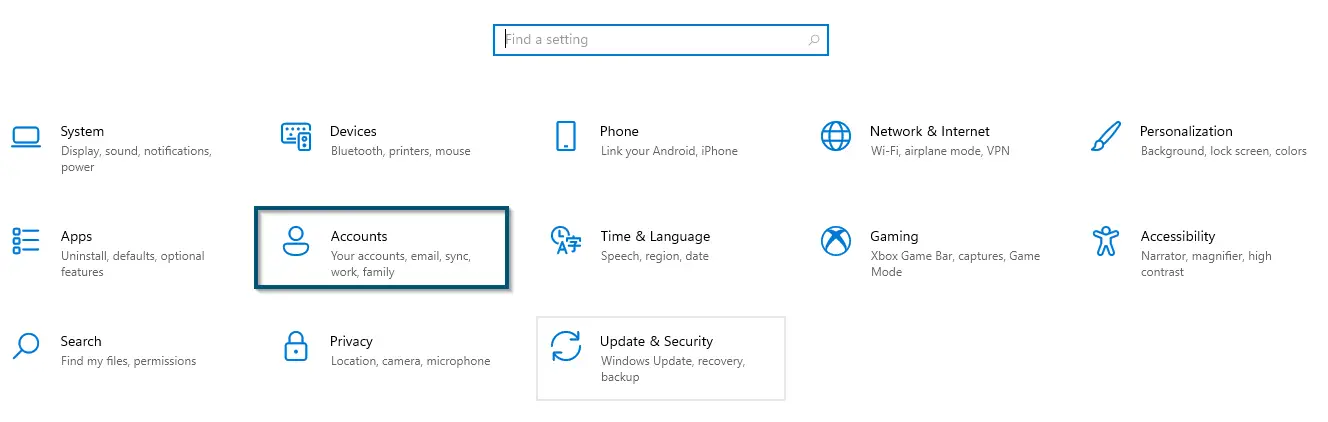
Accessing the ‘Settings’ option via the start menu - Then, you’ll choose the ‘Accounts’ option inside the ‘Settings’ window.

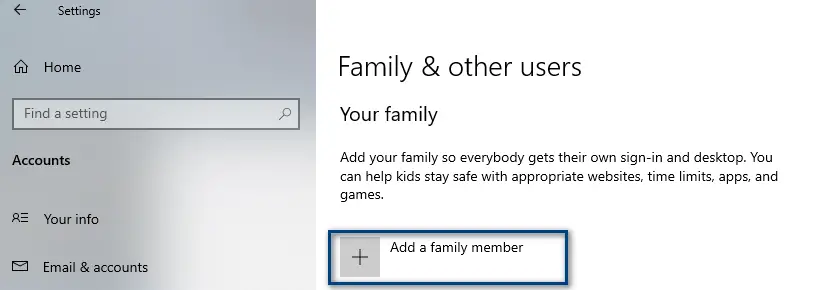
Choosing the ‘Accounts’ option inside the ‘Settings’ window - Now, you’ll choose the ‘Family & other users’ option.
- Inside this, you’ll click on the ‘Add a family member’ option.

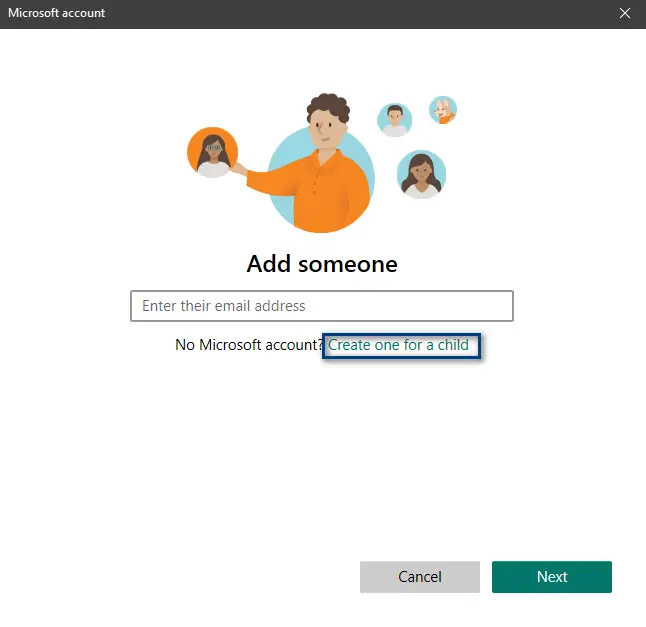
Choosing the ‘Add a family member’ option inside the ‘Family & other users’ option - A new window will pop up, which will ask you whether you want to create a child or adult account. So, you’ll choose the ‘Add a child’ option and then, you’ll enter the email of your child’s account.

Add a child – Microsoft Accounts - After that, you’ll click on the ‘Next’ button.
- In the next window, you’ll click on the ‘Confirm’ button to confirm the procedure of adding a child account.
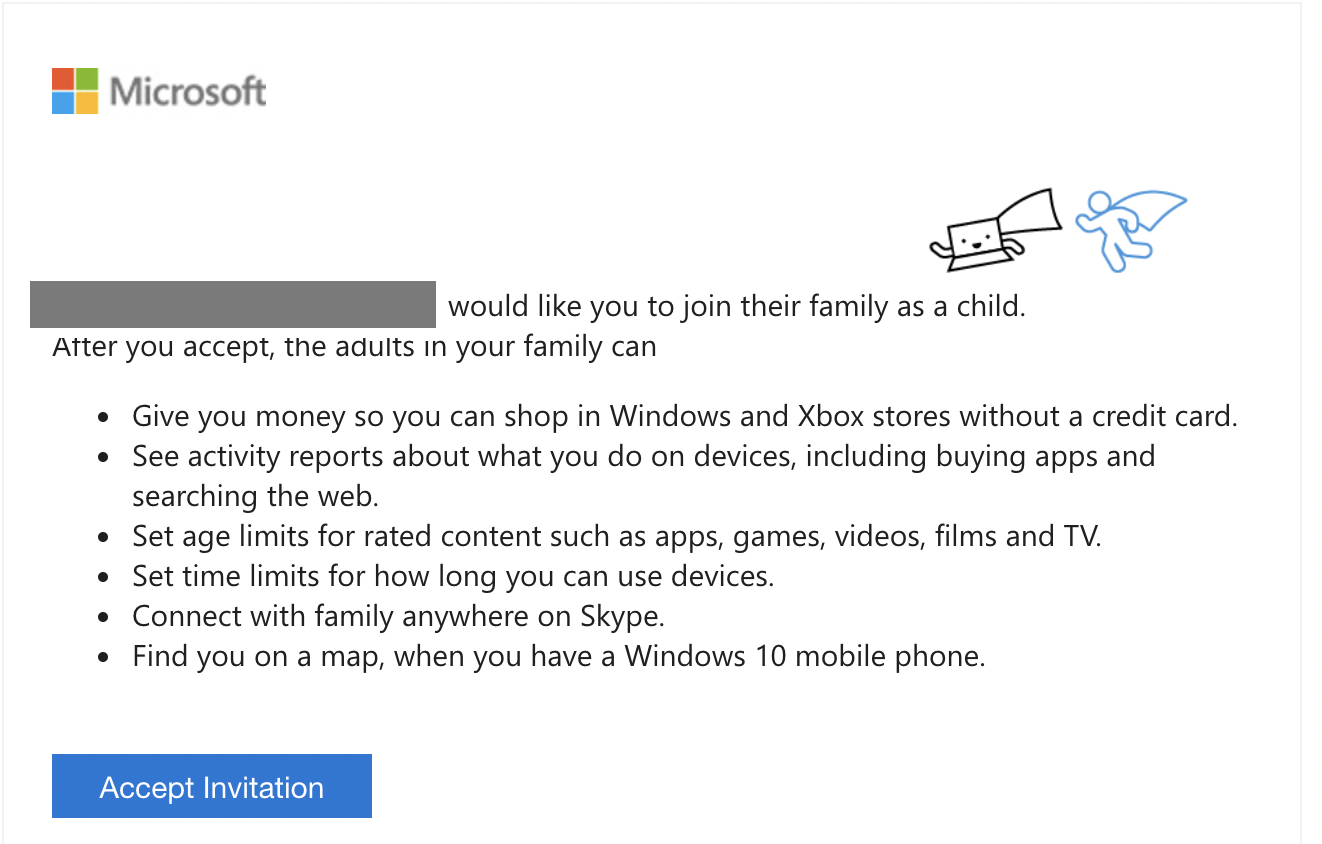
- This will send an invitation email to your child’s account. So, you can check the inbox of that account and click on the ‘Accept Invitation’ button.

Clicking on the ‘Accept Invitation’ button via Email
Goal 2: All the Devices are Signed in and On (Very Important)
- This is a crucial step and if all the devices are not turned on or signed in, then this procedure might not work for you. So, you’ll make sure that all the devices associated with the account are signed in and on.
Goal 3: Remove the Restrictions from Child Account
- Now, you’ll use the parent account to remove all the restrictions from the child’s account. This will include any screen timing, and application/website blocking restrictions. So, you can go to the following link to do that:
https://account.microsoft.com/family
Goal 4: Remove the Child Account from Parent Account
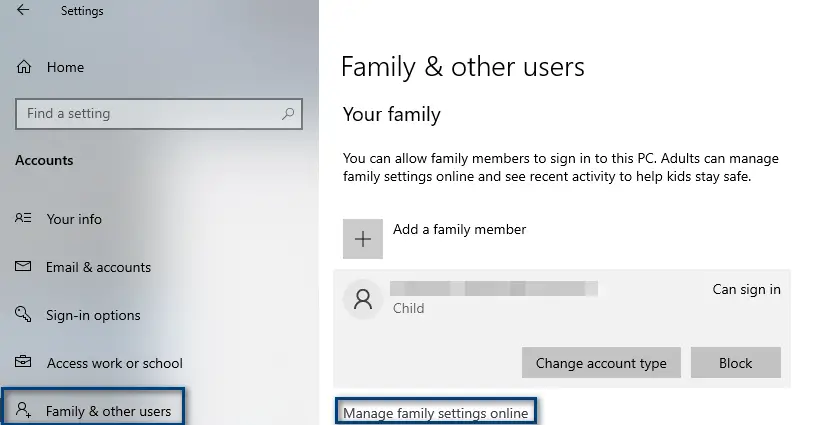
- Once you’ve successfully removed all the restrictions, then you’ll remove that child account from the parent account. So, you’ll ‘follow the first three steps of Goal 1’ to reach the ‘Family & other users’ window.
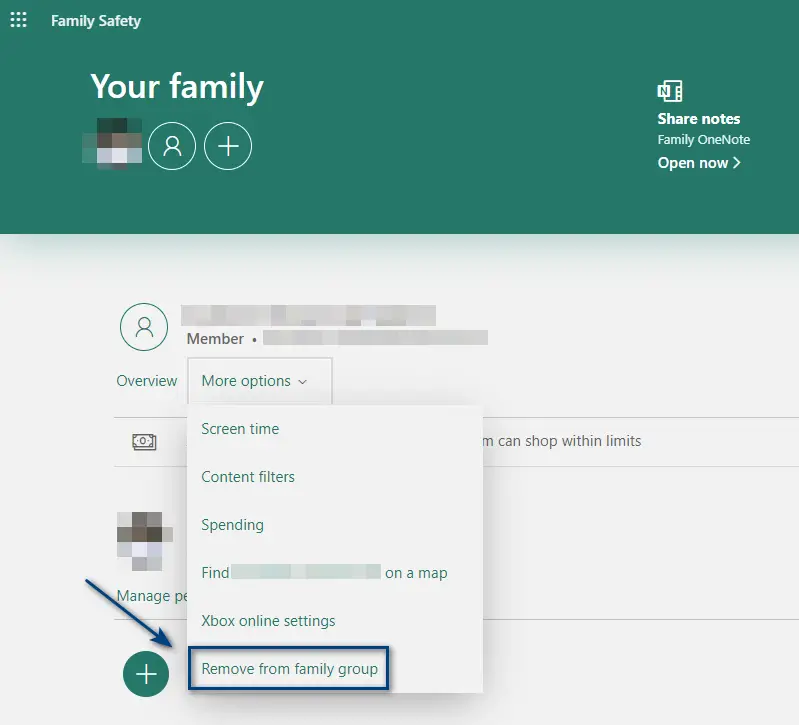
- Now, you’ll click on the ‘Manage family settings online’ option. This will open a new link in your default web browser.

Clicking on the ‘Manage family settings online’ option - Now, you’ll click on the ‘More options’ option to reveal a drop-down menu.
- Then, you’ll choose the ‘Remove from family’ option.

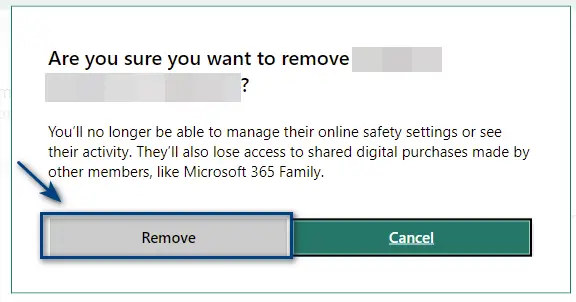
Removing the child from parent’s account - After that, you’ll confirm this process by clicking on the ‘Remove’ button.

Clicking on the ‘Remove’ button to confirm the removal of the child account
This solution will fix this problem for the mentioned use case. So, if you’re facing a similar issue, then this will definitely work for you. However, if it didn’t work for you, then try the next solution.
4. Running ‘schtasks’ Commands in CMD
For People Facing ‘IiYINCW4UercLI4.105.1’ Error Code
If the Microsoft family features application is asking for adult permission on Google Chrome and displaying the ‘IiYINCW4UercLI4.105.1’ error code upon accepting the request, then the following steps will come in handy.
Note: Make sure that your Microsoft account age should be 18+ for following these steps. Otherwise, this solution won’t work
- First, you’ll ‘follow Goal 4 of Method # 3’ for removing your account from the family.
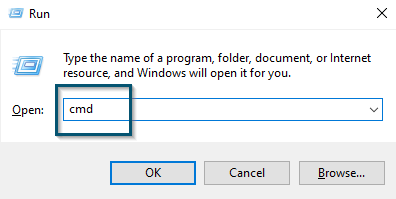
- Now, you’ll press the ‘Windows + R’ keys to open the Run dialog box and type ‘cmd.’

Typing ‘cmd’ in the ‘Run’ dialog box - Then, (instead of pressing enter) you’ll press the ‘Ctrl + Shift + Enter’ keys to open the command prompt as administrator.
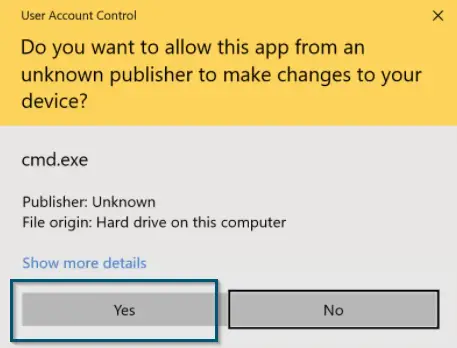
- In the next window, you’ll select ‘Yes’ for opening the ‘Command Prompt’ as administrator.

Choosing ‘Yes’ for running CMD as administrator - Once the CMD window opens, you’ll paste the following command and hit the ‘Enter’ key to execute this command:
schtasks /Run /TN "Microsoft\Windows\Shell\FamilySafetyRefreshTask"
- This will set a custom trigger on Microsoft family features pop up and now, it will only trigger when you want because you’ve removed the restriction.
If you’re facing a similar issue and your use case is also similar, then this solution will prove handy for you.
5. Switching From a Local To Microsoft Account
If you have removed the child account, but the Microsoft family features popup is still showing and blocking some of the apps, then try the following steps.
Goal 1: Create a Local Admin Account
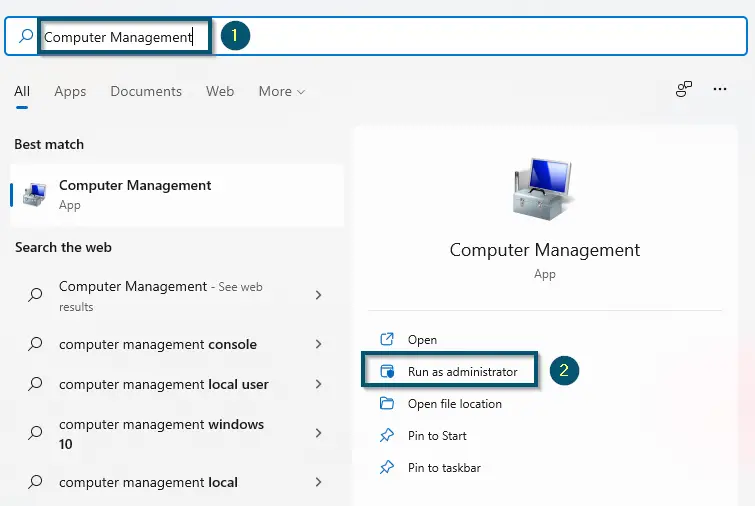
- First, you’ll type ‘Computer Management’ in the start menu and click on ‘Run as administrator’ to open this application as administrator.

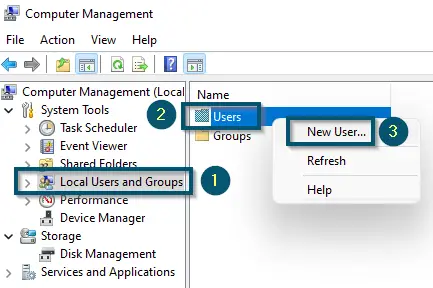
Opening ‘Computer Management’ as Administrator - Then, you’ll go to the option named ‘Local Users and Groups’ and right-click on the ‘Users’ entry to expand its options.
- From the options, you’ll choose the ‘New User…’ option.

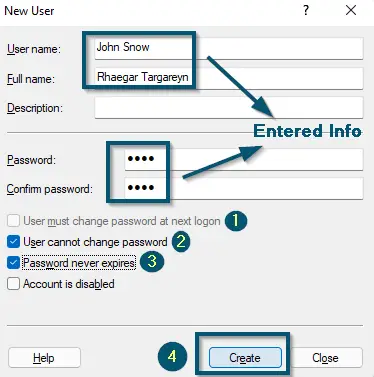
Clicking on the ‘New User…’ in the ‘Local Users and Groups’ < ‘Users’ options - This will open a new window and you’ll enter the details of the new user in this window, like his ‘User name,’ ‘Full name’ and ‘Password.’
- Here, you’ll uncheck the box named ‘User must change password at next logon’ and check the boxes named ‘User cannot change the password’ and ‘Password never expires.’
- After that, you’ll click on the ‘Create’ and then the ‘Close’ button.

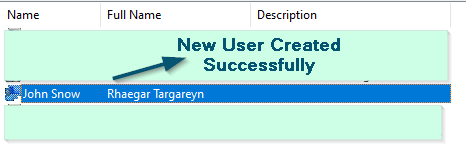
Adding the information of the new user and clicking on the ‘Create’ button, then the ‘Close’ button - So, if you double-click the ‘User’ entry again, you can see that the new user has been created.

Verification of the successful creation of the new user - Now, you’ll ‘follow the first three steps of Goal 1 of Method # 3’ to reach the ‘Family & other users’ option.
- Then, you’ll go to the ‘Other users’ section and click on the newly created user.
- After that, you’ll click on the ‘Change account type’ button to open a new window.

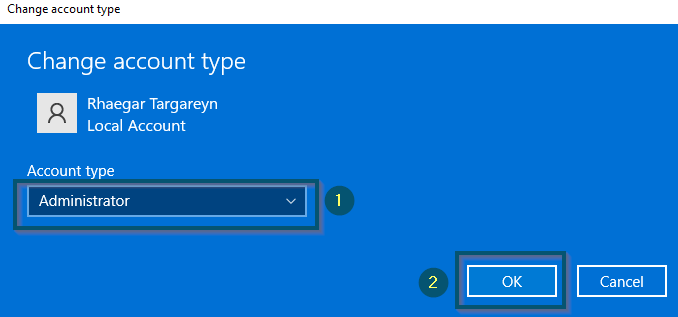
Clicking on the ‘Change account type’ option by expanding the newly created user - In the new window, you’ll choose ‘Administrator’ as your ‘Account type’ and click on the ‘OK’ button to confirm your changes.

Changing the ‘Account type’ of the newly created user and clicking on the ‘OK’ button

Goal 2: Sign Out from Problematic Account
- Now, you’ll sign out from the Microsoft account, which is creating problems for you.
Goal 3: Delete the Problematic Account
- Once you’re successfully signed out, then you’ll delete that account from your system.
Goal 4: Convert Local Account to a Microsoft Account
- Now, you’ll ‘follow the first two steps of Goal 1 of Method # 3’ to reach the ‘Accounts’ window in Settings.
- After that, we will try to switch to a Microsoft account. Take a look at the detailed steps of our article on converting your local account to a Microsoft account.
This solution is handy for the mentioned use case. So, before applying it, read the use case in the link provided. This way, you will know whether it is worth using in your case or not.
Conclusion
These are the solutions that have worked for other users and one of them will surely work for you. But, if you are still receiving the popup and it is not even malware, then you can check Microsoft’s official help regarding Microsoft family features.
If you’re looking for how to disable Microsoft family features as a child, then you can’t do anything effectively unless you’re 13+ or you have access to your parent’s account. So, we recommend asking your parents about giving you access to a particular thing because it will not hurt you or cost you anything.
