Pokémon GO users face the ‘Pokémon GO failed to detect location’ error message after enabling the mock location option in their device settings. The game sometimes displays this error message with the error code ’12’ and it looks like this:

This error message also occurs when you try to spoof or add a joystick because Niantic can now track your mock location.
This error message is one of the most common issues among the iOS and Android users of Pokémon GO. So, if you’re wondering what to do if Pokémon GO failed to detect location error messages occurs, then we have got you covered.
Background
Pokémon GO users use location or GPS spoofing applications to spoof their locations in the game. Such applications allow users to travel the entire world and catch Pokémons while sitting at home.
However, before March 2017, location spoofing applications didn’t inform the system or any applications about location mocking. So, the developers were unaware of whether a person was using a location spoofing application or not.
To stop this, the developers of Pokémon GO partnered with Google in March 2017 and after that, Android users received a security patch, which forced the Android 4.4, or later version users, to patch the mock locations feature.
After installing the security patch, if you alter the GPS location, the game will know and instantly show the location not found error message. It won’t even let you play the game unless you disable the mock location option.
Pokémon GO Failed to Detect Location? – The Reasons
Users have faced this error message with different location spoofing applications, such as FGL Pro and Fake GPS Location – GPS JoyStick.
So, if you’re facing this error message, then this might be due to one of the following reasons:
- The most common reason for this error message is the enabled mock location option in the smartphone settings.
- Another popular reason for this error message is the inability of the device to receive proper GPS signals because you’re somewhere under the house/building.
- If you have enabled Find My Device (on Android) or Find My iPhone (on iOS smartphone), you will also face this error message. Because when you enable the aforementioned options, you apply restrictions on the Pokémon GO to use GPS location.
- In rare cases, if you’re using an outdated version of Pokémon GO, then this might cause this error message.
- Sometimes, users also face the GPS joystick failed to detect location error messages upon using an unreliable GPS spoofer.
How to Fix this issue? – The Solutions
Pre-requisites
Before getting to the main methods to solve this error message, try these basic tips to solve the Pokémon GO error 12 spoofing issue.
Checking the Signal Strength of Wi-Fi and Cellular Data
Whether you’re using mobile data or Wi-Fi, the signal strength of both network types can get weak at times. Therefore, make sure that you’re using a reliable internet connection.
However, a strong network (full signal bar) doesn’t always guarantee a stable connection. So, if you’re facing a network problem, try switching your network and see if that fixes this issue.
Checking whether GPS Location Service is Enabled or Not
For Android Devices
Another major reason for the GPS signal not found (11 Pokémon GO spoofing) issue is the disabled Location Accuracy settings for GPS. You can check whether you’ve enabled the Location Accuracy settings or not.
- First, you’ll go to the ‘Settings’ of your device.
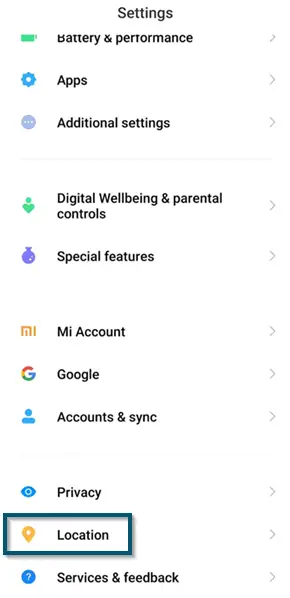
- Then, you’ll find the ‘Location’ option inside the settings of your smartphone.

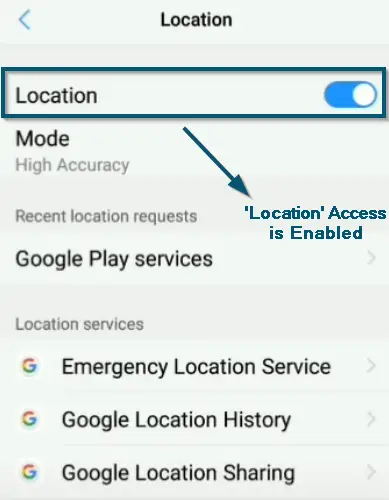
Entering the ‘Location’ option in the ‘Settings’ window - Now, you’ll check whether the ‘Location’ access is enabled or not. If not, then turn on this option. But if you have already enabled it, then move to the next step.

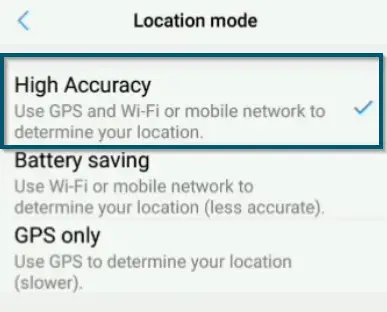
Checking whether ‘Location’ access is enabled or not - Next, tap the ‘Mode’ option and inside the new window, you’ll select the ‘High accuracy’ option in the ‘Location mode’ section.

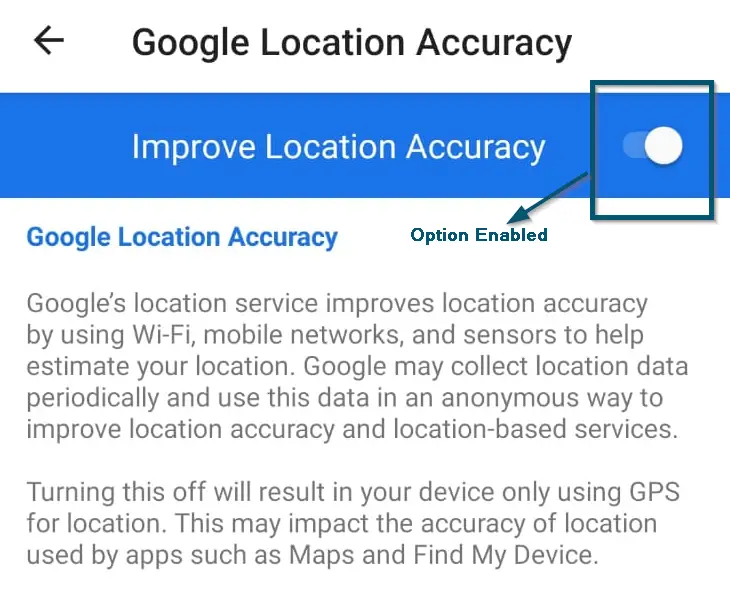
Selecting ‘High Accuracy’ as ‘Location mode’ - If you can’t find the ‘High accuracy’ option, you’ll tap the ‘Google Location Accuracy’ option and turn on the ‘Improve Location Accuracy’ option on the next screen.

Enabling the ‘Improve Location Accuracy’ option
Note: The UI of settings will vary from device to device. So, if you can’t find the required option, you can check Google’s help.
If these tips have solved the error message for you, then good for you. Otherwise, try the methods discussed below 👇🏻.
1. Disabling the Mock Location
As mentioned, the most popular reason for facing this error message is the turned-on ‘mock location’ setting, which is preventing you from playing Pokémon GO. So, if that is your case, then you can disable it and see if that fixes this issue.
- First, you’ll go to the ‘Settings’ of your smartphone.
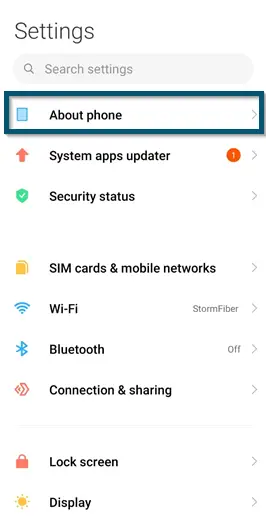
- Then, you’ll go to the ‘About phone’ option.

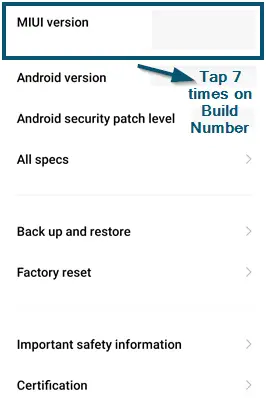
Selecting the ‘About phone’ option in the smartphone’s ‘Settings’ - After that, you’ll tap the build number of your smartphone 7 times.

Tapping the build number 7 times in the ‘About phone’ option - Once the 7 times tapping is complete, then you’ll see the following message.

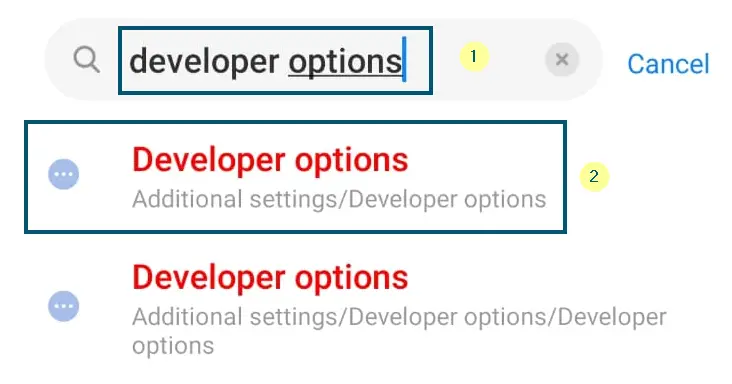
Indication of the ‘Developer options’ enabled - Now, you’ll go to the ‘Developer options.‘

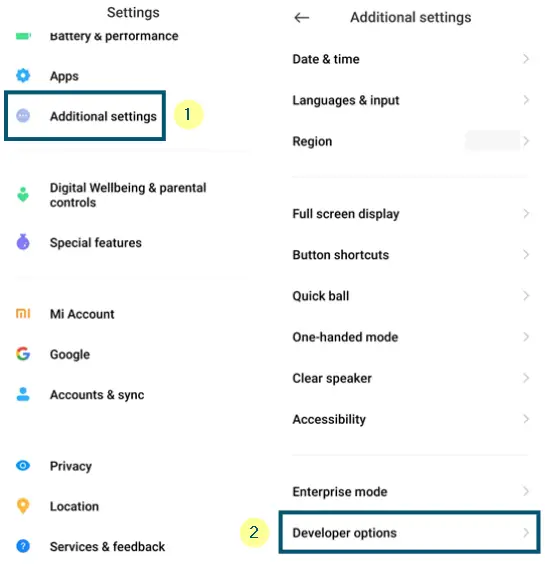
Note: If you can’t find the ‘Developer options,‘ you can search this option in the search bar of the ‘Settings’ window
Note: If you don’t have the search bar, go to the ‘Additional settings’ option and the ‘Developer options’ will be there
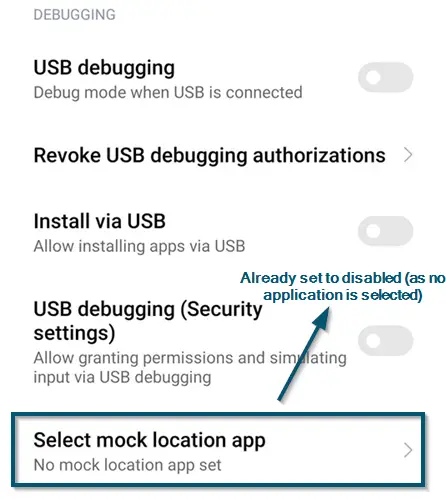
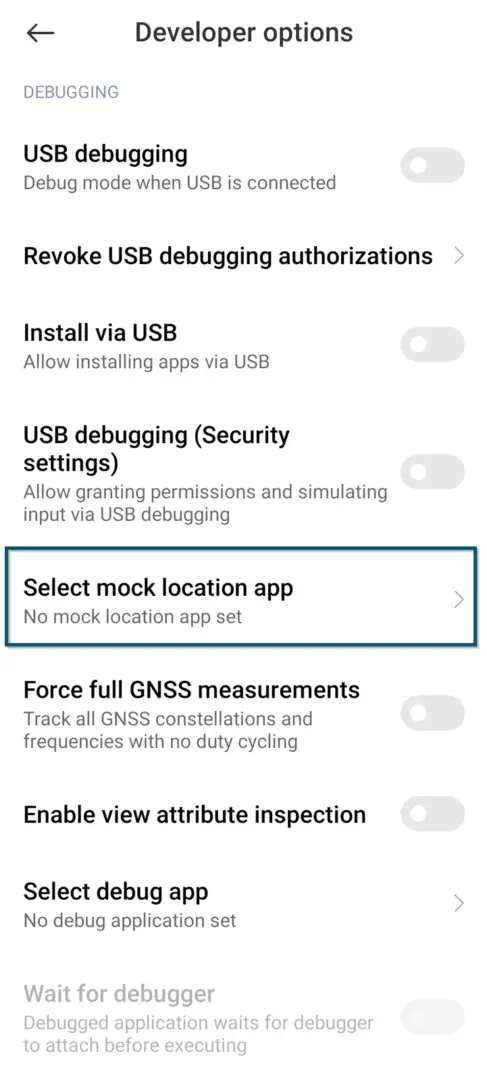
- After that, you’ll look for the option that says ‘Allow mock locations’ or ‘Select mock location app’ and see if this option is unchecked. If not, then uncheck this option.

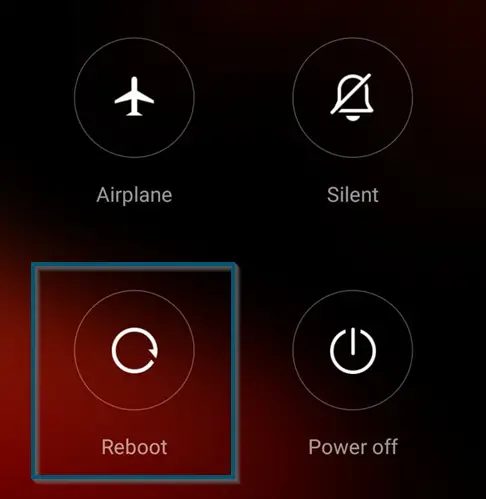
‘Select mock location app’ is already disabled or no mock application is selected - Now, you’ll restart your device by pressing the power button for a few seconds and choosing the ‘Restart’ or ‘Reboot’ option.

Rebooting the device - After restart, open the game again and see if this method has proved useful for you.
This method will work if you were spoofing the application earlier.
However, if you still want to spoof your location, then try the next methods.
2. Downgrading Google Play Services & Using Mock Location
For FGL Pro Users – Non-Rooted Phones
tested solution
Whether you want to use ‘FGL Pro’ with Pokémon GO or you’re already using it, but if after updating the game you’ve been facing the ‘Failed to Detect Location (Error 12),’ then the following steps will come in handy.
Note: This method might prove complicated for some users so proceed at your own risk.
Step 1: Downloading and Installing ‘FGL Pro’
- First, you’ll download and install the ‘FGL Pro’ application from ‘Google Play Store.’ You can open the following link to download this application.
https://play.google.com/store/apps/details?id=com.ltp.pro.fakelocation
- Once you have installed the application, you’ll open it and allow all the permissions.
- After that, it will ask you to downgrade your ‘Google Play services’ application to version 12.6.85 or lower. So, you’ll tap on the ‘Downgrade’ button and the application will give you a set of instructions.
Step 2: Disabling the ‘Auto-update apps’ Option in ‘Google Play Store’
The first instruction is to disable the ‘auto-update apps’ in ‘Play Store.’ So, try the following steps.
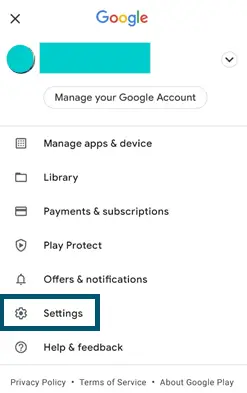
- You can disable the auto-updates of the ‘Google Play Store’ by tapping on your account at the ‘top-right corner’ of the screen. Then, you’ll choose the ‘Settings’ option.

Tapping on the ‘User-Profile’ icon in the ‘Top-Right Corner’ of the screen 
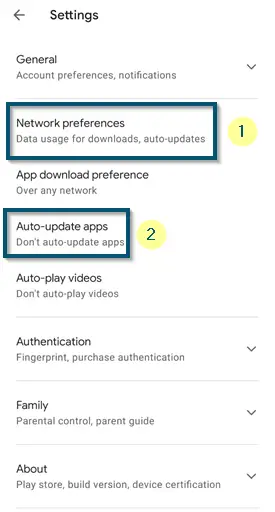
Tapping on the ‘Settings’ option in the ‘Google Play Store’ user profile option - In the ‘Settings’ window, you’ll expand the ‘Network preferences’ and tap on the ‘Auto-update apps’ option.

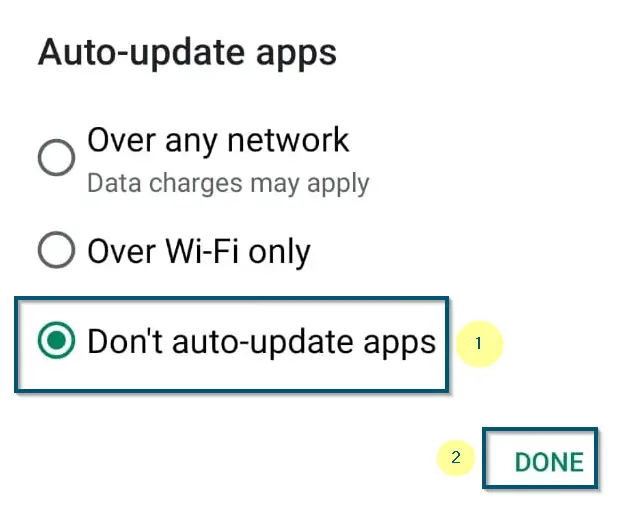
Expanding the ‘Network preferences’ and tapping on the ‘Auto-update apps’ section - A new dialog box will appear. So, you’ll choose the ‘Don’t auto-update apps’ option and tap the ‘Done’ option.

Choosing ‘Don’t auto-update apps’ and clicking the ‘Done’ option
Note: If you have an old Google Play Store version, then you’ll tap on the ‘hamburger icon,’ then choose the ‘Settings’ option and tap on the ‘Auto-update apps’ option in the ‘General’ section
Step 3: Downloading the Older Version of ‘Google Play services’ Application
The second instruction is to download the 12.6.85 version of Google Play services, but the application will give a specific CPU architecture and Screen DPI by detecting your operating system version. You’ll have to download it according to the instructions on your screen.
- Now, you’ll open the following link in your smartphone’s browser and download the ‘12.6.85 version’ of ‘Google Play services’ from it.
https://www.apkmirror.com/apk/google-inc/google-play-services/google-play-services-12-6-85-release/
Note: You can see the instructions for our device in the following picture:

- Once you’ve found the required variant of the ‘12.6.85’ version of ‘Google Play services,’ then you’ll download it.

Choosing the ‘Google Play Service 12.6.85’ variant according to the on-screen DPIs and architecture instructions

Step 4: Disabling the ‘Find My Device’ Option
The third instruction is to disable the ‘Find My Device’ option on your smartphone.
- So, you’ll go to the ‘Settings’ of your android device.
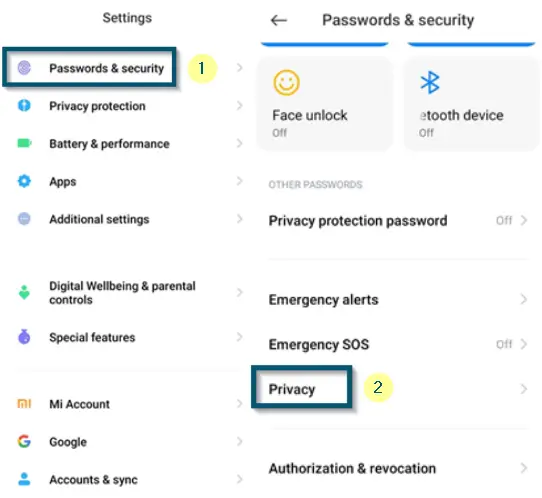
- Then, you’ll navigate to the ‘Password & security < Privacy’ options one by one.

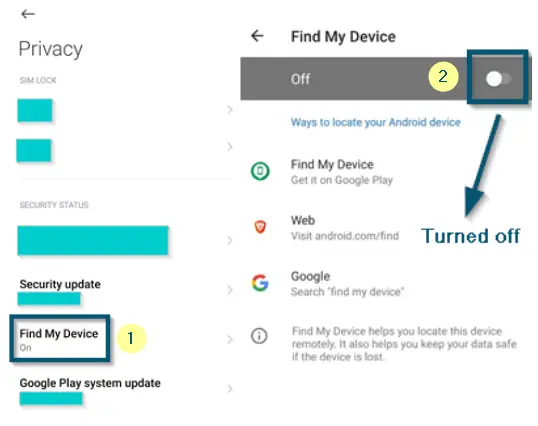
Choosing the ‘Password & security < Privacy’ options in the ‘Settings’ of android device - Here, you’ll find the ‘Find My Device’ settings. So, you’ll tap on that and turn it off.

Choosing the ‘Find My Device’ option and then, turning off the option
Note: Some devices will have a ‘Deactivate’ button after tapping on the ‘Find My Device’ settings. So, choosing that will disable it
Note: If you have ‘Screen lock service’ option, ‘Deactivate’ that option as well
Step 5: Uninstalling the Old Version of ‘Google Play services’ Application
- Now, you’ll go to the ‘Manage apps’ window inside the ‘Settings’ option.
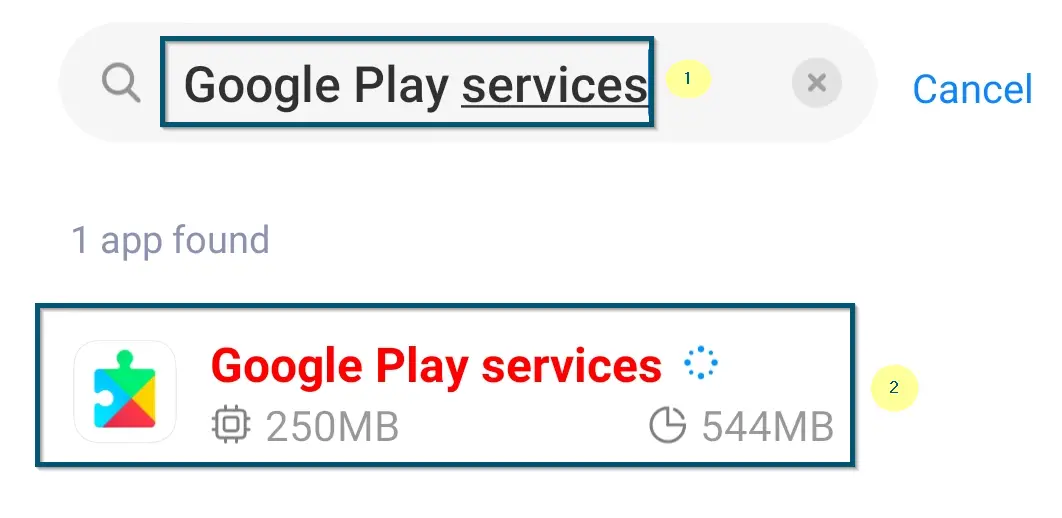
- After that, you’ll search for ‘Google Play services’ in the search bar.
- Once the system has found your application, then you’ll tap on it.

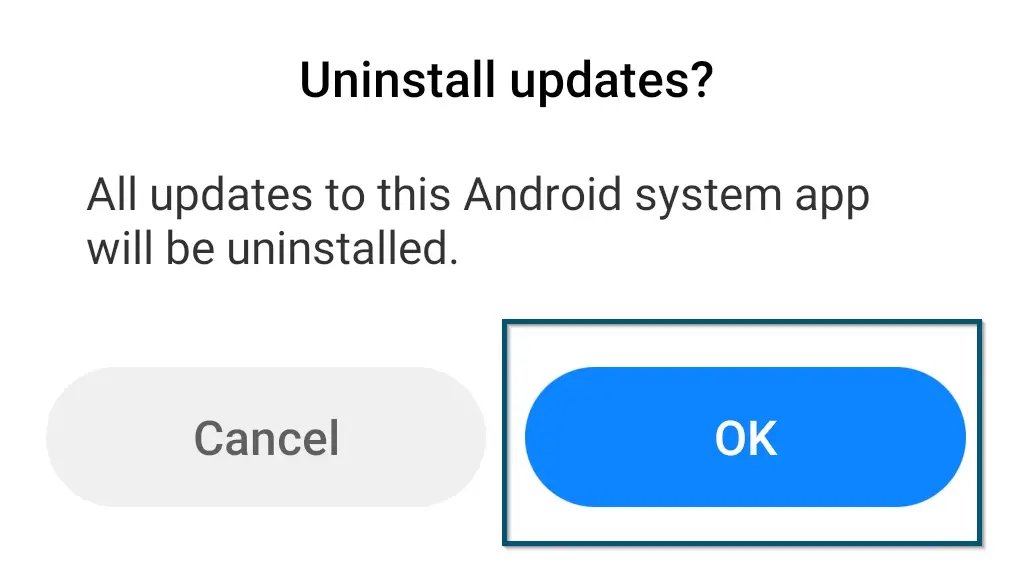
Searching for ‘Google Play services’ in the ‘Manage apps’ window and opening it - Now, you’ll tap on the ‘Uninstall updates’ option and then, tap on the ‘OK’ button to confirm the uninstallation process.

Confirming the uninstallation procedure by tapping on the ‘OK’ button
Step 6: Installing the Downloaded ‘.apk’ File
The fourth instruction is to install the downloaded ‘.apk’ file of ‘Google Play services’ to downgrade it.
- So, you’ll go to the file manager/explorer of your smartphone and find the downloaded file.
- Then, you’ll tap on it to begin the installation procedure.
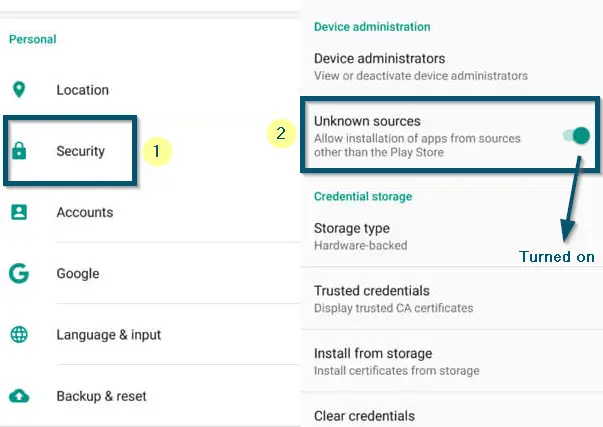
Note: If your system blocks the installation procedure, then you need to enable the installation from ‘Unknown sources’ by going to the ‘Settings < Security’ options
- Now, you’ll again tap on the downloaded .apk file and the system will begin the installation procedure.
Step 7: Setting the ‘FGL Pro’ as ‘Mock location app’
- Once the installation is complete, then you’ll ‘follow the first 4 steps of Solution 1’ to reach the ‘Developer options’ window.
- Then, you’ll scroll down to find the ‘Select mock location app’ option and tap on it.

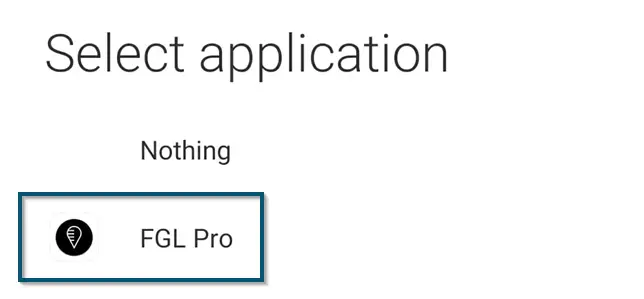
Choosing the ‘Select mock location app’ option inside the ‘Developer options’ - In the new window, you’ll tap on the ‘FGL Pro’ option to select it as a mock application.

Selecting ‘FGL Pro’ as mock location application - Now, you’ll select the desired location in the ‘FGL Pro’ and run the ‘Pokémon GO’ game.
Note: If you’re using ‘GPS JoyStick,’ then you’ll enable the ‘Suspended Mocking’ option in it before running the game
If this method has worked for you, then that’s great. Otherwise, you can try to download the ‘12.2.21’ version of ‘Google Play services’ and see if that works.
3. Rooting the Device & Converting GPS Spoofing to a System Application
For Android Devices
As mentioned earlier, you can’t spoof in Pokémon GO after installing the security patch of March 2017. But if you still want to spoof in Pokémon GO, you’ll have to root your device first and after that, you’ll convert the GPS spoofing application to a system application. So, we’ll divide this solution into several parts.
Step 1: Rooting the Device
In the terminology of Android, the term ‘Rooting’ is equivalent to jailbreaking an iOS device and people root their devices to get ‘Super User’ privileges and customize everything on their android devices. However, the procedure of rooting the device is different for each device. So, check our complete guide of how to root an android device and after rooting your device, follow the next steps.
Step 2: Downloading the Location Spoofing Application
- After successfully rooting your device, you’ll download and install the ‘Fake GPS Location – GPS JoyStick’ application. So, you can open this link on your Android device.
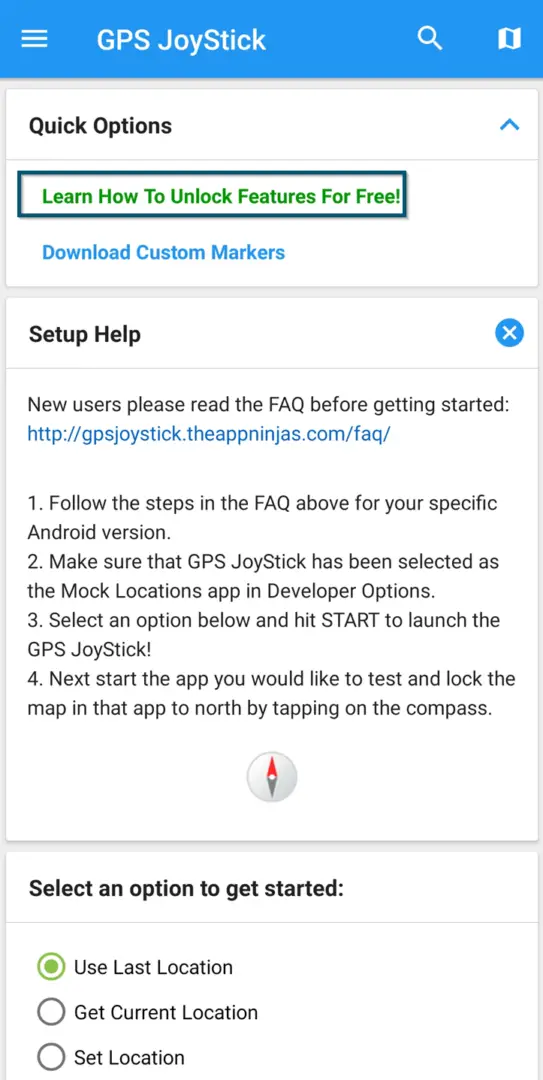
- After successfully installing the application, you’ll open it and tap on the ‘Learn How To Unlock Features for Free!’ option inside the ‘Quick Options’ section.

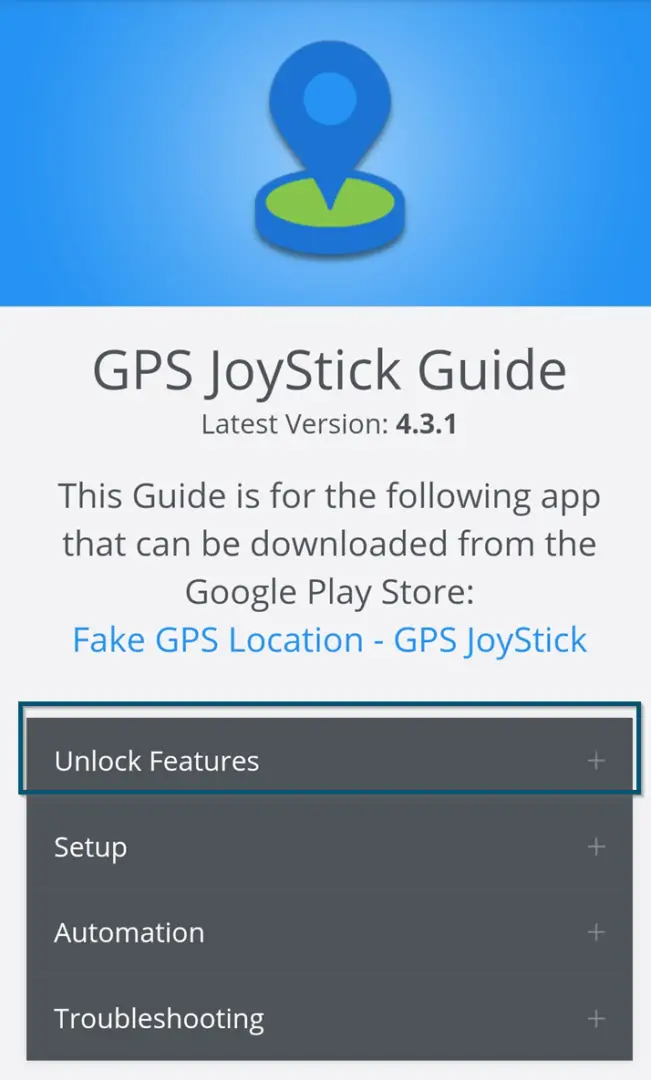
Clicking on the ‘Learn How To Unlock Features for Free!’ option inside the ‘Quick Options’ section - The application will take you to a new link and here, you’ll expand the ‘Unlock Features’ option.

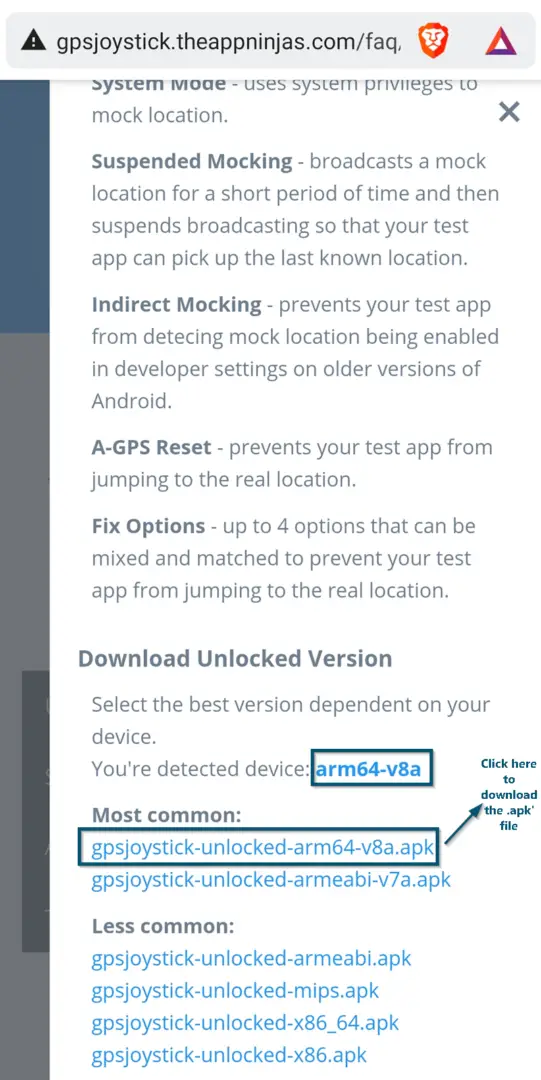
Clicking on the ‘Unlock Features’ option in the new webpage - Now, this webpage will detect the model of your android device and according to your model, it will suggest which version of the unlocked application will be suitable for you. In this case, we have downloaded the ‘gpsjoystick-unlocked-arm64-v8a.apk’ file.

Downloading the suggested ‘.apk’ file of the unlocked version of the ‘Fake GPS Location – GPS JoyStick’ application - After completion of the downloading process, you’ll install this ‘.apk’ file and open it.Note: If your device prompts that the installation process is blocked, then you’ll turn on the ‘Unknown sources’ option by going to the ‘Settings < Security’ options
 Going to the ‘Security’ options and turning on the ‘Unknown sources’ option
Step 3: Configuring the New App Copy
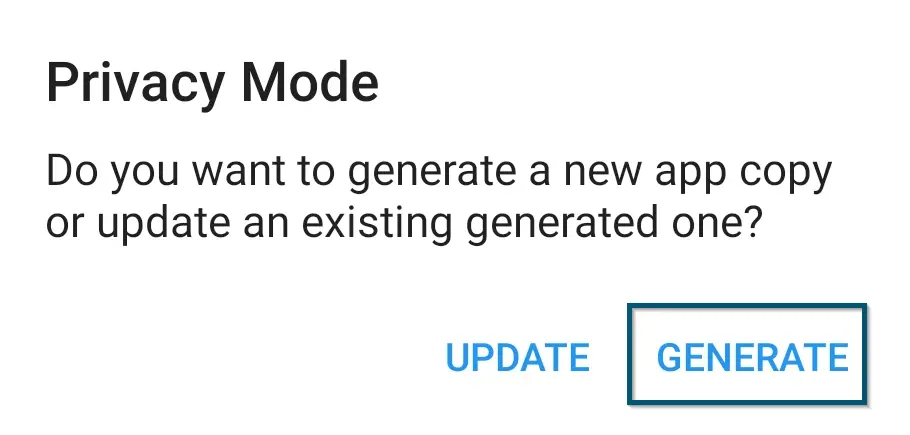
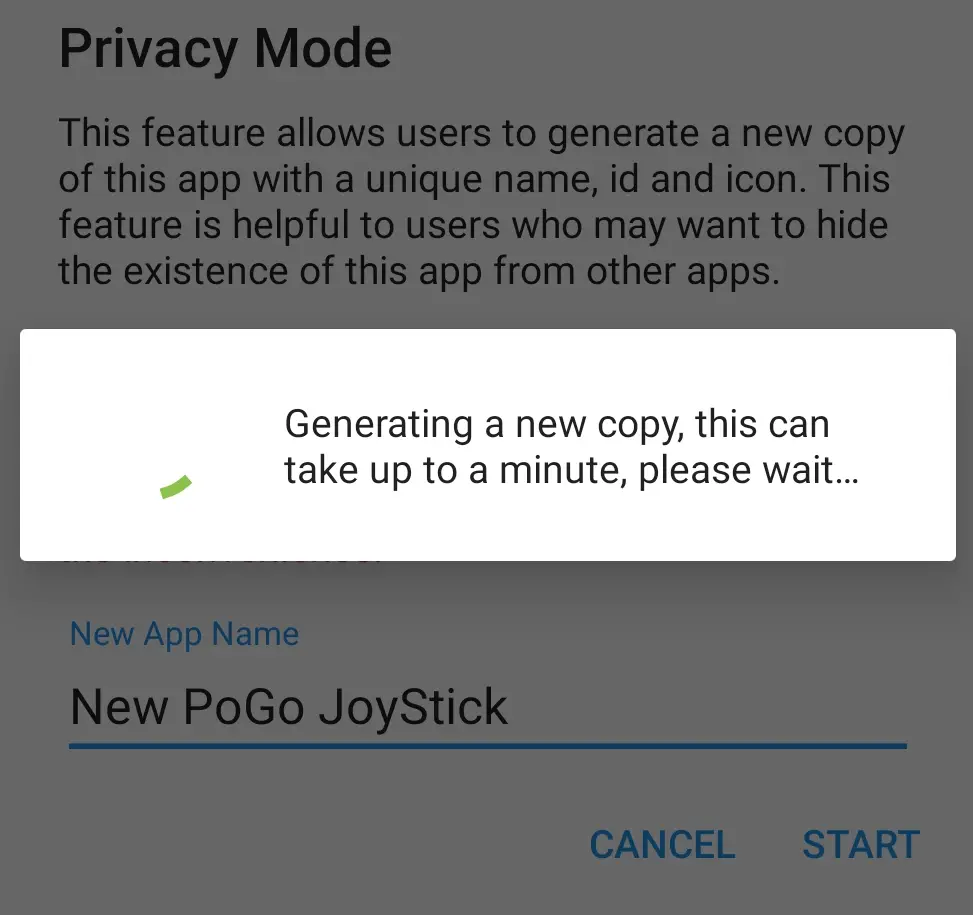
- Now, you’ll tap on the ‘Privacy Mode’ under the ‘Quick Options’ section. This will create a new privacy mode feature, which hides the presence of location spoofing applications from the game (Pokémon GO).

- Upon tapping on it, the application will ask you whether you want to update the existing copy or generate a new one. So, you’ll tap on the ‘GENERATE’ option.

Tapping on the ‘GENERATE’ button to create a new app copy - Now, the application will ask you to give a new name to your new GPS JoyStick because you will need this name later on. So, you can type any name and tap on the ‘START’ button.

Typing the new app
name (New PoGo JoyStick) and tapping on the ‘START’ button - The application will start the procedure and depending on your device, it will take some time. So, be patient.

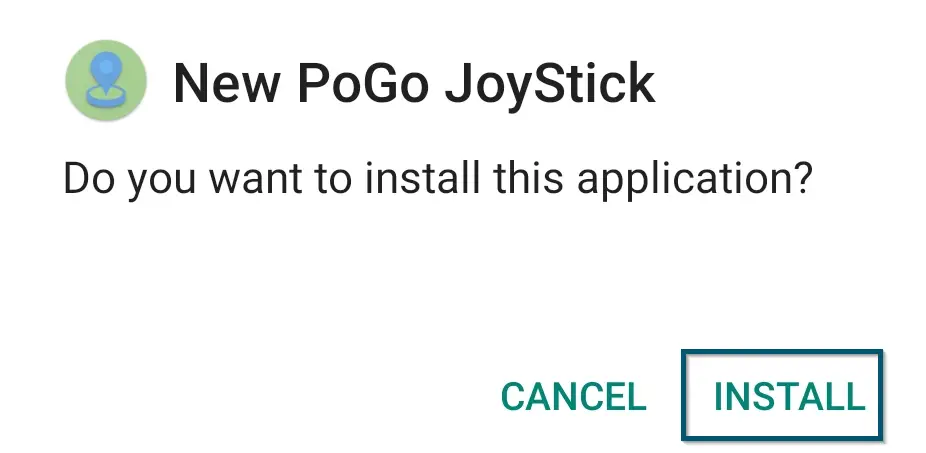
Fake GPS Location – GPS JoyStick’ application has started the procedure of generating a new app - After some time, the ‘Fake GPS Location – GPS JoyStick’ application will ask you to install the newly generated application. So, you’ll tap on the ‘Install’ button.

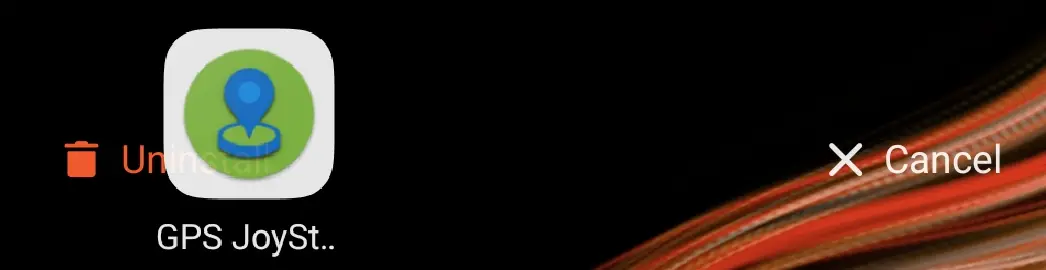
Tapping on the ‘Install’ button to install the newly generated application - Once the installation process is successful, then you’ll uninstall the previously installed ‘Fake GPS Location – GPS JoyStick’ application by long-tapping on it and dropping it to the ‘Uninstall’ option appearing on the top-left corner of the home screen.

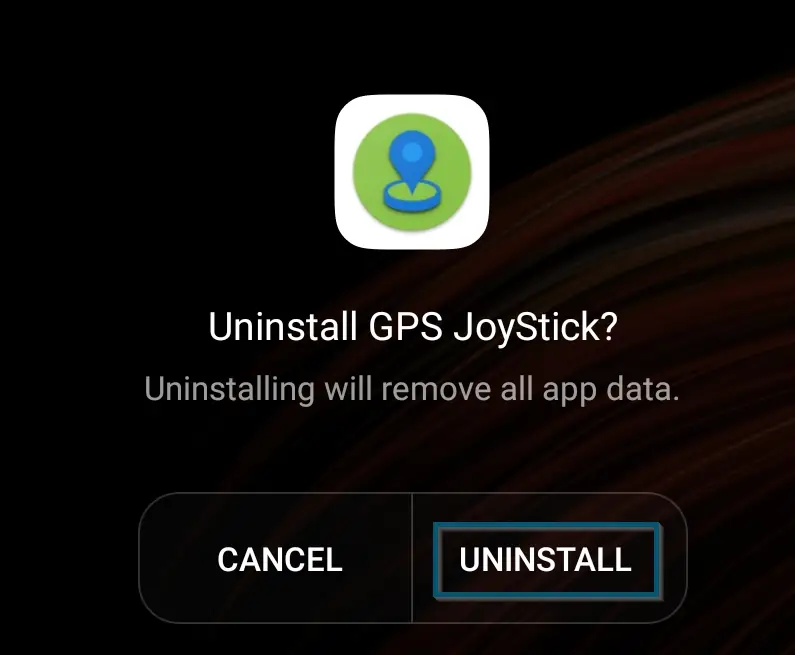
Dropping the ‘Fake GPS Location – GPS JoyStick’ application icon to ‘Uninstall’ option on home screen - Next, the system will ask you to confirm the uninstallation procedure. So, you’ll tap on ‘UNINSTALL’ again.

Choosing the ‘UNINSTALL’ option to confirm the uninstallation procedure of the ‘Fake GPS Location – GPS JoyStick’ Application - Goal 4: Converting the ‘New PoGo JoyStick’ Application to a System Application
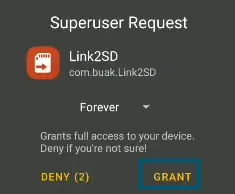
- Now, you’ll download and install a new application named ‘Link2SD’ by opening this link on your android device.
- After that, you’ll open the ‘Link2SD’ application and grant the root permissions by tapping on the ‘GRANT’ button.

Granting the root access to the ‘Link2SD’ application - Once you have granted the root permission, then the application will show the following confirmation message:
Link2SD was granted Superuser rights
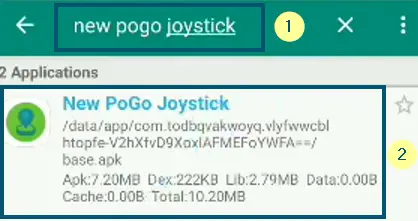
- Now the ‘Link2SD’ application will show all the installed applications. So, you’ll find and open the newly created GPSs JoyStick application named ‘New PoGo JoyStick’ by either scrolling down or searching and tapping on it.

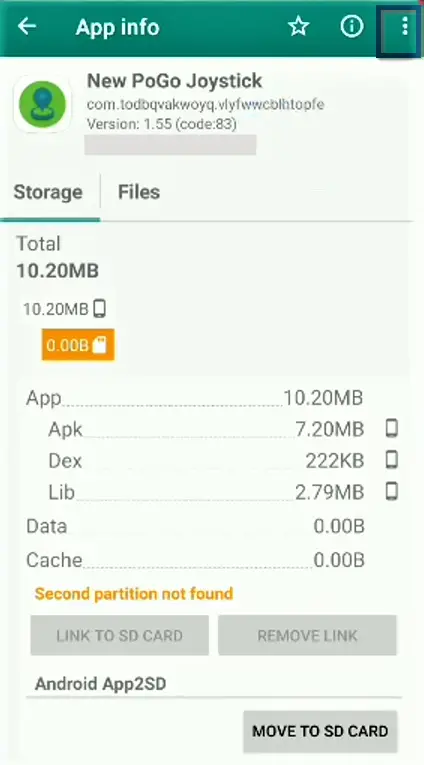
Searching and opening the newly created ‘New PoGo JoyStick’ application in the ‘Link2SD’ app - Once ‘Link2SD’ has opened the window of ‘New PoGo JoyStick,’ then you’ll tap on the ‘three-dots menu’ in the ‘top-right corner’ of the screen.

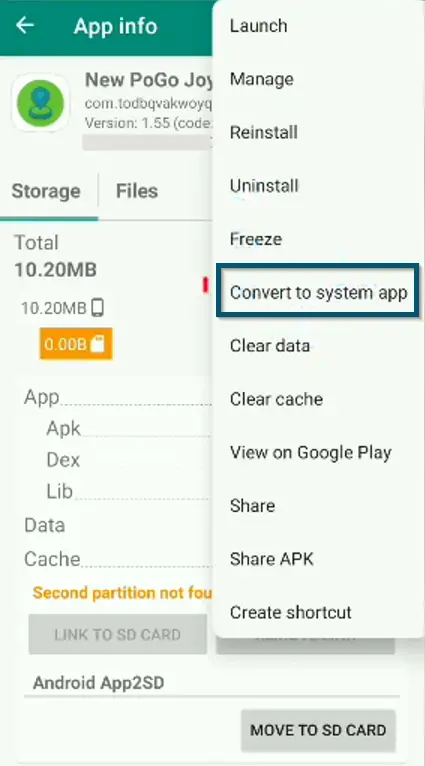
Tapping on the ‘three-dots menu’ in the ‘top-right corner’ of the screen - Now, you’ll click on the ‘Convert to system app’ option.

Clicking on the ‘Convert to system app’ option - Note: If you’re not seeing this option, then you aren’t following the procedure correctly
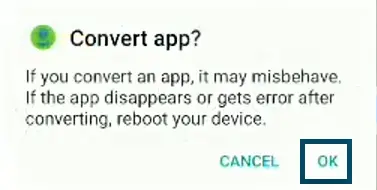
- In the next window, you’ll confirm this procedure by tapping the ‘OK’ option.

Confirming the procedure of converting the application to a system app by tapping the ‘OK’ option - This process will take some time and once the application has completed this procedure, it will ask you to restart your device.
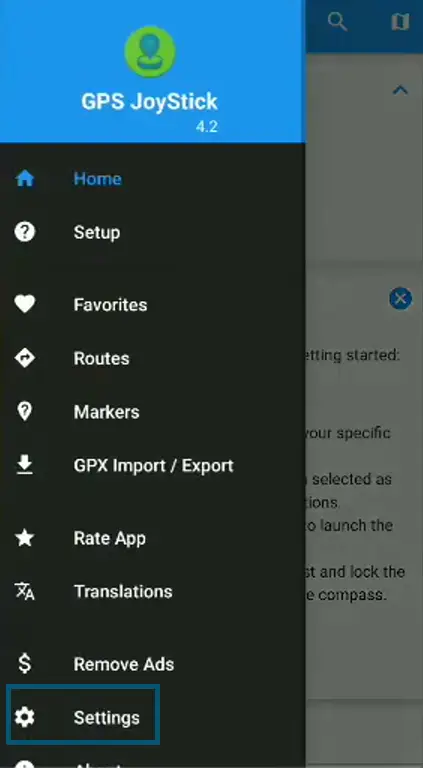
- After restart, when you open the ‘New PoGo JoyStick’ application, then you’ll navigate to its ‘Settings’ by tapping on the ‘three-dots menu’ and scrolling down.

Going to the ‘Settings’ of ‘New PoGo JoyStick’ application from the ‘three-dots menu’ - In the ‘Settings’ window, you’ll scroll down to find that the following options are turned on or not.
Enable Indirect Mocking

Enable System Mode

Disable Location Service

Enable A-GPS Reset
- If these options are not turned on, then turn on them. Otherwise, leave this step.
- Now since we have turned on the option of ‘Disable Location Service,’ therefore, the application will ask us to reboot your device. So, we’ll tap the ‘OK’ option.


Step 5: Unrooting the Device
- Now, you’ll have to unroot the device because the latest versions of Pokémon GO do not allow the users to play the game on a rooted device.
- Here we don’t need to install any new applications. We’ll use the built-in abilities of ‘SuperSU’ which will be automatically installed on your device after rooting.
- So, you’ll tap on the ‘SuperSU’ application to open it.
- After that, you’ll navigate to the ‘Settings’ of this application, which is present on the third tab of this application.
- In the new window, you’ll scroll down to find the ‘Full unroot’ option.
- Now, the application will ask you to confirm this process. So, you’ll first tap on the ‘CONTINUE’ option and then (in the next dialog box, you’ll tap on) the ‘YES’ option and again, you’ll choose the ‘YES’ option in the last dialog box.
- The application will initialize the uninstalling process and after a few seconds, the ‘SuperSU’ application and root access will be removed from your device.
Step 6: Checking Whether the Unroot is Successful or Not?
- Now, you will download and install an application named ‘Root Checker’ from Google Play Store.
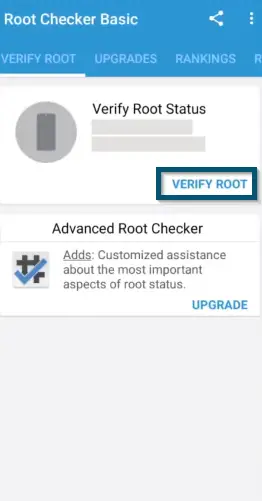
- Once you’ve installed the application, you’ll open it and tap on the ‘VERIFY ROOT’ option.

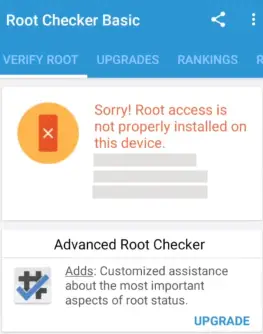
Clicking on the ‘VERIFY ROOT’ option to begin the Root checking process - The application will instantly tell whether the root access is installed on your device or not.
Note: If the Root access is still installed on your device, then you haven’t unrooted the device successfully
Confirmation that the Root access is not installed
Step 7: Setting Up the Location
-
- Now, you’ll ‘follow the first three steps of Basic Tip # 2’ to reach the ‘Location’ window in the ‘Settings’ of your smartphone.
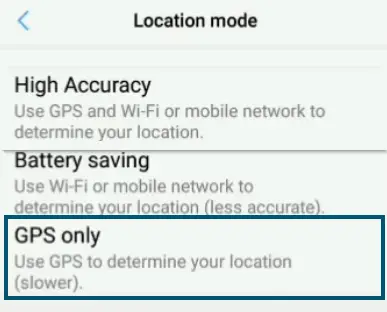
- After that, you’ll choose the ‘GPS only’ (Device only) instead of the ‘High accuracy’ option.
Choosing the ‘GPS only’ option in the ‘Location mode’ section
 Choosing the ‘GPS only’ option in the ‘Location mode’ section
Note: If these settings are not present, then you’ll turn off the ‘Improve Location Accuracy’ option by going to the ‘Location < Google Location Accuracy’ options
- Now, you’ll open the ‘New PoGo JoyStick’ application and under the ‘Select an option to get started’ section, you’ll choose the ‘Set Location’ option.
- Then, you’ll enter the location and start the game.
- Note: If the game error message didn’t solve, then you’ll turn off the ‘Enable Indirect Mocking’ and Enable A-GPS Reset’ options (if these are enabled)
- Hopefully, this lengthy method has proved useful for you because it has helped several other users.
