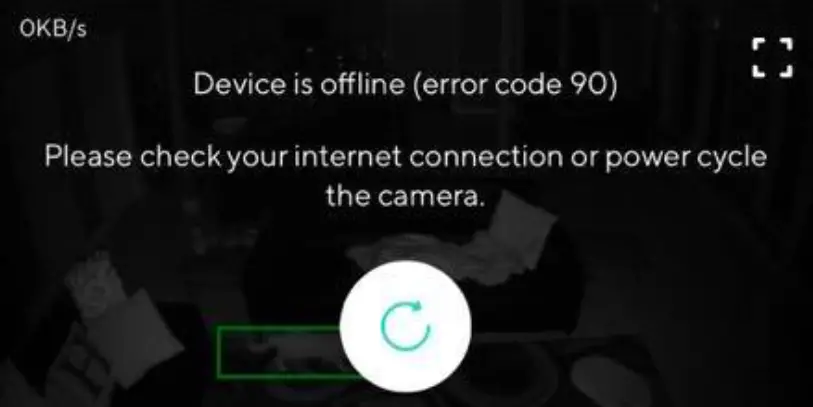
Wyze error code 90 indicates the inability of the Wyze camera to reach its streaming servers. This is due to no internet access or interference in the network. This is a very common error with an option to recheck the internet right underneath the error message.
Several users have faced this issue with different Wyze camera devices, such as Wyze Cam Pan v1/v2, Wyze Cam Outdoor, Wyze Cam v1/v2/v3, and Wyze Video Doorbell.
Causes
Before getting to the solutions, we recommend checking the reasons for this issue for a better understanding of the underlying issue.
- Not fulfilling device requirements of Wyze.
- An overloaded or unstable network can repeatedly cause this problem. Make sure you check the stability of your internet connection.
- This issue can also occur if the Router’s firewall blocks communication of Wyze camera devices with the streaming servers.
- A faulty adapter or cable can also cause this problem.
Verified Fixes
We recommend following some basic troubleshooting tips before moving on to advanced solutions.
Basic Troubleshooting Tips
- Remove the SD card from your Wyze camera device and check if it works.
- If removing the SD card doesn’t work, we recommend using a different adapter and power cable. Even if you have a third-party adapter and power cable, we recommend trying that out.
- If the issue persists, you can power cycle your Wyze camera device as mentioned on the Wyze support site. Power cycling means disconnecting the power source from your device for some time (15-30 seconds) and plugging it again.
- If power cycling doesn’t work, you can reset your Wyze device. However, the resetting procedure is different for each Wyze camera device. Use the following table to apply the resetting steps according to your device type:
| DEVICE-TYPE | RESETTING STEPS |
| Wyze Cam and Wyze Cam Pan |
|
| Wyze Video Doorbell and Wyze Video Doorbell Pro |
|
Important: You can’t reset the Wyze Cam Outdoor because there is no option of reset for that device
Changing the Wi-Fi Channel
Wyze camera devices work with the 2.4Ghz frequency. But compared to the 5Ghz frequency, 2.4Ghz is more vulnerable to nearby interference. That is why your Wyze camera is facing difficulties communicating with the internet and router because of nearby interference.
We recommend switching your Wi-Fi network to non-overlapping channels, such as channels 1, 6, or 11. Although these channels have co-channel interference, it’s a better choice than dealing with adjacent-channel interference of other options.
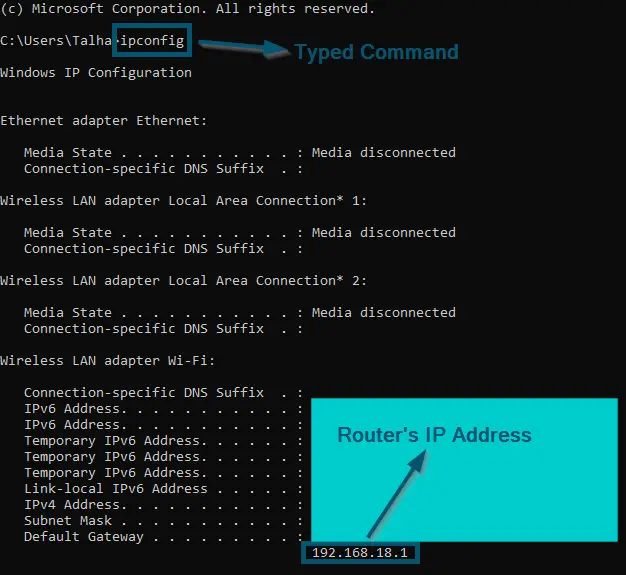
- First of all, open ‘Command Prompt’ on your PC and type the following command:
ipconfig
- Once you’ve executed the command, you can scroll down to find the entry named ‘Default Gateway’ because this is the IP address of your router.

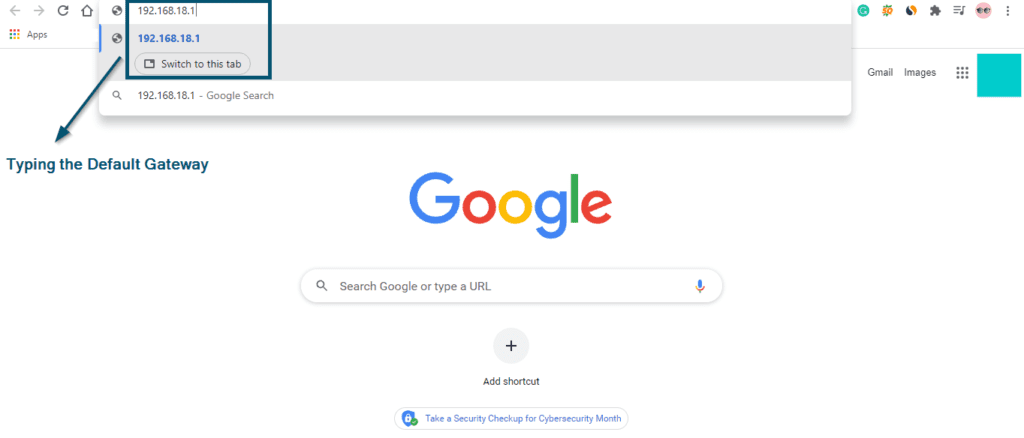
Finding the router’s IP address through PC - Now, open any browser on your computer and type your router’s IP address in the search bar, and hit the ‘Enter’ key.

Entering the default gateway in browser and hitting the ‘Enter’ key - Once you are on the login page, enter your router’s credentials and click on the ‘Log In’ button.

Entering the credentials of Wi-Fi router and clicking on the ‘Log In’ button
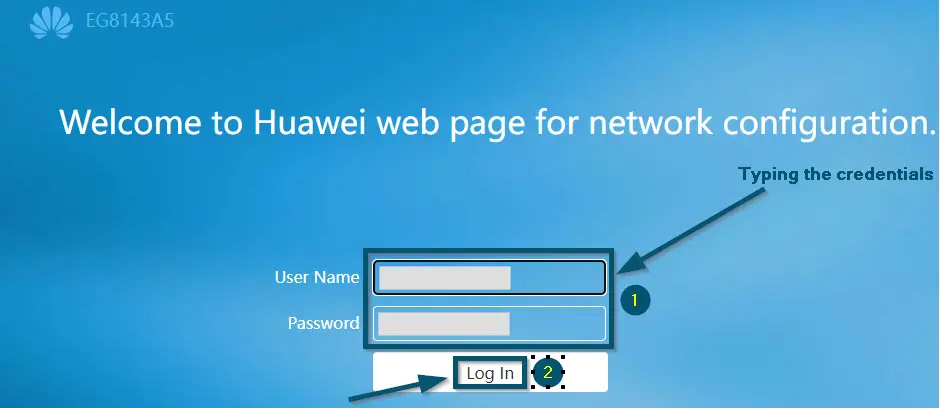
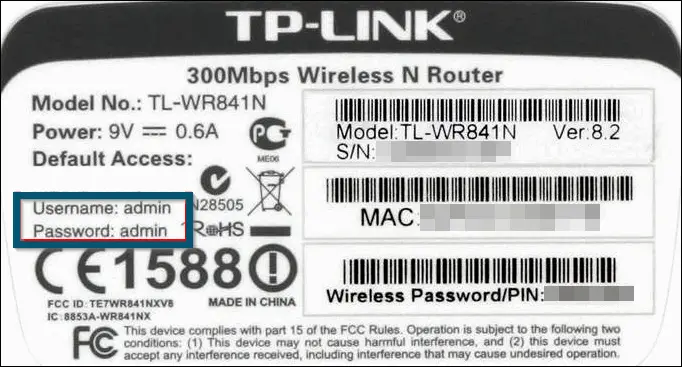
Note: If you don’t know the credentials of your router, you can check the back of your router and pick the entries labeled as ‘username’ and ‘password’
- After entering the credentials, you will get inside the router’s configurations page.
Note: The UI of the router’s configuration page varies from router to router. So, we will perform the operations according to our router’s page and, you can find the same settings in your case.
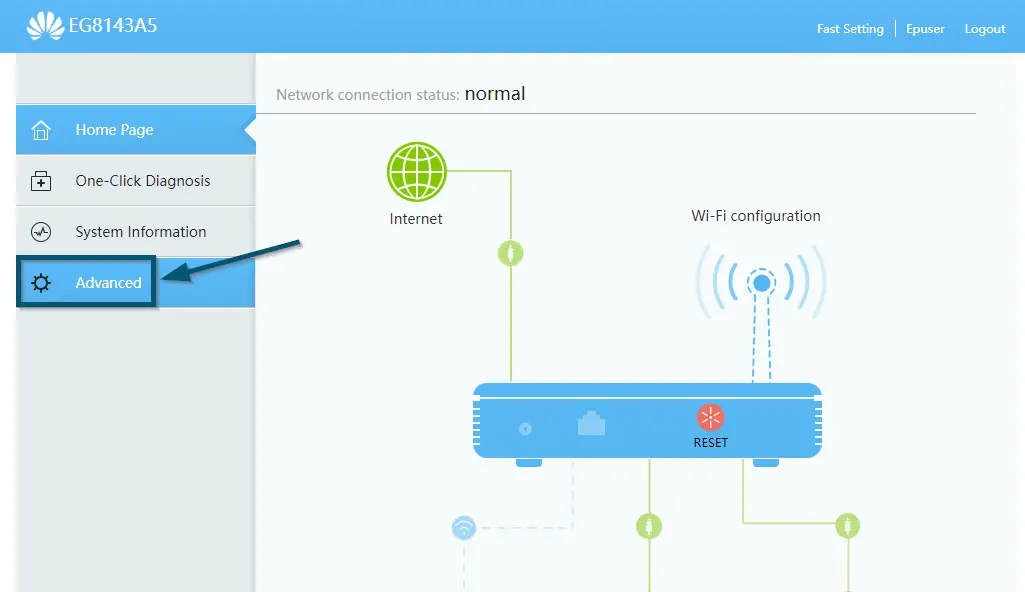
- Click on the ‘Advanced’ tab first.

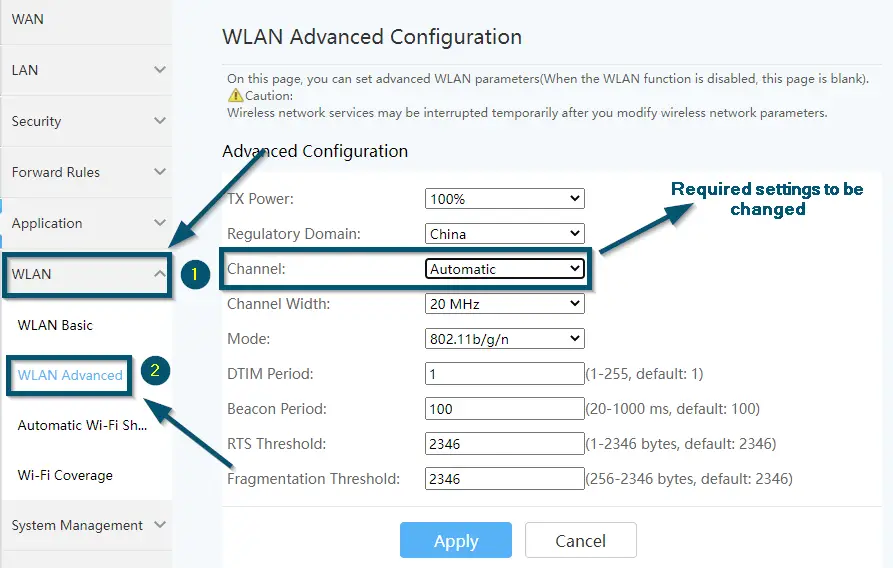
Clicking on the ‘Advanced’ tab in router’s settings home page - Then, expand the ‘WLAN’ section and click on the ‘WLAN Advanced’ option.

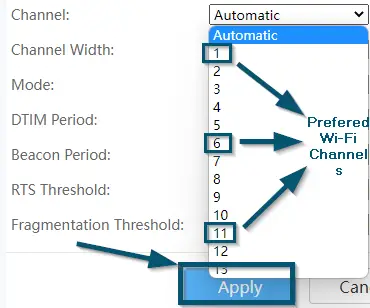
Switching to the ‘WLAN’ tab, then clicking on the ‘WLAN Advanced’ option - Now, change the value against the ‘Channel’ option to ‘1’ or ‘6’ or ‘11’ and apply the settings.

Picking the preferred Wi-Fi channel and applying the settings
Adding Another Wireless Access Point
Sometimes, when your Wyze camera device has a low wireless signal strength issue, you will face the 90 error code. In this case, we recommend adding another wireless access point in your shed.
You can also purchase cheap Wi-Fi extenders from Amazon. These are USB-like devices and can be plugged in any power outlet closer to the location of your Wyze device. This will re-transmit the wireless signals.
Reinstalling Wyze Application and Re-Adding the Camera
Tested for Wyze Cam v2
Your Wyze application acts as a remote controller but through Wireless internet. It helps you set up the device and automate its routine. There are instances where the application is not working as expected. This might occur if it is not updated to the latest build or has corrupt data present.
Here, in this case, reinstalling the Wyze application while also re-adding the camera can help initialize everything from scratch and solve the problem. Make sure you have your account credentials at hand.
- First, uninstall the Wyze application from your smartphone and reinstall it from the App Store.
- Once you have reinstalled the application, tap on the edit icon.

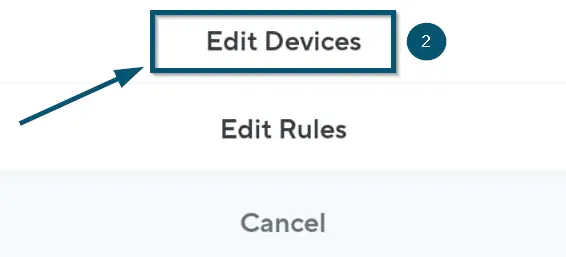
Tapping on the edit icon from the home screen of ‘Wyze’ application - Then, select the ‘Edit devices’ option.

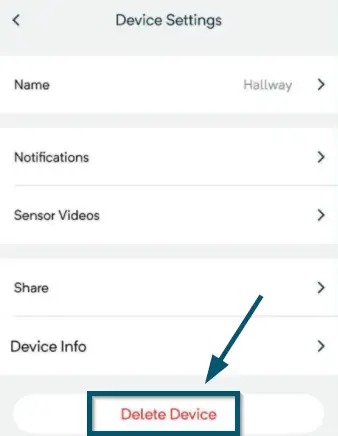
Selecting the ‘Edit Devices’ option - Now, tap on the device you want to delete and after that, tap on the ‘Delete Device’ option.

Tapping on the ‘Delete Device’ button for the selected device - Then, select the ‘Yes’ option in the next window to confirm everything.
Important: The LED of Wyze Cam should be blinking yellow, which indicates the disconnected device
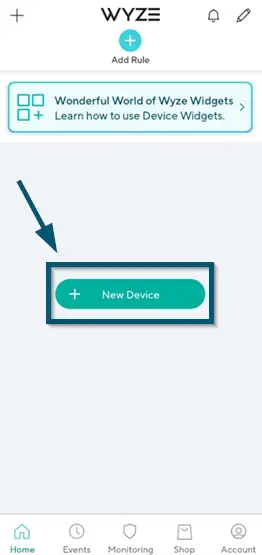
- After deleting the device, tap on the ‘New Device’ button.

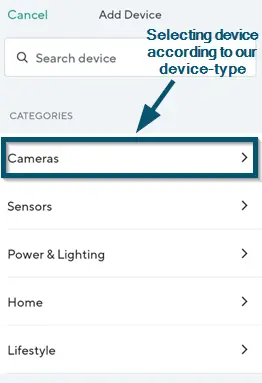
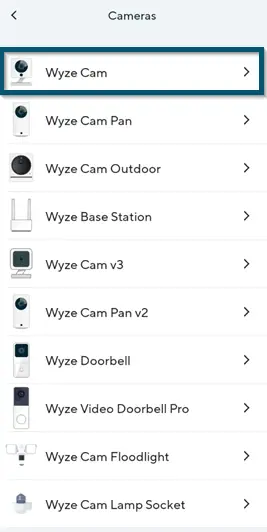
Tapping on the ‘New Device’ button - The application will show the ‘Add Device’ screen. So, tap on the ‘Cameras’ option.

Selecting the device according to our device type from the ‘Add a Device’ screen - Then, choose the camera type from the next screen.

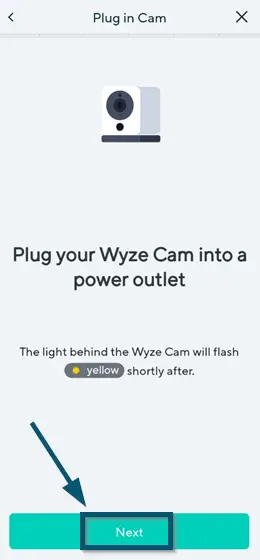
Choosing the ‘Wyze Cam’ as our camera type - Once you have selected your device type, the application will start the device-adding wizard. So, tap on the ‘Next’ button first.

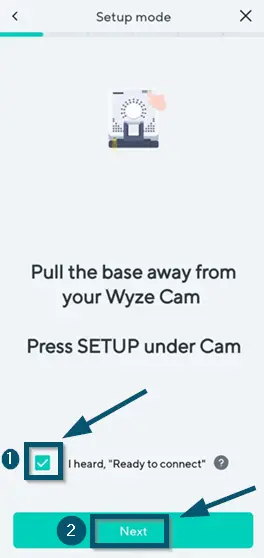
Tapping on the ‘Next’ button from the ‘Plug in Cam’ screen - Then, press the ‘SETUP’ button at the back of the device and check the box against the ‘I heard, “Ready to connect”’ option.
Important: If you have selected some other device, you can read the on-screen instructions in your case
- After that, tap on the ‘Next’ button.

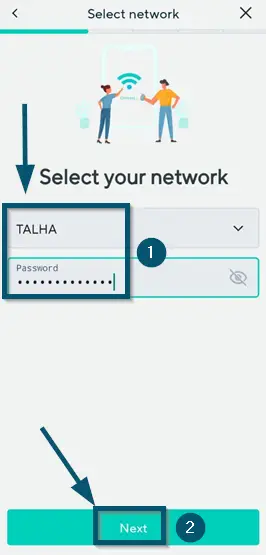
Checking the box against the ‘I heard, ”Ready to connect”’ option and tapping on the ‘Next’ button in the ‘Setup mode’ screen - Now, enter your network’s credentials and tap on the ‘Next’ button.

Entering the network credentials and tapping on the ‘Next’ button in the ‘Select network’ screen
Important: The application will ask you for location access. So, allow it
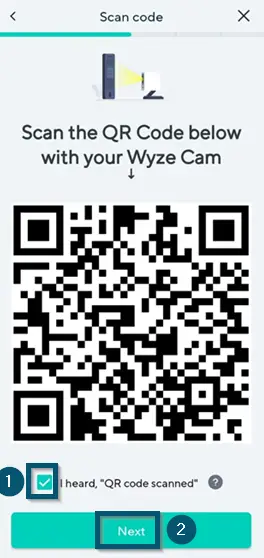
- Then, scan the QR Code (appearing on the smartphone screen) with your Wyze Cam.
- Once the Wyze Cam has successfully scanned the QR Code, you will hear the ‘QR code scanned’ message. So, check the box against the ‘I heard, “QR code scanned”’ option and tap on the ‘Next’ button.
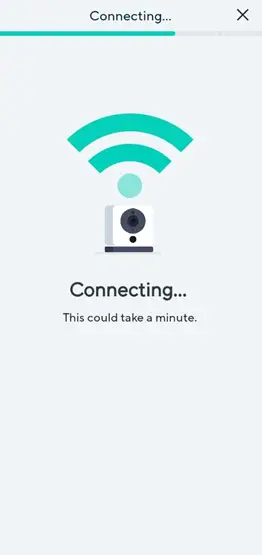
Checking the box that says: ‘I heard, ”QR code scanned”’ and tapping on the ‘Next’ button in the ‘Scan code’ screen - Then, the application will try to connect to your device.
‘Wyze – Make Your Home Smarter’ application is connecting to the device - Follow the on-screen instructions to add your device successfully.
Flashing the Firmware to SD Card
Tested Solution (Lots of Reddit users too)
You might also be facing this error due to a faulty firmware version. Wyze already has a history of releasing unstable firmware. In this case, you can downgrade your Firmware to a lower version that is more stable than the current one. Downgrading the firmware can be a daunting task but it is relatively simple using these steps.
Important: We recommend using an 8GB or 16GB card instead of large one. We received reports of large cards malfunctioning during the process.
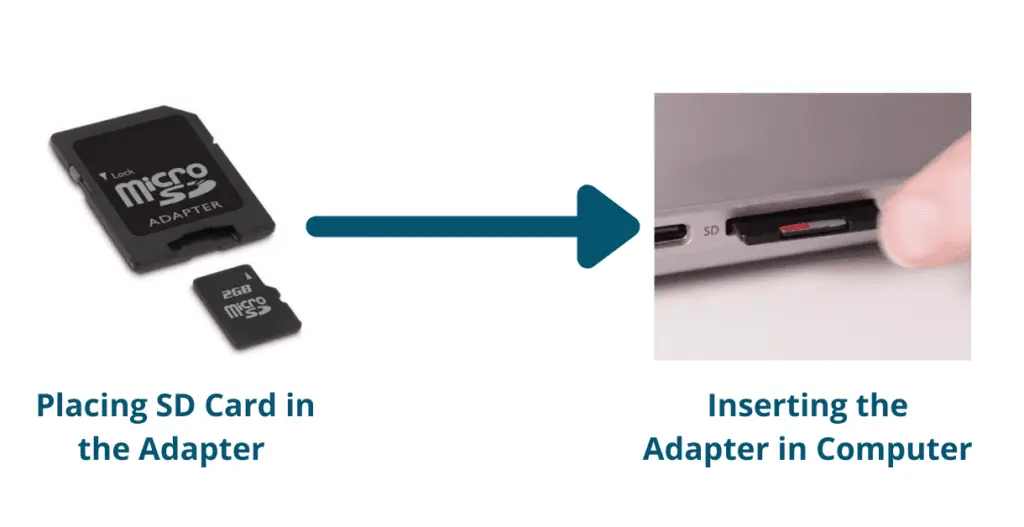
- First, place the microSD card in its adapter, and insert the adapter into your computer.

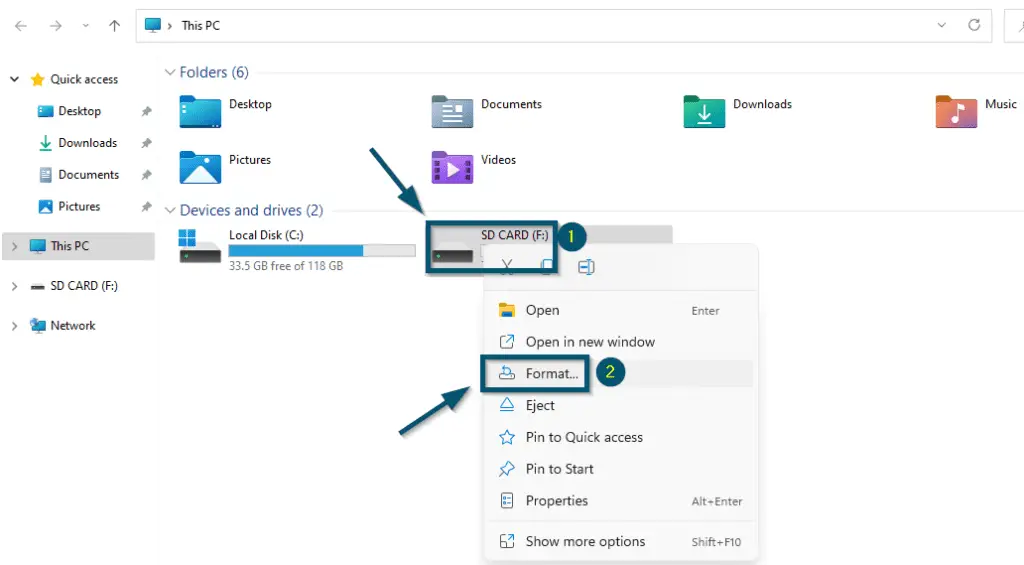
Placing the SD card in the adapter and inserting the adapter into the computer - Now, open the ‘File Explorer’ (or ‘This PC’ or ‘My Computer’) and right-click on the drive of the inserted SD card.
- Then, click on the ‘Format…’ option to format your SD card.

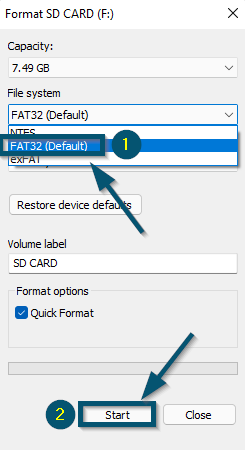
Right-clicking on SD card and choosing the ‘Format…’ option - A sub-window will open. So, choose the ‘File system’ as ‘FAT32’ or ‘FAT’ and click on the ‘Start’ button to start the formatting procedure.

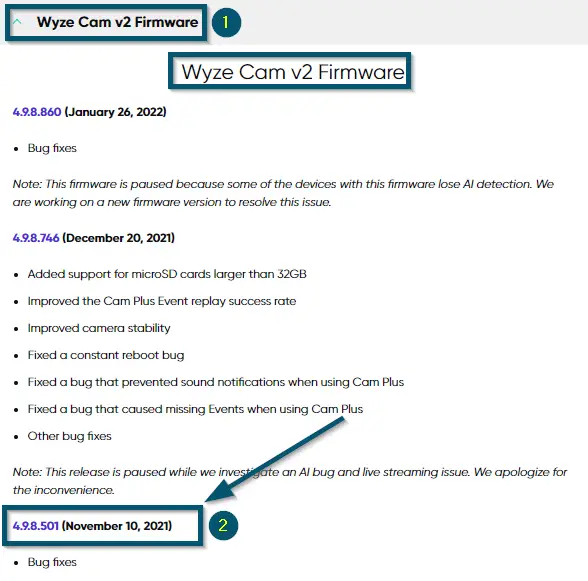
Switching the ‘File system’ to ‘FAT32 (Default)’ and clicking on the ‘Start’ button to start the formatting procedure - After formatting, navigate to the official firmware page of Wyze.
Important: Choose the firmware according to your Wyze camera device. Generally, this information is present at the bottom of every Wyze camera
- Then, scroll down to find the required firmware version according to your Wyze camera device and click on it to start the downloading procedure.

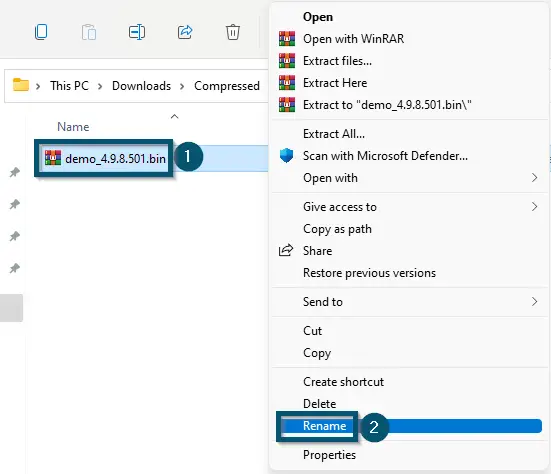
Downloading the required firmware version according to the Wyze Cam device type - Once the download is complete, rename it as ‘demo.bin’ and add it to your SD card.

Renaming the downloaded file by right-Clicking on It and choosing the ‘Rename’ option 
File renamed successfully

Note: This procedure will not work if you use any other name for the downloaded file
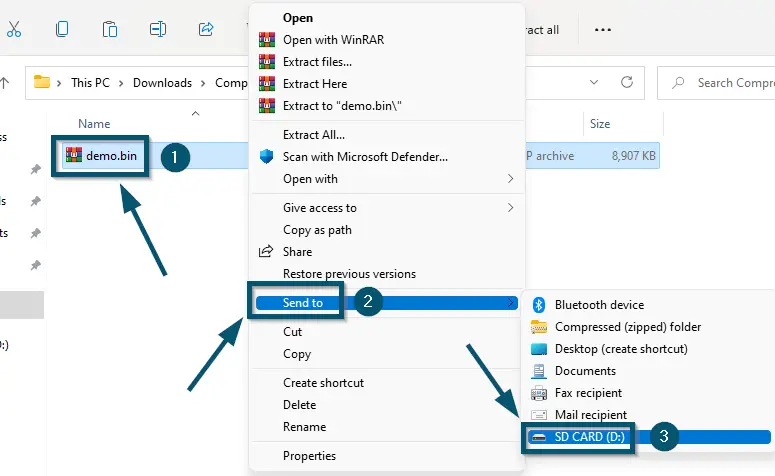
- Now, copy the ‘demo.bin’ file to the plugged-in SD card.

Copying the downloaded ‘demo.bin’ File to the SD card - Once the system has successfully copied the file, insert the microSD card into your Wyze camera device while the camera is powered off/unplugged.
- Now, power up (plug in) your Wyze camera device.
- After that, press and hold the ‘Reset’ button until you hear the ‘Ready to connect’ voice.
Note: This step could take a few minutes. So, don’t leave the ‘Reset’ button
- Once you’ve heard the ‘Ready to connect’ message, you can leave the ‘Reset’ button.
- After that, the LED of the Wyze camera device should be blinking yellow. So, you can set up your Wyze camera device again.
Wrapping up
These are the only verified solutions available to solve the ‘Wyze Error Code 90’ issue. But if you can’t get your Wyze camera to work even after trying all the techniques, we recommend submitting a ticket to the official support team of Wyze.