Adobe Acrobat Reader DC (from Adobe Systems) is a computer program that allows users to view, print, and share PDF files. Being an application of a renowned company, Adobe Systems updates this application frequently to meet the ever-growing needs of users. When the Adobe Acrobat (Reader) DC checks for updates, it uses the AdobeARM.exe file.
Several people have reported high resource consumption issues when the AdobeARM.exe file runs in the background. From its definition to checking if it is a virus, we will discuss everything related to the executable file here. So, without any further ado, let’s dig in.

What is ‘AdobeARM.exe’?
AdobeARM.exe is an acronym for Adobe Reader (Acrobat Reader) and Acrobat Manager. As the name of this file suggests, it is an executable file of Adobe Acrobat Reader DC, which notifies, downloads, and installs updates for Adobe Acrobat Reader DC.
This executable file resides inside the ‘C:\Program Files (x86)\Common Files\Adobe\ARM\1.0’ folder, which is the file’s default location. But if users change its directory during installation, it will have a different place.
Is ‘AdobeARM.exe’ a Virus?
Generally, unknown executable files are dangerous for systems because they often masquerade as official files to attack the systems as trojans. So, it is essential to get rid of such files. But before removing an executable file, it is mandatory to confirm if it is dangerous because every unknown executable file is not harmful to a system. The same is the case with AdobeARM.exe.
1. Checking the Digital Signature
As this executable file belongs to Adobe, it will have the digital ownership of Adobe in its properties. So, check the digital signature of this file to determine whether it belongs to Adobe or is a trojan.
2. Scanning the File with Antivirus
Sometimes, companies don’t provide the digital signature information of a file. So, if this situation represents your scenario for the AdobeARM.exe file, you can scan that file with an antivirus.
For scanning the (under-discussed) executable file, you can use any antivirus application. But here, we will check this executable file (for viruses) using ‘Microsoft Windows Defender.’
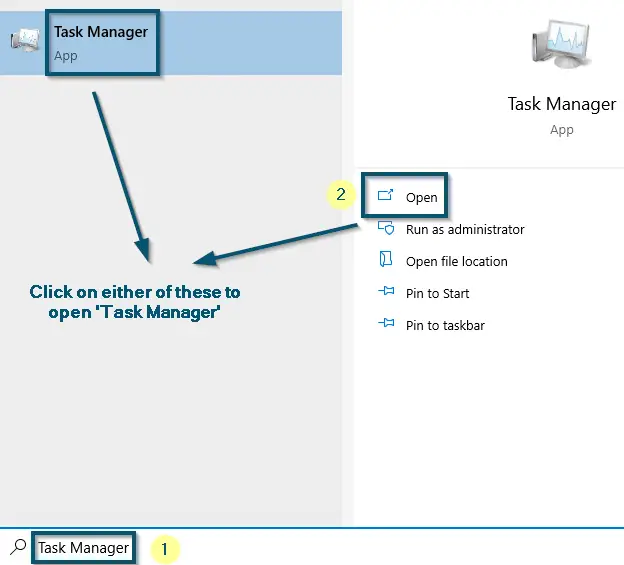
- Open the ‘Task Manager’ on your system.

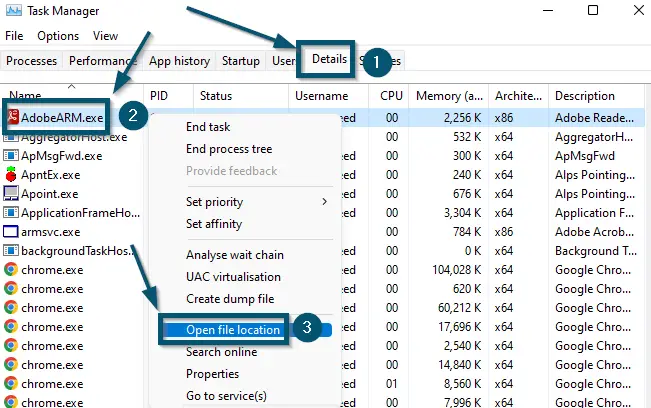
Opening the ‘Task Manager’ from the ‘Start menu’ - Then, switch to the ‘Details’ tab.
- Scroll down to find the ‘AdobeARM.exe’ process.
- Then, select and right-click on the ‘Open file location’ option. Doing this will take you to the root folder of the AdobeARM.exe file.

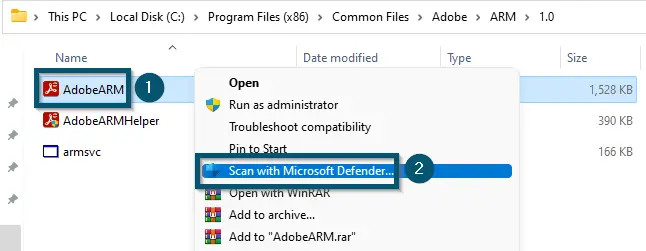
Switching to the ‘Details’ tab, right-clicking on the ‘AdobeARM.exe’ process and choosing the ‘Open file location’ option - Now, right-click on the ‘AdobeARM’ file and choose the ‘Scan with Microsoft Defender…’ option.

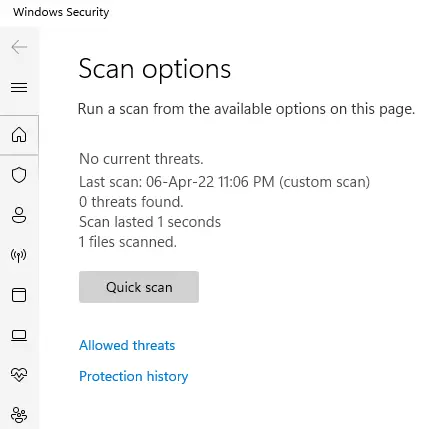
Right-Clicking on the ‘AdobeARM’ (executable) file and choosing the ‘Scan with Microsoft Defender…’ option - Windows Security (Defender) will scan this executable file and show the results within a few seconds.

Results of Windows Security’s (Defender) Scanning for ‘AdobeARM’ (Executable) file
Both methods are valuable for checking if an executable file is safe. However, the digital signature verification method should be your priority. If Adobe doesn’t provide digital signature information for the AdobeARM.exe, you can use the second method.
Anyway, if this executable file is not safe in your case, you should remove it. So, let’s see the steps to remove this executable file.
How to Disable or Stop ‘AdobeARM.exe’?
According to the description of the Adobe AdobeARM.exe file, it is not a critical component of the Windows system. So, suppose this executable file is creating some issues in your system, you can easily disable it without any repercussions.
Here are a few methods that you can use:
1. Uninstalling the Associated Application
As mentioned earlier, the adobe arm 1.0 AdobeARM.exe file is associated with Adobe Acrobat Reader DC. So, the most obvious way to get rid of this executable file is to uninstall the associated application. Thus, try the following steps.
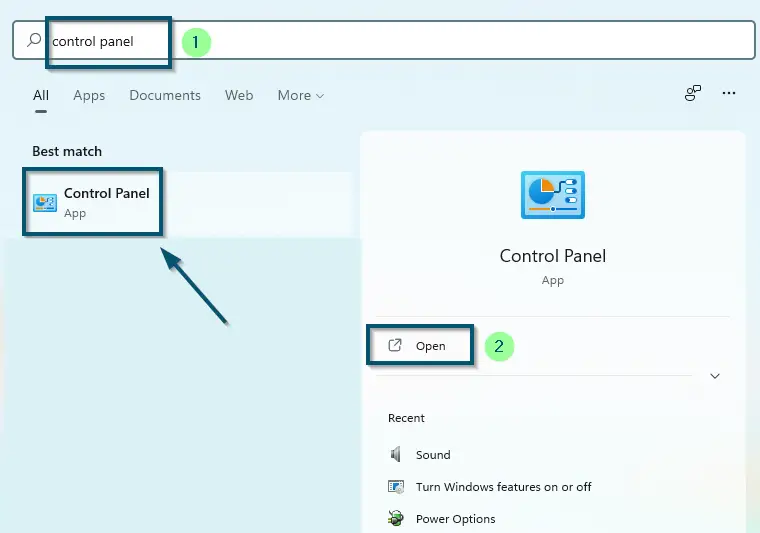
- First, open the ‘Control Panel’ on your system.

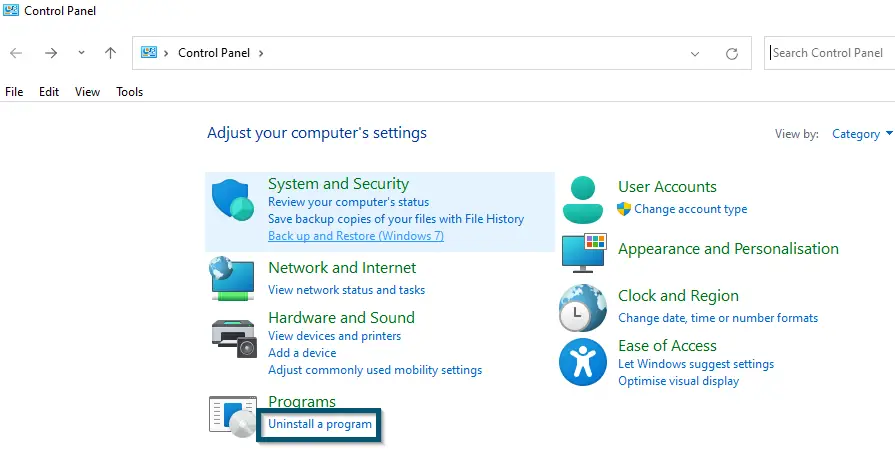
Opening ‘Control Panel’ via ‘Start menu’ - Then, click on the ‘Uninstall a program’ section under the ‘Programs’ category. Doing this will take you to the ‘Programs and Features’ window of ‘Control Panel.’

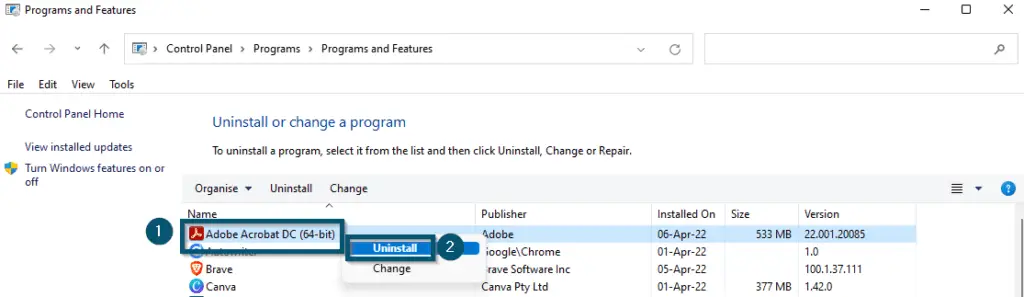
Choosing the ‘Uninstall a program’ option in the ‘Control Panel’ window - So, locate the ‘Adobe Acrobat (Reader) DC’ application and right-click on it.
- Then, choose the ‘Uninstall’ option.

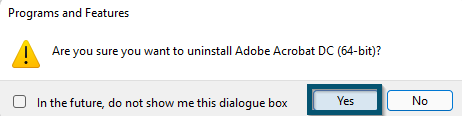
Right-Clicking on the ‘Adobe Acrobat DC (64-Bit)’ application and choosing the ‘Uninstall’ option in the ‘Programs and Features’ window - Now, the system will ask you for confirmation of the uninstallation procedure. So, click on the ‘Yes’ button to begin the process.

Clicking on the ‘Yes’ button to confirm the uninstallation of ‘Adobe Acrobat DC (64-Bit)’ - Your system will gather the required files for performing the uninstallation. So, after a few seconds, it will complete the operation.
This procedure is the easiest way to eliminate the AdobeARM.exe application errors. But if you don’t want to uninstall the associated software, try the next solutions.
2. Disabling ‘Adobe Acrobat Update Task’ via ‘Task Scheduler’
Temporary Solution
Another effective technique to disable the AdobeARM.exe file for fixing the AdobeARM.exe system errors is killing its process. But this is a temporary solution because when you will restart your system or manually perform the Adobe Acrobat Reader DC update procedure, the system automatically starts this process.
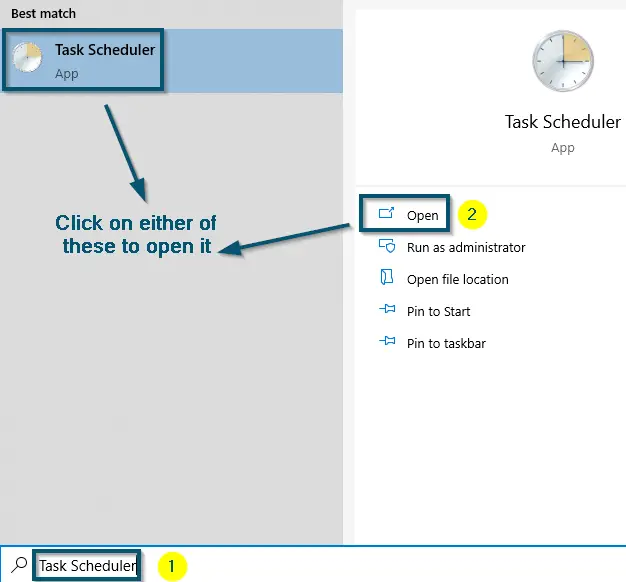
- Open ‘Task Scheduler’ on your system.

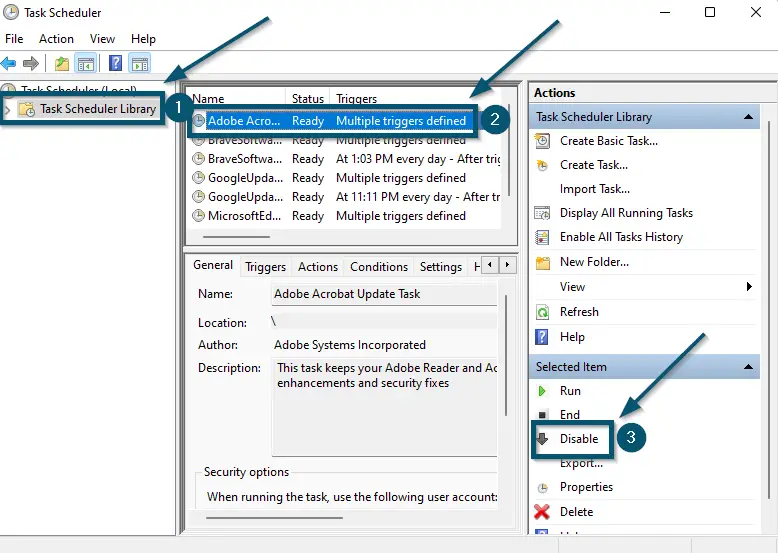
Opening the ‘Task Scheduler’ from the ‘Start menu’ - Click on the ‘Task Scheduler Library’ option (appearing) on the left side.
- Then, select the ‘Adobe Acrobat Update Task’ entry and click on the ‘Disable’ option.

Clicking on the ‘Task Scheduler Library’ option, selecting the ‘Adobe Acrobat Update Task’ entry and clicking on the ‘Disable’ option - Close the ‘Task Scheduler’ and enjoy.
If this temporary solution doesn’t work according to your requirement, try the next solution.
3. Permanently Disabling the ‘AdobeARM.exe’
As mentioned earlier, the procedure of disabling this process via ‘Task Scheduler’ is temporary. So, if you want a permanent solution, try this. This method permanently disables the ‘Adobe Acrobat Update Task’ through the ‘Registry Editor’ and ‘Services’ applications.
- Follow the (four) steps of the previous solution to disable the ‘Adobe Acrobat Update Task’ through ‘Task Scheduler.’
Note: From here, there are two ways of permanently disabling this executable file. So, you can try anyone after attempting the first step of this solution
3.1: Via Registry Editor
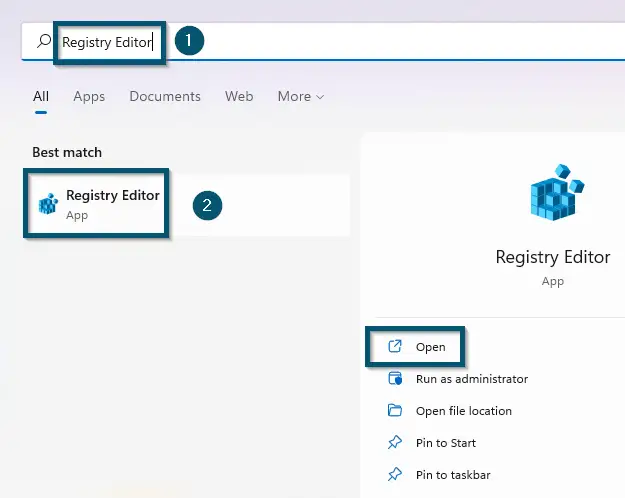
- Now, open the ‘Registry Editor’ on your system.

Opening the ‘Registry Editor’ from the ‘Start menu’ - Then, paste the following address (after the ‘Computer’ entry) into the address bar of ‘Registry Editor’ and hit the ‘Enter’ key
\HKEY_LOCAL_MACHINE\SOFTWARE\WOW6432Node\Adobe\Adobe ARM\Legacy

- After that, expand the ‘Acrobat’ folder under the ‘Legacy’ folder.
- Then, double-click on the product code folder.

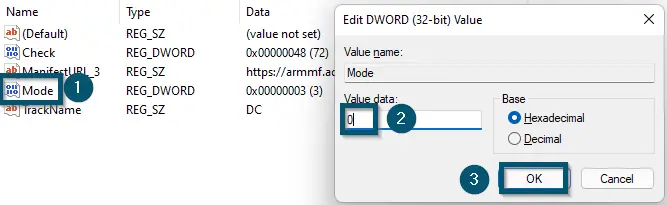
Expanding the ‘Acrobat’ folder under the ‘Legacy’ folder and double-clicking on the product code - Now, double-click on the ‘Mode’ file.
- Then, type the value in the ‘Value data:’ box (according to the guide below) and click on the ‘OK’ button to confirm changes.

Double-Clicking on the ‘Mode’ file, changing its value and clicking on the ‘OK’ button

Note: Use the following guide to understand the data values of the ‘Mode’ file
0 – this value will disable the automatic updates downloading and installation procedure.

2 – it will automatically download the updates. But this option will allow the users to choose the duration for installing the updates.

3 – this is the default value of the ‘Mode’ file. Therefore, when ‘Mode’ is set to ‘3,’ the program will automatically download and install the updates.

4 – this value will notify the users when updates are available. However, it won’t download them.
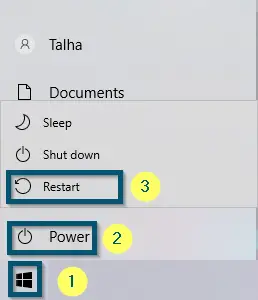
- After that, close the ‘Registry Editor’ and restart your computer.

Restarting the system
3.2: Via Services
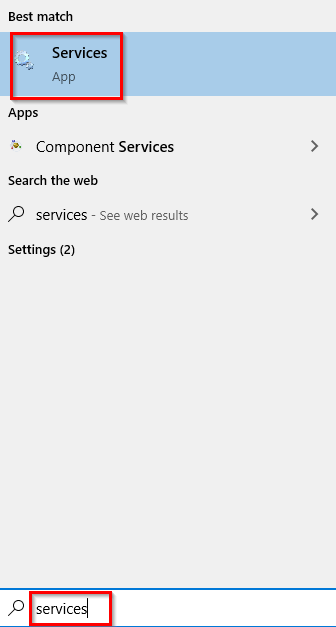
- Now, open the ‘Services’ application on your system.

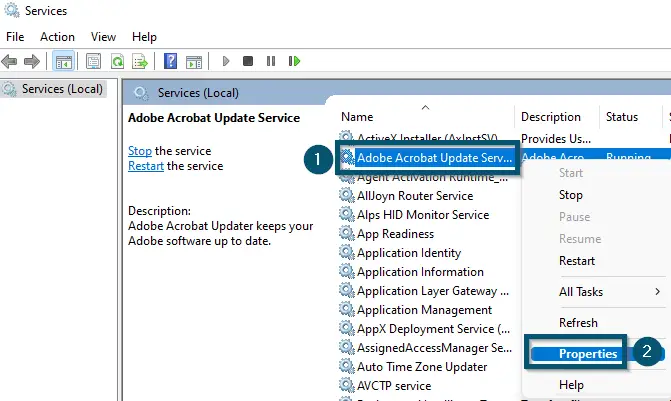
Searching and opening the ‘Services’ application from the ‘Start menu’ - Then, select the ‘Adobe Acrobat Update Service’ entry and right-click on it.
- After that, choose the ‘Properties’ option.

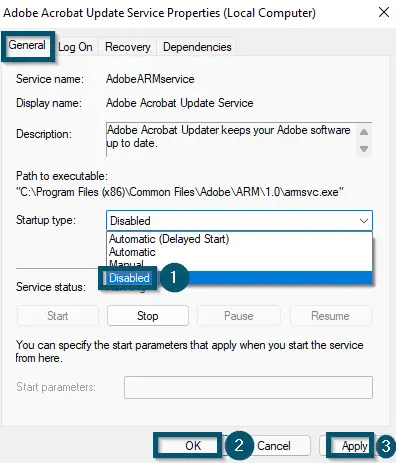
Right-clicking on the ‘Adobe Acrobat Update Service’ entry and choosing the ‘Properties’ option - Change the ‘Startup type:’ to ‘Disabled’ (in the ‘Properties’ window) and apply the changes by clicking on the ‘Apply’ < ‘OK’ buttons.

Changing the ‘Startup type:’ to ‘Disabled’ and applying the changes by clicking on the ‘Apply’ and ‘OK’ buttons - Now, Adobe Acrobat (Reader) DC will not download the updates, which means ‘AdobeARM.exe’ will never run.
After following the first step of this solution, you can attempt any sub-solutions.
