The ‘nvlddmkm.sys’ is an unclear error message because it isn’t associated with one specific problem. It indicates some issues between the NVIDIA graphics card and Windows operating systems. This message is often also associated with a BSOD.

When does this Error Code Occur?
nvlddmkm is a software component of Windows that acts as a bridge between the hardware and software counterparts of the computer. It stands for Nvidia Windows Longhorn Display Driver Model Kernel Mode Driver. However, the ‘nvlddmkm.sys’ error code occurs when a task (editing, gaming, or rendering) requires a large portion of graphics memory for a long time.
Why does this Error Code Occur? – the Probable Reasons
The exact causes of this error are different for each use case. But the following are the most common reasons for this error message.
- If the graphics card has a damaged component, your card heats up and it doesn’t allow higher clock speeds. This behavior results in the BSoD error followed by the ‘nvlddmkm.sys’ error code.
- The NVIDIA graphics driver has to respond to the Windows operating system in a specified time. But when the driver doesn’t respond within a short deadline, it is the job of TDR (Time Detection and Recovery) to reset the functioning of the driver. That is when the ‘video TDR failure’ along with ‘nvIddmkm.sys’ error occurs. As a result of it, you see the Blue Screen of Death issue.
- Sometimes, when the system is in the Adaptive power mode, battery saving is the priority of the system rather than the performance. That is when people also face the ‘nvlddmkm.sys NVIDIA corporation video_tdr_error’ issue.
- An overclocked graphics card might be the reason for this issue.
- A faulty graphics card can also be the reason for this issue.
- Sometimes a corrupted or incompatible graphics card driver can also cause problems.
How to Fix this Error Code? – the Solutions
Before trying any complex solutions, we recommend running the SFC scans and DISM tool to check whether the system reports any error or not. Sometimes, the DISM and SFC scans can solve discrepancies in different files.
However, if the built-in troubleshooters don’t fix this issue, try the following solutions.
1. Underclocking the Graphics Card
If you are experiencing a Blue Screen of Death (BSoD) error followed by the ‘nvlddmkm.sys’ error code, we recommend downclocking/underclocking your graphics card. People use different applications to underclock graphics cards, but we’ll do the underclocking/downclocking with MSI Afterburner.
- First of all, open MSI Afterburner. But if you have not already installed it on your system, then navigate to the following link to download and install this software:
https://www.msi.com/page/afterburner
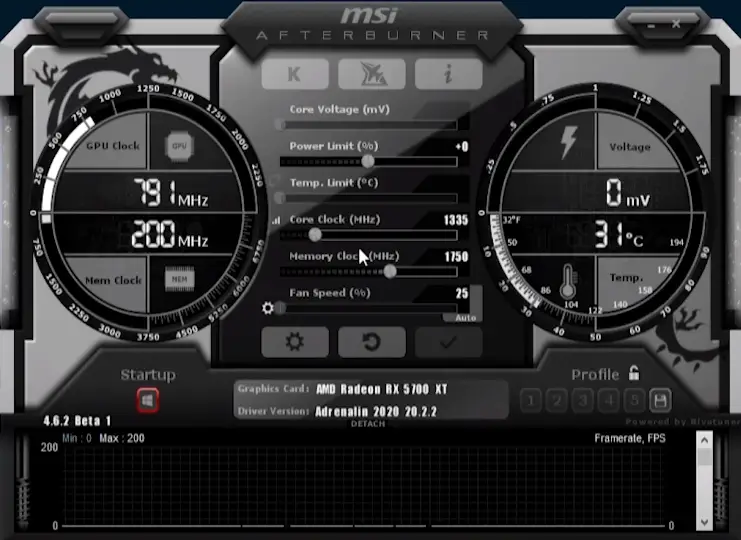
- Once you have downloaded the software, open it and you will see the following window.

‘MSI Afterburner’ home screen - The software will automatically detect the graphics card before needing to make any adjustments.
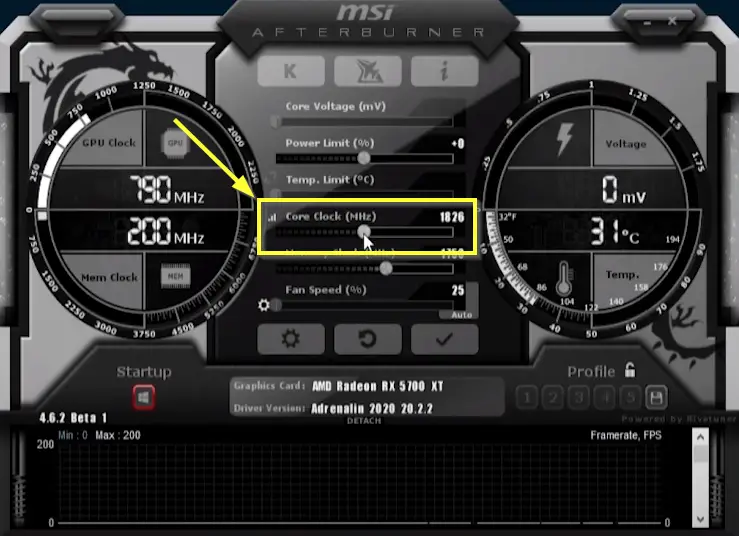
- Now, adjust the slider of ‘Core Clock (MHz)’ towards the left according to your preferred adjustment.

Adjusting the slider of ‘Core Clock (MHz)’ to left for underclocking the graphics card - After that, click on the tick (apply) button to override the adjustments.
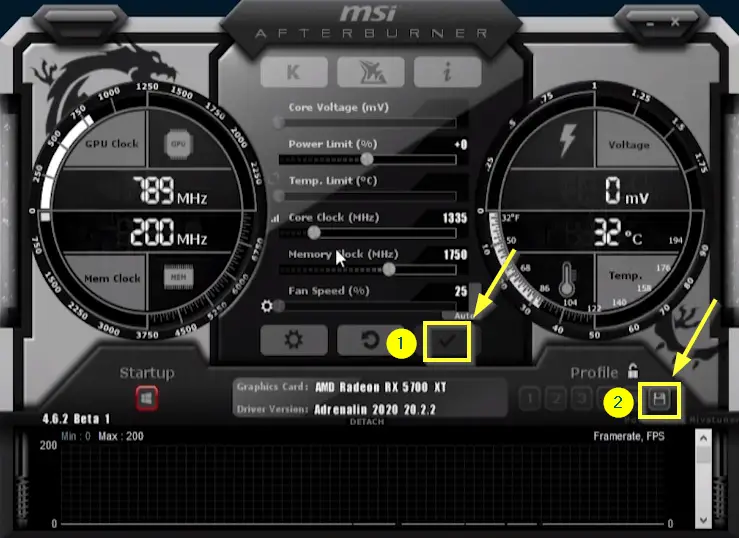
- Now, save the new adjustments to your preferred profile.

Clicking on the ‘Tick (Apply)’ button and saving the new adjustments to the preferred slot Number
Once you have underclocked your graphics card, then check whether this solution has proved useful for you or not.
2. Reinstalling the Drivers of Graphics Card
Sometimes, the BSOD (Blue Screen of Death) followed by the ’nvlddmkm.sys’ error code occurs when the system is in an idle state. So, if that is your case, we recommend reinstalling the graphics card drivers in the following way.
Booting the System in the ‘Safe Mode’
Firstly, boot your system into Safe Mode. You can check our guide on How to enable Safe Boot here.
- Once you are in Safe Mode, press the ‘Windows + X’ keys to open a list of options. Choose the ‘Device Manager’ option to open the Device Manager window.
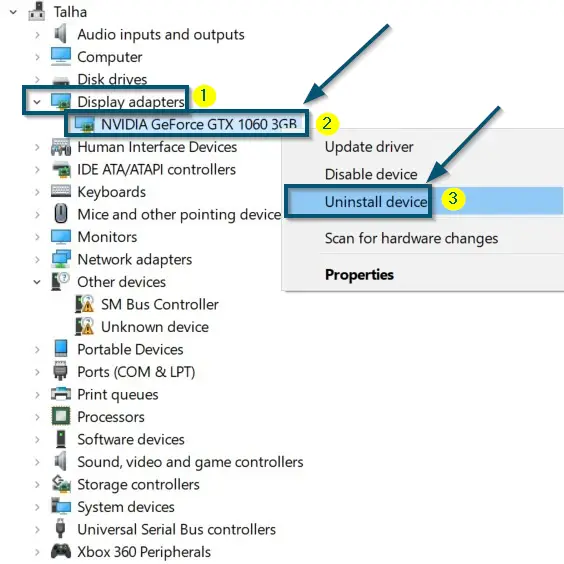
- Then, expand the ‘Display adapters’ option and right-click on the graphics card.
- The ‘Device Manager’ window will display some new options. Choose the ‘Uninstall device’ option to uninstall the graphics card driver.

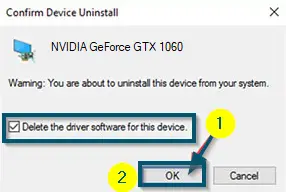
Choosing the ‘Uninstall device’ option after right-clicking on the installed graphics card in the ‘Device Manager’ window - Now, Windows will display a confirmation message. Check the ‘Delete the driver software for this device’ option and click on the ‘OK’ (or ‘Uninstall’) button.

Checking the ‘Delete the driver software for this device.’ option and clicking on the ‘OK’ button - Once you have uninstalled the drivers, boot your computer normally by disabling Safe Boot.
Downloading and Installing the Latest Graphics Card Drivers
- Now, install the graphics card drivers from the official website. As mentioned earlier, this message occurs with NVIDIA graphics cards. So, check the complete guide on installing the NVIDIA graphics card driver.
Changing the Name of ‘nvlddmkm.sys’ File
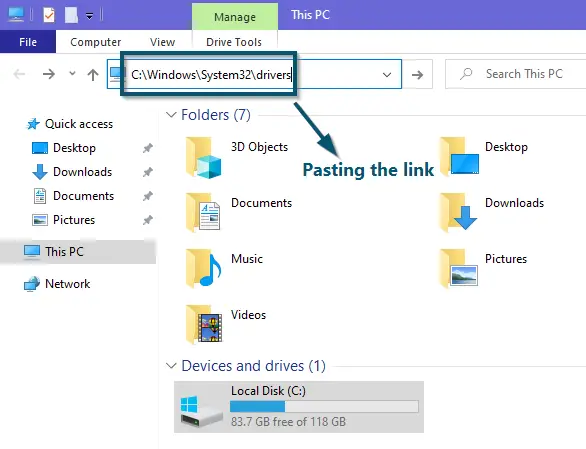
- Now, paste the following link in the address bar of ‘File Explorer’ and hit the ‘Enter’ key to reach the required folder.
C:\Windows\System32\drivers

Pasting the link to the ‘driver’ folder - Scroll down to find the ‘nvlddmkm.sys’ file in the ‘drivers’ folder.
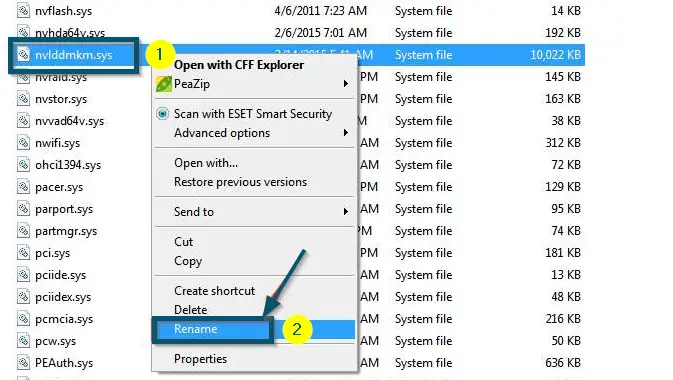
- Once you’ve found the required file, right-click on it and choose the ‘Rename’ option. Then, type ‘nvlddmkm.sys.old’ to rename the selected file.
Note: Your system will ask for confirmation. So, click on the ‘Yes’ button.
Right-clicking on the ‘nvlddmkm.sys’ file and choosing the ‘Rename’ option - Now, go to the root directory of ‘NVIDIA’ in your system and scroll down to find the file named ‘nvlddmkm.sy_.’
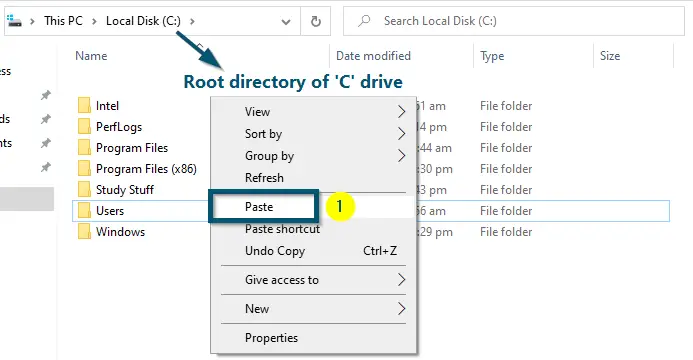
- Once you have found the required file, copy and paste it to the root directory of the ‘C’ drive.

Pasting the ‘nvlddmkm-sy_’ file to the root directory of the ‘C’ drive Creating a New ‘nvlddmkm.sys’ File
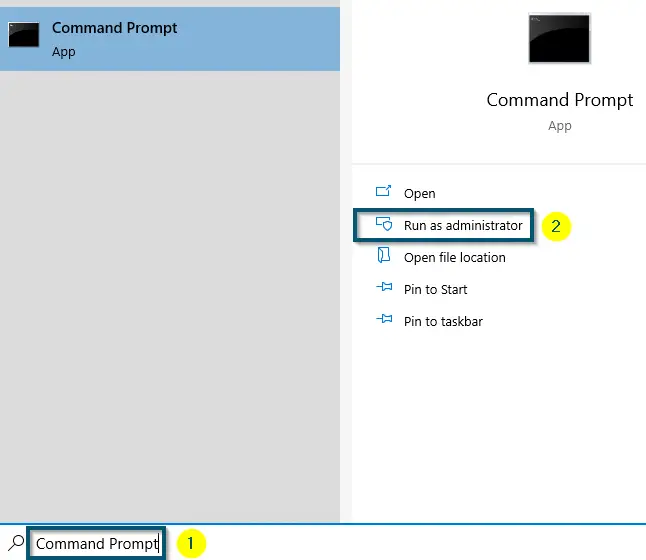
- Now, open ‘Command Prompt’ as ‘Administrator.’

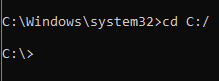
Opening ‘Command Prompt’ as ‘Administrator’ - Then, navigate to the ‘C:’ drive by typing the following command:
cd C:/

Navigating to the ‘C’ drive via ‘Command Prompt’
- After that, type the following command in the ‘Command Prompt’ and hit the ‘Enter’ key to create a new ‘nvlddmkm.sys’ file
expand.exe nvlddmkm.sy_ nvlddmkm.sys

Typing and executing the command for creating a new ‘nvlddmkm.sys’ file
- Copying the Newly Created ‘nvlddmkm.sys’ File to the ‘drivers’ Folder
- Now, navigate to the ‘C:’ drive to find the newly created ‘nvlddmkm.sys’ file.
- Once you have found the required file, copy it and paste it into the ‘drivers’ folder.Note: Follow step # 8 to reach the ‘drivers’ folder
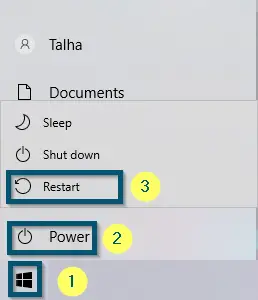
- Now, restart your system.

Restarting the system

After the system boots, check whether this solution has solved the BSoD and ‘nvlddmkm.sys’ issue or not. If yes, then good for you. Otherwise, try the next solution.
3. Disabling ‘Intel Power Management Settings’
For People Using ‘Intel’ Graphics Card
If the ‘nvlddmkm.sys’ with ‘video TDR failure’ issue persists, we recommend disabling the ‘Intel Power Management Settings.’ This power management system is known to conflict with the system and cause TDR failures.
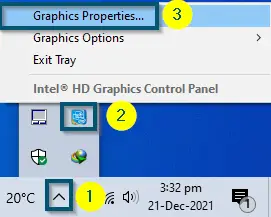
- First, go to the bottom-right of ‘Taskbar’ and click on the ‘Show hidden icons’ option to reveal a set of icons.
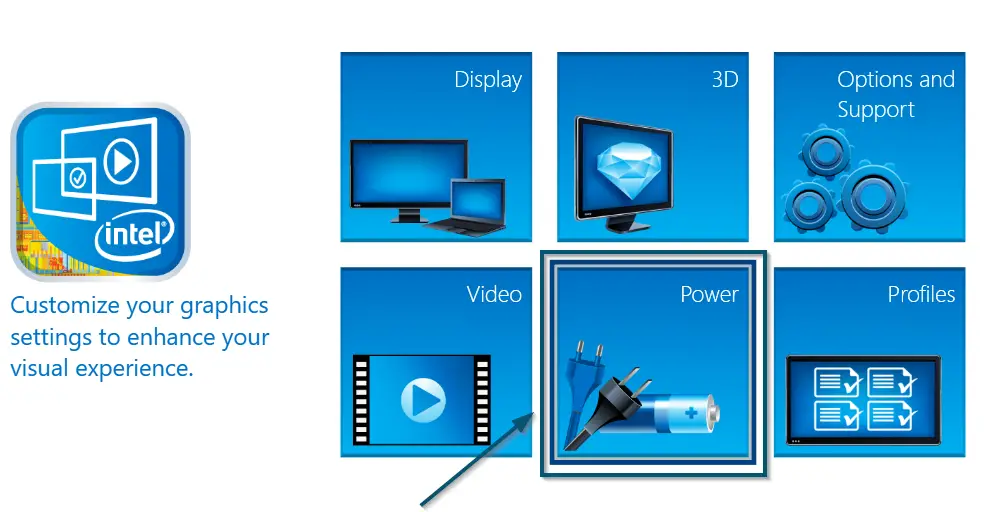
- So, choose the ‘Graphics Properties…’ from those icons, which will reveal the ‘Intel Graphics Control Panel.’

Navigating to the ‘Graphics Properties’ of ‘Intel Graphics Control Panel’ - Now, click on the ‘Power’ option in the ‘Intel Graphics Control Panel.’

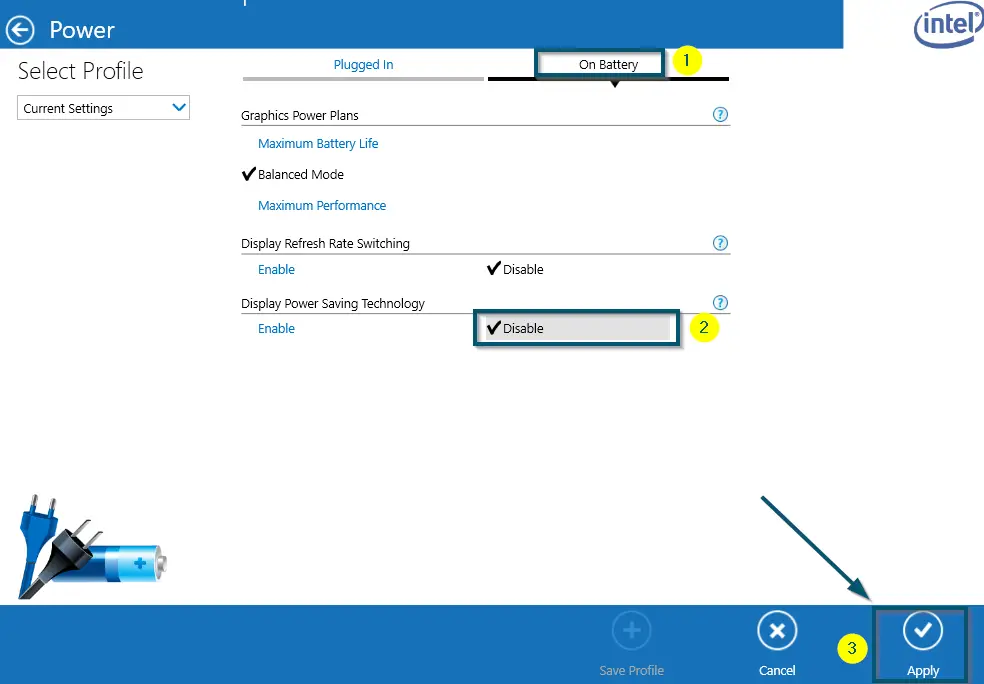
Clicking on the ‘Power’ option inside the ‘Intel Graphics Control Panel’ - Then, navigate to the ‘On Battery’ tab and click on the ‘Disable’ option under the ‘Disable Power Saving Technology’ option.
- Now, click on the ‘Apply’ icon to apply the new settings.

Choosing the ‘Disable’ option under the ‘Display Power Saving Technology’ section and applying the settings
4. Setting Graphics Card to Maximum Performance Mode
As mentioned earlier, the ‘nviddmkm.sys’ in Windows 10 also occurs if the ‘Power management mode’ is set to ‘Adaptive’ for your graphics card. We recommend putting the NVIDIA card in the maximum performance mode.
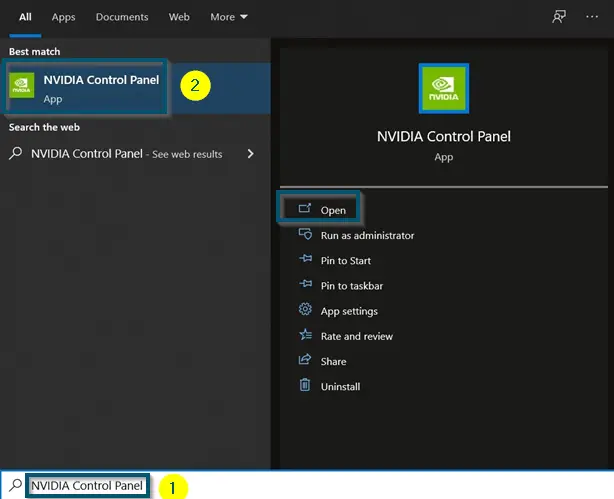
- First of all, open the ‘NVIDIA Control Panel.’

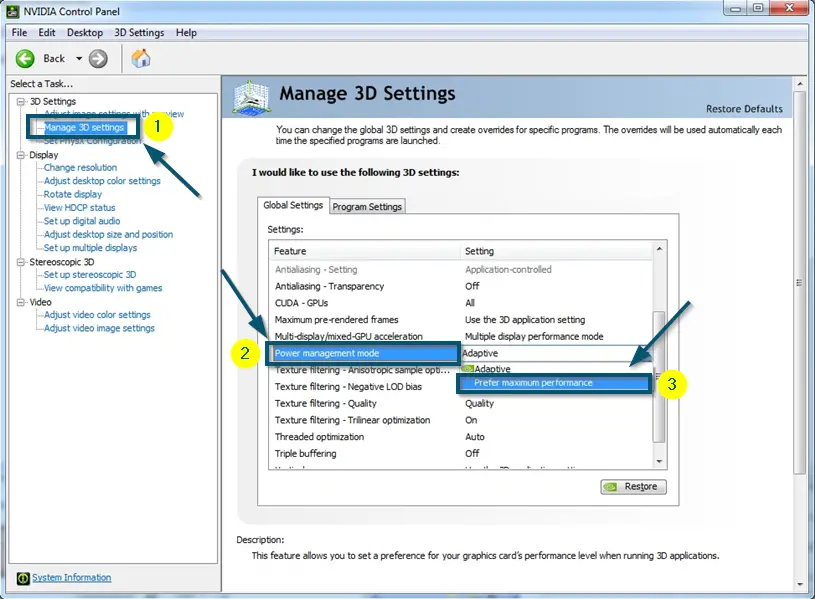
Opening ‘NVIDIA Control Panel’ from ‘Start menu’ - Now, click on the ‘Manage 3D settings’ option under the ‘3D Settings’ section.
- After that, scroll down to find the ‘Power management mode’ settings and change it to ‘Prefer maximum performance.’

Changing the ‘Power management mode’ to ‘Prefer maximum performance’ - Then, click on the ‘Apply’ button appearing at the bottom-right of the screen to save the changes.

Clicking on the ‘Apply’ button to save the new settings in the ‘NVIDIA Control Panel’ - Lastly, restart your system to make sure that the system has applied the new settings.
Restarting the system


After the system restarts, check whether this solution solved the problem.
5. Disable the Low-level Options in MSI Afterburner Settings
Tested for RTX 3080 Users
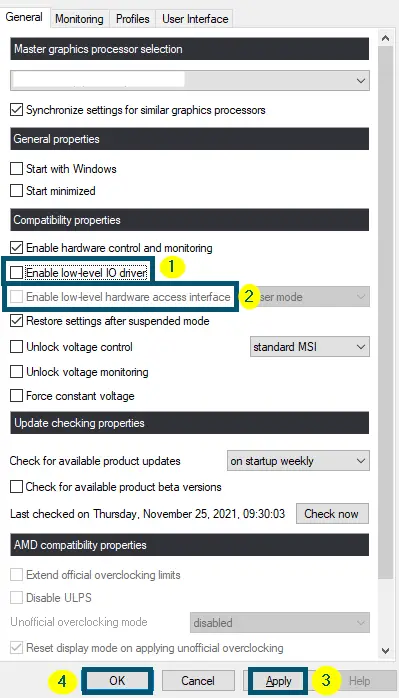
Sometimes, the enabled options of ‘Enable low-level hardware access interface’ and ‘Enable low-level IO driver’ options in MSI Afterburner settings could be the reason for the occurrence of this issue. So, disabling these two settings in the MSI Afterburner settings will fix the issue in this case.
- Open MSI Afterburner.
- Then, press the ‘Ctrl + S’ keys to open the ‘Settings’ panel of ‘MSI Afterburner.’
- Inside the ‘General’ tab, uncheck the ‘Enable low-level hardware access interface’ and ‘Enable low-level IO driver’ options.
- Now, click on ‘Apply’ and the ‘OK’ buttons.

Unchecking the ‘Enable low-level hardware access interface’ and ‘Enable low-level IO driver’ options in the ‘Settings’ of ‘MSI Afterburner’
6. Disabling Dedicated Graphics Card
Last Resort
If you have applied all the above solutions but the error still persists, then we recommend disabling the dedicated graphics card and using the integrated one. You should use this method only if you have both integrated and dedicated graphics cards.
There are two ways of disabling the graphics card. You can either use the ‘Device Manager’ or ‘BIOS’ for disabling the dedicated graphics card. ‘BIOS’ is different for every manufacturer. We will use the ‘Device Manager’ option.
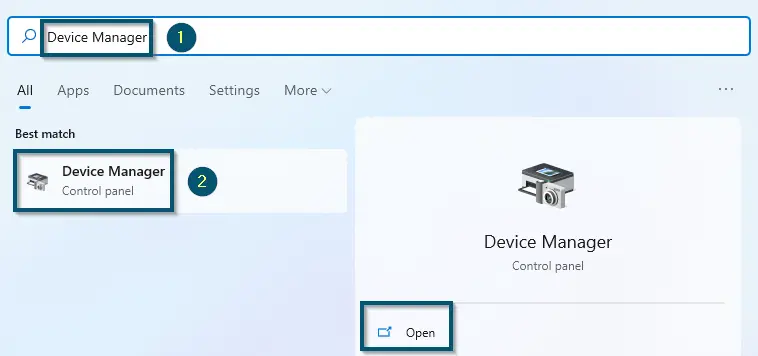
- First, open the ‘Device Manager.’

Opening ‘Device Manager’ from the ‘Start menu’ - Then, scroll down to find the ‘Display adapters’ option and expand it.
- Right-click on the dedicated graphics card and choose the ‘Disable device’ option.

Choosing the ‘Disable device’ option for the dedicated graphics card in the ‘Device Manager’ window
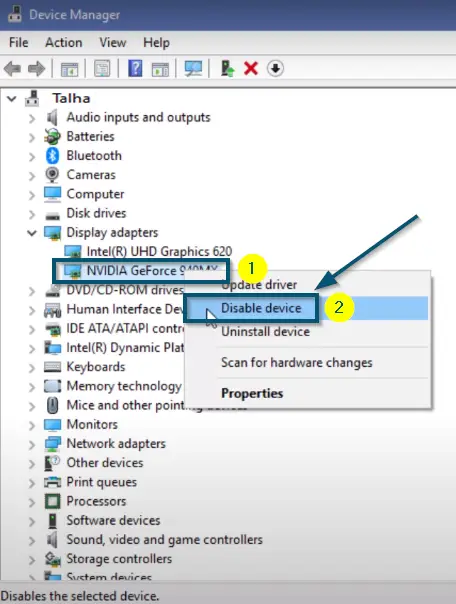
Once you have disabled the selected device, your screen will not go black because we have disabled the dedicated graphics card. Check whether this solution has fixed the BSoD and nvlddmkm.sys issue or not. If yes, the problem is in your dedicated graphics card, which means that your graphics card is dying.
Conclusion
In this article, we discussed the majority of the variations of ‘nvlddmkm.sys’. However, if you still experience the issue even after all the above-mentioned solutions, it probably means your graphics card isn’t stable. You should consider getting it checked in detail.
