You will fail to add a printer on Windows 11 with error 0x00000709 due to a recent change in the connection method of the OS or if the printer’s driver on the host is no longer valid. Changing the group policy or editing the system’s registry to restore the connection method to the earlier state will resolve the issue.
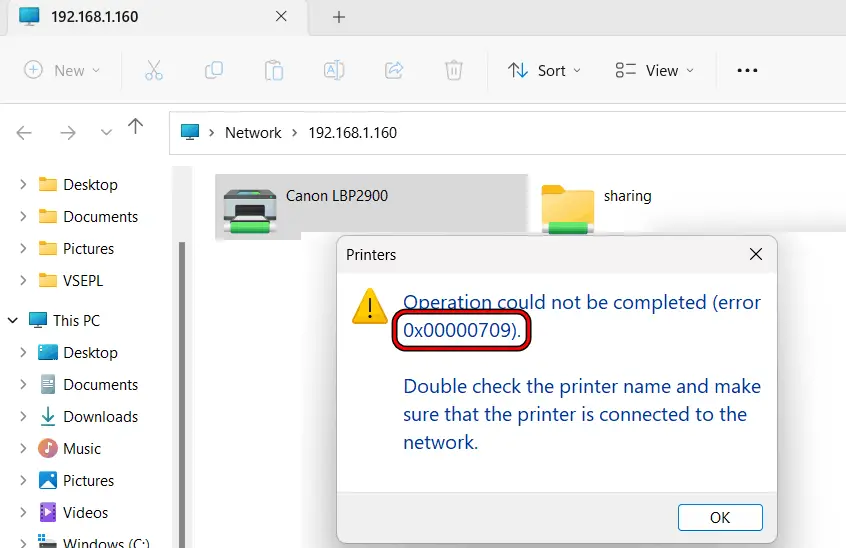
The issue occurs when you try to add a printer (connected to a host or standalone network printer) to your Windows 11 system but will face ‘Operation could not be completed (error 0x00000709)’. The problem is reported in the corporate or PRO as well as with home versions of Windows 11.
Sometimes, the host machines running older versions of Windows (10, 7, etc.) were also part of the problem. An update to Windows is reported to trigger the error.
Restart the Printer, Host, Client, And Networking Equipment
You will not be able to add a printer to your Windows 11 system with the error 0x00000709 if the communication modules of the printer, host (if any), client, and networking equipment are stuck in an error state. Restarting the printer, host, client, and networking equipment will resolve the issue.
- Restart the printer and check if that clears the error.
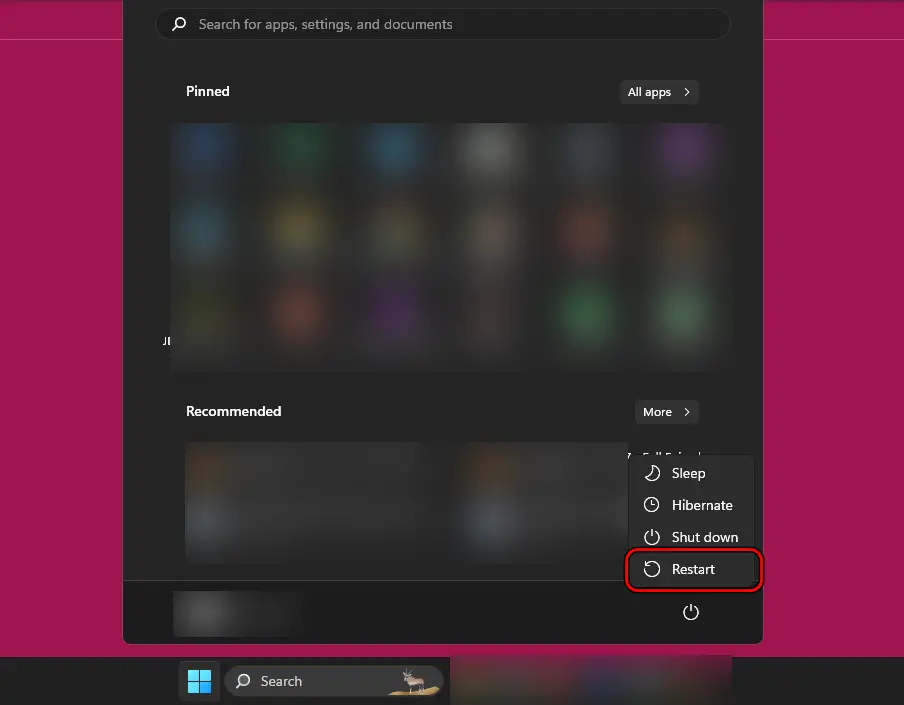
- If this does not work, then on the host machine, click Windows, expand Power, and select Restart.

Restart the Windows 11 System Through the Power Menu - Upon restart, check if the printer error is cleared.
- If not, restart the client machine and check if that resolves the issue.
- If the issue persists, power off the printer, host, client, and networking equipment.
- Wait for a minute, power on the host, and then the printer.
- Power on the networking equipment and then the client. Check if the printing error is cleared.
Update The PC’s Windows To The Latest Version
You will encounter the error 0x00000709 when adding a printer on Windows 11 if the PC’s Windows is missing the latest patches. This will make the OS incompatible with the printer or OS of the host device. Here, updating the PC’s Windows to the latest version will resolve the issue.
Moreover, if the issue is occurring due to a bug, updating Windows on your system will also patch any such bugs.
- Right-click Windows and open Settings.
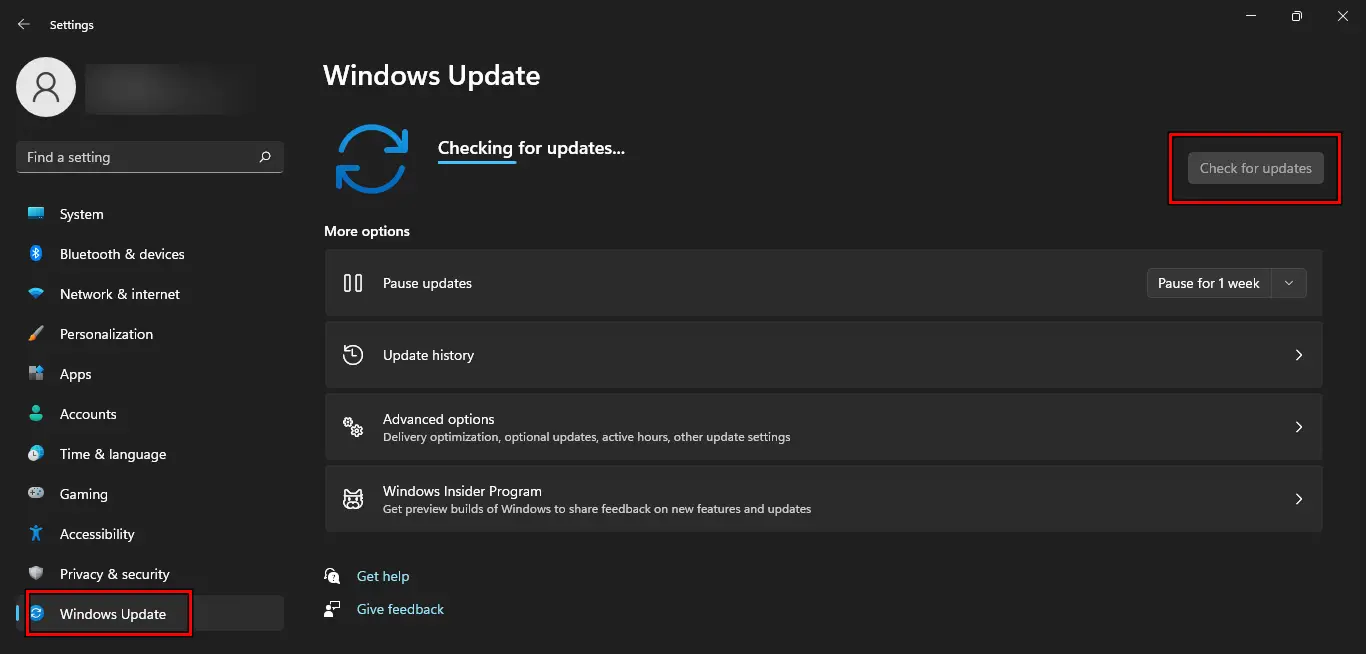
- Go to the Windows Update tab and in the right pane, click on Check for Updates.

Check for Windows Updates - Install all the available updates and restart the system.
- Upon restart, check if the error 0x00000709 is cleared.
Run The Printer Troubleshooter
The Printer Troubleshooter can help in identifying or rectifying common issues with the printer that can lead to the printer error at hand.
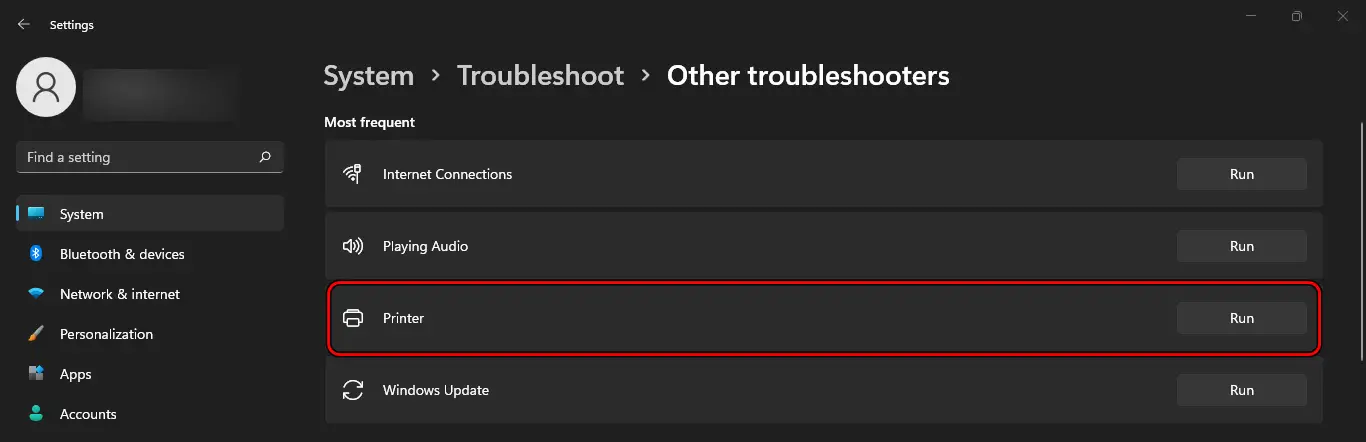
- On the host machine (if any), right-click Windows and go to Settings > System > Troubleshoot > Other Troubleshooters.
- Click on Run for the Printer troubleshooter and follow the prompts to complete the process.

Run the Printer Troubleshooter - Once done, apply any changes suggested by the troubleshooter.
- Repeat the same on the client machine and check if the printer problem is solved.
You can also open the printer troubleshooter by executing the following in the Run command box:
msdt.exe /id PrinterDiagnostic
Edit The Group Policy And System’s Registry
Since Windows 11 22H2 the default connection method has changed, and you will need to alter a Group Policy Editor setting to resolve the issue.
If you have a printer server or host, you will need to make changes to that system as well. If you have a network-shared printer, then only apply the client-side configurations.
Warning: Advance with extreme caution and at your own risk as editing the system’s registry is a skillful task and if not done properly, you may cause damage or harm to your system, data, devices, or network.
On the Host
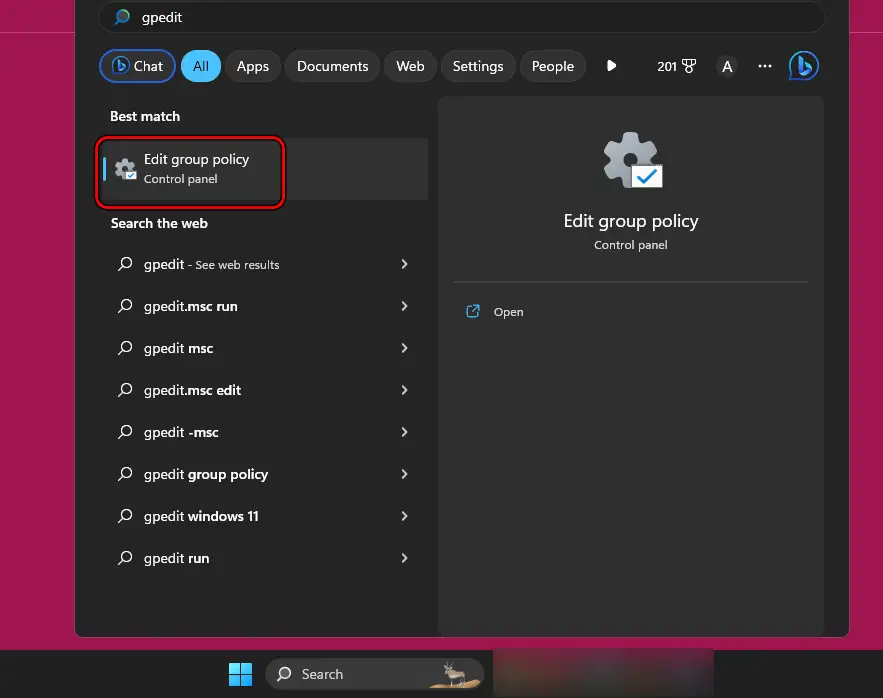
- Click Windows and type GPEdit.

Open Group Policy Editor - Select Edit Group Policy and to Computer Configuration > Administrative Templates > Printers.
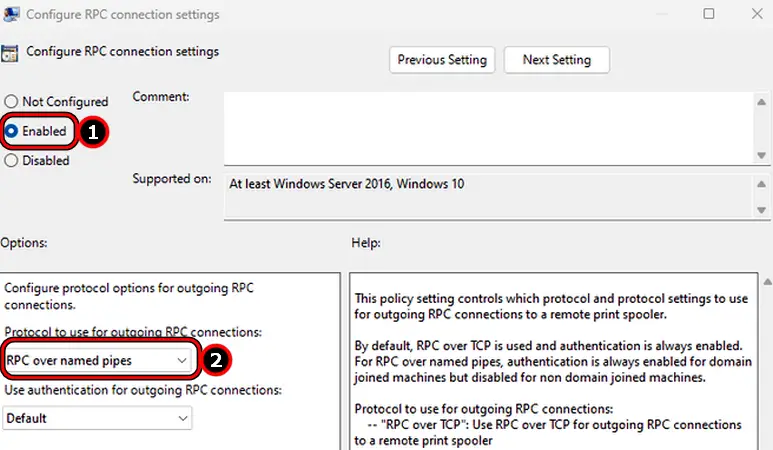
- Open Configure RPC Connection Settings and set it to Enabled.
- Set the dropdown of Protocol to Use for Outgoing RPC Connections to RPC Over Named Pipes.

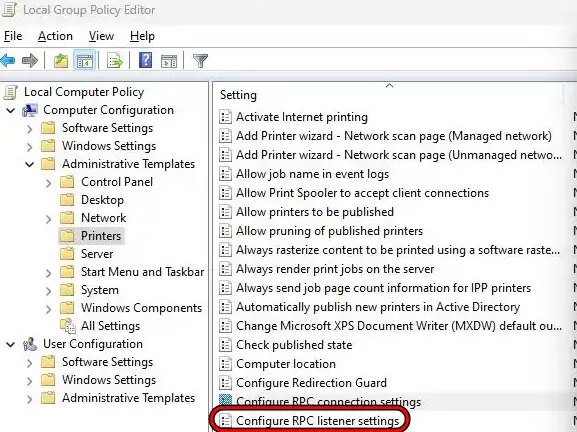
Enable Configure RPC Connection Settings and Set its Protocol to RPC Over Named Pipes - Open Configure RPC Listener Settings and set it to Enabled.

Open Configure RPC Listner Settings - Set the protocol to Choose RPC Over Named Pipes and TCP.
- Click Windows and search for Registry Editor.
- Right-click on it and select Run as Administrator.
- Navigate to:
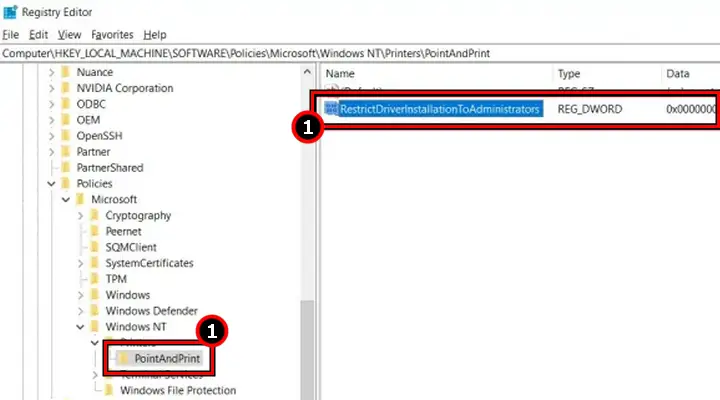
HKEY_LOCAL_MACHINE\Software\Policies\Microsoft\Windows NT\Printers\PointAndPrint
- Right-click on PointAndPrint and select New > DWORD (32-bit) Value.
- Enter the name as RestrictDriverInstallationToAdministrators and set its value to 0.

Create a RestrictDriverInstallationToAdministrators Value and Set it to 0 - Go to:
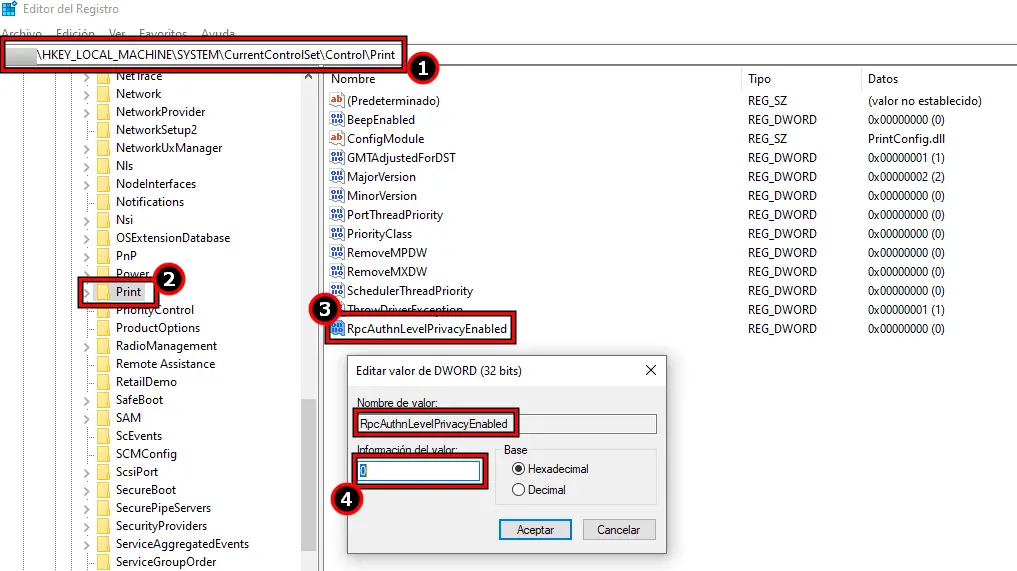
HKEY_LOCAL_MACHINE\SYSTEM\CurrentControlSet\Control\Print
- Right-click on Print and select New > DWORD (32-bit) Value.
- Enter the name as RpcAuthnLevelPrivacyEnabled and set its value to 0.

Create a RpcAuthnLevelPrivacyEnabled Value and Set it to 0 - Restart your system and check if the issue is resolved.
Another Read: Fixes for Printer Operation Failed with Error 0x00011b
Windows 11 Home Edition
If you are using Windows 11 Home, GPEditor will not be present. You either need to install GPEditor or use the Registry Editor as mentioned below to enable group policy-related settings (steps 1 to 6 as discussed above):
- Click Windows and search for Registry Editor.
- Right-click on it and select Run as Administrator.
- Navigate to:
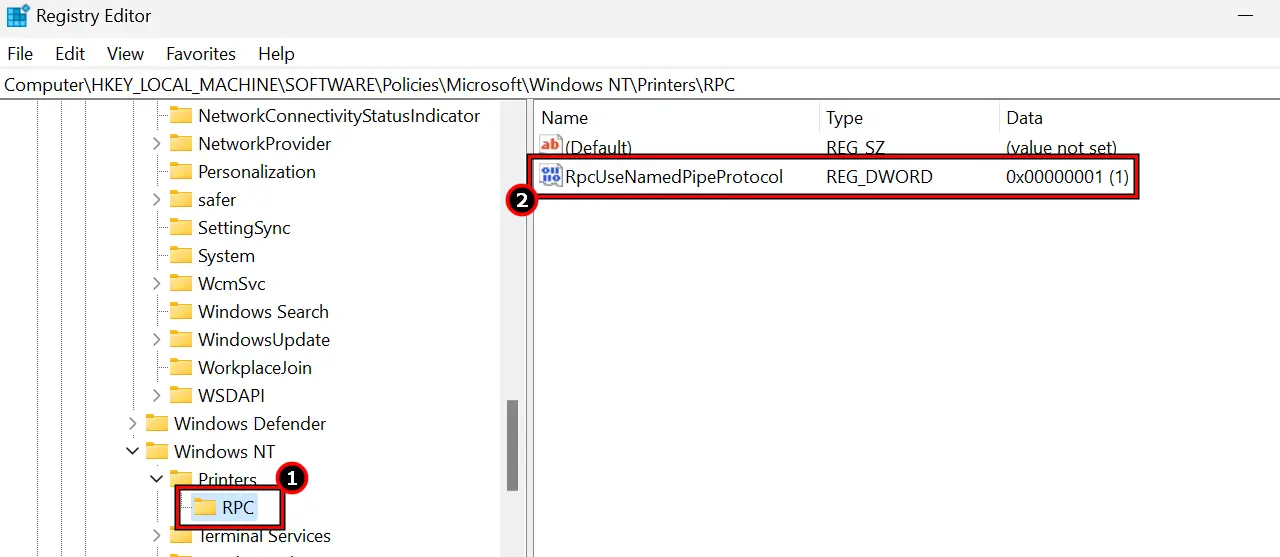
HKEY_LOCAL_MACHINE\Software\Policies\Microsoft\Windows NT\Printers\RPC
- Right-click on RPC and select New > DWORD (32-bit) Value.
- Enter the name as RpcUseNamedPipeProtocol and set its value to 1.

Create a RpcUseNamedPipeProtocol Value and Set it to 1 - Navigate to:
HKEY_LOCAL_MACHINE\Software\Policies\Microsoft\Windows NT\Printers\RPC
- Right-click on RPC and select New > DWORD (32-bit) Value.
- Enter the name as RpcProtocols and set its value to 7.
- Reboot the PC and check if the error is cleared.
On the Client
- Launch Group Policy Editor and navigate to Computer Configuration > Administrative Templates > Printer.
- Open Configure RPC Connection Settings, enable it, and select RPC Over Named Pipes.
- Close the editor and restart the system.
- Verify if the printer can be added successfully.
Windows 11 Home Edition
- Launch the Registry Editor as an administrator and go to:
HKEY_LOCAL_MACHINE\Software\Policies\Microsoft\Windows NT\Printers\RPC
- Right-click on RPC and select New > DWORD (32-bit) Value.
- Enter its name as RpcUseNamedPipeProtocol and set its value to 1.
- Reboot the PC and check if the printer issue is resolved.
Reinstall The Printer Driver And Software
The 0x00000709 error while accessing a shared printer or sharing a printer can be a result of an invalid driver installation or if the essential modules of the printer software on your system are no more valid. To fix this, reinstall the printer driver and software on your system (host and client).
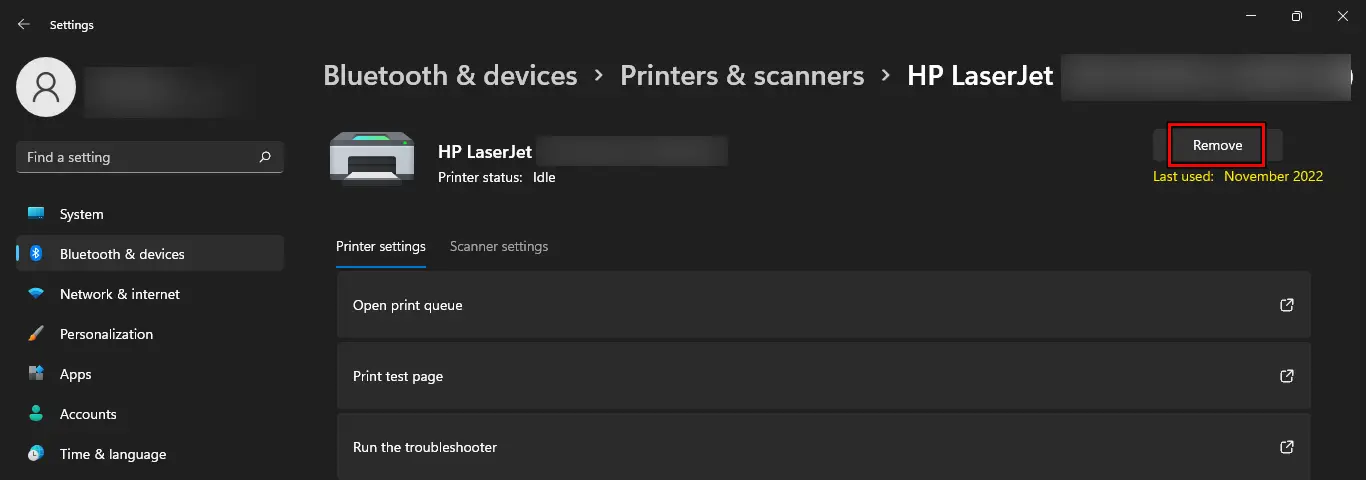
- On the host system (if any), right-click Windows and navigate to Settings > Bluetooth & Devices > Printers & Scanners.
- Select the problematic printer and click on Remove.

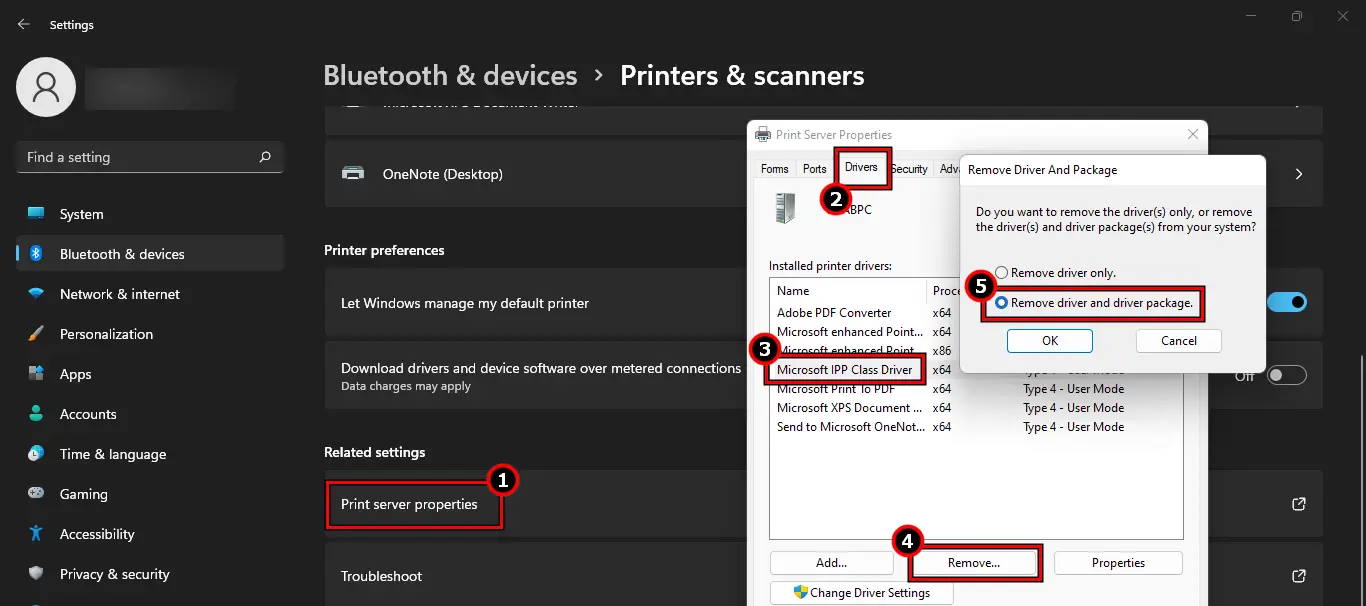
Remove the Printer in the Windows Settings - Hit the back button and in the Related Settings, open Print Server Properties.
- Go to the Drivers tab and select the driver of your printer.
- Click Remove and select Remove Driver and Driver Package.

Remove the Printer Driver in the Drivers Tab of Print Server Properties - Click OK and close the opened windows.
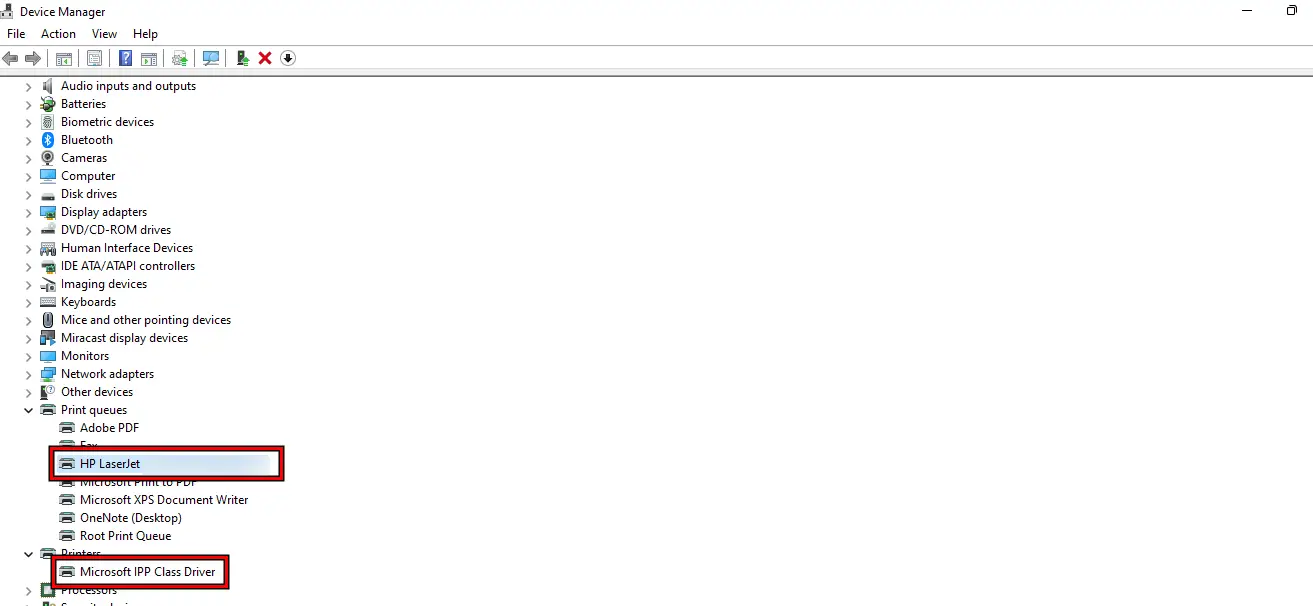
- Right-click Windows and open Device Manager.
- Expand Printers and right-click on the printer driver.
- Select Uninstall Device and confirm to uninstall the device.
- Once done, expand Print Queues and right-click on the problematic printer driver.
- Select Uninstall Device and confirm to uninstall the device.

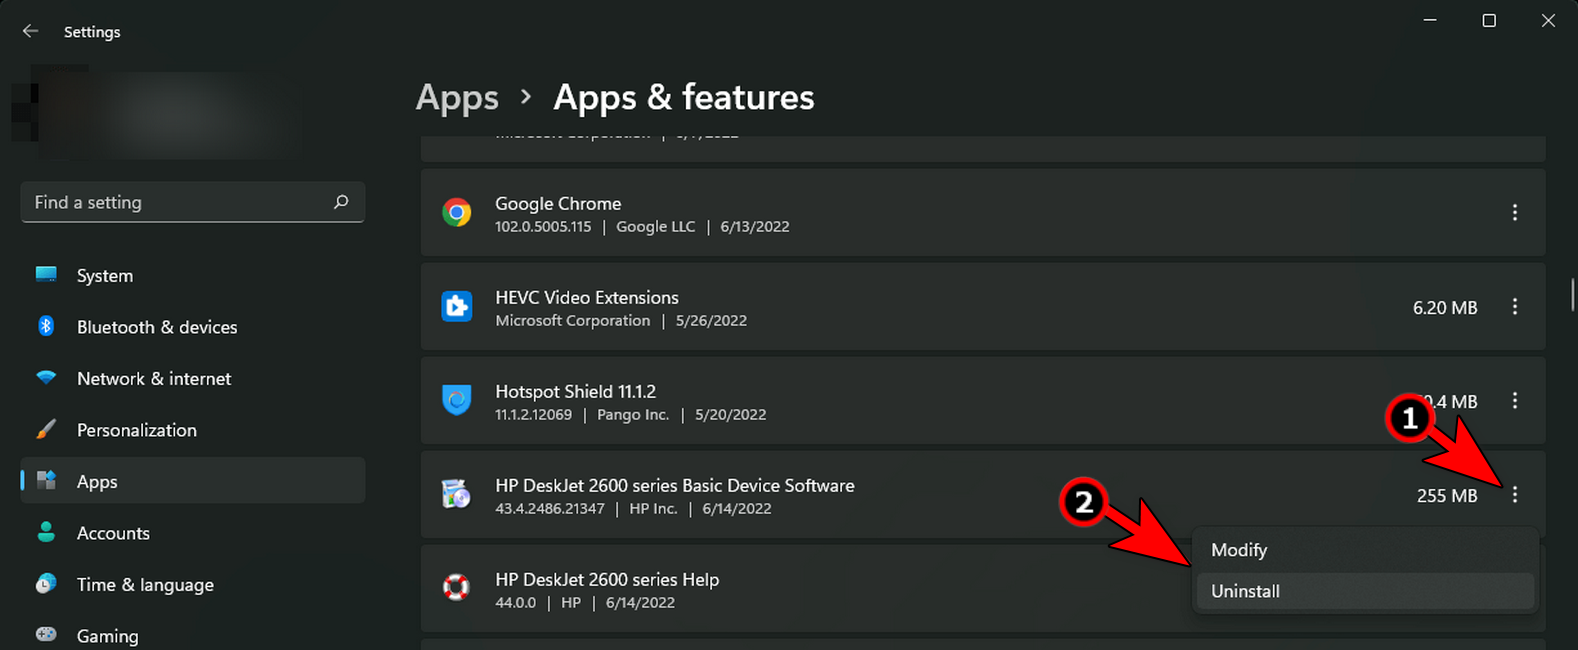
Remove the Printer Driver in the Device Manager - Right-click Windows and select Apps & Features.
- Locate the application related to your printer and expand its Options.
- Select Uninstall and follow the prompts to complete the process.

Uninstall Printer Software in the Windows Apps & Features - Once done, restart the system and printer.
- Repeat the same on the client system.
- Reinstall the printer driver on the host system and share the printer. Check if the client can add the printer without causing the 0x00000709
We Also Fixed: Windows Cannot Connect to the Printer. Access is Denied
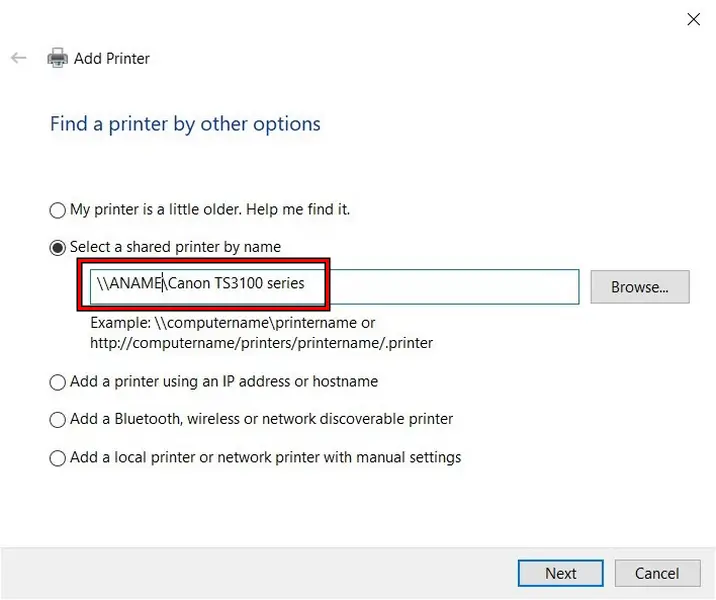
Add The Printer Through The PC Name
As you are failing to add the printer through its IP and facing the 0x00000709 error, adding the printer through the host PC name will do the trick.
- On the Host PC, right-click Windows, select System, and note down the Device Name shown.
- On the client machine, launch File Explorer and enter the following in the address bar (replace NameofPC with your host’s PC name):
\\NameofPC\

Add a Printer by the Host PC Name - Double-click on the printer shown and check if the issue is resolved.
- If not, change the name of the host (less than 20 characters) and check if that solves the problem.
- If this does not work, make sure your host machine has a username and password in place.
- Launch Command Prompt on your host system, execute the following, and note down the results (PCName/UserName):
whoami
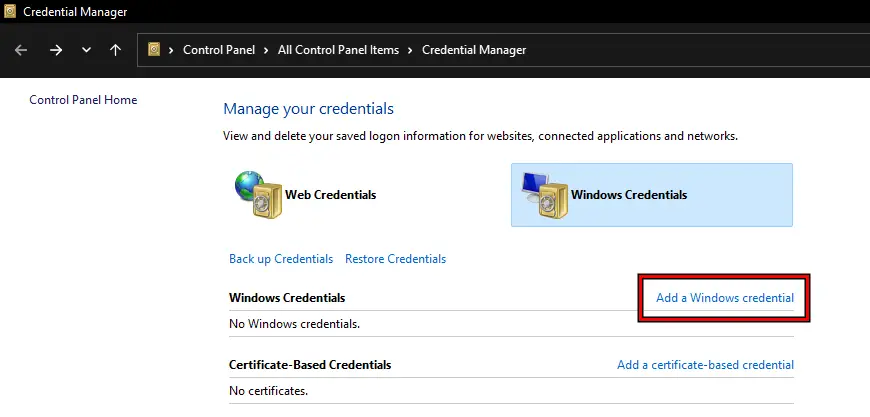
- On the client, launch Credential Manager and go to Windows Credentials.
- Click on Add a Windows Credential.

Add a Windows Credential to the Credential Manager - In the Network or Internet Address, enter the name of the PC
- Add the username and password to the client’s Credentials Manager by using the PC name as the following:
\\NameofPC\
- In the user, enter the username noted in step 6 and enter the password of the host machine.
- Reinstall the printer on the client machine and check if the problem is solved.
Create A New Admin Account On Windows 11
If the printer configurations in your account settings are no more valid and the OS is failing to overwrite these configurations, you will fail to add a printer to Windows 11 with the error 0x00000709. This can be solved by creating a new admin account on the system.
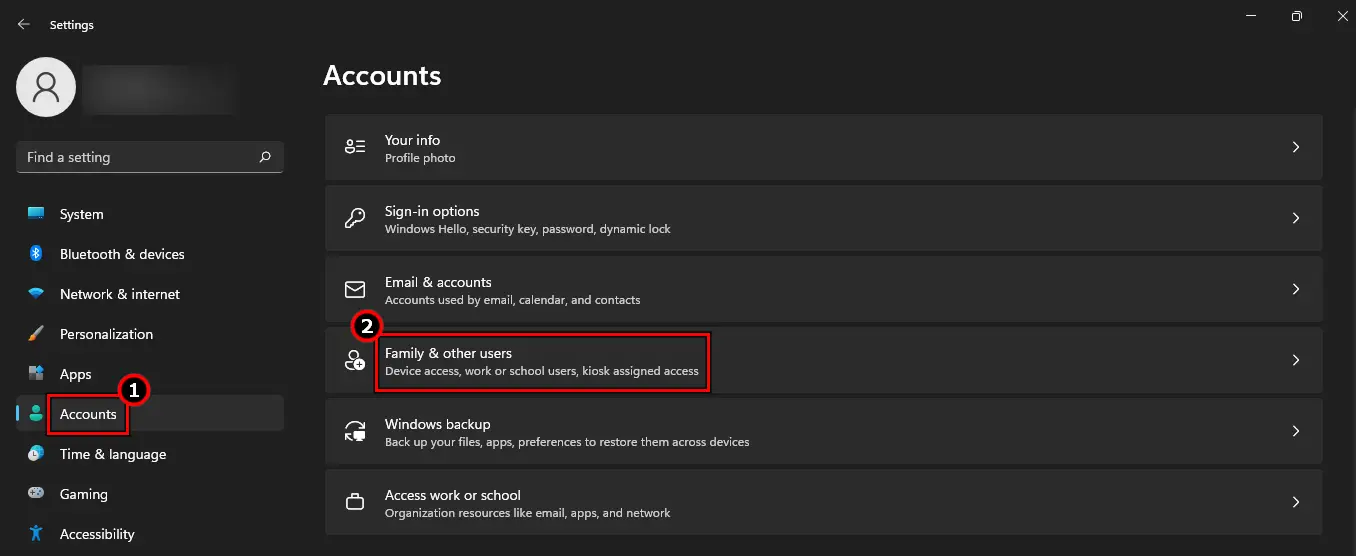
- Right-click Windows and go to Settings > Accounts > Family & Other Users.
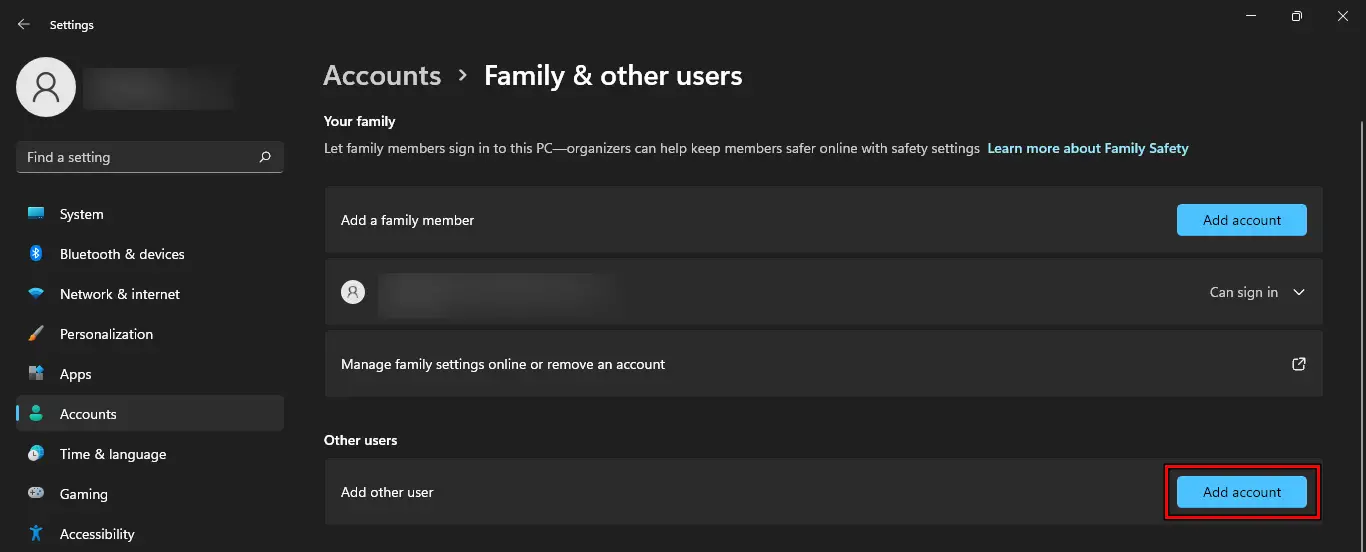
- In the Other User section, click on Add Account and click I don’t Have This Person’s Sign-in Information.

Open Family & Other Users in the Accounts Settings - On the next screen, click on Add a User Without Microsoft Account and fill in the details.

Add Other User to the System - Once done, click OK and expand the newly created account.
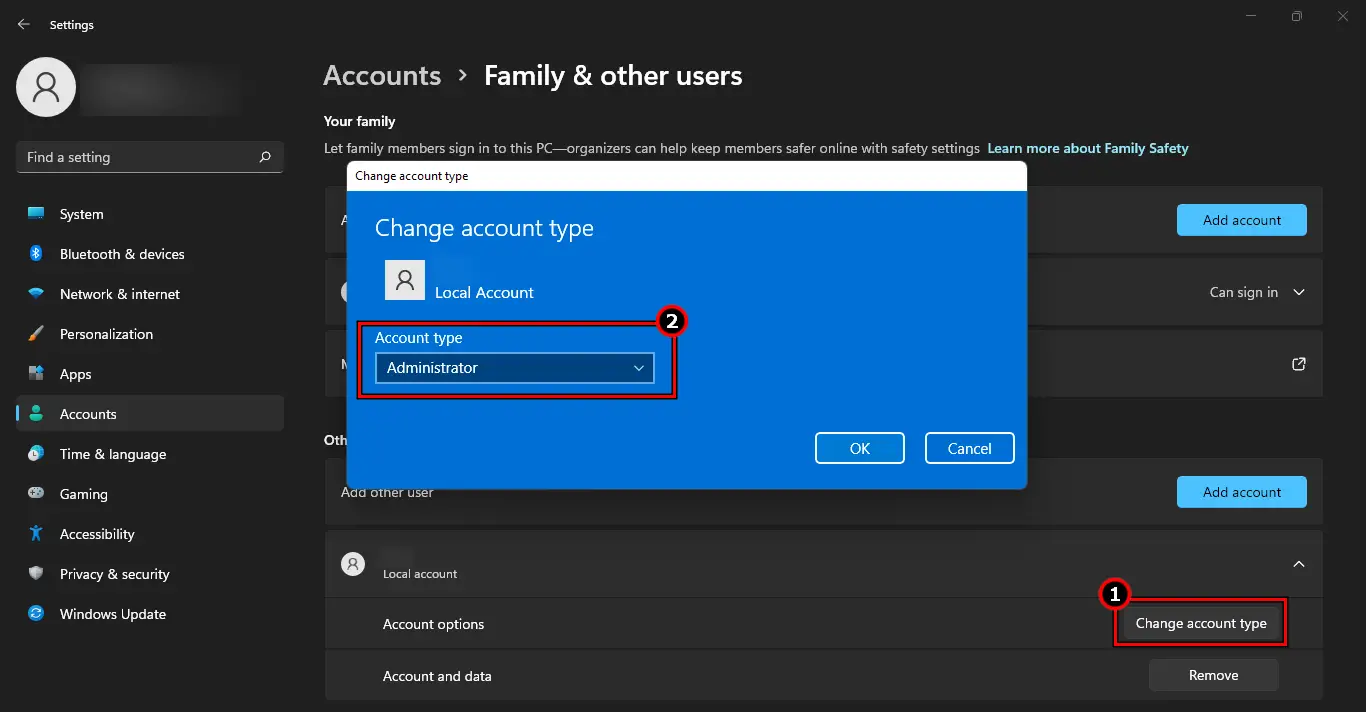
- Click on Change Account Type and set it to Administrator.

Change the Account Type of the Newly Created Account to Administrator - Click OK and close the Settings window.
- Repeat the same on the host machine (if any) to create an administrator account. You will need to add the printer to that account and share it on the local network.
- On the client machine, log out of the current account and log into the new account. Check if you can add the printer without the 0x00000709 error.
Uninstall The Conflicting Update
If the error 0x00000709 has started to occur after a recent Windows update, then that update might be buggy or not optimal for your setup. Here, uninstalling the conflicting update will resolve the issue.
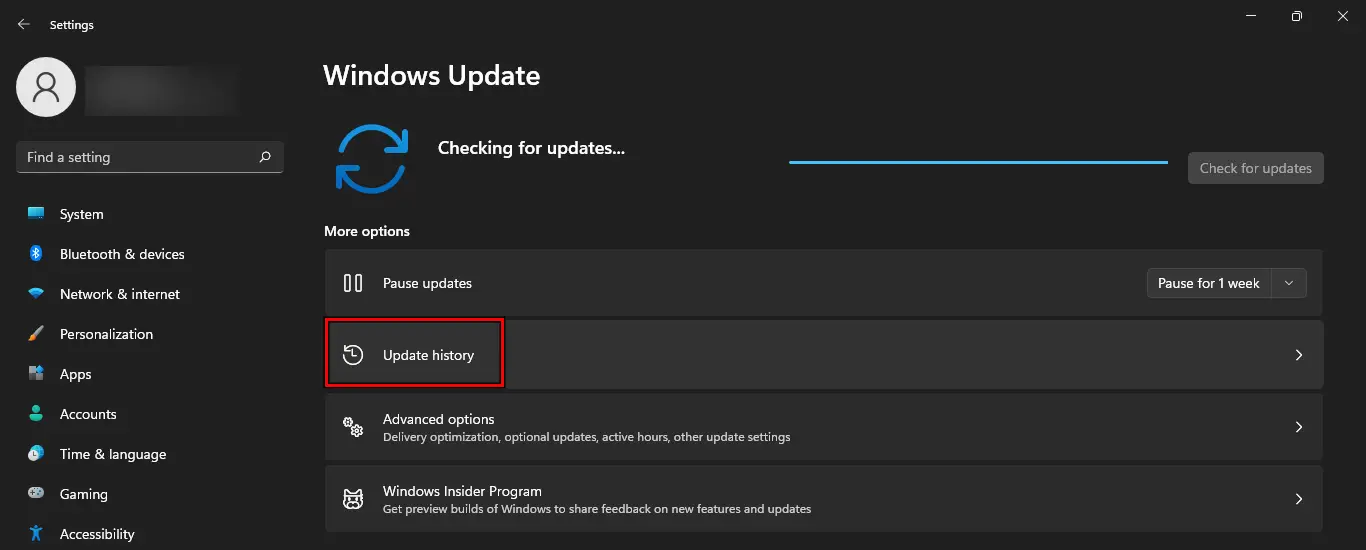
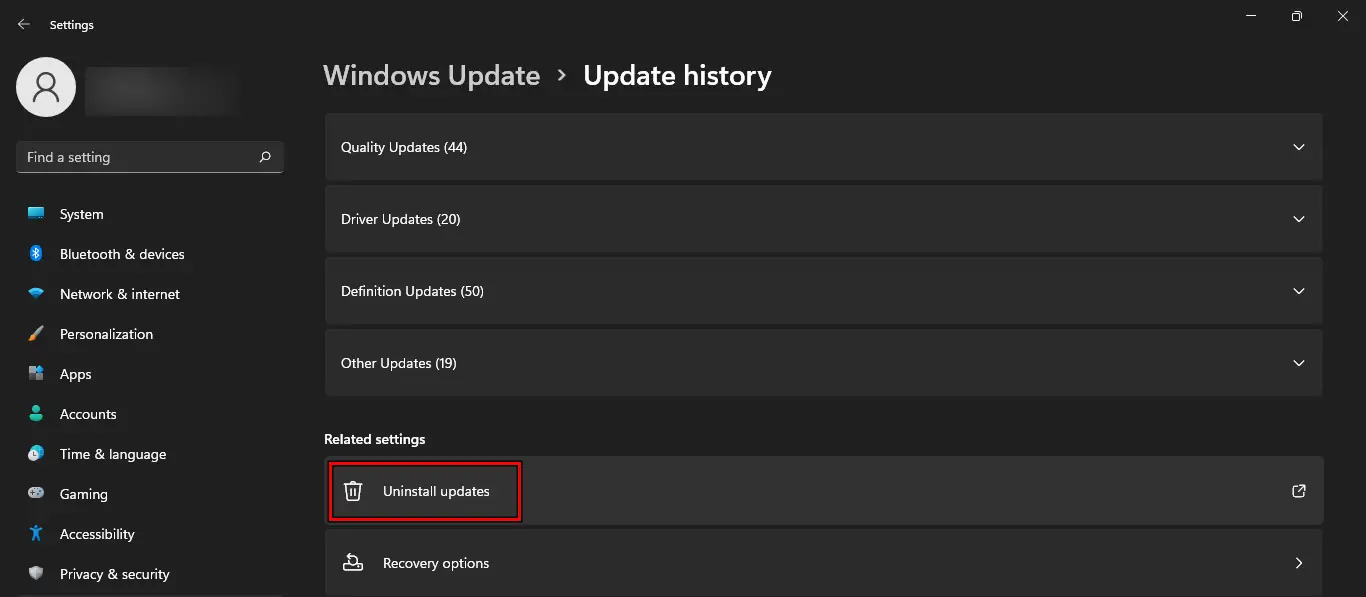
- Right-click Windows and go to Settings > Windows Update > Update History.

Open Update History on Windows - In the Related Settings, click on Uninstall Updates, and in the resulting window, see the Installed-on column.

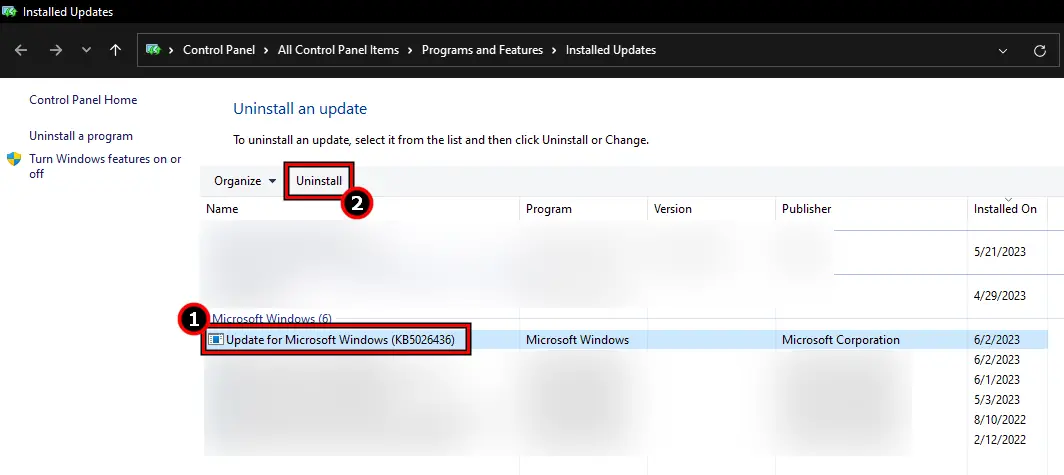
Open Uninstall Updates in the Update History - See which is the last update installed and select it.
- Click on Uninstall and follow the prompts to complete the uninstallation.

Uninstall the Latest Update from Installed Updates - Once done, restart your system and hopefully, you will be able to add the printer without the error 0x00000709. If so, then you may hide the offending update in the update settings of your system.
- If this does not work and you have set up a System Recovery point, check if reverting to that recovery point solves the problem.
If not, you may reset your PC while keeping your files and check if that clears the error. You will need to reinstall your applications. If the issue persists, check if performing a clean install of Windows does the trick.
There are some reports that people were able to solve this problem by replacing the Win32.dll file but that may compromise your system’s security or void your system’s warranty. It will be better to contact Microsoft Support to get the problem solved if the issue persists after performing a clean installation of Windows 11.
Final Words
As far as our credibilty goes, we are well versed in solving printer errors, like this one. An example is Printer not Activated (Error Code 30). And as far as our solutions go, they were handpicked from deep inside community forums. We tried and tested them, and wrote detailed solutions.