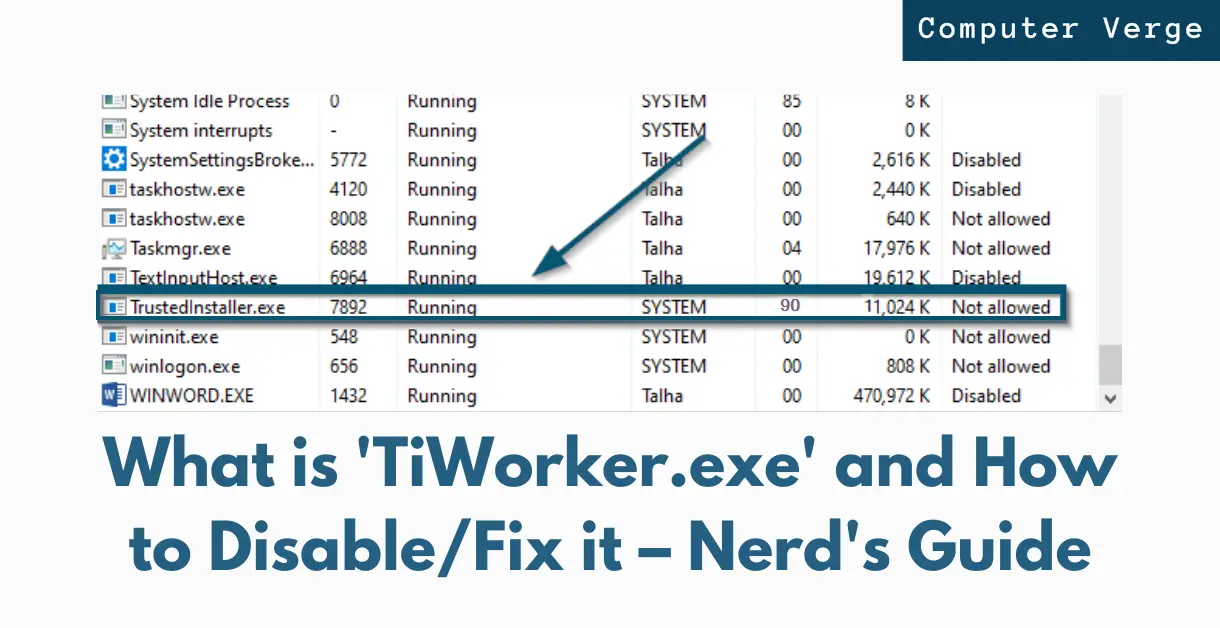
If you use a Windows system, you will often experience slow system performance. So, when you open the ‘Task Manager’ to find the reason for sluggish system performance, you see high resource consumption of ‘TiWorker.exe’ (or ‘TrustedInstaller.exe’). This issue mostly occurs after Windows has finished the installation of an update.
What is ‘TiWorker.exe’?
‘TiWorker.exe’ is an executable file that works along with the ‘Windows Module Installer’ service to provide updates for components of Windows. It is also known as Trusted Installer because it updates the hard links in “C:\Windows\System32” and other Windows directories to run the updated components. So, if you stop or disable it, you won’t get the required updates for your system which means your system will be more vulnerable.
Is it Harmful?
‘TiWorker.exe’ (or ‘TrustedInstaller.exe’) often runs when you boot up your system and consume high system resources after an update has run. But if you are a tech nerd, you will know that Trojans harm computer systems as executable files because they also consume heavy system resources without activating them. So, it’s better to check the authenticity of this executable file before classifying it as harmful straightaway.
How to Disable or Fix the Process?
Following are the resource problems that users have reported with the process:
- High disk usage.
- High memory usage.
- High CPU usage.
Here, we will cover both problems as to how to stop TiWorker.exe and how to delete TiWorker.exe.
Note: Read the description of the solutions before applying them because each solution will only work if you meet the mentioned use-case
1. Running SFC and DISM Commands
If ‘TiWorker.exe’ is consuming high CPU or disk resources, it might be because of some corrupted files stored in the system. So, the best way to get rid of those files is via using the built-in SFC (System File Checker) scan and DISM (Deployment Image Servicing and Management) tool.
2. Rebuilding the Search Index
If you are still facing the high disk consumption of the ‘TiWorker.exe’ file after applying all the steps of the previous solution, then we recommend rebuilding your search index. This technique has worked for others and it will definitely work for you.
There are two ways of doing it. You can either use the ‘Command Prompt’ or the ‘Search Indexing Options’ of windows. So, here, we’ll discuss both.
Via Command Prompt
- First of all, open the ‘Command Prompt’ as ‘Administrator.’

Opening ‘Command Prompt’ as ‘Administrator’
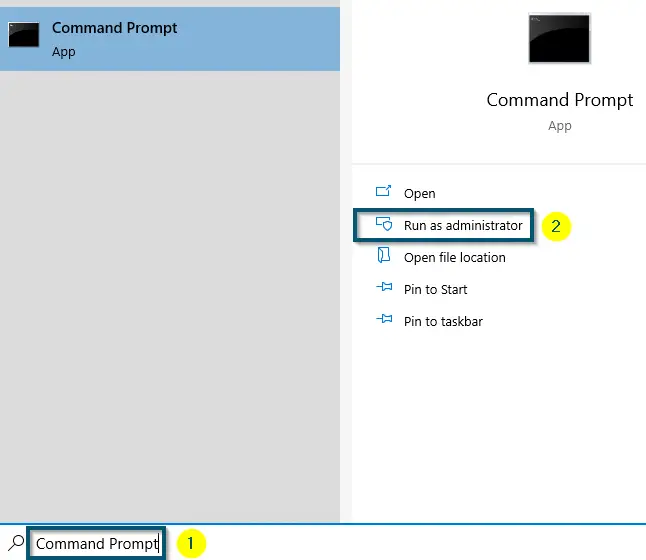
Note: Run the ‘Command Prompt’ as ‘Administrator,’ otherwise, you’ll get the ‘System error 5 Access denied’ message
- Then, stop the ‘Indexing Service’ by running the following command in the ‘Command Prompt’ and pressing the ‘Enter’ key:
net stop wsearch
- Now, delete the database files of the Windows-10 search index by running the following command in the ‘Command Prompt’ and pressing the ‘Enter’ key:
del “%ProgramData%\Microsoft\Search\Data\Applications\Windows\Windows.edb”
- Once the deletion operation is complete, then restart the ‘Indexing Service’ by running the following command in the ‘Command Prompt’ and pressing the ‘Enter’ key:
net start wsearch
Note: If you see the error message ‘The Windows Search service could not be started,’ after running the above command, then run the command again because it often takes two or three tries
Via Search Indexing Options
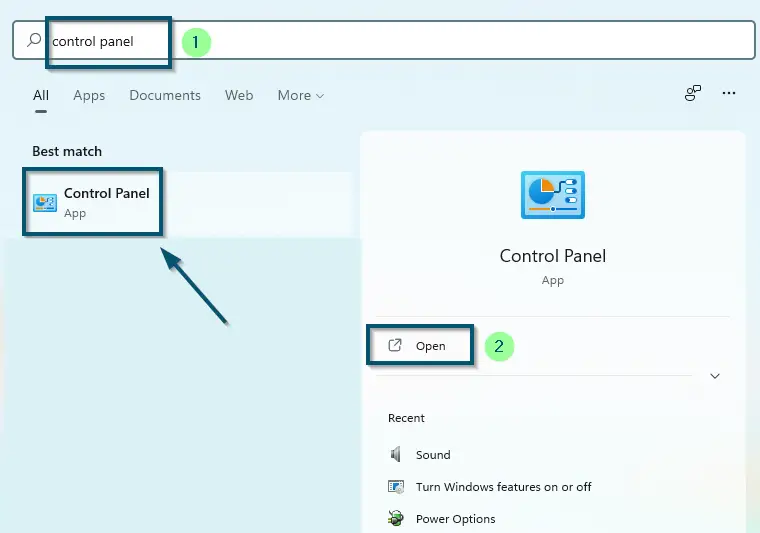
- First of all, open the ‘Control Panel.’

Opening ‘Control Panel’ via ‘Start menu’ - Then, navigate to the ‘View by:’ option and change ‘Category’ to ‘Small icons.’

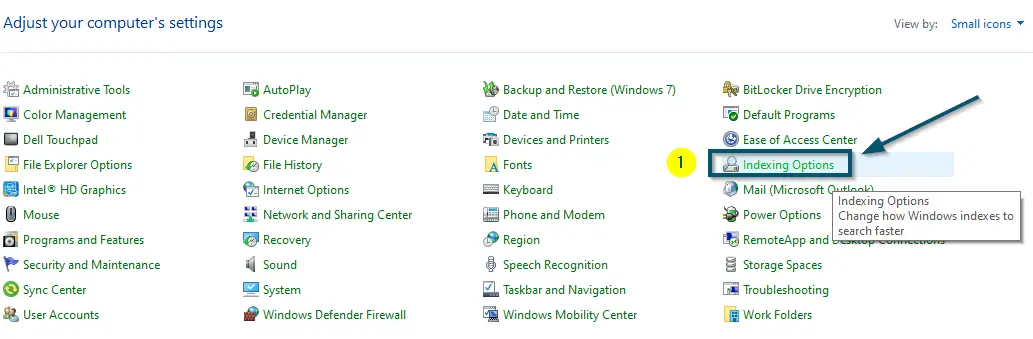
Navigating to the ‘View by’ option and changing ‘Category’ to ‘Small icons’ - After that, click on the ‘Indexing Options’ to open it.

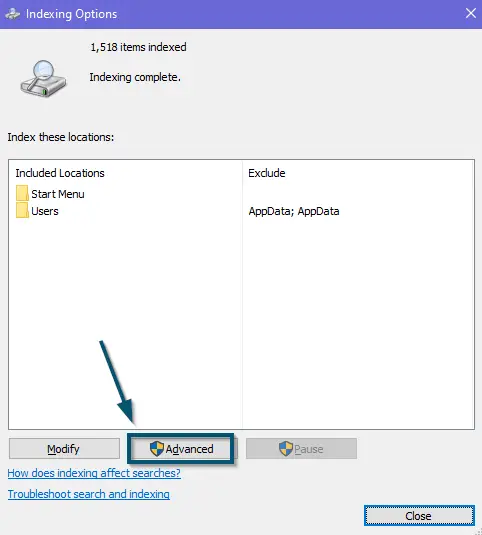
Clicking on the ‘Indexing Options’ in ‘Control Panel’ - A sub-window will open. So, click on the ‘Advanced’ button.

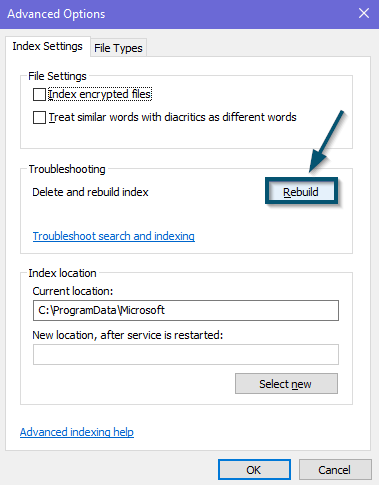
Clicking on the ‘Advanced’ button in the ‘Indexing Options’ - Now, click on the ‘Rebuild’ button in the ‘Advanced Options’ window. This action will delete the current search index of Windows and start the file indexing service from scratch.

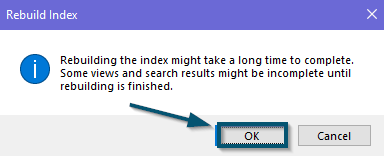
Clicking on the ‘Rebuild’ button in the ‘Advanced Options’ window - After that, Windows will ask for your confirmation. So, click on the ‘OK’ button to confirm the process.

Clicking on the ‘OK’ button to confirm the ‘Index Rebuilding’
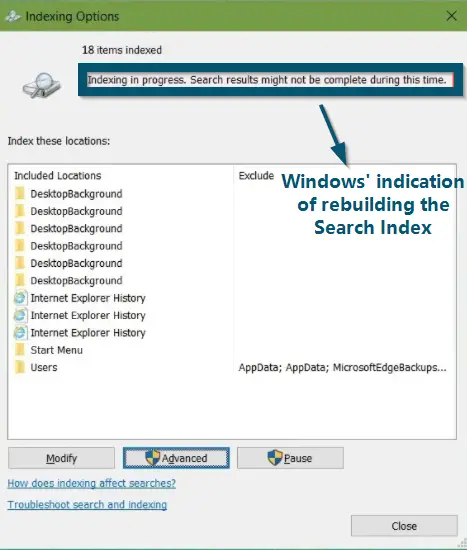
Note: If you are using Windows-10, your system will show you whether the indexing procedure is complete, or it is still going
3. Force Stopping ‘Windows Update’ Service
Temporary Fix
If the high resource consumption issue of ‘TiWorker.exe’ is still there, we recommend force-stopping the ‘Windows Update’ service. But you should know that this is a temporary fix because you will have to perform the same procedure again upon booting up your system each time.
- First of all, open the ‘Task Manager’ from the ‘Start menu.’

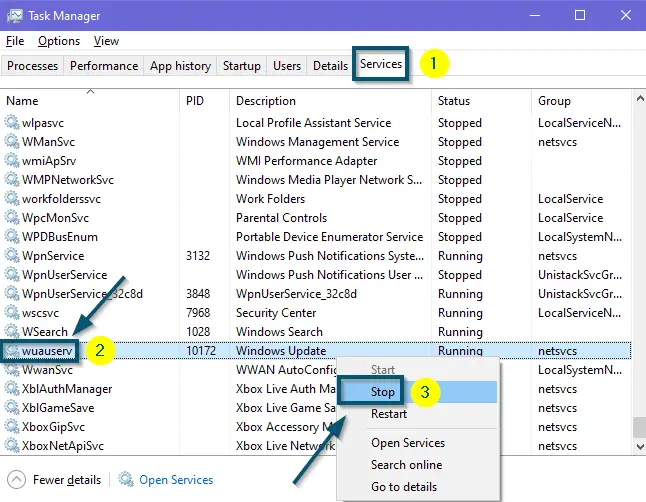
Opening ‘Task Manager’ via ‘Start menu’ - Now, click on the ‘Services’ tab in the ‘Task Manager’ and scroll down to find the ‘wuauserv’ service.
- Then, right-click on it and choose the ‘Stop’ option.

Stopping the ‘wuauserv’ service from the ‘Task Manager’

4. Booting in the ‘Safe Mode’
If the above techniques have not worked for you, then you can reboot your system in the ‘Safe Mode’ and check whether the problem persists or not. If the problem doesn’t continue, you can boot your system back into normal mode. We’ve received several positive feedback that booting into safe mode somehow fixes the problem immediately.
Booting the System in the ‘Safe Mode’
There are several ways of booting a system in the ‘Safe Mode.’ You can try anyone according to your choice. But we are applying the simplest one here.
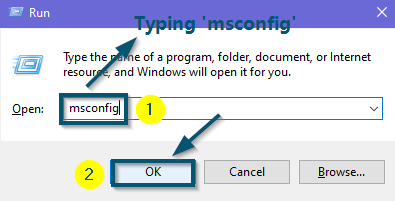
- First of all, press the ‘Windows + R’ keys to open the ‘Run’ dialog box.
- Now, type ‘msconfig’ and press the ‘Enter’ key (or click on the ‘OK’ button).

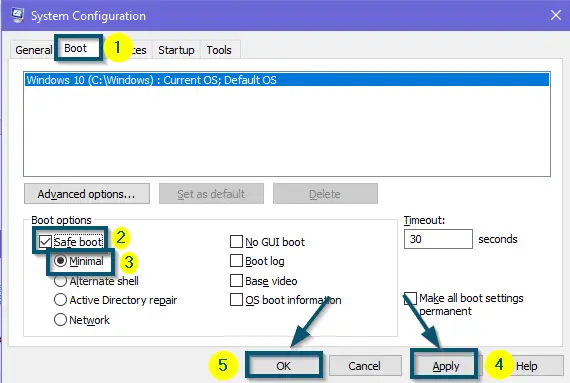
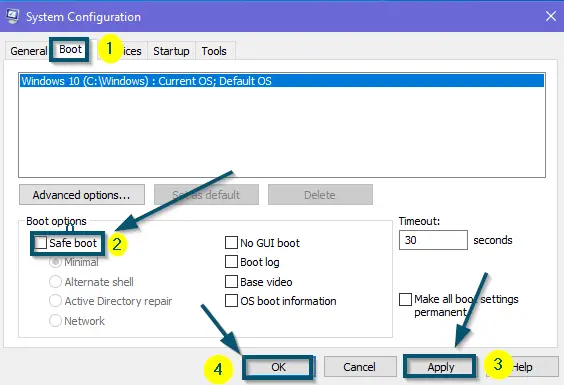
Typing ‘msconfig’ in the search box of the ‘Run’ dialog box and clicking on the ‘OK’ button - After that, switch to the ‘Boot’ tab and check the ‘Safe boot’ and ‘Minimal’ options.
- Now, apply the new settings by clicking on the ‘Apply’ and ‘OK’ buttons.

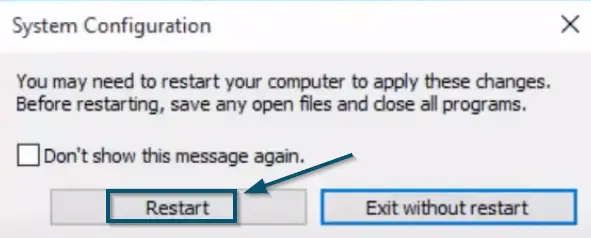
Checking the ‘Safe boot’ and ‘Minimal’ options in the ‘Boot’ Tab and applying the settings - After that, Windows will show you a confirmation message. So, click on the ‘Restart’ option to restart the system in ‘Safe Mode.’

Clicking on the ‘Restart’ button to restart the system in the ‘Safe Mode’ - Now, check whether the high resource consumption of ‘TiWorker.exe’ persists or not. If yes, then skip the next steps. Otherwise, keep following.
Booting the System to the ‘Normal Mode’
- Now, again go to the ‘System Configuration’ by ‘following steps 1 and 2 of this solution.’
- After that, switch to the ‘Boot’ tab and uncheck the ‘Safe boot’ option.
- Then, apply the new settings by clicking on the ‘Apply’ and ‘OK’ buttons.

Unchecking the ‘Safe boot’ option and applying the settings - Now, windows will show you a confirmation message. So, click on the ‘Restart’ option to restart the system normally.
5. Clearing Windows Update Files
Windows systems store the Windows Update files in the ‘Software Distribution’ folder. So, sometimes the high resource consumption issue of ‘TiWorker.exe’ can also occur due to corrupted files in the ‘Software Distribution’ folder. The only way to solve this is by clearing the files in that folder. So, try the following steps.
Stopping the ‘Windows Update’ Service
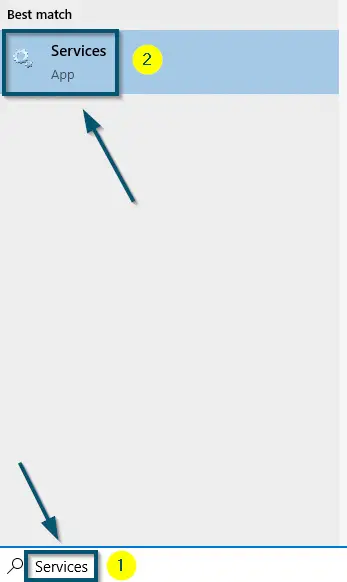
- First of all, open the ‘Services’ of the Windows system.

Opening ‘Services’ from the ‘Start menu’ - Then, scroll down to find the ‘Windows Update’ service.
- Once you have found the required service, select it and click on the ‘Stop’ option.

Selecting the ‘Windows Update’ service and stopping it

Deleting the Software Distribution’ Folder
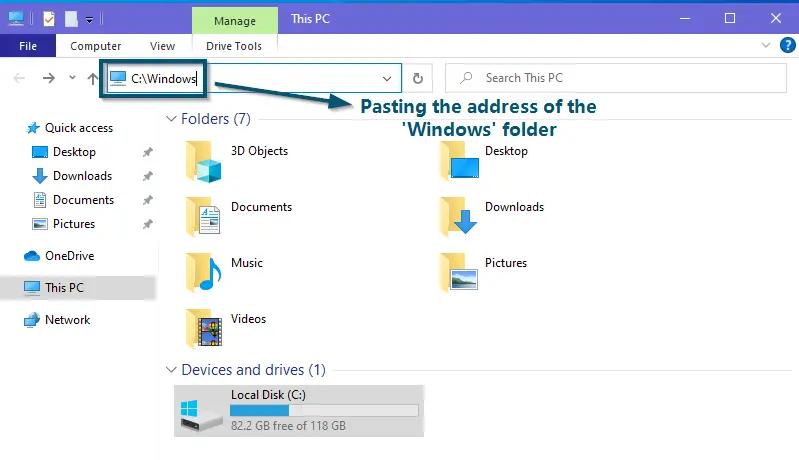
- Now, open the ‘File Explorer’ and paste the following address into the address bar.

Pasting the address of the ‘Windows’ folder in the address bar of ‘This PC’ or ‘File Explorer’ - Then, hit the ‘Enter’ key to navigate to the ‘Windows’ folder.
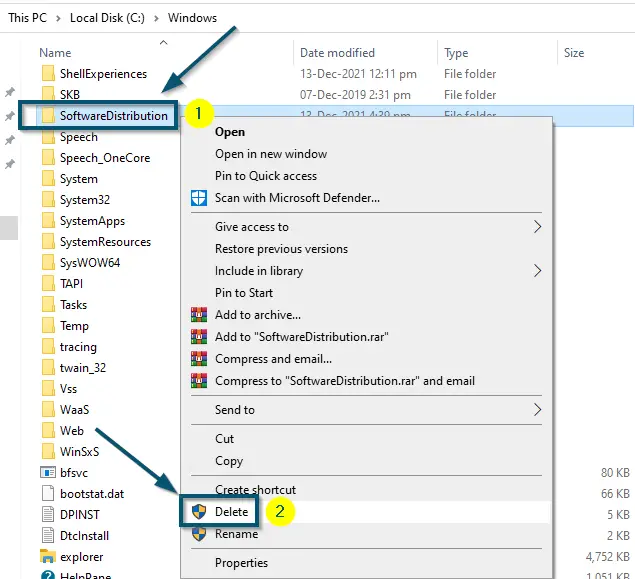
- Now, scroll down to find the ‘Software Distribution’ folder and delete it.

Deleting the ‘Software Distribution’ folder - After that, restart your system.

Restarting the system
Note: Windows will automatically enable the ‘Windows Update’ service upon restarting the system. Don’t worry about the folder we deleted; Windows will automatically create a new Software Distribution folder when it boots again.
6. Setting the Priority as Low
Temporary Fix
If ‘TrustedInstaller.exe’ is consuming high CPU resources and causing worrying CPU temperature when you play a game in your system, we recommend decreasing the priority of this process. So, try the following steps.
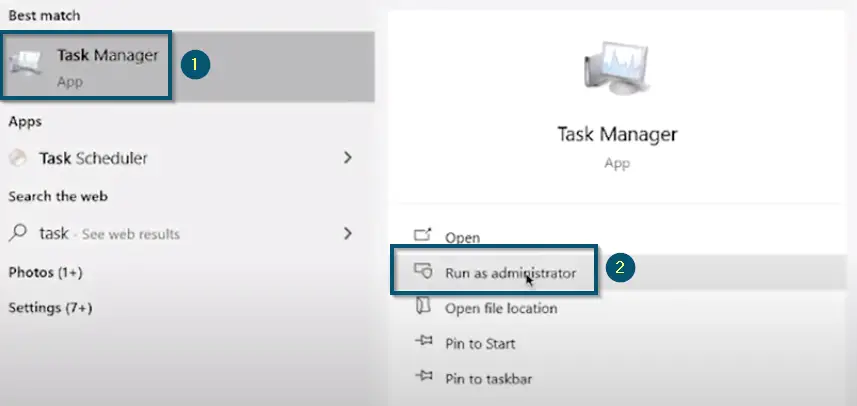
- First, open the ‘Task Manager’ as ‘Administrator.’

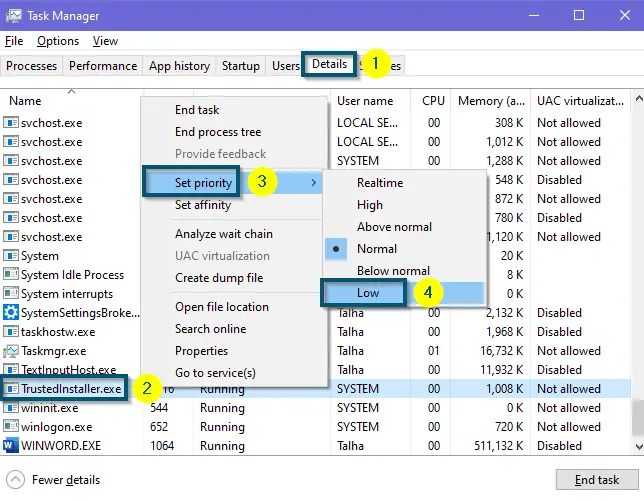
Clicking on ‘Run as administrator’ to run the Task Manager as Administrator - Then, switch to the ‘Details’ tab and scroll down to find the ‘TiWorker.exe’ (‘TrustedInstaller.exe’) process.
- Right-click on ‘TiWorker.exe’ (‘TrustedInstaller.exe’) and choose the ‘Set Priority’ option.
- The system will further display a series of menus. So, choose the ‘Low’ option.

Setting the priority of ‘TrustedInstaller.exe’ as ‘Low’
This method is a temporary fix because if any other application requires CPU power, ‘TiWorker.exe’ (‘TrustedInstaller.exe’) will now have to wait, as we have set its priority to low.
7. Using a Third-Party Application to Kill Process
If none of the above solutions have worked for you, we recommend using a third-party application to kill the process on the go. Its name is ‘Process Lasso.’ This application is best if you want to terminate Windows processes all the time automatically.
- First, open ‘Process Lasso.’
Note: If you don’t have ‘Process Lasso’ installed, download and install it before following the next steps
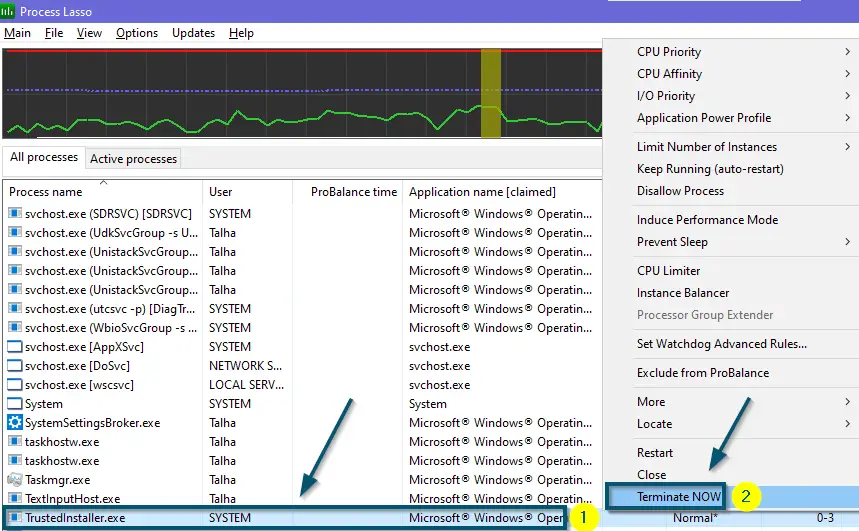
- In the ‘All processes’ tab, scroll down to find the ‘TrustedInstaller.exe’ process.
- Then, right-click on it and choose the ‘Terminate NOW’ option.

Scrolling down to find the ‘TrustedInstaller.exe’ and choosing ‘Terminate NOW’ option after right-clicking on it
Even if other methods haven’t proved useful, this solution will still overcome the ‘TiWorker.exe disk usage’ issue.
8. Updating, Resetting the BIOS, and Activating the TPM Security
If ‘Windows Defender’ classifies ‘TiWorker.exe’ as malware and you are sure that this file is safe, try updating the BIOS first, then reset the BIOS. After that, activate the TPM security.
Updating the BIOS
Updating the BIOS solves various hardware-related issues and improves the stability of the system. Make sure your BIOS is updated to the latest build available. You can check our guide on how to update your BIOS.
Resetting the BIOS
Now, we’ll perform the BIOS reset procedure. Again, we’ll perform this procedure according to DELL, but you need to do the same according to your system’s manufacturer.
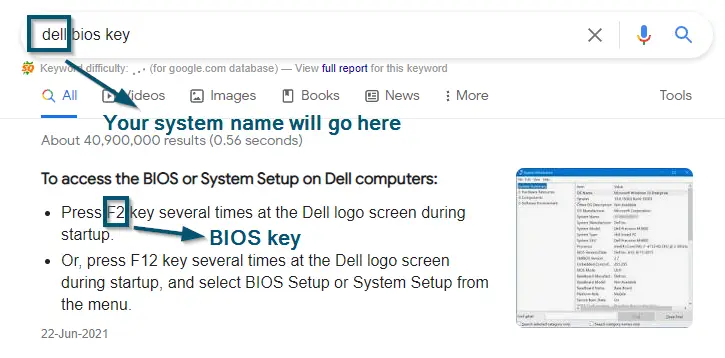
- First, search for the BIOS key of your system on the internet because the BIOS key is different from system to system. But if you already know it, then skip this step.

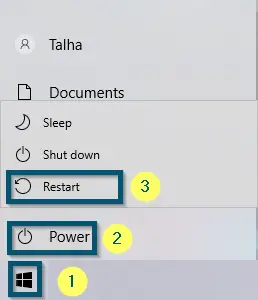
Searching for the BIOS key of the system - Now, restart your system by going to the ‘Start menu,’ clicking on the ‘Power’ option, and selecting the ‘Restart’ option.
Restarting the system - Once the manufacturer logo appears, keep pressing the BIOS key several times until the BIOS window opens.
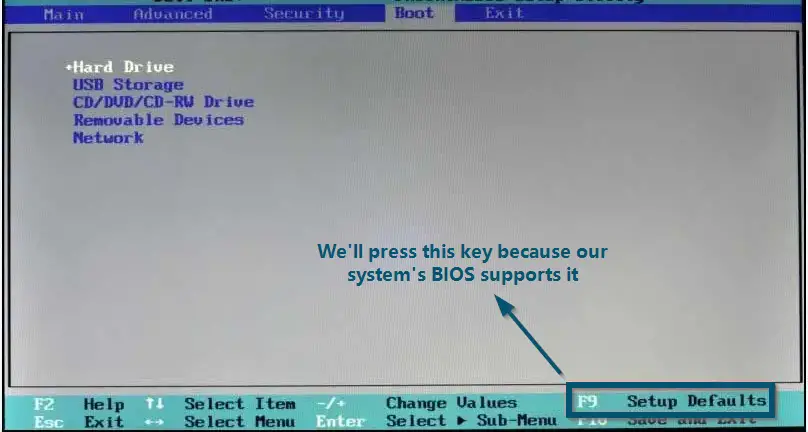
- Now, according to our system, we’ll press the ‘F9’ key to load the default BIOS settings.

Pressing the ‘F9’ key to load the default settings for DELL BIOS
Note: Perform the BIOS resetting procedure according to your system’s manufacturer
Activating the TPM
Now, we’ll perform the TPM activation procedure according to DELL. But you can perform the same procedure according to your system’s manufacturer.
- Again, press the BIOS key according to your system to reach the BIOS window.
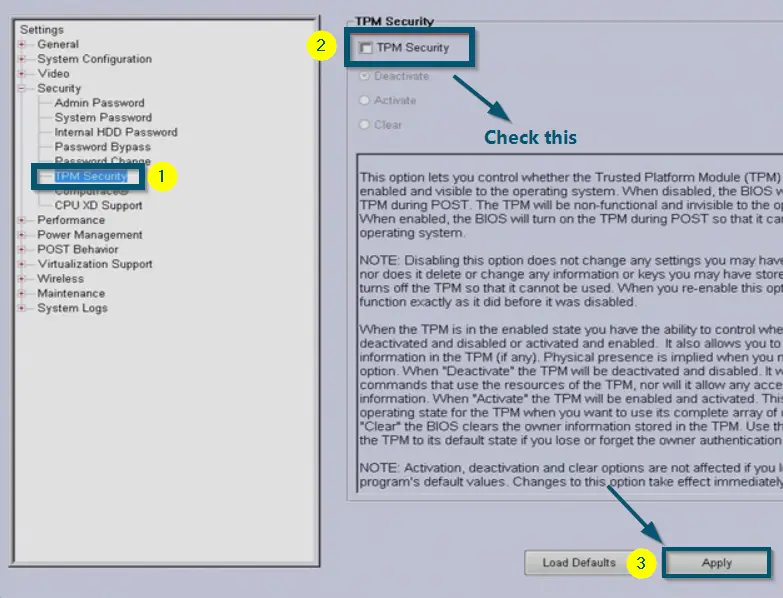
- Then, go to the ‘Security’ (or ‘Advanced’) tab and scroll down to find the ‘TPM Security’ option.
- Hit the ‘Enter’ key to enter the ‘TPM Security’ option.
- Then, check the ‘TPM Security’ option and click on the ‘Apply’ button to save the changes.

Enabling the ‘TPM Security’ option in BIOS and clicking on the ‘Apply’ button to save the changes
After following all the steps, ‘Windows Defender’ won’t classify ‘TiWorker.exe’ as malware anymore because this similar solution has worked for others facing this problem.
9. Buying a New Hard Disk
Last Resort
If the problem persists after following all the above solutions and you are still facing a high disk usage issue, we recommend buying a new hard drive. There are a lot of cases where a bad hard drive was causing the process to flare up. Preferably switch to SSD if you are using HDD because this technique has solved the high disk usage issue for others.
Conclusion
‘TiWorker.exe’ (or ‘TrustedInstaller.exe’) is not a virus. So, we don’t recommend removing it. However, you can try the above techniques and one of them will surely fix the issue you are facing with ‘TiWorker.exe.’ But keep in mind that purchasing new hardware should be your last resort.
