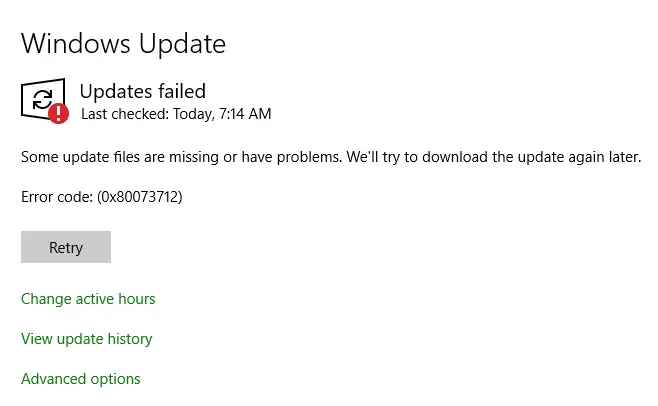
The ‘Error code (0x80073712)’ indicates the corruption of stored components required to perform the update process. When users try to download ‘.Net Framework,’ ‘DirectX,’ or similar components, they face this error message.
But that’s not it because users also face the ‘Windows 10 20h2 0x80073712’ issue while installing the Cumulative or Security Updates on their system.
Different Reasons for the ‘Error code (0x80073712)’
Before getting to the solutions, let’s understand this error message by discussing its reasons. After researching this error message, we have found the following reasons:
- Missing or damaged files required to process the installation
- You didn’t perform a clean install of Windows 11
- Sometimes third-party background services interrupt the ‘Windows Update’ services
- Using incompatible disk images and file backup creation tools
- A corrupted Component-Based Servicing (CBS) manifest
How to Fix Error Code 0x80073712
Pre-requisites: Running ‘SFC’ and ‘DISM’ Scans:
As mentioned earlier, this problem occurs because of a corrupted ‘.Net Framework’ or some other Windows framework files. We recommend performing SFC and DISM scans because it’s better to use the built-in tools of Windows to get rid of any corrupted files before getting into any complexities.
1. Using ‘Windows Update Assistant’
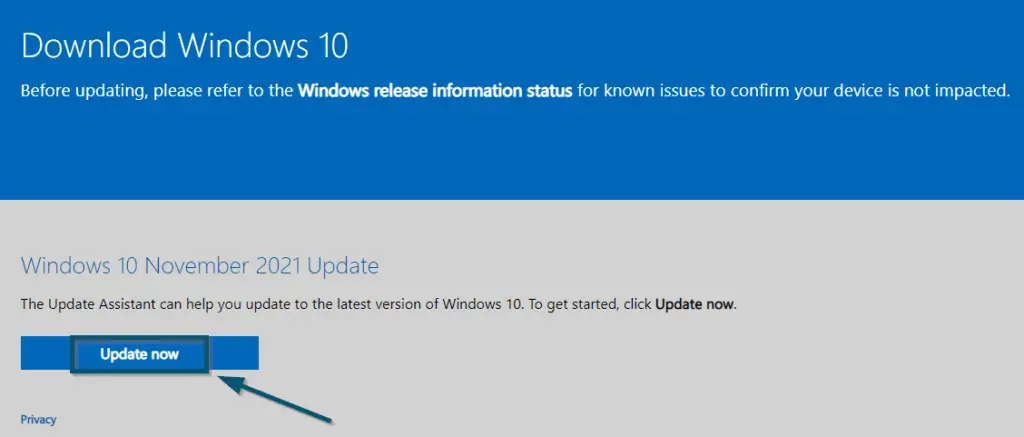
If you face the error code ‘0x80073712’ while trying to install the Cumulative Update for Windows 10, we recommend using ‘Windows Update Assistant.’ Microsoft has designed this tool for people who don’t want to wait for automatic updates. So, try the following steps.
- First, go to the official download page of ‘Windows Update Assistant.’
- Then, click on the ‘Update now’ button.

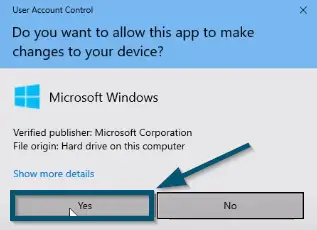
Clicking on the ‘Update now’ button to download the ‘Windows Update Assistant’ tool - Once you have downloaded the tool, open it to run the installer. It will ask for confirmation. So, click on the ‘Yes’ button to allow ‘Windows Update Assistant’ to make changes to your device.

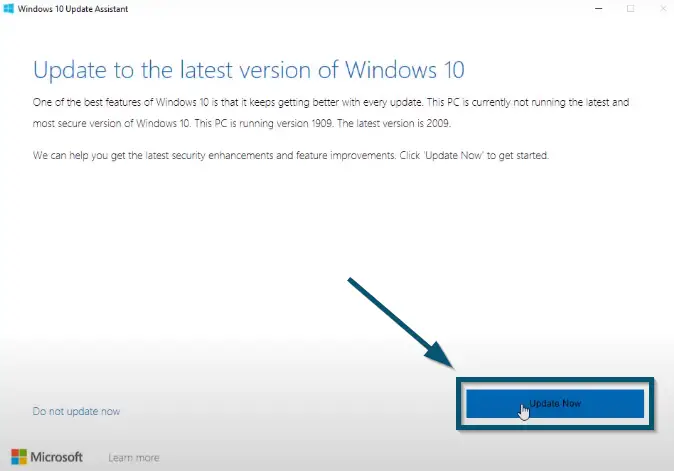
‘Windows Update Assistant’ is asking for confirmation. So, clicking on the ‘Yes’ button to allow ‘Windows Update Assistant’ to make changes to your device - Then, click on the ‘Update Now’ button to start the updating procedure.

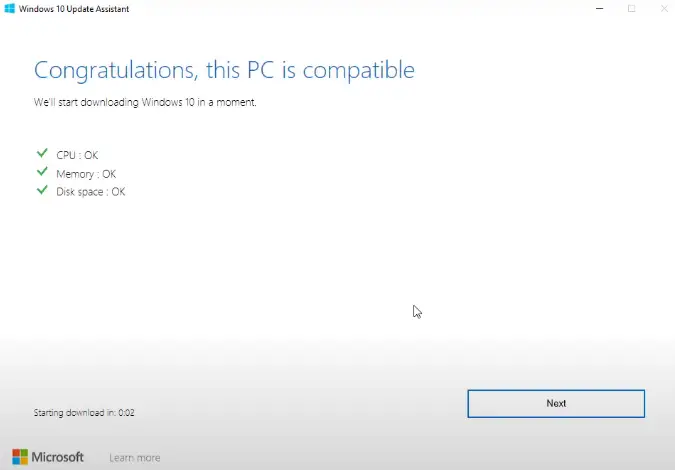
Clicking on the ‘Update Now’ button to start the update downloading process - The tool will confirm whether or not your system is compatible with the update. And once the compatibility test has passed, it will start the update downloading process.

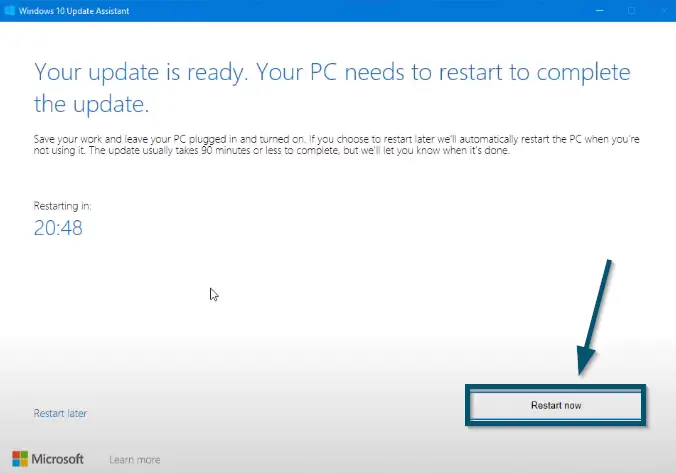
‘Windows Update Assistant’ is checking whether the system is compatible with (this particular) update or not - Once the system has downloaded the necessary files, it will ask you to restart your system. So, click on the ‘Restart now’ button.

Clicking on the ‘Restart now’ button to restart the system for updates’ installation
Important: Your system will restart several times during the update installation process
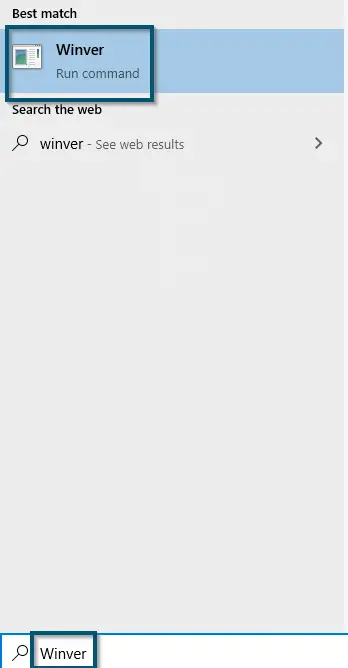
- After the system restarts, check whether you have updated your PC/laptop to the required version or not by typing ‘Winver’ in the ‘Start menu’ and pressing the ‘Enter’ key.

Searching and opening the ‘Winver’
If the error message persists and this solution couldn’t resolve this issue, try the next solution.
2. Repairing, Restarting, and Performing a Clean Boot
If the error message persists and you can’t install the features update, we recommend performing the following series of steps.
Repairing the Damaged Files
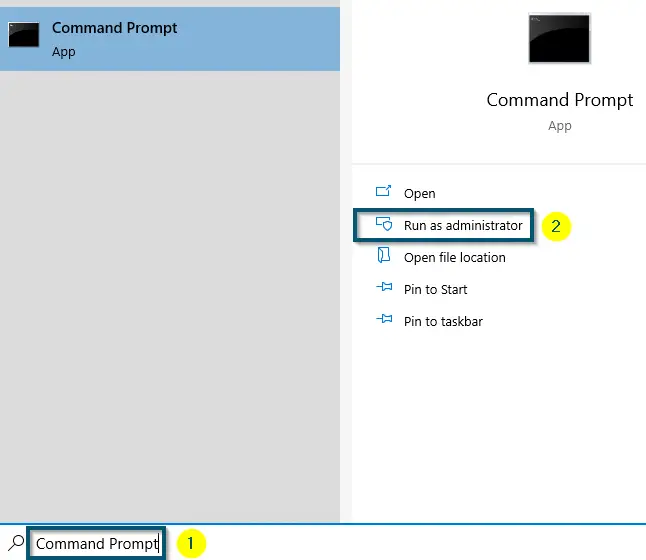
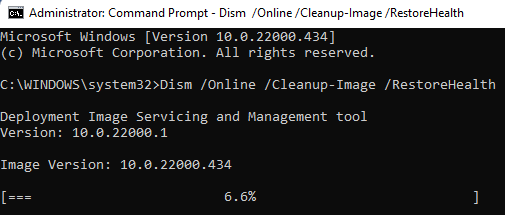
- First of all, open ‘Command Prompt’ as ‘Administrator.’

Opening ‘Command Prompt’ as ‘Administrator’ - Then, type the following command and hit the ‘Enter’ key to connect the DISM to Windows and download and repair the damaged files.
Dism /Online /Cleanup-Image /RestoreHealth
Restarting the ‘Windows Update’ Services
- Now, we will restart the ‘Windows Update’ services by running the following command one by one and pressing the ‘Enter’ key after each command.
net stop bits

net stop cryptsvc

net stop wuauserv

net stop msiserver

Ren C:\Windows\SoftwareDistribution SoftwareDistribution.old

Ren C:\Windows\System32\catroot2 Catroot2.old

net start bits

net start cryptsvc

net start wuauserv

net start msiserver
Performing a Clean Boot
- Once you have successfully executed the above commands, we recommend performing a clean boot. A clean boot is a handy technique to identify whether some third-party add-ons are interfering with the proper functioning of Windows or not. Doing this will disable the third-party background services that might be interrupting the ‘Windows Update’ services.
Now, try to update the system again and check whether the issue persists or not.
3. Performing an In-place Upgrade
If you are still facing the same error code or with the Cumulative Updates installation, we recommend you perform an in-place upgrade. The process to install the updates using the ‘Media Creation Tool’ is known as ‘in-place upgrade.’
Important: If the simple in-place upgrading process doesn’t work, you will have to disconnect the internet and continue the procedure once the ‘Getting Updates’ section appears
4. Resetting Windows Update Components
If the issue persists, it might be because of the corrupted Windows Update components. Here, we recommend resetting the update components to default.
There are two ways of resetting the Windows Update components. One way is through executing several commands in the elevated command prompt. However, the second procedure runs those commands from a ‘.bat’ file. So, we will follow the second way.
Important: We recommend closing all the opened files before attempting this solution because you will have to restart your system at the end
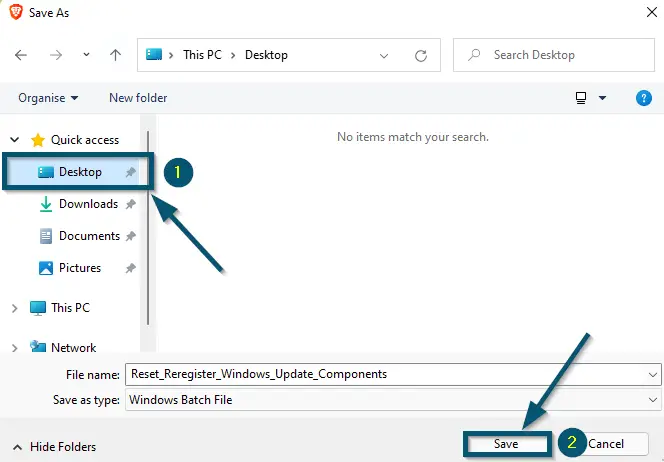
- First, download the required ‘.bat’ file and save it to ‘Desktop.’

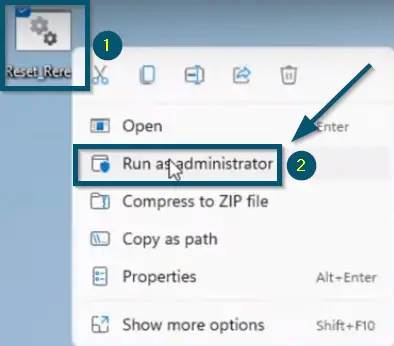
Downloading and saving the ‘Reset_Reregister_Windows_Update_Components.bat’ file to ‘Desktop’ - Then, right-click on the file and choose the ‘Run as administrator’ option to run this file as administrator.

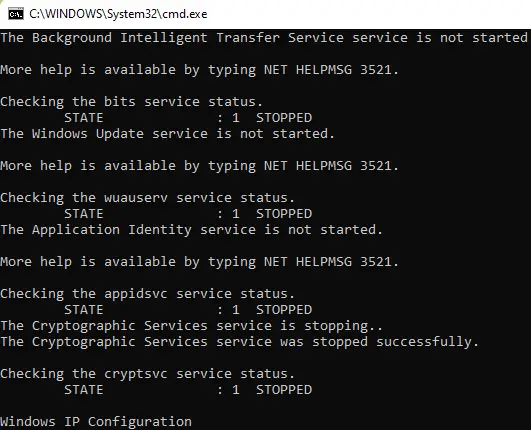
Running the ‘Reset_Reregister_Windows_Update_Components.bat’ file as ‘Administrator’ - The command prompt window will open and the commands inside the ‘Reset_Reregister_Windows_Update_Components.bat’ file will start executing.

Command Prompt is executing the commands inside the ‘Reset_Reregister_Windows_Update_Components.bat’ file - After some time, the CMD window will prompt you to restart the computer. So, press any key to restart your system.

Command Prompt is prompting to restart the system
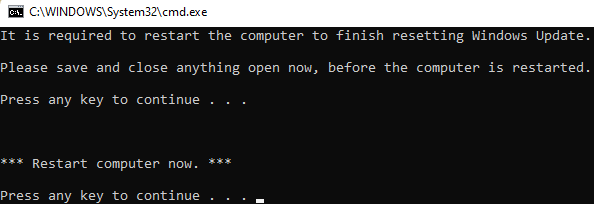
Note: It is necessary to restart the system to complete the operation
After the system restarts, check whether or not the problem persists. If the problem persists, try the next solution.
5. Manually Deleting the Files of ‘KB5008215’ version of Windows 11
If you face the error code (0x80073712) on Windows 11 issue while trying to install the ‘KB5008215’ Cumulative Update, it might be due to some leftover files of the incomplete update installation. So, if this is your case, we recommend manually searching and deleting the files.
- First, open ‘This PC.’

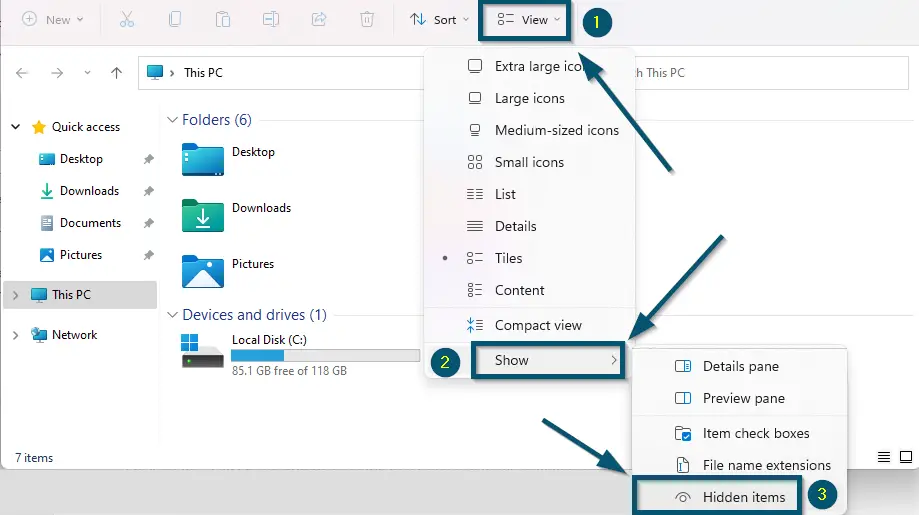
Opening ‘This PC’ from ‘Desktop’ - Then, navigate to the above options and click on the ‘View’ option to expand some drop-down options.
- Click on the ‘Show’ < ‘Hidden items’ options to show the hidden files on your system.

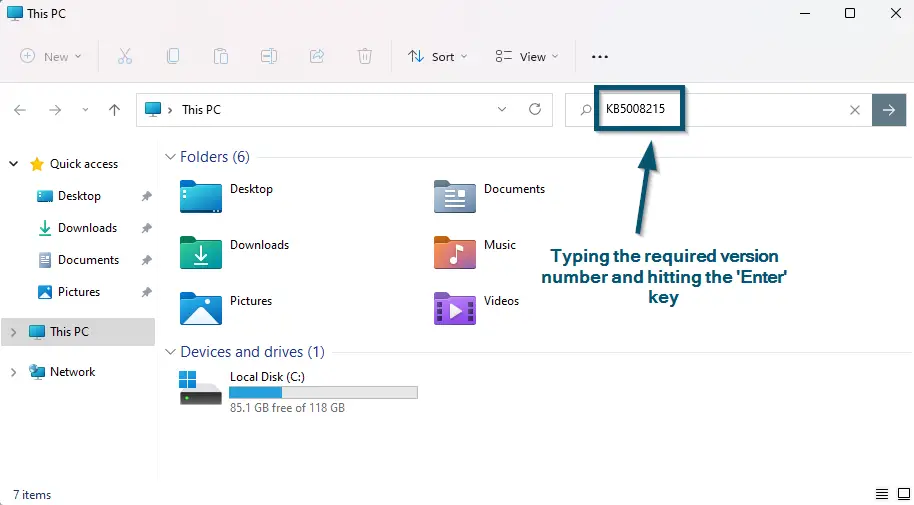
Enabling the option for showing the hidden items - Now, type ‘KB5008215’ in the search bar of the ‘This PC’ window and hit the ‘Enter’ key.

Typing the required version number in the search bar of ‘This PC’ and hitting the ‘Enter’ key - The computer will begin the search and, after some time, it will list all the matched items.
- Once the computer has completed the search, delete the relevant files.

Important: Delete the files from ‘Recycle Bin’ as well
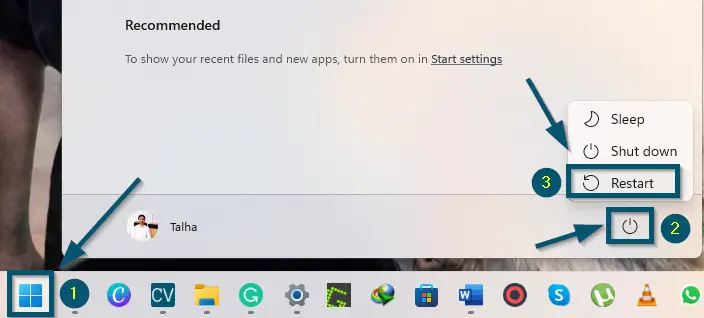
- Then, restart your computer by going to the ‘Start’ < ‘Power button’ < ‘Restart’ options.

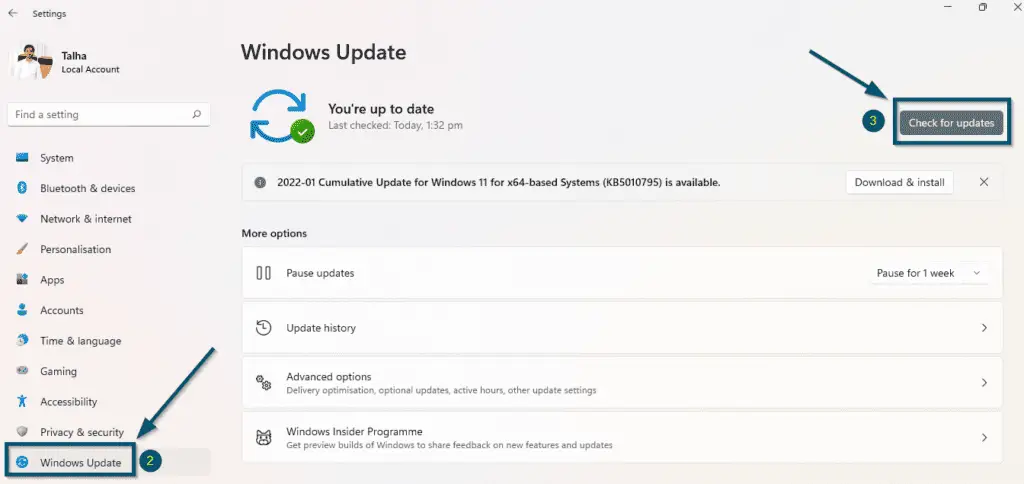
Restarting the system in Windows-11 - After the system restarts, navigate to ‘Settings’ < ‘Windows Update’ options. Then, click on the ‘Check for updates’ button to try and install the available updates again.

Choosing the ‘Windows Update’ section and clicking on the ‘Check for updates’ button
Check whether or not this technique has proved useful. If yes, then good for you. Otherwise, try the next solution.
6. Resetting the PC
Last Resort
If the error message persists after trying all the above solutions, we recommend resetting your system by keeping the data. Resetting the PC will restore everything to its default settings without affecting your data. But this should be your last resort.
