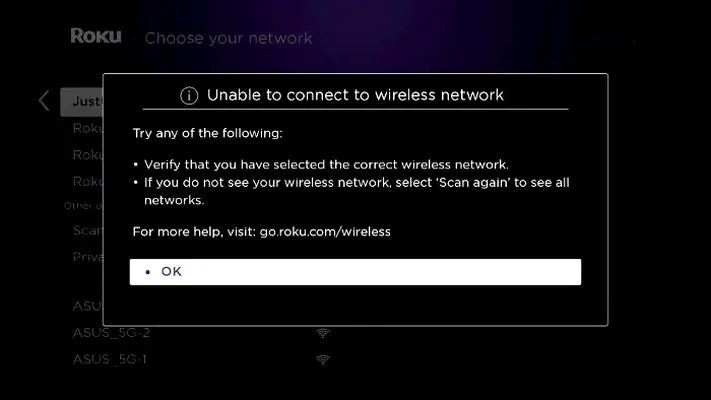
The error of Roku not connecting to WiFi occurs if the router’s configurations are not compatible with the Roku device or the device’s firmware is not valid. Try changing the router’s configurations or resetting the Roku device to solve the problem.
The issue arises when a perfectly working Roku device (player or TV) stops connecting to the Wi-Fi. This generally occurs after a router or device update. Sometimes an error code may also be shown with the error message.
Before starting the troubleshooting process, make sure the Roku device is connected to an external power source. Usually, the TV ports fail to provide enough current to run the Roku Wi-F modules. Once connected to an external source, check if the Roku connection issue is resolved.
Restart the Roku Device and Router
The handshake between the Roku device and router will fail if the communication modules of the devices are in an error state. Restarting the Roku device and router will solve the problem.
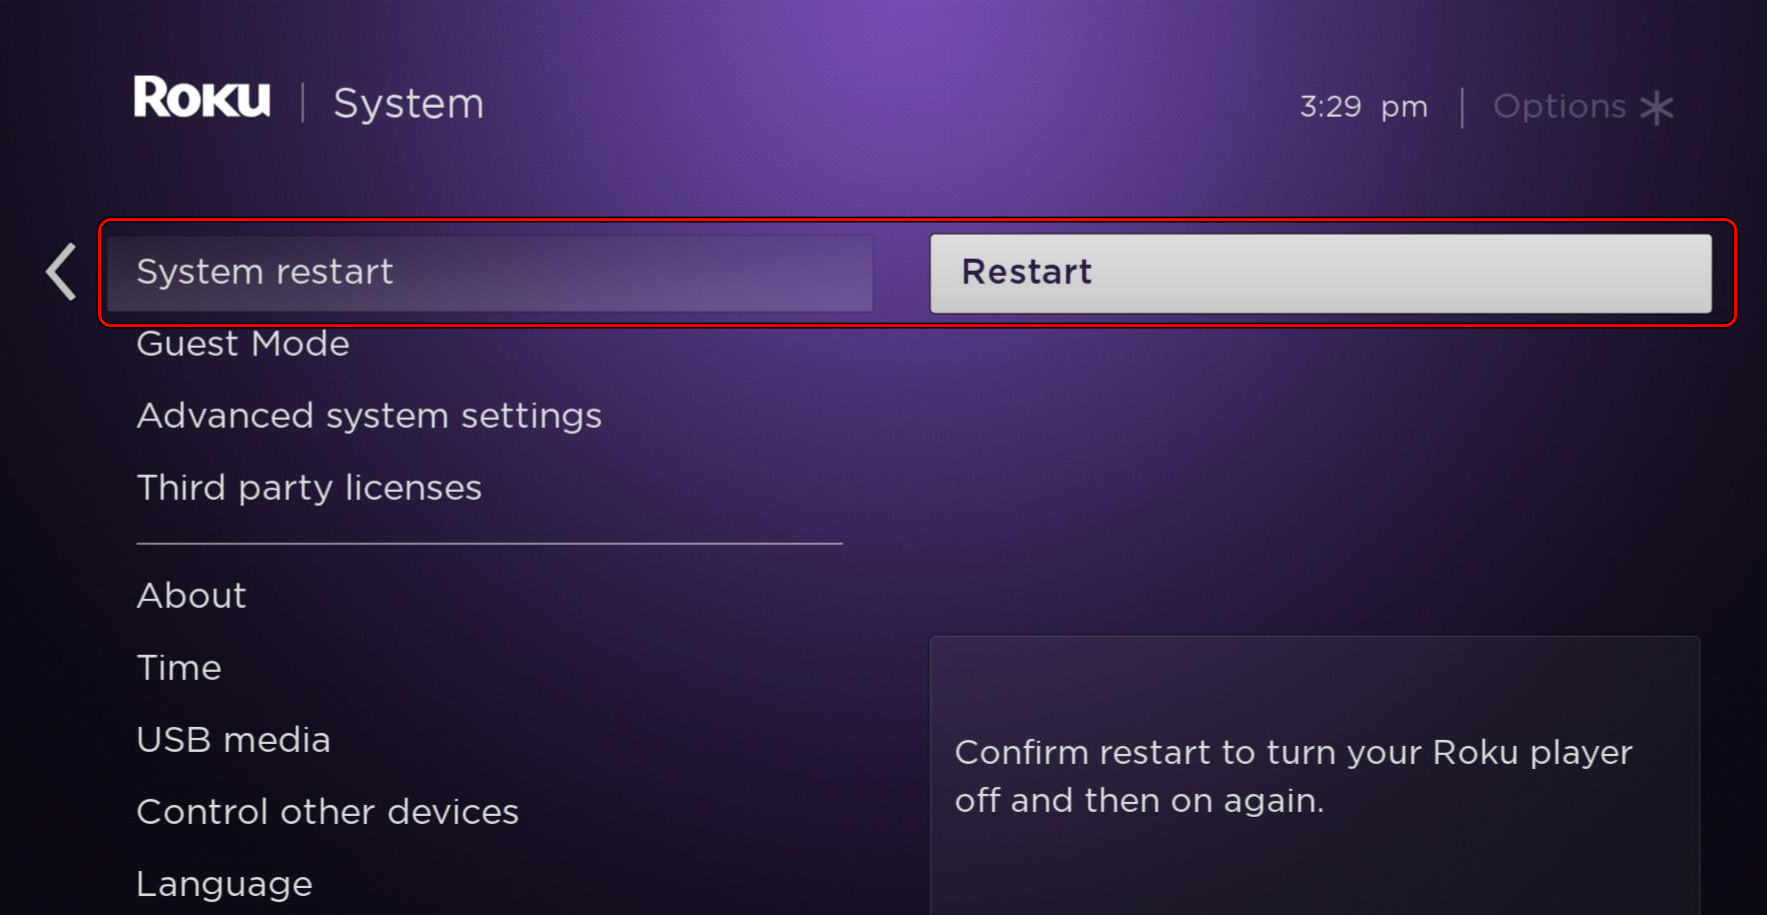
- Launch Roku Settings and navigate to System > Power > System Restart.
Restart Roku from the Roku Settings - Select Restart and once restarted, check if the device is connecting to the Wi-Fi.
- If not, power off the Roku and router.
- Unplug the power cables of both devices and wait for a minute. If a separate modem is used, power it off as well and unplug its power cable.
- Plug back the power cables and power on the devices.
- Do not connect any other device (such as phones, Xbox, etc.) to the Wi-Fi network, and check if Roku is connecting to the Wi-Fi.
Perform a Network Connection Reset of the Roku Device
If the network settings of the Roku device hold invalid configurations of your Wi-Fi connection, it will not let the Roku device connect to the Wi-Fi. For example, if a recent update to the router’s firmware has changed a router’s Wi-Fi setting that is not in the configurations of the Roku device, the Roku device will fail to connect to the Wi-Fi. In such a case, resetting the network settings of the Roku device will solve the problem.
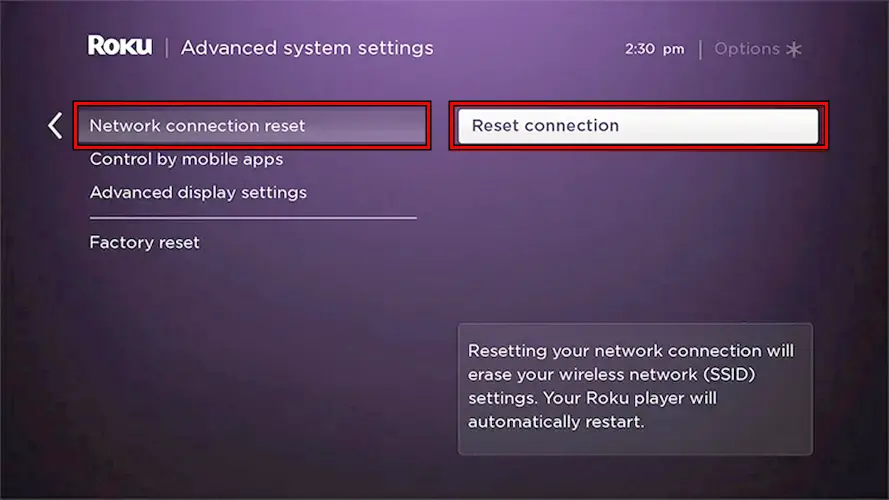
- Launch the Roku Settings and go to System > Advanced System Settings > Network Connection Reset.
- Select Reset Connection and once done, restart the Roku device.
Reset the Connection on Roku - Restart the router and check if Roku is connecting to the Wi-Fi connection.
Similar Fix: Roku Error Code 014.40 [All Solutions]
Update the Firmware of the Roku Device or TV
The Roku will fail to connect to the Wi-Fi if its firmware is outdated and has become incompatible with the router. Updating the firmware of the Roku device or TV will solve the problem.
As the Roku device or TV is not connecting to the Internet, either you may contact it to another Wi-Fi network (such as a hotspot from your phone) or manually update the firmware by using USB.
To update the firmware on a Roku TV:
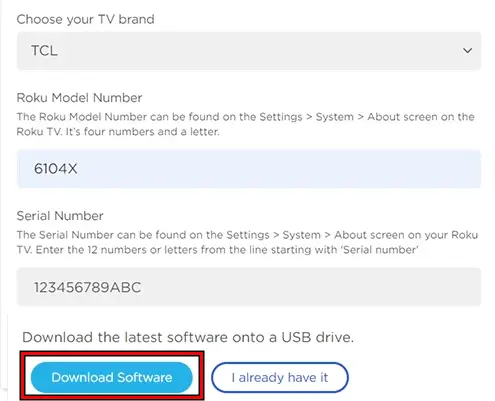
- Go to the TV update firmware page of the Roku website and select the model of your TV.
- Enter the Roku model and serial number.
- Click on Download Software and once downloaded, copy the update.roku file to a USB drive. Make sure nothing else is present on the USB and the USB is formatted in the FAT32 format. Do not close the browser window.
Download the Latest Firmware of the Roku TV from the Roku Website - Connect the USB drive to a USB port of the TV and open the Roku Settings.
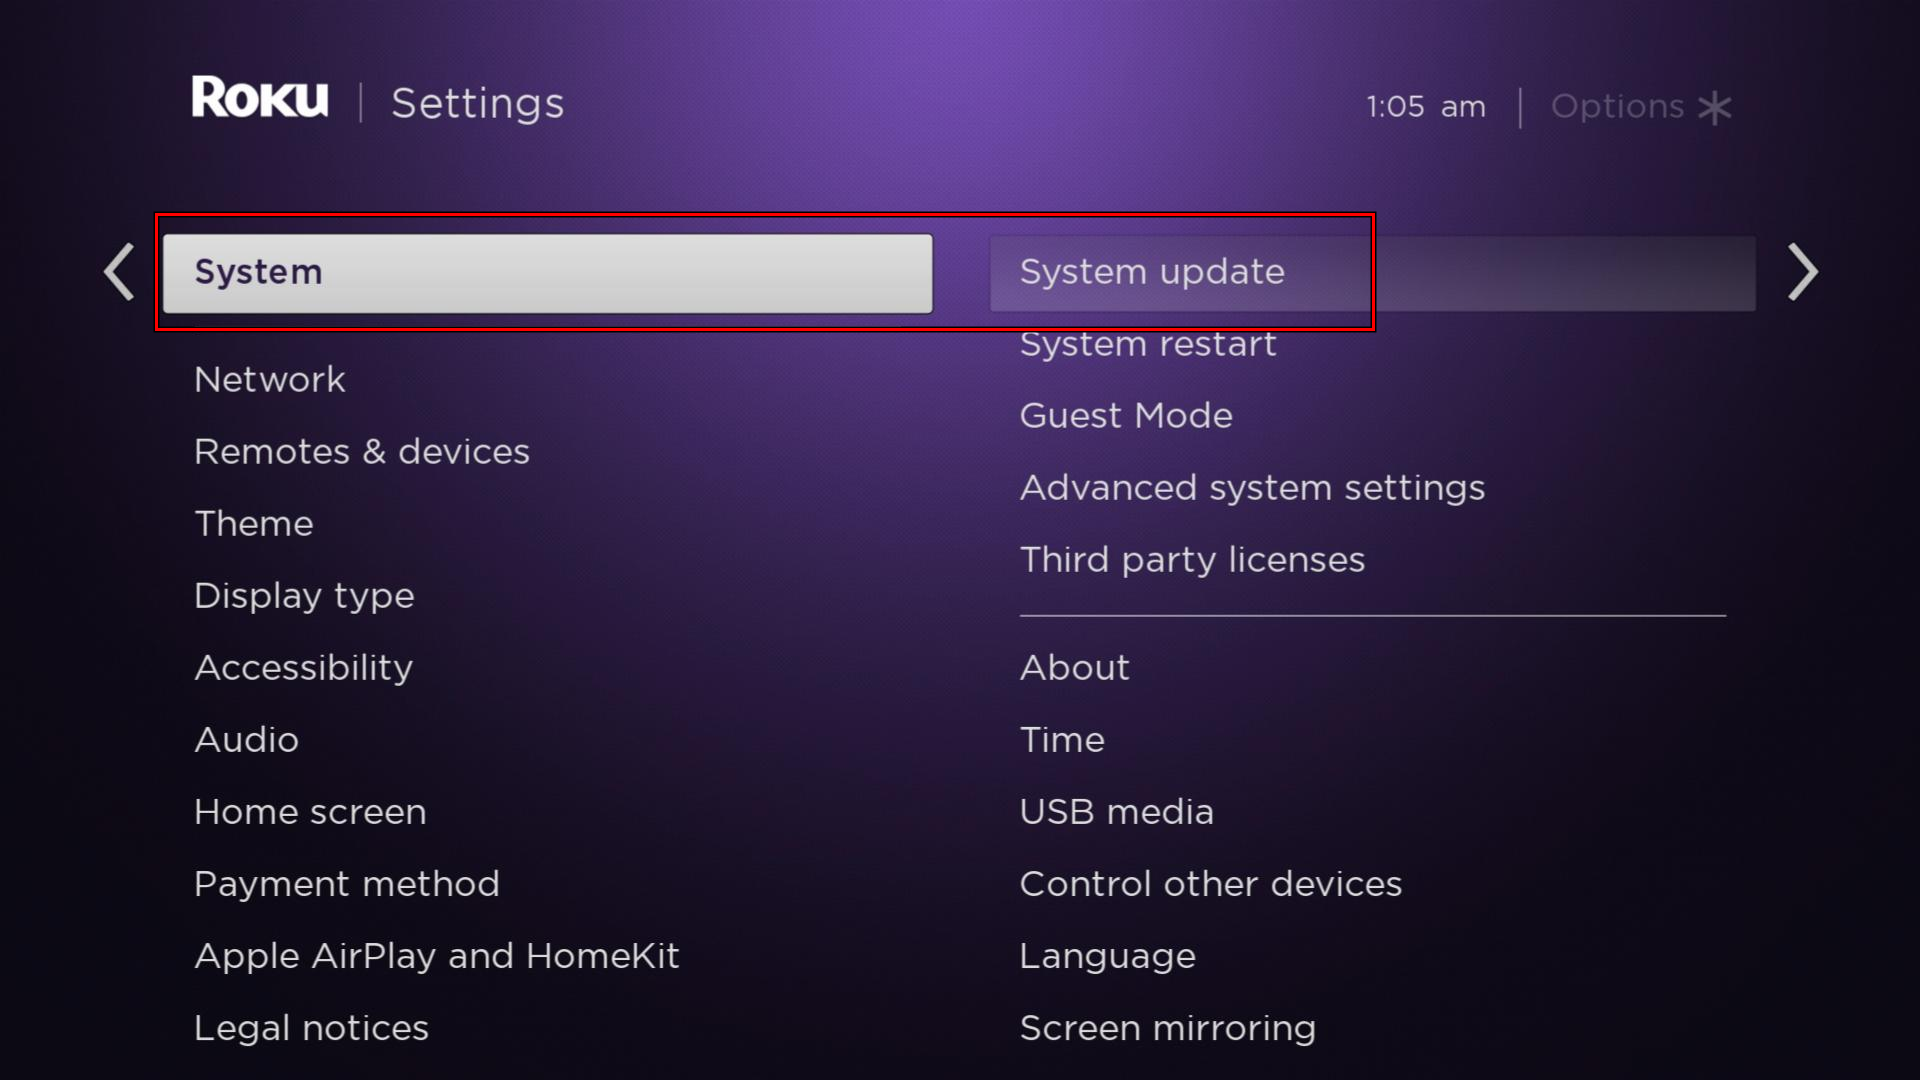
- Go to System > System Update > I Can’t Connect.
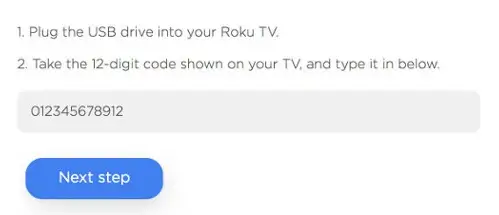
Open System Update in the Roku System Settings - Note the 12-digit code shown on the TV and enter it in the browser window.
Enter the 12 Digit Code in the Roku Website - Note the 6-digit code shown and enter it on the TV.
Enter the 6-Digit code on the Roku TV to Initiate the Update - Wait till the update completes and once done, check if Roku TV is connecting to the Wi-Fi.
Also Read: (Top Fixes) Hulu Not Working on Roku
Pause Conflicting Devices in the Router Settings
If signals from a device (such as Xbox) conflict with the signals from the Roku device, Roku might not be able to connect to Wi-Fi. Here, pausing the conflicting device in the router settings will solve the problem. Xbox is reported to cause issues with Roku’s communication.
- Go to the router’s admin portal in an app or a web browser.
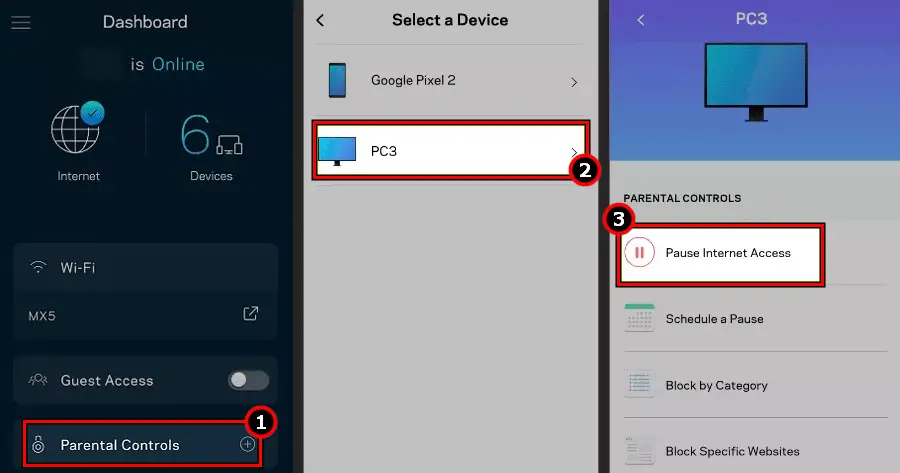
- Open Settings > Devices and select the problematic device (such as Xbox).
- Click on Pause and power off the offending device. Remember sometimes powering off a device does not remove it from the router’s settings.
Pause Internet Access of the Conflicting Device in the Router Settings - Restart Roku and check if it connects with the Wi-Fi.
This is a verified solution to fix the error: Roku not connecting to WIFI.
Separate SSIDs for Different Network Bands
Roku devices prefer to use a 2.4 GHz network band and on a dual-band router that uses the same SSID for both bands, the auto-switching of Wi-Fi to 5GHz will not let the Roku device connect to the Wi-Fi. Here, separating SSIDs for different network bands or disabling the 5GHz band will solve the problem.
To do this on an Unifi Router:
- Launch a web browser and go to the admin portal of the router.
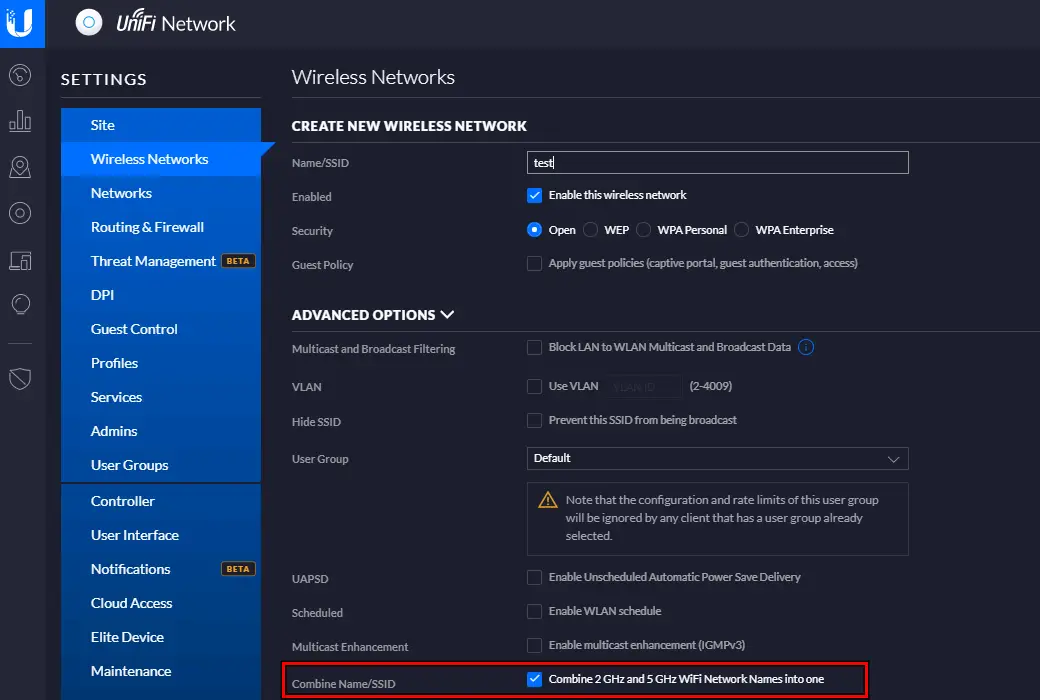
- Navigate to Settings > Wireless Networks.
- Expand Advanced Options and uncheck Combine 2.4 GHz and 5 GHz Network Names into One.
Disable Combine 2.4 GHz and 5 GHz Network Names into One in the Router Settings - Save the changes made and restart the router.
- Restart Roku and check if it connects to the 2.4 GHz Wi-Fi band.
If this does not work, you may disable the 5 GHz band altogether and check if that clears the issue. In some cases, you may need to disable Wireless AI to stop the automatic switching of the Wi-Fi channels.
Change the Wi-Fi Security
If your router is using or has been auto-configured by a firmware update to use a Wi-Fi security that is not supported by the Roku device, the Roku device will not be able to connect to the Wi-Fi. Here, changing the Wi-Fi security to WPA-PSK/WPA2-PSK of your router will solve the problem.
General guidelines are as under:
- Go to the admin portal of the router by using a browser or mobile app.
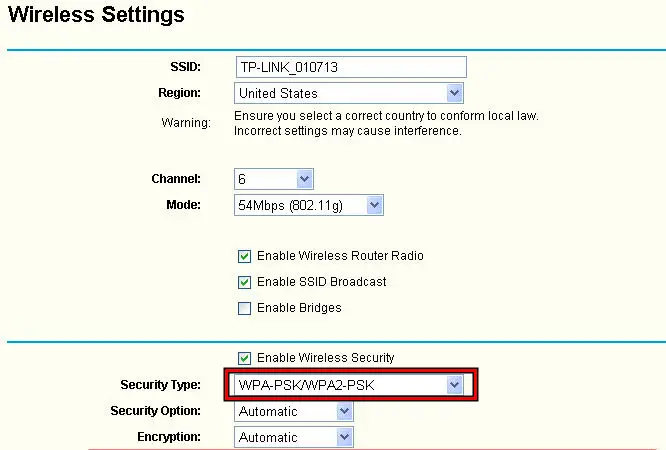
- Navigate to Settings > Wireless Settings > Wireless Security.
- Set the Security Type to WPA-PSK/WPA2-PSK.
Change the Wi-Fi Security Type to WPA-PSK/WPA2-PSK - Save the changes made and restart the router.
- Restart Roku and check if it is connecting to the Wi-Fi.
Change the Wi-Fi Mode of the Router
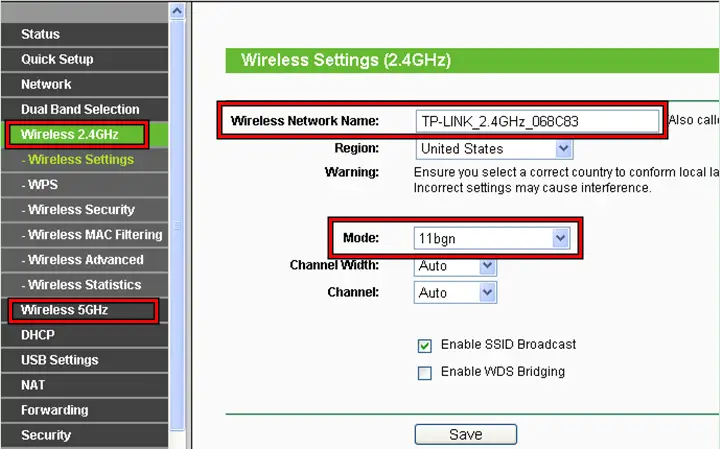
If a firmware update has changed the router’s Wi-Fi mode to one that is not compatible (such as G/N) with the Roku device, the device will not connect to the Wi-Fi. Changing the Wi-Fi mode of the router will resolve the issue.
- Go to the admin portal of your router either by a browser or using an app.
- Navigate to Settings > Connect > See Network > Advanced Network Settings.
- Select 2.4 GHz and 5 GHz.
- Change the Wireless Mode to 802.11 b/g/n and restart the router.
Change the Wireless Mode to 802.11 b/g/n - Restart Roku and check if it connects properly to the Wi-Fi.
Change the Wi-Fi Channel of the Network Band
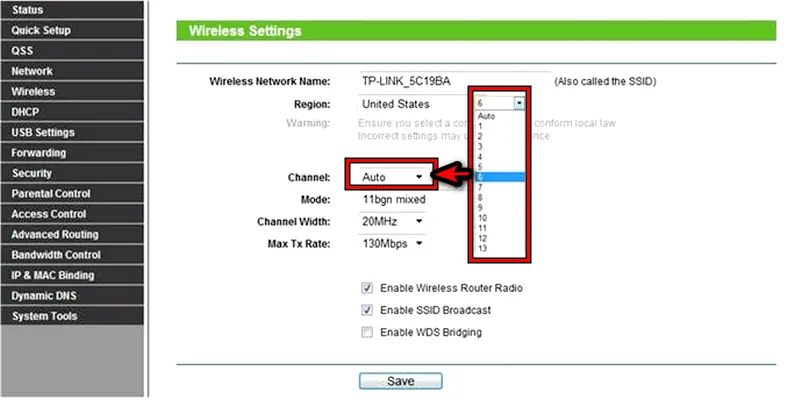
Roku does not support all the channels (especially, DFS channels) used by the network band. If your router is broadcasting the network band on a channel that is not supported by the Roku device, the device will fail to connect to the Wi-Fi. If it was previously working properly, an update to the router firmware may have changed the channel.
In any case, changing the Wi-Fi channel of the Wi-Fi band will solve the problem.
- Navigate to the router’s admin portal by using an app or browser.
- Navigate to Settings > Change Wi-Fi Settings > See Network > Advanced Settings.
- Open 2.4 and GHz Wi-Fi.
- Set the 2.4 GHz SSID to channels 1, 6, or 11. It may previously be on Auto.
- Set the Width to 20.
- For the 5 GHz SSID (if applicable), set the channels to 36-48 or 149-165.
Change the Wi-Fi Channel to 6 - Save the changes and restart the router.
- Restart Roku and check if it connects to the Wi-Fi network.
If not, you may use a Wi-Fi channel scanning app and use the best available channel that is compatible with Roku. Many open channels are not compatible with Roku as those channels are reserved. This could possibly fix the Roku not connecting to WIFI error.
Helpful Read: Volume not Working in Roku Remote [Fixed]
Set Roku as a Streaming Device in the Router Settings
Streaming devices use different network protocols. If your router or networking equipment does not allow streaming from a device till it is set as a streaming device, then that could cause connection issues for Roku. Settings Roku as a streaming device in the router’s settings will solve the problem.
- Access the router’s web portal through a web browser or app.
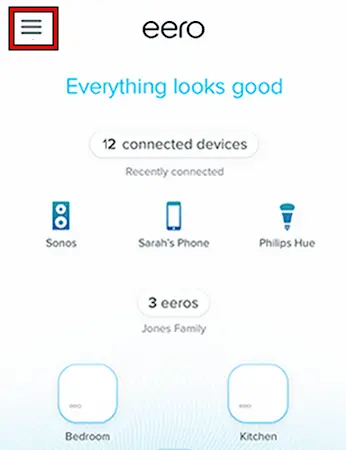
- Go to Settings > Devices.
Open Devices in the Eero App and Set Roku as a Streaming Device - Select Roku and set it as a Streaming Device.
- Save the changes and restart the router.
- Restart Roku and check if it is connecting to Wi-Fi.
Reset the Router to the Factory Defaults
The Roku device will fail to connect to the router’s Wi-Fi if the router’s firmware is no more valid or the old entries of the Roku device in the router’s configurations have gone invalid. To fix this, reset the router to the factory defaults.
Before resetting, make sure to note down the ISP configurations that will be required later to set up the router.
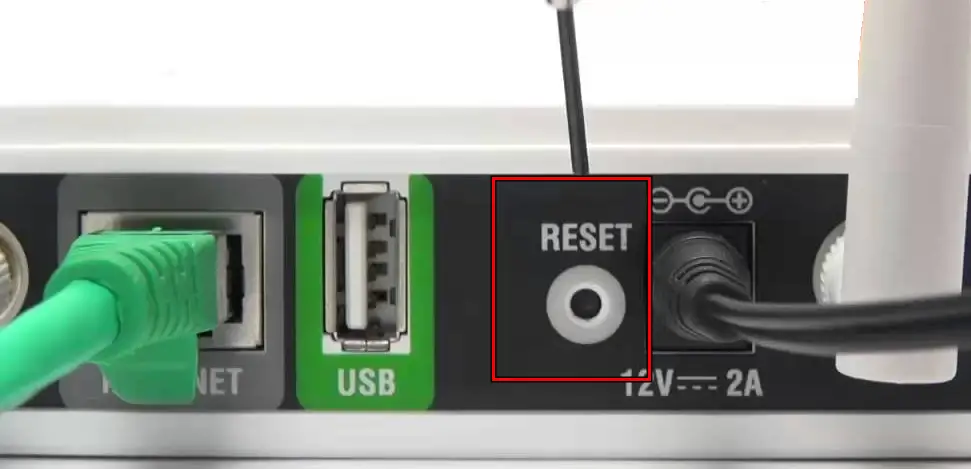
- Locate the reset button of the router and use a pin or paper clip to press the reset button.
Reset the Router to the Factory Defaults - Wait till the router reboots (around 30 seconds) and then release the button.
- Once done, set up the router and after that, check if the Roku is connecting to the Wi-Fi.
If not, check if the Roku connects to your phone’s hotspot. If so, you may need another router or set up a manual DHCP or DNS in the router settings.
Reset the Roku Device to the Factory Defaults
The Roku device will fail to connect to a Wi-Fi if the communication modules are no more valid or fail to override previously-stored Wi-Fi details. This can be solved by resetting the Roku device to the factory defaults.
Before resetting, ensure to back up the data or info that you may require later.
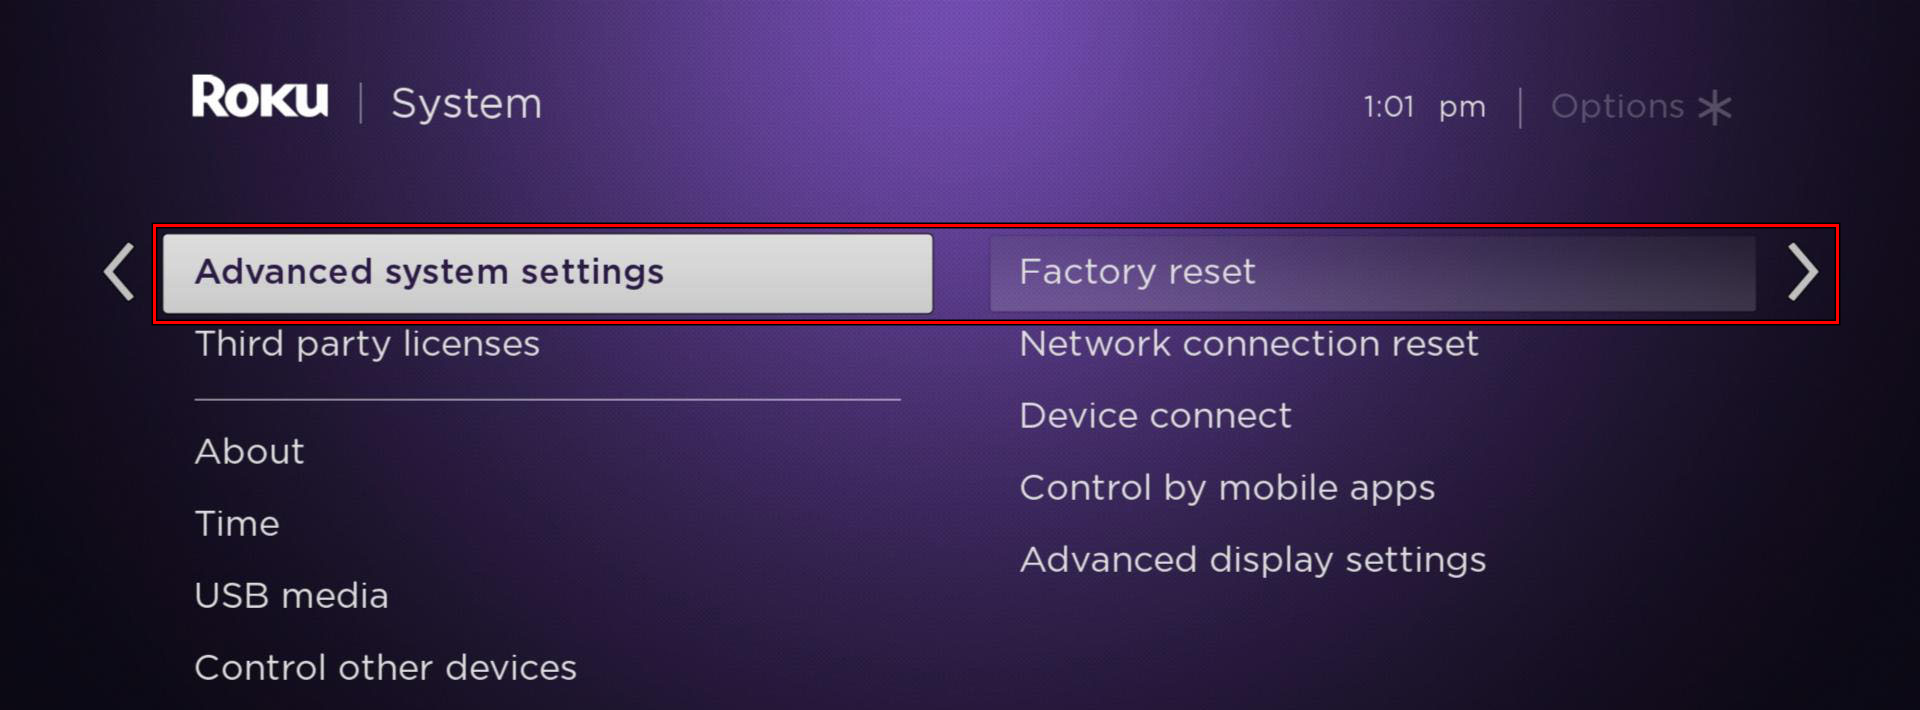
- Launch the Roku Settings and navigate to System > Advance System Settings > Factory Reset.
Factory Reset Roku - Confirm to reset the Roku device and once done, restart the router.
- Disconnect all other devices from the router.
- Connect the Roku device to the Wi-Fi and hopefully, it will be working correctly.
If the issue persists, you may contact Roku Support or get a replacement device if it is under warranty. If that is not an option, you may use a LAN cable to connect the Roku device to the Internet.
FAQs – Roku Not Connecting To WiFi
We have gathered the most frequently asked question about the error: Roku Not Connecting to WiFi.

